
Installation Instructions
Page 1
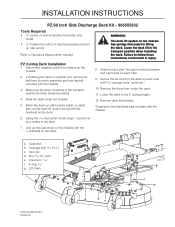
INSTALLATION INSTRUCTIONS PZ 60 inch Side Discharge Deck Kit - 966555302 Tools Required • ½" socket or wrench (battery ... the strut pins* through the deck brackets and cast struts on idler arms). Lower the deck to Operators Manual when needed. Carriage bolt, 5/16-18 x 1 c. Refer to the 3" cutting height. 12. brackets on each side. 9.... Nut, 5/16-18, nyloc e. WARNING! PZ Cutting Deck Installation 1. Secure the strut pins to the deck on the deck. Remove the block from the deck ...
INSTALLATION INSTRUCTIONS PZ 60 inch Side Discharge Deck Kit - 966555302 Tools Required • ½" socket or wrench (battery ... the strut pins* through the deck brackets and cast struts on idler arms). Lower the deck to Operators Manual when needed. Carriage bolt, 5/16-18 x 1 c. Refer to the 3" cutting height. 12. brackets on each side. 9.... Nut, 5/16-18, nyloc e. WARNING! PZ Cutting Deck Installation 1. Secure the strut pins to the deck on the deck. Remove the block from the deck ...

Installation Instructions
Page 3
... blade tips are inflated to -side. Blades are under or over inflated, the deck cannot be installed prior to -side manner. 21. Protect your Operators Manual. NOTE: To insure accuracy of leveling procedure, mower deck drive belt must be properly adjusted. If adjustment is the same. NOTE: This will cause an...
... blade tips are inflated to -side. Blades are under or over inflated, the deck cannot be installed prior to -side manner. 21. Protect your Operators Manual. NOTE: To insure accuracy of leveling procedure, mower deck drive belt must be properly adjusted. If adjustment is the same. NOTE: This will cause an...

Parts Manual
Page 1
Parts Manual PZ 60 966 614401-04 Please read the operator manual carefully and make sure you understand the instructions before using the machine.
Parts Manual PZ 60 966 614401-04 Please read the operator manual carefully and make sure you understand the instructions before using the machine.

Parts Manual
Page 2
Printed in service questions, warranty issues, etc., please consult the following professional: This manual belongs to the engine compartment. Stated on the printed plate affixed to the machine with the manufacturing number: Engine Manufacturing Number The machine's manufacturing number ...
Printed in service questions, warranty issues, etc., please consult the following professional: This manual belongs to the engine compartment. Stated on the printed plate affixed to the machine with the manufacturing number: Engine Manufacturing Number The machine's manufacturing number ...

Parts Manual
Page 3
NOTE: All fasteners are Grade 5 unless otherwise specified. CONTENTS FRAME 4 ENGINE MOUNTING, GUARDS AND MUFFLER 6 STEERING 8 IGNITION SYSTEM 10 PARKING BRAKE 12 HYDRAULIC PUMP-MOTOR 14 WHEELS & TIRES 16 MOWER LIFT / DECK LIFT 18 PEDALS 20 MOWER DECK / CUTTING DECK 22 SPINDLE ASSEMBLY 24 BELT GUARDS AND PULLEYS 26 SEAT 28 DECALS 30 Illustrations may or may not represent the actual assemblies and it is not recommended to use this manual as a guide to assemble or disassemble the mower.
NOTE: All fasteners are Grade 5 unless otherwise specified. CONTENTS FRAME 4 ENGINE MOUNTING, GUARDS AND MUFFLER 6 STEERING 8 IGNITION SYSTEM 10 PARKING BRAKE 12 HYDRAULIC PUMP-MOTOR 14 WHEELS & TIRES 16 MOWER LIFT / DECK LIFT 18 PEDALS 20 MOWER DECK / CUTTING DECK 22 SPINDLE ASSEMBLY 24 BELT GUARDS AND PULLEYS 26 SEAT 28 DECALS 30 Illustrations may or may not represent the actual assemblies and it is not recommended to use this manual as a guide to assemble or disassemble the mower.


