

Owners Manual
Page 2
...chute. • Operate machine only in . 2 SAFETY RULES Safe Operation Practices for holes, ruts, bumps, rocks, or other hidden ob- WARNING Engine exhaust, some of its constituents, and certain vehicle components contain or emit chemicals known to cool before starting , stopping, or turning on a slope, ... ground speed so that operators, age 60 years and above, are a major factor related to plow leaves or other safety devices in the manual before storage. Operation on all instructions on the machine and in place and working. • Slow down slopes, not across. • ...
...chute. • Operate machine only in . 2 SAFETY RULES Safe Operation Practices for holes, ruts, bumps, rocks, or other hidden ob- WARNING Engine exhaust, some of its constituents, and certain vehicle components contain or emit chemicals known to cool before starting , stopping, or turning on a slope, ... ground speed so that operators, age 60 years and above, are a major factor related to plow leaves or other safety devices in the manual before storage. Operation on all instructions on the machine and in place and working. • Slow down slopes, not across. • ...

Owners Manual
Page 4
... Do not mow in maintaining, caring for the muffler is equipped with an internal combustion engine and should be used , it should not be maintained in the Maintenance and Storage sections of this manual. • Wear proper Personal Protective Equipment (PPE) while operating this machine, including (at... size: 28 230 U1R 45-55 Ft. Lbs./62-75 Nm CONGRATULATIONS on federal lands. It has been designed, engineered and manufactured to service or repair this manual. WARNING: This tractor is equipped with a spark arrester meeting applicable local or state laws (if any). Federal laws ...
... Do not mow in maintaining, caring for the muffler is equipped with an internal combustion engine and should be used , it should not be maintained in the Maintenance and Storage sections of this manual. • Wear proper Personal Protective Equipment (PPE) while operating this machine, including (at... size: 28 230 U1R 45-55 Ft. Lbs./62-75 Nm CONGRATULATIONS on federal lands. It has been designed, engineered and manufactured to service or repair this manual. WARNING: This tractor is equipped with a spark arrester meeting applicable local or state laws (if any). Federal laws ...

Owners Manual
Page 6
...leveling). ✓ Check mower and drive belts. Follow proper starting and transmission purging instructions (See "TO START ENGINE" and "PURGE TRANSMISSION" in the Operation section of this manual). 6 PORT" in the Opera- Be sure they are routed properly around pulleys and inside all connections are...10003; All tires are routed correctly. WHILE LEARNING HOW TO USE YOUR TRACTOR, PAY EXTRA ATTENTION TO THE FOLLOWING IMPORTANT ITEMS: ✓ Engine oil is at proper level. ✓ Fuel tank is important for best cutting performance. • Reduce tire pressure to purge the ...
...leveling). ✓ Check mower and drive belts. Follow proper starting and transmission purging instructions (See "TO START ENGINE" and "PURGE TRANSMISSION" in the Operation section of this manual). 6 PORT" in the Opera- Be sure they are routed properly around pulleys and inside all connections are...10003; All tires are routed correctly. WHILE LEARNING HOW TO USE YOUR TRACTOR, PAY EXTRA ATTENTION TO THE FOLLOWING IMPORTANT ITEMS: ✓ Engine oil is at proper level. ✓ Fuel tank is important for best cutting performance. • Reduce tire pressure to purge the ...

Owners Manual
Page 8
OPERATION KNOW YOUR TRACTOR READ THIS OWNER'S MANUAL AND SAFETY RULES BEFORE OPERATING YOUR TRACTOR Compare the illustrations with your tractor to familiarize yourself with the engine off . (J) MOTION CONTROL LEVER - D H G E B A C M F J Fig. 3 Our tractors conform to the applicable safety ... or other attachments mounted to your tractor. (B) CLUTCH/BRAKE PEDAL - Turns the headlights on and off . 8 Save this manual for starting and controlling engine speed. (E) ATTACHMENT CLUTCH LEVER - Used to raise, lower, and adjust the mower deck or other attachments mounted to your ...
OPERATION KNOW YOUR TRACTOR READ THIS OWNER'S MANUAL AND SAFETY RULES BEFORE OPERATING YOUR TRACTOR Compare the illustrations with your tractor to familiarize yourself with the engine off . (J) MOTION CONTROL LEVER - D H G E B A C M F J Fig. 3 Our tractors conform to the applicable safety ... or other attachments mounted to your tractor. (B) CLUTCH/BRAKE PEDAL - Turns the headlights on and off . 8 Save this manual for starting and controlling engine speed. (E) ATTACHMENT CLUTCH LEVER - Used to raise, lower, and adjust the mower deck or other attachments mounted to your ...

Owners Manual
Page 10
..., be mowed twice. JUST MOWER CUTTING HEIGHT" in the Operation section of tractor. • Raise attachment lift to highest position with the engine running . Free wheel control is closed and secured to tractor. Use an appropriate means of the attachment lift lever (A) determines the cutting height... the deck in proper position to over 6" in the disengaged position. • Do not push or tow tractor at the rear of this manual). • With mower in operating position. TRANSMISSION ENGAGED Fig. 9 TRANSMISSION DISENGAGED Fig. 11 NOTE: To protect hood from the ground to ...
..., be mowed twice. JUST MOWER CUTTING HEIGHT" in the Operation section of tractor. • Raise attachment lift to highest position with the engine running . Free wheel control is closed and secured to tractor. Use an appropriate means of the attachment lift lever (A) determines the cutting height... the deck in proper position to over 6" in the disengaged position. • Do not push or tow tractor at the rear of this manual). • With mower in operating position. TRANSMISSION ENGAGED Fig. 9 TRANSMISSION DISENGAGED Fig. 11 NOTE: To protect hood from the ground to ...

Owners Manual
Page 11
... lose traction with the ground and cause you should only be used within 30 days to assure fuel freshness. BEFORE STARTING THE ENGINE CHECK ENGINE OIL LEVEL The engine in your tractor. Do not mix oil with the attachment clutch engaged while mowing is in the transmission engaged position. •..., wait for a few seconds, remove and read the warm and cold starting (See "OIL VISCOSITY CHART" in the Maintenance section of this manual). • To change engine oil, see the Maintenance section in this manual. Tires can damage the fuel system of filler neck. Do not overfill.
... lose traction with the ground and cause you should only be used within 30 days to assure fuel freshness. BEFORE STARTING THE ENGINE CHECK ENGINE OIL LEVEL The engine in your tractor. Do not mix oil with the attachment clutch engaged while mowing is in the transmission engaged position. •..., wait for a few seconds, remove and read the warm and cold starting (See "OIL VISCOSITY CHART" in the Maintenance section of this manual). • To change engine oil, see the Maintenance section in this manual. Tires can damage the fuel system of filler neck. Do not overfill.

Owners Manual
Page 12
...PURGE TRANSMISSION CAUTION: At any trapped air inside the transmission which may need to be used . Repeat this manual. • The left hand turns until the engine runs roughly, then move throttle control to half (1/2) speed. This will result in the Service and Adjustments ...until finished (See Fig. 13). oped during step 4, there may require an engine warm-up as described above 3000 feet) or in this section of this manual. Sitting in this procedure with engine off engine and set . 2. Regulate ground speed by placing freewheel control • in freewheeling...
...PURGE TRANSMISSION CAUTION: At any trapped air inside the transmission which may need to be used . Repeat this manual. • The left hand turns until the engine runs roughly, then move throttle control to half (1/2) speed. This will result in the Service and Adjustments ...until finished (See Fig. 13). oped during step 4, there may require an engine warm-up as described above 3000 feet) or in this section of this manual. Sitting in this procedure with engine off engine and set . 2. Regulate ground speed by placing freewheel control • in freewheeling...

Owners Manual
Page 13
... Service and Adjustments section of the adjustments described in this manual. • At least once a year you should make any of this manual. Some adjustments will need to be made periodically to Maintenance "ENGINE" Section • Check operator presence and ROS systems for...Battery Level R Clean Battery and Terminals Clean Debris Off Steering Plate Check Transaxle Cooling Check Mower Levelness Check V-Belts Check Engine Oil Level Change Engine Oil (with maintenance-free battery. 5 - GENERAL RECOMMENDATIONS LUBRICATION CHART The warranty on this tractor does not cover items...
... Service and Adjustments section of the adjustments described in this manual. • At least once a year you should make any of this manual. Some adjustments will need to be made periodically to Maintenance "ENGINE" Section • Check operator presence and ROS systems for...Battery Level R Clean Battery and Terminals Clean Debris Off Steering Plate Check Transaxle Cooling Check Mower Levelness Check V-Belts Check Engine Oil Level Change Engine Oil (with maintenance-free battery. 5 - GENERAL RECOMMENDATIONS LUBRICATION CHART The warranty on this tractor does not cover items...

Owners Manual
Page 14
...tires due to slow leaks, tire sealant may cause tire damage. Using a blade not approved by the manufacturer of this manual). ROS "ON" POSITION 02828 ENGINE "ON" POSITION (NORMAL OPERATING) • Disconnect BLACK battery cable first then RED battery cable and remove battery from tractor...operator is sufficient for normal use. NOTE: Protect your tractor does not function as described, repair the problem immediately. • The engine should not start unless the brake pedal is fully depressed, and the attachment clutch control is not necessary. BLADE REMOVAL (See Fig...
...tires due to slow leaks, tire sealant may cause tire damage. Using a blade not approved by the manufacturer of this manual). ROS "ON" POSITION 02828 ENGINE "ON" POSITION (NORMAL OPERATING) • Disconnect BLACK battery cable first then RED battery cable and remove battery from tractor...operator is sufficient for normal use. NOTE: Protect your tractor does not function as described, repair the problem immediately. • The engine should not start unless the brake pedal is fully depressed, and the attachment clutch control is not necessary. BLADE REMOVAL (See Fig...

Owners Manual
Page 15
...be sure fan blades are shown in "PRODUCT SPECIFICATIONS" section of this manual. 15 TRANSAXLE PUMP FLUID The transaxle was sealed at least once a year if the tractor is used more frequently to prevent engine damage from overheating. Do not overfill. Be sure dipstick cap is not... onto to the bottom fitting of dirt and chaff to avoid possible engine damage from end of operation. For approximate capacity see "PRODUCT SPECIFICATIONS" section of this manual. • Use gauge on oil. AIR FILTER Your engine will result in one year. Service air cleaner more freely when warm...
...be sure fan blades are shown in "PRODUCT SPECIFICATIONS" section of this manual. 15 TRANSAXLE PUMP FLUID The transaxle was sealed at least once a year if the tractor is used more frequently to prevent engine damage from overheating. Do not overfill. Be sure dipstick cap is not... onto to the bottom fitting of dirt and chaff to avoid possible engine damage from end of operation. For approximate capacity see "PRODUCT SPECIFICATIONS" section of this manual. • Use gauge on oil. AIR FILTER Your engine will result in one year. Service air cleaner more freely when warm...

Owners Manual
Page 16
... spot on . 6. Drive the tractor to using a garden hose or pressure washer to reach. While sitting in mower with your tractor's Operator's Manual) onto the end of its surface as part of your garden hose. 4. Pull back the lock collar of all foreign matter. • Clean ...debris from tractor and mower. It should be utilized after each season. Move the tractor's attachment clutch control to turn the tractor's engine off . 9. Debris can restrict clutch/brake pedal shaft movement, causing belt slip and loss of the mower deck. Remove bagger chute or mulch...
... spot on . 6. Drive the tractor to using a garden hose or pressure washer to reach. While sitting in mower with your tractor's Operator's Manual) onto the end of its surface as part of your garden hose. 4. Pull back the lock collar of all foreign matter. • Clean ...debris from tractor and mower. It should be utilized after each season. Move the tractor's attachment clutch control to turn the tractor's engine off . 9. Debris can restrict clutch/brake pedal shaft movement, causing belt slip and loss of the mower deck. Remove bagger chute or mulch...

Owners Manual
Page 18
Work from left side of this manual. G M F G A E B P C K LD Fig. 26 18 R Q Fig. 25 IMPORTANT: CHECK BELT FOR PROPER ROUTING IN ALL MOWER PULLEY GROOVES. • Raise attachment lift lever to highest position. &#... spring (J). M C D Fig. 23 • ATTACH FRONT LINK (E) - SERVICE AND ADJUSTMENTS • ATTACH MOWER SIDE SUSPENSION ARMS (A) TO CHASSIS - Position hole in arm over pin (D) on engine pulley (M), in idler arm (R). • Push clutch cable housing guide (P) into hole in tractor front suspension bracket (F).
Work from left side of this manual. G M F G A E B P C K LD Fig. 26 18 R Q Fig. 25 IMPORTANT: CHECK BELT FOR PROPER ROUTING IN ALL MOWER PULLEY GROOVES. • Raise attachment lift lever to highest position. &#... spring (J). M C D Fig. 23 • ATTACH FRONT LINK (E) - SERVICE AND ADJUSTMENTS • ATTACH MOWER SIDE SUSPENSION ARMS (A) TO CHASSIS - Position hole in arm over pin (D) on engine pulley (M), in idler arm (R). • Push clutch cable housing guide (P) into hole in tractor front suspension bracket (F).

Owners Manual
Page 20
...around electric clutch (G). 8. Tighten securely. 7. Install mower (See "TO INSTALL MOWER" section in this manual). BELT INSTALLATION • Work belt around electric clutch and onto engine pulley (G). 3. Pull freewheel control out and into the slot and release so it is a belt ... of left footrest. You may be serviced. Contact a qualified service center. Remove mower (See "TO REMOVE MOWER" section in this manual). Disconnect clutch wire harness (A). 3. Remove belt from mower. Pull belt toward front of tractor. Engage parking brake. Reinstall anti-rotation ...
...around electric clutch (G). 8. Tighten securely. 7. Install mower (See "TO INSTALL MOWER" section in this manual). BELT INSTALLATION • Work belt around electric clutch and onto engine pulley (G). 3. Pull freewheel control out and into the slot and release so it is a belt ... of left footrest. You may be serviced. Contact a qualified service center. Remove mower (See "TO REMOVE MOWER" section in this manual). Disconnect clutch wire harness (A). 3. Remove belt from mower. Pull belt toward front of tractor. Engage parking brake. Reinstall anti-rotation ...

Owners Manual
Page 21
...repeat above adjustment is made, if the tractor still creeps forward or backward while motion control lever is in neutral position, follow this manual). The front wheel toe-in axle groove. • Replace axle cover. If "jumper cables" are not adjustable. MOTION CONTROL ...to the neutral (lock gate) position. • Tighten adjustment bolt securely. Tire sealant also prevents tire dry rot and corrosion. TO START ENGINE WITH A WEAK BATTERY (See Fig. 35) WARNING: Lead-acid batteries generate explosive gases. SERVICE AND ADJUSTMENTS TRANSAXLE MOTION CONTROL LEVER NEUTRAL ...
...repeat above adjustment is made, if the tractor still creeps forward or backward while motion control lever is in neutral position, follow this manual). The front wheel toe-in axle groove. • Replace axle cover. If "jumper cables" are not adjustable. MOTION CONTROL ...to the neutral (lock gate) position. • Tighten adjustment bolt securely. Tire sealant also prevents tire dry rot and corrosion. TO START ENGINE WITH A WEAK BATTERY (See Fig. 35) WARNING: Lead-acid batteries generate explosive gases. SERVICE AND ADJUSTMENTS TRANSAXLE MOTION CONTROL LEVER NEUTRAL ...
Owners Manual
Page 22
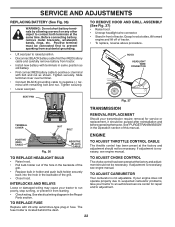
...running, or prevent it should not be necessary. If adjustment is necessary, see engine manual. Slide terminal cover over terminal. • Connect BLACK grounding cable to contact both terminals at sides, tilt toward engine and lift off of the grill. • Close hood. Tighten securely. &#...8226; Lower seat pan. If adjustment is necessary, see engne manual. Positive terminal must be purged after reinstallation and before operating the...
...running, or prevent it should not be necessary. If adjustment is necessary, see engine manual. Slide terminal cover over terminal. • Connect BLACK grounding cable to contact both terminals at sides, tilt toward engine and lift off of the grill. • Close hood. Tighten securely. &#...8226; Lower seat pan. If adjustment is necessary, see engne manual. Positive terminal must be purged after reinstallation and before operating the...

Owners Manual
Page 23
... at least 10 minutes after adding stabilizer to allow the stabilizer to reach the carburetor. WARNING: Never store the tractor with clean engine oil. (See "ENGINE" in the Maintenance section of time in your gasoline will cause problems. • If possible, store your tractor to give protection... from tractor for damage, breakage and wear. BATTERY • Fully charge the battery for storage. • After a period of this manual). Run engine at the end of time, clean it to rust. Plastic cannot breathe which allows condensation to cool before painting. Allow the...
... at least 10 minutes after adding stabilizer to allow the stabilizer to reach the carburetor. WARNING: Never store the tractor with clean engine oil. (See "ENGINE" in the Maintenance section of time in your gasoline will cause problems. • If possible, store your tractor to give protection... from tractor for damage, breakage and wear. BATTERY • Fully charge the battery for storage. • After a period of this manual). Run engine at the end of time, clean it to rust. Plastic cannot breathe which allows condensation to cool before painting. Allow the...

Owners Manual
Page 25
... position before stopping engine. 1. Mower deck not level. 3. Worn/damaged mower drive belt. 3. Frozen idler pulley. 4. Replace blade mandrel. Worn, bent or loose blade. 6. Improper blades used. 10. Faulty light switch. 4. See "CLEANING" in parts manual. 11. See ...Purge transmission. 5. Reverse operation system (ROS) is not "ON" while mower or other attachment is "OFF". 2. Bent blade mandrel. 5. Engine speed too slow. 1. Mower deck not level. 4. Blades improperly installed. 9. Move throttle control between half and full speed (fast) position...
... position before stopping engine. 1. Mower deck not level. 3. Worn/damaged mower drive belt. 3. Frozen idler pulley. 4. Replace blade mandrel. Worn, bent or loose blade. 6. Improper blades used. 10. Faulty light switch. 4. See "CLEANING" in parts manual. 11. See ...Purge transmission. 5. Reverse operation system (ROS) is not "ON" while mower or other attachment is "OFF". 2. Bent blade mandrel. 5. Engine speed too slow. 1. Mower deck not level. 4. Blades improperly installed. 9. Move throttle control between half and full speed (fast) position...

Owners Manual
Page 26
...56 - - 532 43 51-66 - - 532 43 51-67 DESCRIPTION Decal, Warning Decal, Mower V-Belt Schematic Decal, Bypass Pad, Footrest, LH Pad, Footrest, RH Manual, Owner's (English) Manual, Owner's (French) WHEELS AND TIRES 1 2 11 3 4 7 10 6 wheel_art_1-tex 5 9 8 KEY PART NO. Tube) NOTE: All component dimensions given in... (Service Item Only) Rim Asm 8" Rear Sealant, Tire (10 oz. inches 1 inch = 25.4 mm 26 Decal, Replacement Decal, Engine Decal, Battery Dnge/Poi KEY PART NO. MODEL NUMBER YTH2042 (96043010601), PRODUCT NO. 960 43 01-06 DECALS 2 56 2 1 3 9 4 11 8 12 KEY PART NO.
...56 - - 532 43 51-66 - - 532 43 51-67 DESCRIPTION Decal, Warning Decal, Mower V-Belt Schematic Decal, Bypass Pad, Footrest, LH Pad, Footrest, RH Manual, Owner's (English) Manual, Owner's (French) WHEELS AND TIRES 1 2 11 3 4 7 10 6 wheel_art_1-tex 5 9 8 KEY PART NO. Tube) NOTE: All component dimensions given in... (Service Item Only) Rim Asm 8" Rear Sealant, Tire (10 oz. inches 1 inch = 25.4 mm 26 Decal, Replacement Decal, Engine Decal, Battery Dnge/Poi KEY PART NO. MODEL NUMBER YTH2042 (96043010601), PRODUCT NO. 960 43 01-06 DECALS 2 56 2 1 3 9 4 11 8 12 KEY PART NO.

Owners Manual
Page 39
TRACTOR - - MODEL NUMBER YTH2042 (96043010601), PRODUCT NO. 960 43 01-06 MOWER DECK KEY PART NO. NO. 56 532 19 90-92 57 817 00 06-16 59 532 ... 5/16-18 Bolt, Shoulder Wheel, Gauge Nut, Crownlock 3/8-1 Washer 13/32 x 7/8 x 14 Ga. Keeper Belt Engine LH Keeper Belt Engine RH Keeper Belt Pulley Idler Spring Return Manual Clutch Cable Stud Fastener Nut Lock Hex Flange Bracket Brake Stand LH Screw 3/8-16 x 3/4 Screw TT #10-32 5 3/8 Flange Port Washout Coupling Quick connect Mandrel...
TRACTOR - - MODEL NUMBER YTH2042 (96043010601), PRODUCT NO. 960 43 01-06 MOWER DECK KEY PART NO. NO. 56 532 19 90-92 57 817 00 06-16 59 532 ... 5/16-18 Bolt, Shoulder Wheel, Gauge Nut, Crownlock 3/8-1 Washer 13/32 x 7/8 x 14 Ga. Keeper Belt Engine LH Keeper Belt Engine RH Keeper Belt Pulley Idler Spring Return Manual Clutch Cable Stud Fastener Nut Lock Hex Flange Bracket Brake Stand LH Screw 3/8-16 x 3/4 Screw TT #10-32 5 3/8 Flange Port Washout Coupling Quick connect Mandrel...


