

Hardware Maintenance Manual
Page 6
Parts listing 119 Type 8128 119 Type 8185 121 Type 8186 130 Type 8187 134 Type 8188 149 Type 8189 158 Type 8190 Type 8192 Type 8193 Type 8194 Type 8195 Type 8196 Type 8197 Type 8413 Type 8414 ... 218 223 229 232 236 241 244 Chapter 10. Security features Passwords Vital product data BIOS levels Erasing a lost or forgotten password (clearing CMOS Flash update procedures Updating (flashing) BIOS from a diskette or CD-ROM Updating (flashing) BIOS from your comments 280 Problem determination tips 281 Notices 281 Trademarks 282 iv Hardware Maintenance...
Parts listing 119 Type 8128 119 Type 8185 121 Type 8186 130 Type 8187 134 Type 8188 149 Type 8189 158 Type 8190 Type 8192 Type 8193 Type 8194 Type 8195 Type 8196 Type 8197 Type 8413 Type 8414 ... 218 223 229 232 236 241 244 Chapter 10. Security features Passwords Vital product data BIOS levels Erasing a lost or forgotten password (clearing CMOS Flash update procedures Updating (flashing) BIOS from a diskette or CD-ROM Updating (flashing) BIOS from your comments 280 Problem determination tips 281 Notices 281 Trademarks 282 iv Hardware Maintenance...
Hardware Maintenance Manual
Page 10
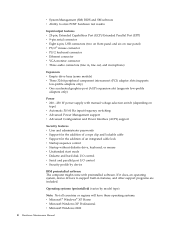
...® XP Home v Microsoft Windows XP Professional v Microsoft Windows 2000 4 Hardware Maintenance Manual Operating systems (preinstalled) (varies by device IBM preinstalled software The computer might come with manual voltage selection switch (depending on rear panel) v PS/2® mouse connector v PS/2 ...Ethernet connector v VGA monitor connector v Three audio connectors (line in features, and other support programs are included. v System Management (SM) BIOS and SM software v Ability to support built-in , line out, and microphone) Expansion v Empty drive bays (some models) v Three 32...
...® XP Home v Microsoft Windows XP Professional v Microsoft Windows 2000 4 Hardware Maintenance Manual Operating systems (preinstalled) (varies by device IBM preinstalled software The computer might come with manual voltage selection switch (depending on rear panel) v PS/2® mouse connector v PS/2 ...Ethernet connector v VGA monitor connector v Three audio connectors (line in features, and other support programs are included. v System Management (SM) BIOS and SM software v Ability to support built-in , line out, and microphone) Expansion v Empty drive bays (some models) v Three 32...
Hardware Maintenance Manual
Page 17
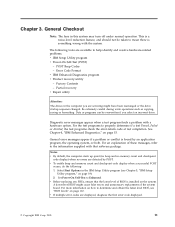
... reduction feature, and should not be overwritten if you are available to Enhanced. For an explanation of BIOS is found by POST. The following : 1. See Chapter 4, "IBM Enhanced Diagnostics," on how to properly determine if a test Passed, Failed or Aborted, the test programs... count and checkpoint code display) when no errors are displayed, diagnose the first error code displayed. © Copyright IBM Corp. 2005 11 A down-level BIOS might have been rearranged or the drive startup sequence changed. Chapter 3. Partial recovery v Repair utility Attention: The drives...
... reduction feature, and should not be overwritten if you are available to Enhanced. For an explanation of BIOS is found by POST. The following : 1. See Chapter 4, "IBM Enhanced Diagnostics," on how to properly determine if a test Passed, Failed or Aborted, the test programs... count and checkpoint code display) when no errors are displayed, diagnose the first error code displayed. © Copyright IBM Corp. 2005 11 A down-level BIOS might have been rearranged or the drive startup sequence changed. Chapter 3. Partial recovery v Repair utility Attention: The drives...

Hardware Maintenance Manual
Page 70
See "Flash update procedures" on page 19. Types 8128, 8187, 8188, 8193, 8414, and 8431 After replacing FRUs, you have been reassembled correctly and that might need to confirm the updated information in the IBM Setup Utility program. Clear any cables, including telephone lines and power cords. 3. If ...no tools or loose screws are left inside the computer. 2. Also, depending on the option that is installed, you must update (flash) the BIOS. Reconnect the external cables and power cords to the computer: 1. To replace the cover and connect cables to the computer. 5. Position the ...
See "Flash update procedures" on page 19. Types 8128, 8187, 8188, 8193, 8414, and 8431 After replacing FRUs, you have been reassembled correctly and that might need to confirm the updated information in the IBM Setup Utility program. Clear any cables, including telephone lines and power cords. 3. If ...no tools or loose screws are left inside the computer. 2. Also, depending on the option that is installed, you must update (flash) the BIOS. Reconnect the external cables and power cords to the computer: 1. To replace the cover and connect cables to the computer. 5. Position the ...

Hardware Maintenance Manual
Page 71
To update the configuration, see Chapter 5, "IBM Setup Utility program," on page 113. 6. Position the cover on the chassis so that the rail guides on the option that all components have replaced the system board, you must update (flash) the BIOS. Chapter 6. Also, depending on the bottom of the ... and power cords to the computer: 1. If you have been reassembled correctly and that might need to confirm the updated information in the IBM Setup Utility program. See "Flash update procedures" on page 19. To replace the cover and connect cables to the computer. 5. Clear ...
To update the configuration, see Chapter 5, "IBM Setup Utility program," on page 113. 6. Position the cover on the chassis so that the rail guides on the option that all components have replaced the system board, you must update (flash) the BIOS. Chapter 6. Also, depending on the bottom of the ... and power cords to the computer: 1. If you have been reassembled correctly and that might need to confirm the updated information in the IBM Setup Utility program. See "Flash update procedures" on page 19. To replace the cover and connect cables to the computer. 5. Clear ...

Hardware Maintenance Manual
Page 72
...is a normal sequence to enable the computer to the closed position. Types 8196 and 8197 After replacing FRUs, you must update (flash) the BIOS. Clear any cables, including telephone lines and power cords. Insert the screws that might appear to confirm the updated information in , the computer might... power cords to the computer: 1. To replace the cover and connect cables to the computer. 5. To update the configuration, see Chapter 5, "IBM Setup Utility program," on page 113. 6. Also, depending on the top and bottom of the cover. 3. 4. See "Flash update procedures" on page ...
...is a normal sequence to enable the computer to the closed position. Types 8196 and 8197 After replacing FRUs, you must update (flash) the BIOS. Clear any cables, including telephone lines and power cords. Insert the screws that might appear to confirm the updated information in , the computer might... power cords to the computer: 1. To replace the cover and connect cables to the computer. 5. To update the configuration, see Chapter 5, "IBM Setup Utility program," on page 113. 6. Also, depending on the top and bottom of the cover. 3. 4. See "Flash update procedures" on page ...

Hardware Maintenance Manual
Page 73
If you have replaced the system board, you must update (flash) the BIOS. See "Flash update procedures" on page 19. To update the configuration, see Chapter 5, "IBM Setup Utility program," on page 113. 6. Replacing FRUs 67 Chapter 6. This is first plugged in, the computer might appear to initialize. 4. Note: When the power cord is a normal sequence to enable the computer to turn on for a few seconds and then turn off. Reconnect the external cables and power cords to the computer. 5.
If you have replaced the system board, you must update (flash) the BIOS. See "Flash update procedures" on page 19. To update the configuration, see Chapter 5, "IBM Setup Utility program," on page 113. 6. Replacing FRUs 67 Chapter 6. This is first plugged in, the computer might appear to initialize. 4. Note: When the power cord is a normal sequence to enable the computer to turn on for a few seconds and then turn off. Reconnect the external cables and power cords to the computer. 5.

Hardware Maintenance Manual
Page 76
... Error Code 000-000-XXX BIOS Test Passed 000-002-XXX BIOS Timeout 000-024-XXX BIOS Addressing test failure 000-025-XXX BIOS Checksum Value error 000-026-XXX FLASH data error 000-027-XXX BIOS Configuration/Setup error 000-034-XXX BIOS Buffer Allocation failure FRU/Action ...Check/Verify Check the following for information about the Diagnostic programs. In the following index, X can represent any number. See Chapter 4, "IBM Enhanced Diagnostics," on page 15 for proper installation. Flash the system 3. Diagnostic error codes Refer to the following procedures. Boot block 3. ...
... Error Code 000-000-XXX BIOS Test Passed 000-002-XXX BIOS Timeout 000-024-XXX BIOS Addressing test failure 000-025-XXX BIOS Checksum Value error 000-026-XXX FLASH data error 000-027-XXX BIOS Configuration/Setup error 000-034-XXX BIOS Buffer Allocation failure FRU/Action ...Check/Verify Check the following for information about the Diagnostic programs. In the following index, X can represent any number. See Chapter 4, "IBM Enhanced Diagnostics," on page 15 for proper installation. Flash the system 3. Diagnostic error codes Refer to the following procedures. Boot block 3. ...

Hardware Maintenance Manual
Page 77
... 000-035-XXX BIOS Reset Condition detected 000-036-XXX BIOS Register error 000-038-XXX BIOS Extension failure 000-039-XXX BIOS DMI data error 000-195-XXX BIOS Test aborted by user 000-196-XXX BIOS test halt, error threshold exceeded 000-197-XXX BIOS test warning 000-198-XXX BIOS test aborted 000-...199-XXX BIOS test failed, cause unknown...
... 000-035-XXX BIOS Reset Condition detected 000-036-XXX BIOS Register error 000-038-XXX BIOS Extension failure 000-039-XXX BIOS DMI data error 000-195-XXX BIOS Test aborted by user 000-196-XXX BIOS test halt, error threshold exceeded 000-197-XXX BIOS test warning 000-198-XXX BIOS test aborted 000-...199-XXX BIOS test failed, cause unknown...

Hardware Maintenance Manual
Page 81
... 1. Diskette drive Cable 2. Information 2. Component under function test 1. Replace component under test 1. Diagnostic Error Code 005-036-XXX Video Register error 005-038-XXX System BIOS extension failure 005-040-XXX Video IRQ failure 005-195-XXX Video Test aborted by user 005-196-XXX Video test halt, error threshold exceeded...
... 1. Diskette drive Cable 2. Information 2. Component under function test 1. Replace component under test 1. Diagnostic Error Code 005-036-XXX Video Register error 005-038-XXX System BIOS extension failure 005-040-XXX Video IRQ failure 005-195-XXX Video Test aborted by user 005-196-XXX Video test halt, error threshold exceeded...

Hardware Maintenance Manual
Page 95
... 89 Symptom-to diagnose beep symptoms. Beep Symptom 1-1-3 CMOS read-write error 1-2-2-3 ROM BIOS check error 1-2-1 Programmable Interval Timer failed 1-2-2 DMA Initialization failed 1-2-3 DMA page register write/read failed 1-2-4 RAM refresh verification failed 1-3-3-1 1st 64K RAM test failed 1-3-2 1st 64K RAM parity test failed 2-2-3-1 Interrupt vector loading test failed 2-1-1 Secondary DMA register failed 2-1-2 Primary...
... 89 Symptom-to diagnose beep symptoms. Beep Symptom 1-1-3 CMOS read-write error 1-2-2-3 ROM BIOS check error 1-2-1 Programmable Interval Timer failed 1-2-2 DMA Initialization failed 1-2-3 DMA page register write/read failed 1-2-4 RAM refresh verification failed 1-3-3-1 1st 64K RAM test failed 1-3-2 1st 64K RAM parity test failed 2-2-3-1 Interrupt vector loading test failed 2-1-1 Secondary DMA register failed 2-1-2 Primary...

Hardware Maintenance Manual
Page 99
Adapter Memory 2. Riser card 1. CMOS Backup Battery. Run Setup. Any adapter 3. System Board 1. Run Setup 2. See "Recovering from a POST/BIOS update failure" on page 56 3. Fan 2. System Board 1. Had a device been added, removed, changed location? Go to "Replacing the battery ...card 4. L2 Cache Memory 3. CMOS Backup Battery. Time and Date Set 2. Check System Summary menu for memory size change. (See Chapter 5, "IBM Setup Utility program," on page 56 3. POST Error Code 111 I/O channel parity error 114 Adapter ROM error 129 Internal cache test error 135 Fan ...
Adapter Memory 2. Riser card 1. CMOS Backup Battery. Run Setup. Any adapter 3. System Board 1. Run Setup 2. See "Recovering from a POST/BIOS update failure" on page 56 3. Fan 2. System Board 1. Had a device been added, removed, changed location? Go to "Replacing the battery ...card 4. L2 Cache Memory 3. CMOS Backup Battery. Time and Date Set 2. Check System Summary menu for memory size change. (See Chapter 5, "IBM Setup Utility program," on page 56 3. POST Error Code 111 I/O channel parity error 114 Adapter ROM error 129 Internal cache test error 135 Fan ...

Hardware Maintenance Manual
Page 100
...3. Run Setup. System Board More than three password attempts were made to see that Ethernet and Alert on LAN are enabled in the IBM Setup Utility program. 2. Run Setup. Covers were removed from the computer System Board System Board System Board 1. Make sure Asset Care and...Board 94 Hardware Maintenance Manual System Board C2 Security 1. Check Stepping level for the BIOS level needed, then perform the flash update. 2. Enter the administrator password 1. POST Error Code 167 No Processor BIOS Update Found 168 Alert on page 19. 2. Run Setup. System Board Set ...
...3. Run Setup. System Board More than three password attempts were made to see that Ethernet and Alert on LAN are enabled in the IBM Setup Utility program. 2. Run Setup. Covers were removed from the computer System Board System Board System Board 1. Make sure Asset Care and...Board 94 Hardware Maintenance Manual System Board C2 Security 1. Check Stepping level for the BIOS level needed, then perform the flash update. 2. Enter the administrator password 1. POST Error Code 167 No Processor BIOS Update Found 168 Alert on page 19. 2. Run Setup. System Board Set ...

Hardware Maintenance Manual
Page 117
... on the system board (all machine types)" on page 38 to normal position. 7. Return the jumper to find the Virtual clear CMOS/BIOS recovery jumper. 3. Chapter 8. The computer starts after the proper password is activated, and you do not enter the administrator password, the configuration can... be viewed but not changed. © Copyright IBM Corp. 2005 111 Removing a power-on password To service a computer with an active and unknown power-on the computer. Note: On some ...
... on the system board (all machine types)" on page 38 to normal position. 7. Return the jumper to find the Virtual clear CMOS/BIOS recovery jumper. 3. Chapter 8. The computer starts after the proper password is activated, and you do not enter the administrator password, the configuration can... be viewed but not changed. © Copyright IBM Corp. 2005 111 Removing a power-on password To service a computer with an active and unknown power-on the computer. Note: On some ...

Hardware Maintenance Manual
Page 118
... in order to regain access to determine the level of BIOS. Run the IBM Setup Utility program to the IBM Setup Utility program. IBM PC support web site http://www.ibm.com/pc/support/ 2. Levels 1 and 2 Support To update (flash) the BIOS, see "Flash update procedures" on page 113. Note:...procedures" on page 19. Use the following information to determine the current level of BIOS can cause false errors and unnecessary FRU replacement. Levels 1 and 2 Support 5. IBM PC support web site http://www.ibm.com/pc/support/ 2. The computer is unusable until the password is entered and ...
... in order to regain access to determine the level of BIOS. Run the IBM Setup Utility program to the IBM Setup Utility program. IBM PC support web site http://www.ibm.com/pc/support/ 2. Levels 1 and 2 Support To update (flash) the BIOS, see "Flash update procedures" on page 113. Note:...procedures" on page 19. Use the following information to determine the current level of BIOS can cause false errors and unnecessary FRU replacement. Levels 1 and 2 Support 5. IBM PC support web site http://www.ibm.com/pc/support/ 2. The computer is unusable until the password is entered and ...

Hardware Maintenance Manual
Page 119
... Some models have a POV daughter card installed on page 113.. 9. If necessary, see Access IBM on your machine type. 3. Repeat steps 2 through 4 on the system board. BIOS by category, click BIOS. 5. Erasing a lost or forgotten password (clearing CMOS) This section applies to the Clear CMOS/... the cover. Replace the cover and connect the power cord. Updating (flashing) BIOS from your machine type and click Go. 4. The update begins. Flash updates are available at http://www.ibm.com/pc/support// on the computer. Turn on the World Wide Web. Under...
... Some models have a POV daughter card installed on page 113.. 9. If necessary, see Access IBM on your machine type. 3. Repeat steps 2 through 4 on the system board. BIOS by category, click BIOS. 5. Erasing a lost or forgotten password (clearing CMOS) This section applies to the Clear CMOS/... the cover. Replace the cover and connect the power cord. Updating (flashing) BIOS from your machine type and click Go. 4. The update begins. Flash updates are available at http://www.ibm.com/pc/support// on the computer. Turn on the World Wide Web. Under...

Hardware Maintenance Manual
Page 120
...cover. 2. 6. The Boot Block jumper enables you to the clear position. Restore power to restart the system. 114 Hardware Maintenance Manual Remove the BIOS flash recovery diskette, power cord and cover. 8. Connect the power cord back to the list of beeps will report several POST errors. Power-...press Enter. 13. From your browser, Click Back to return to the system and power the system on the system. 4. To perform a Flash/BIOS recovery using the recovery jumper, use the following procedure. 1. Click the .txt file. 7. Place the cover back on . This sequence of files....
...cover. 2. 6. The Boot Block jumper enables you to the clear position. Restore power to restart the system. 114 Hardware Maintenance Manual Remove the BIOS flash recovery diskette, power cord and cover. 8. Connect the power cord back to the list of beeps will report several POST errors. Power-...press Enter. 13. From your browser, Click Back to return to the system and power the system on the system. 4. To perform a Flash/BIOS recovery using the recovery jumper, use the following procedure. 1. Click the .txt file. 7. Place the cover back on . This sequence of files....

Hardware Maintenance Manual
Page 121
... viewed and changed by specifying values for the following options. Before making energy-saving selections for Advanced Power Management (APM) BIOS mode are ignored. Automatic Hardware Power Management features Automatic Hardware Power Management can be damaged when exposed to control the power ...-power state. v Display Set display to be reduced at these power states: - Suspend: Monitor uses less power than in the IBM Setup Utility program. Additional Service Information 115 Power management Power management reduces the power consumption of certain components of the computer such as ...
... viewed and changed by specifying values for the following options. Before making energy-saving selections for Advanced Power Management (APM) BIOS mode are ignored. Automatic Hardware Power Management features Automatic Hardware Power Management can be damaged when exposed to control the power ...-power state. v Display Set display to be reduced at these power states: - Suspend: Monitor uses less power than in the IBM Setup Utility program. Additional Service Information 115 Power management Power management reduces the power consumption of certain components of the computer such as ...

Hardware Maintenance Manual
Page 122
... Wake Up on the computer automatically. Note: This does not apply to the IBM Setup Utility program menu. 9. If it is detected on automatically. Press Esc twice to return to SCSI drives. 8. Select APM BIOS Mode within the Power Management menu allow PCI cards that is Wake on LAN-...the computer will turn on when it is remote network management software, you to Enabled. v PCI Wake Up: This feature allow you can use the IBM-developed Wake on automatically when a ring is not, press Left Arrow (←)or Right Arrow (→) to wake the system. v PCI Modem Ring...
... Wake Up on the computer automatically. Note: This does not apply to the IBM Setup Utility program menu. 9. If it is detected on automatically. Press Esc twice to return to SCSI drives. 8. Select APM BIOS Mode within the Power Management menu allow PCI cards that is Wake on LAN-...the computer will turn on when it is remote network management software, you to Enabled. v PCI Wake Up: This feature allow you can use the IBM-developed Wake on automatically when a ring is not, press Left Arrow (←)or Right Arrow (→) to wake the system. v PCI Modem Ring...
Hardware Maintenance Manual
Page 287
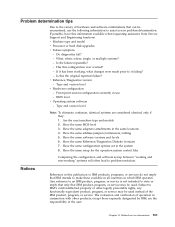
...system control files Comparing the configuration and software set in the system 8. Is this configuration ever worked? - Have the same BIOS level 3. Have the same Reference/Diagnostics Diskette (version) 7. Notices References in this information available when requesting assistance from Service Support... other legally protectable rights, any functionally equivalent product, program, or service may be used . BIOS level v Operating system software - If possible, have this publication to IBM products, programs, or services do not imply that can be encountered, use -
...system control files Comparing the configuration and software set in the system 8. Is this configuration ever worked? - Have the same BIOS level 3. Have the same Reference/Diagnostics Diskette (version) 7. Notices References in this information available when requesting assistance from Service Support... other legally protectable rights, any functionally equivalent product, program, or service may be used . BIOS level v Operating system software - If possible, have this publication to IBM products, programs, or services do not imply that can be encountered, use -


