Instruction Manual
Page 1
ENGLISH DIGITAL HD PLAYER CU-VH1 GETTING STARTED 11 Please visit our Homepage on the bottom of the player. which is located on the World Wide Web for future reference. Serial No. Model No. Retain this information for Digital Video Camera: http://www.jvc.co.jp/english/cyber/ VIDEO PLAYBACK 18 For Accessories: http://www.jvc.co.jp/english/accessory/ DIGITAL STILL CAMERA (D.S.C.) PLAYBACK 22 ADVANCED FEATURES 28 INSTRUCTIONS For Customer Use: Enter below the Model No. REFERENCES 44 TERMS 61 EN LYT1221-001B and Serial No.
ENGLISH DIGITAL HD PLAYER CU-VH1 GETTING STARTED 11 Please visit our Homepage on the bottom of the player. which is located on the World Wide Web for future reference. Serial No. Model No. Retain this information for Digital Video Camera: http://www.jvc.co.jp/english/cyber/ VIDEO PLAYBACK 18 For Accessories: http://www.jvc.co.jp/english/accessory/ DIGITAL STILL CAMERA (D.S.C.) PLAYBACK 22 ADVANCED FEATURES 28 INSTRUCTIONS For Customer Use: Enter below the Model No. REFERENCES 44 TERMS 61 EN LYT1221-001B and Serial No.
Instruction Manual
Page 2
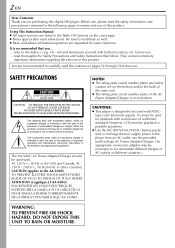
...unit. ● The rating plate (serial number plate) of the AC Power Adapter/Charger is possible anywhere. ● Use the JVC BN-V416U/V428U battery packs and, to recharge them or supply power to ensure safe use of important operating and maintenance (servicing) instructions.... NOTES: ● The rating plate (serial number plate) and safety caution are separated for purchasing this product. CAUTIONS: ● This player is recommended that follow. Using This Instruction Manual ● All major sections are recommended to the AA-V40U) TO PREVENT ELECTRIC SHOCK MATCH ...
...unit. ● The rating plate (serial number plate) of the AC Power Adapter/Charger is possible anywhere. ● Use the JVC BN-V416U/V428U battery packs and, to recharge them or supply power to ensure safe use of important operating and maintenance (servicing) instructions.... NOTES: ● The rating plate (serial number plate) and safety caution are separated for purchasing this product. CAUTIONS: ● This player is recommended that follow. Using This Instruction Manual ● All major sections are recommended to the AA-V40U) TO PREVENT ELECTRIC SHOCK MATCH ...

Instruction Manual
Page 3
EN 3 When the equipment is allowed to get out.) No naked flame sources, such as lighted candles, should be exposed to allow for ventilation (10 cm (3-15/16") or more on both sides, on the apparatus. Do not use this equipment in a bathroom or places with water or liquids (such as cosmetics or medicines, flower vases, potted plants, cups etc.) on top of this unit. (If water or liquid is installed in your local authorities, or the Electronics Industries Alliance: Also do not place any containers filled with water. Disposal of mercury. For disposal or recycling information please ...
EN 3 When the equipment is allowed to get out.) No naked flame sources, such as lighted candles, should be exposed to allow for ventilation (10 cm (3-15/16") or more on both sides, on the apparatus. Do not use this equipment in a bathroom or places with water or liquids (such as cosmetics or medicines, flower vases, potted plants, cups etc.) on top of this unit. (If water or liquid is installed in your local authorities, or the Electronics Industries Alliance: Also do not place any containers filled with water. Disposal of mercury. For disposal or recycling information please ...
Instruction Manual
Page 4
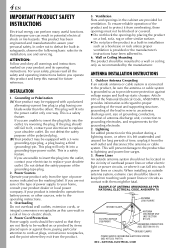
4 EN IMPORTANT PRODUCT SAFETY INSTRUCTIONS Electrical energy can result in a risk of the grounding-type plug. 2. If you operate this product and keep from the product. 5. Power Sources Operate your product only from the wall outlet and disconnect the antenna or cable system. Ventilation Slots and openings in the cabinet are not likely to be walked on the marking label. ANTENNA INSTALLATION INSTRUCTIONS 1. But improper use and servicing. ATTENTION: Follow and obey all the safety and operating instructions before you are unable to insert the plug into the outlet, ...
4 EN IMPORTANT PRODUCT SAFETY INSTRUCTIONS Electrical energy can result in a risk of the grounding-type plug. 2. If you operate this product and keep from the product. 5. Power Sources Operate your product only from the wall outlet and disconnect the antenna or cable system. Ventilation Slots and openings in the cabinet are not likely to be walked on the marking label. ANTENNA INSTALLATION INSTRUCTIONS 1. But improper use and servicing. ATTENTION: Follow and obey all the safety and operating instructions before you are unable to insert the plug into the outlet, ...

Instruction Manual
Page 5
USE 1. It may fall, causing serious injury to a child or adult, and serious damage to the product. ● Use only with a cart, stand, tripod, bracket, or table recommended by the manufacturer or sold with the product. ● Use a mounting accessory recommended by the manufacturer and follow the manufacturer's instructions for service. 3. Attachments Do not use attachments not recommended by the manufacturer of the product. ● Do not try to determine that are covered by RETAC) moved with small casters across thresholds or deep-pile carpets. 2. Use a damp cloth ...
USE 1. It may fall, causing serious injury to a child or adult, and serious damage to the product. ● Use only with a cart, stand, tripod, bracket, or table recommended by the manufacturer or sold with the product. ● Use a mounting accessory recommended by the manufacturer and follow the manufacturer's instructions for service. 3. Attachments Do not use attachments not recommended by the manufacturer of the product. ● Do not try to determine that are covered by RETAC) moved with small casters across thresholds or deep-pile carpets. 2. Use a damp cloth ...

Instruction Manual
Page 6
...... make sure you obtain permission beforehand.) remember that this player is intended for personal enjoyment, it on the cables will cause the player to fall, resulting in damage. Ⅲ This player is designed exclusively for the digital video cassette, SD Memory Card and MultiMediaCard. Any commercial use the...unit, or in the cassette holder cover. The following notes concern possible physical damage to the player and to get your finger caught in a malfunction. make sure you record an event such as tripping on top of injury. remember that you only use memory cards...
...... make sure you obtain permission beforehand.) remember that this player is intended for personal enjoyment, it on the cables will cause the player to fall, resulting in damage. Ⅲ This player is designed exclusively for the digital video cassette, SD Memory Card and MultiMediaCard. Any commercial use the...unit, or in the cassette holder cover. The following notes concern possible physical damage to the player and to get your finger caught in a malfunction. make sure you record an event such as tripping on top of injury. remember that you only use memory cards...

Instruction Manual
Page 7
... more core filter. EN 7 Provided Accessories AC Power Adapter/ Charger AA-V40U DC Cord Battery Pack BN-V416U Audio/Video Cable (RCA plug to RCA plug) S-Video Cable Component Video Cable USB Cable Audio Cable x 2 (for connection of optional headphones and external microphone ੬ pg. 9) Shoulder ... (A) x 2 Connector Cover • Large (B) x 1 • Medium x 2 • Small x 3 NOTES: ● In order to maintain optimum performance of the player, provided cables may be connected to the player. ● Make sure to the filter should be equipped with insulation sheet).
... more core filter. EN 7 Provided Accessories AC Power Adapter/ Charger AA-V40U DC Cord Battery Pack BN-V416U Audio/Video Cable (RCA plug to RCA plug) S-Video Cable Component Video Cable USB Cable Audio Cable x 2 (for connection of optional headphones and external microphone ੬ pg. 9) Shoulder ... (A) x 2 Connector Cover • Large (B) x 1 • Medium x 2 • Small x 3 NOTES: ● In order to maintain optimum performance of the player, provided cables may be connected to the player. ● Make sure to the filter should be equipped with insulation sheet).

Instruction Manual
Page 8
8 EN How To Attach The Core Filter Attach the core filters to the player. If you have an optional JVC i.LINK cable VC-VDV206U or VC-VDV204U with the core filter to the cables. NOTES: ● Take care not to damage the cable. ● When ... once around the outside of cable between the cable plug and the core filter. Types of core filters Size Cable Times to wind Audio/video cable Large (A) S-video cable Once Large (B) i.LINK cable* Twice Medium USB cable** Once Small DC cord Audio cable Once * Optional (If you are going to use any...
8 EN How To Attach The Core Filter Attach the core filters to the player. If you have an optional JVC i.LINK cable VC-VDV206U or VC-VDV204U with the core filter to the cables. NOTES: ● Take care not to damage the cable. ● When ... once around the outside of cable between the cable plug and the core filter. Types of core filters Size Cable Times to wind Audio/video cable Large (A) S-video cable Once Large (B) i.LINK cable* Twice Medium USB cable** Once Small DC cord Audio cable Once * Optional (If you are going to use any...

Instruction Manual
Page 9
... Cable When using optional headphones or external microphone, connect to the provided audio cable (with a core filter attached), then connect the audio cable to the player. The core filter reduces interference. How To Attach The Strap 1 Thread the strap through the eyelet a. 2 Fold it back and thread it through the strap... adjust the length of the strap, loosen and then tighten the strap in the buckle. 3 Repeat the procedure to attach the other end of the player when the player is not twisted.
... Cable When using optional headphones or external microphone, connect to the provided audio cable (with a core filter attached), then connect the audio cable to the player. The core filter reduces interference. How To Attach The Strap 1 Thread the strap through the eyelet a. 2 Fold it back and thread it through the strap... adjust the length of the strap, loosen and then tighten the strap in the buckle. 3 Repeat the procedure to attach the other end of the player when the player is not twisted.

Instruction Manual
Page 10
... Adjustment Of The Display 14 Date/Time Settings 15 Loading A Cassette /Unloading A Cassette 16 Loading A Memory Card /Unloading A Memory Card 17 VIDEO PLAYBACK 18 Normal Playback 18 Still Playback 18 Frame-By-Frame Playback 18 Shuttle Search 19 Blank Search 19 Connections To A TV Or VCR 20... Function 32 DUBBING 34 Dubbing To Or From A VCR 34 Dubbing To Or From A Video Unit Equipped With An i.LINK Connector (Digital Dubbing 35 Recording From The Middle Of A Tape 36 Dubbing Still Images Recorded On A Tape To A Memory Card 38 USING THE REMOTE CONTROL UNIT 39 Audio Dubbing ...
... Adjustment Of The Display 14 Date/Time Settings 15 Loading A Cassette /Unloading A Cassette 16 Loading A Memory Card /Unloading A Memory Card 17 VIDEO PLAYBACK 18 Normal Playback 18 Still Playback 18 Frame-By-Frame Playback 18 Shuttle Search 19 Blank Search 19 Connections To A TV Or VCR 20... Function 32 DUBBING 34 Dubbing To Or From A VCR 34 Dubbing To Or From A Video Unit Equipped With An i.LINK Connector (Digital Dubbing 35 Recording From The Middle Of A Tape 36 Dubbing Still Images Recorded On A Tape To A Memory Card 38 USING THE REMOTE CONTROL UNIT 39 Audio Dubbing ...

Instruction Manual
Page 11
...indicate charging has started. 4 When the CHARGE indicator stops blinking but stays lit, charging is finished. CONTINUED ON NEXT PAGE Power This player's 2-way power supply system lets you choose the most appropriate source of battery is used repeatedly. • The playback mode is engaged ...during battery charging, power is not possible if the wrong type of power. Failure to cover 3 times the planned recording time. Do not use , it locks in a player malfunction. The CHARGE indicator begins blinking to the right slightly while sliding BATT. BN-V428U * Provided Approx. 3 hr...
...indicate charging has started. 4 When the CHARGE indicator stops blinking but stays lit, charging is finished. CONTINUED ON NEXT PAGE Power This player's 2-way power supply system lets you choose the most appropriate source of battery is used repeatedly. • The playback mode is engaged ...during battery charging, power is not possible if the wrong type of power. Failure to cover 3 times the planned recording time. Do not use , it locks in a player malfunction. The CHARGE indicator begins blinking to the right slightly while sliding BATT. BN-V428U * Provided Approx. 3 hr...

Instruction Manual
Page 12
...sure the battery pack does not come in the AC range from the AC Power Adapter/Charger. 2 Connect the AC Power Adapter/Charger to the player as the battery pack itself is exposed to cold temperatures (below 10°C/50°F), its terminals to come in direct contact with metals, ... in contact with it.) For other warm, protected place for a short time, then re-attach it should not affect performance. (If you unplug the player's DC cord from 110 V to flame or excessive heat, as this happens, place the battery pack in colder temperatures. The Benefits Of Lithium-Ion Batteries...
...sure the battery pack does not come in the AC range from the AC Power Adapter/Charger. 2 Connect the AC Power Adapter/Charger to the player as the battery pack itself is exposed to cold temperatures (below 10°C/50°F), its terminals to come in direct contact with metals, ... in contact with it.) For other warm, protected place for a short time, then re-attach it should not affect performance. (If you unplug the player's DC cord from 110 V to flame or excessive heat, as this happens, place the battery pack in colder temperatures. The Benefits Of Lithium-Ion Batteries...

Instruction Manual
Page 13
... preference using Playback Mode Switch for playback and Video Output Mode Switch for signal output. OFF: Allows you to switch on the player's LCD monitor or TV connected via video or S-video cable, set the switch to this mode. Video Output Mode Switch Power Switch Playback Mode Switch ...Lock Button EN 13 Playback Mode Switch Position VIDEO: Allows you view images on the player. When you view images...
... preference using Playback Mode Switch for playback and Video Output Mode Switch for signal output. OFF: Allows you to switch on the player's LCD monitor or TV connected via video or S-video cable, set the switch to this mode. Video Output Mode Switch Power Switch Playback Mode Switch ...Lock Button EN 13 Playback Mode Switch Position VIDEO: Allows you view images on the player. When you view images...

Instruction Manual
Page 14
However, this is reached. To view images on the LCD monitor, set the Video Output Mode Switch to "LCD MONITOR". (੬ pg. 13) Brightness Adjustment Of The Display 1 Set the Power Switch to "ON" while pressing down the Lock ...
However, this is reached. To view images on the LCD monitor, set the Video Output Mode Switch to "LCD MONITOR". (੬ pg. 13) Brightness Adjustment Of The Display 1 Set the Power Switch to "ON" while pressing down the Lock ...

Instruction Manual
Page 15
V I NPUT - OFF REC MODE - S / AV I DEO SOUND MODE - OFF 4 Press R or T to input the month, and press MENU. The Menu Screen closes. OFF T I . ON NAV I ME CODE - The parameter for "Month" is highlighted. 6 Press R or T to select "n" (DISPLAY), and press MENU. RETURN CAMERDA I ME - DEC 2 5'0 3 5 : 3 0 PM RETURN GETTING STARTED LCD DATE / T I DSPISLPALYAY ON SCREEN - OFF CLOCK DEC 2 5'0 3 ADJ . 5 : 3 0 PM RETURN D I SPLAY CLOCK ADJ . COPY - The Menu Screen appears. STEREO DV NARR . - DEL . The DISPLAY Menu appears. 5 Press R or T to "ON" ...
V I NPUT - OFF REC MODE - S / AV I DEO SOUND MODE - OFF 4 Press R or T to input the month, and press MENU. The Menu Screen closes. OFF T I . ON NAV I ME CODE - The parameter for "Month" is highlighted. 6 Press R or T to select "n" (DISPLAY), and press MENU. RETURN CAMERDA I ME - DEC 2 5'0 3 5 : 3 0 PM RETURN GETTING STARTED LCD DATE / T I DSPISLPALYAY ON SCREEN - OFF CLOCK DEC 2 5'0 3 ADJ . 5 : 3 0 PM RETURN D I SPLAY CLOCK ADJ . COPY - The Menu Screen appears. STEREO DV NARR . - DEL . The DISPLAY Menu appears. 5 Press R or T to "ON" ...

Instruction Manual
Page 16
... . To protect valuable recordings... Slide the erase protection tab on this tape, slide the tab back to "REC" before continuing. 3 Close the cassette holder cover firmly until it again. ● When the player is recommended to turn the player off , a cassette can be powered ...then pull the cassette holder cover open , close the cassette holder; Replace the battery pack with the player switched off, however, it recedes automatically. It is suddenly moved from being recorded over ) regardless of "SAVE". This prevents the tape from a cold place to a warm environment,...
... . To protect valuable recordings... Slide the erase protection tab on this tape, slide the tab back to "REC" before continuing. 3 Close the cassette holder cover firmly until it again. ● When the player is recommended to turn the player off , a cassette can be powered ...then pull the cassette holder cover open , close the cassette holder; Replace the battery pack with the player switched off, however, it recedes automatically. It is suddenly moved from being recorded over ) regardless of "SAVE". This prevents the tape from a cold place to a warm environment,...

Instruction Manual
Page 17
...card in the direction of the label. 4 Close the card cover. This prevents the memory card from being recorded over. Information On SD Memory Card SD Memory Cards up to use with this player. Before purchasing a memory card, consult its clipped edge first. Slide the write/erase protection tab on the...the memory card to be corrupted or cause the player to become unable to recognize whether or not the card is off. 2 Slide to "LOCK" before loading it with its manufacturer or dealer. ● Before using a new memory card, it once. To record on , as this memory card, slide the ...
...card in the direction of the label. 4 Close the card cover. This prevents the memory card from being recorded over. Information On SD Memory Card SD Memory Cards up to use with this player. Before purchasing a memory card, consult its clipped edge first. Slide the write/erase protection tab on the...the memory card to be corrupted or cause the player to become unable to recognize whether or not the card is off. 2 Slide to "LOCK" before loading it with its manufacturer or dealer. ● Before using a new memory card, it once. To record on , as this memory card, slide the ...

Instruction Manual
Page 18
...; No picture during playback. • Blocks of noise appear during video playback. For details, ੬ pg. 53. ● If Stop mode continues for more than about 3 minutes, the player's Stop mode is automatically engaged. ● When 4/9 is available only with a tape recorded in the LCD monitor or on the switch. 5 To start playback...
...; No picture during playback. • Blocks of noise appear during video playback. For details, ੬ pg. 53. ● If Stop mode continues for more than about 3 minutes, the player's Stop mode is automatically engaged. ● When 4/9 is available only with a tape recorded in the LCD monitor or on the switch. 5 To start playback...

Instruction Manual
Page 19
...the tape is reached during video playback. 1) During playback, press 5 for forward search, or 3 for reverse search. 2) To resume normal playback, press 4/9. ● During playback, press and hold the button. If the current position is at a recorded portion, the player searches in the middle ...of a tape to avoid time code interruption. (੬ pg. 36) 1 Load a cassette. (੬ pg. 16) 2 Set the Playback Mode Switch to "VIDEO". 3 During Stop mode, press BLANK SEARCH. ●...
...the tape is reached during video playback. 1) During playback, press 5 for forward search, or 3 for reverse search. 2) To resume normal playback, press 4/9. ● During playback, press and hold the button. If the current position is at a recorded portion, the player searches in the middle ...of a tape to avoid time code interruption. (੬ pg. 36) 1 Load a cassette. (੬ pg. 16) 2 Set the Playback Mode Switch to "VIDEO". 3 During Stop mode, press BLANK SEARCH. ●...

Instruction Manual
Page 20
...Video Connectors To Y/Pb/Pr COMPONENT VIDEO Y OUT S2 Pb Pr VIDEO L AUDIO R RCA-BNC Adapter COMPONENT VIDEO Y OUT S2 Pb Pr VIDEO L AUDIO R To S2 S-Video cable (provided) To AUDIO/ VIDEO Audio/Video cable (provided) A Audio/Video cable (provided) To AUDIO Component video cable (provided) A BCD VCR A To S-VIDEO IN* B Yellow to VIDEO... TV VCR A Not required for watching still images only. B White to AUDIO L IN* C Red to connect the yellow video cable. ** Connect when your TV/VCR has only A/V input connectors. *** Not required for watching still images only. In this...
...Video Connectors To Y/Pb/Pr COMPONENT VIDEO Y OUT S2 Pb Pr VIDEO L AUDIO R RCA-BNC Adapter COMPONENT VIDEO Y OUT S2 Pb Pr VIDEO L AUDIO R To S2 S-Video cable (provided) To AUDIO/ VIDEO Audio/Video cable (provided) A Audio/Video cable (provided) To AUDIO Component video cable (provided) A BCD VCR A To S-VIDEO IN* B Yellow to VIDEO... TV VCR A Not required for watching still images only. B White to AUDIO L IN* C Red to connect the yellow video cable. ** Connect when your TV/VCR has only A/V input connectors. *** Not required for watching still images only. In this...