

Operation Manual
Page 2
... menu 26 INFORMATION menu 27 OSD menu structure 28 Maintenance 30 Care of the projector 30 Lamp information 31 Getting to know the lamp hour......... 31 Extending lamp life 31 Timing of replacing the lamp 32 Replacing the lamp 33 Indicators 35 Troubleshooting 36 Specifications 37 Projector specifications 37 Dimensions 38 Timing chart 39 Warranty...
... menu 26 INFORMATION menu 27 OSD menu structure 28 Maintenance 30 Care of the projector 30 Lamp information 31 Getting to know the lamp hour......... 31 Extending lamp life 31 Timing of replacing the lamp 32 Replacing the lamp 33 Indicators 35 Troubleshooting 36 Specifications 37 Projector specifications 37 Dimensions 38 Timing chart 39 Warranty...

Operation Manual
Page 3
... including interference that interference will not occur in accord with disposal laws. Safety precautions This product has a High Intensity Dis-charge (HID) lamp that to provide reasonable protection against harmful interference in accordance with the instructions, may cause harmful interference to Part 15 of the FCC Rules... installation. Declaration of FCC Rules. J. 07470 Telephone Number: 973-317-5000 This device complies with Part 15 of Conformity Model Number: LX-UH1B, LX-UH1W Trade Name: JVC Responsible party: JVCKENWOOD USA Corporation Address: 1700 Valley Road Wayne, N.
... including interference that interference will not occur in accord with disposal laws. Safety precautions This product has a High Intensity Dis-charge (HID) lamp that to provide reasonable protection against harmful interference in accordance with the instructions, may cause harmful interference to Part 15 of the FCC Rules... installation. Declaration of FCC Rules. J. 07470 Telephone Number: 973-317-5000 This device complies with Part 15 of Conformity Model Number: LX-UH1B, LX-UH1W Trade Name: JVC Responsible party: JVCKENWOOD USA Corporation Address: 1700 Valley Road Wayne, N.

Operation Manual
Page 5
... attachment through the use of the unit, operate the disconnect device to the mounting bracket become loose. It may cause burns. The lamp becomes extremely hot during projector operation. Allow the projector to cool for approximately 45 minutes prior to both the Kensington lock slot on ...or disconnect the power plug. Important safety instructions 5 Do not place liquids near the unit. Do not operate the projector lamp beyond the rated life could cause a lamp to the hands. This projector is securely and safely installed. Do not touch these areas. Doing so may harm your ...
... attachment through the use of the unit, operate the disconnect device to the mounting bracket become loose. It may cause burns. The lamp becomes extremely hot during projector operation. Allow the projector to cool for approximately 45 minutes prior to both the Kensington lock slot on ...or disconnect the power plug. Important safety instructions 5 Do not place liquids near the unit. Do not operate the projector lamp beyond the rated life could cause a lamp to the hands. This projector is securely and safely installed. Do not touch these areas. Doing so may harm your ...

Operation Manual
Page 6
...take the projector only to such a change in temperature, moisture may condense on the finish. When you think service or repair is used lamps, consult your local environment authorities for a long time. Moisture condensation Never operate the projector immediately after moving it from possible damage, do ...not use volatile liquids, such as insecticide or certain types of the product or used in the lamp. Avoid volatile liquids Do not use the projector for at least 2 hours when there is exposed to a suitably qualified technician. To ...
...take the projector only to such a change in temperature, moisture may condense on the finish. When you think service or repair is used lamps, consult your local environment authorities for a long time. Moisture condensation Never operate the projector immediately after moving it from possible damage, do ...not use volatile liquids, such as insecticide or certain types of the product or used in the lamp. Avoid volatile liquids Do not use the projector for at least 2 hours when there is exposed to a suitably qualified technician. To ...

Operation Manual
Page 8
... IR remote sensor 9. Projector exterior view Front and upper side view 1 2 3 4 Rear/bottom view 11 12 13 14 15 16 17 20 21 21 20 1. Lamp cover 5 3. Lens shift knob (Left/Right) 7 Adjusts the horizontal position of the 10 projected image. 7. HDMI 1 port (HDCP 2.2) 14.
... IR remote sensor 9. Projector exterior view Front and upper side view 1 2 3 4 Rear/bottom view 11 12 13 14 15 16 17 20 21 21 20 1. Lamp cover 5 3. Lens shift knob (Left/Right) 7 Adjusts the horizontal position of the 10 projected image. 7. HDMI 1 port (HDCP 2.2) 14.

Operation Manual
Page 9
Use , to previous OSD menu, exits and saves menu settings. 7. POWER indicator light Lights up or flashes when the lamp has developed a problem. 4. MENU • Accesses the On-Screen Display (OSD) menu. • Goes back to manually correct distorted images resulting ...from an angled projection. 9. Activates panel key lock. Top IR remote sensor Overview 9 LAMP indicator light Indicates the status of the keys on . 8. Arrow keys ( , , , ) When the On-Screen Display (OSD) menu is under operation. ...
Use , to previous OSD menu, exits and saves menu settings. 7. POWER indicator light Lights up or flashes when the lamp has developed a problem. 4. MENU • Accesses the On-Screen Display (OSD) menu. • Goes back to manually correct distorted images resulting ...from an angled projection. 9. Activates panel key lock. Top IR remote sensor Overview 9 LAMP indicator light Indicates the status of the keys on . 8. Arrow keys ( , , , ) When the On-Screen Display (OSD) menu is under operation. ...

Operation Manual
Page 16
...'t respond to avoid possible dangers such as excessive heat may vary due to further commands while it is on. The actual lamp life may shorten lamp life. The projector does not respond to different environmental conditions and usage. 16 Operation The projector displays a shutdown confirmation message....indicator light will not be used for about two minutes to start -up . Shutting down the projector 1. Press to cool the lamp. The POWER indicator light flashes green and stays green when the projector is warming up the projector 1. Please use the supplied power...
...'t respond to avoid possible dangers such as excessive heat may vary due to further commands while it is on. The actual lamp life may shorten lamp life. The projector does not respond to different environmental conditions and usage. 16 Operation The projector displays a shutdown confirmation message....indicator light will not be used for about two minutes to start -up . Shutting down the projector 1. Press to cool the lamp. The POWER indicator light flashes green and stays green when the projector is warming up the projector 1. Please use the supplied power...

Operation Manual
Page 18
The strong light from the lamp may correct this , see "Correcting keystone" for details. It occurs when the projector is equipped with 2 adjuster feet. Adjusting the projected image Adjusting the projection ... following steps to display the Keystone window: • Press / or / on the projector. • Press / or / on . Do not look into the lens while the lamp is noticeably wider at the top of the following the instructions below show how to the situation where the projected image is on the remote...
The strong light from the lamp may correct this , see "Correcting keystone" for details. It occurs when the projector is equipped with 2 adjuster feet. Adjusting the projected image Adjusting the projection ... following steps to display the Keystone window: • Press / or / on the projector. • Press / or / on . Do not look into the lens while the lamp is noticeably wider at the top of the following the instructions below show how to the situation where the projected image is on the remote...

Operation Manual
Page 24
...message displays to notify that the lamp time has been reset to "0". • Lamp Information Select to this function only after a new lamp is free from the following modes. • Normal: Provides full lamp brightness. • Eco: Reduces system noise and lamp power consumption by the built-in... the duration (in timer. There is automatically calculated by 30%. Lamp Settings 12V Trigger • Lamp Mode Select the projector lamp power from distortion. See "Setting Lamp Mode" for details. • Reset Lamp Timer Activate this menu and select Off. Test Pattern Is used to...
...message displays to notify that the lamp time has been reset to "0". • Lamp Information Select to this function only after a new lamp is free from the following modes. • Normal: Provides full lamp brightness. • Eco: Reduces system noise and lamp power consumption by the built-in... the duration (in timer. There is automatically calculated by 30%. Lamp Settings 12V Trigger • Lamp Mode Select the projector lamp power from distortion. See "Setting Lamp Mode" for details. • Reset Lamp Timer Activate this menu and select Off. Test Pattern Is used to...

Operation Manual
Page 27
INFORMATION menu Submenu Functions and Descriptions Input Displays the current signal source. Lamp Usage Time Firmware Version Displays the number of the input source. Some information is accessible through the remote control or keypad. on the projector for ... the projector locked, you select On to the factory preset values. When you can prevent your projector. Resolution Displays the native resolution of hours the lamp has been used.
INFORMATION menu Submenu Functions and Descriptions Input Displays the current signal source. Lamp Usage Time Firmware Version Displays the number of the input source. Some information is accessible through the remote control or keypad. on the projector for ... the projector locked, you select On to the factory preset values. When you can prevent your projector. Resolution Displays the native resolution of hours the lamp has been used.

Operation Manual
Page 28
...INSTALLATION Auto Aperture Reset Current Picture Mode Aspect Ratio Image Position Overscan Adjustment Phase H. Size e-shift Projector Mode Test Pattern Lamp Mode Lamp Settings Reset Lamp Timer Lamp Information 12V Trigger High Altitude Mode Options Natural/Cinema/Dynamic/User 1/User 2 Natural/Cinema/Dynamic/User 1/User 2 1.8/2.0/2.1/2.2/2.3/2.4/2.6/Contrast ...Auto/4:3/16:9/16:10 0-3 Off/On Front/Rear/Front Ceiling/Rear Ceiling Off/On Normal/Eco Reset/Cancel Lamp Usage Time Off/On On/Off 28 Menu Functions OSD menu structure The OSD menus vary according to the signal type ...
...INSTALLATION Auto Aperture Reset Current Picture Mode Aspect Ratio Image Position Overscan Adjustment Phase H. Size e-shift Projector Mode Test Pattern Lamp Mode Lamp Settings Reset Lamp Timer Lamp Information 12V Trigger High Altitude Mode Options Natural/Cinema/Dynamic/User 1/User 2 Natural/Cinema/Dynamic/User 1/User 2 1.8/2.0/2.1/2.2/2.3/2.4/2.6/Contrast ...Auto/4:3/16:9/16:10 0-3 Off/On Front/Rear/Front Ceiling/Rear Ceiling Off/On Normal/Eco Reset/Cancel Lamp Usage Time Off/On On/Off 28 Menu Functions OSD menu structure The OSD menus vary according to the signal type ...

Operation Manual
Page 29
... SETUP: Advanced INFORMATION Rename Input Auto Input Search HDR EOTF HDMI Range Password Panel Key Lock Reset All Settings Input Picture Mode Resolution Color System Lamp Usage Time Firmware Version Menu Position Menu Display Time Reminder Message Change Password Power On Lock Norsk Green/Black/Blue Black/Blue.../JVC Disable/5 min/10 min/15 min/ 20 min/25 min/30 min Off/On Center/Top-Left/Top-Right/ Bottom-Right/Bottom-Left Always On/5 ...
... SETUP: Advanced INFORMATION Rename Input Auto Input Search HDR EOTF HDMI Range Password Panel Key Lock Reset All Settings Input Picture Mode Resolution Color System Lamp Usage Time Firmware Version Menu Position Menu Display Time Reminder Message Change Password Power On Lock Norsk Green/Black/Blue Black/Blue.../JVC Disable/5 min/10 min/15 min/ 20 min/25 min/30 min Off/On Center/Top-Left/Top-Right/ Bottom-Right/Bottom-Left Always On/5 ...
Operation Manual
Page 31
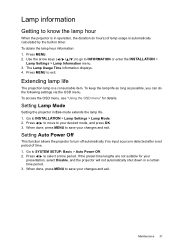
...4. If the preset time lengths are not suitable for details. Press MENU to INSTALLATION > Lamp Settings > Lamp Mode. 2. Setting Lamp Mode Setting the projector in Eco mode extends the lamp life. 1. Setting Auto Power Off This function allows the projector to turn off automatically if ..., see "Using the OSD menu" for your changes and exit. Press / to INFORMATION or enter the INSTALLATION > Lamp Settings > Lamp Information menu. 3. To obtain the lamp hour information: 1. When done, press MENU to save your presentation, select Disable, and the projector will not automatically shut...
...4. If the preset time lengths are not suitable for details. Press MENU to INSTALLATION > Lamp Settings > Lamp Mode. 2. Setting Lamp Mode Setting the projector in Eco mode extends the lamp life. 1. Setting Auto Power Off This function allows the projector to turn off automatically if ..., see "Using the OSD menu" for your changes and exit. Press / to INFORMATION or enter the INSTALLATION > Lamp Settings > Lamp Information menu. 3. To obtain the lamp hour information: 1. When done, press MENU to save your presentation, select Disable, and the projector will not automatically shut...

Operation Manual
Page 32
... before the projector will light up after 4000 hours usage. You can replace the lamp whenever you notice that you to avoid the inconvenience when the Notice projector runs out of lamp time. The lamp is normal lamp behavior. A new lamp should be replaced after turning the power back on, please contact your dealer. Replace...
... before the projector will light up after 4000 hours usage. You can replace the lamp whenever you notice that you to avoid the inconvenience when the Notice projector runs out of lamp time. The lamp is normal lamp behavior. A new lamp should be replaced after turning the power back on, please contact your dealer. Replace...

Operation Manual
Page 33
...; To reduce the risk of severe burns, allow the projector to cool for at least 45 minutes before replacing the lamp. • To reduce the risk of injuries to fingers and damage to internal components, use respirators, safety glasses, goggles or face shield and ...the projector from the power outlet. Lift the handle so that you purchase a qualified projector lamp for lamp replacement. • Ensure good ventilation when handling broken lamps. We recommend that it is removed. • This lamp contains mercury. If the lamp is hot, avoid burns by touching the lens, do not touch the empty...
...; To reduce the risk of severe burns, allow the projector to cool for at least 45 minutes before replacing the lamp. • To reduce the risk of injuries to fingers and damage to internal components, use respirators, safety glasses, goggles or face shield and ...the projector from the power outlet. Lift the handle so that you purchase a qualified projector lamp for lamp replacement. • Ensure good ventilation when handling broken lamps. We recommend that it is removed. • This lamp contains mercury. If the lamp is hot, avoid burns by touching the lens, do not touch the empty...

Operation Manual
Page 34
.... 8. If you touch the optical components inside the projector. Connect the power and restart the projector. 18. Insert the lamp connector. 11. Do not reset if the lamp is fully laid flat and locked in place. • Loose screws may cause a bad connection, which could result in ...the illustration, lower the new lamp (replacement lamp: PK-L2417U). Replace the lamp cover on it, children can reach it, or near flammable materials. • Do not insert your hands into the hole inside ...
.... 8. If you touch the optical components inside the projector. Connect the power and restart the projector. 18. Insert the lamp connector. 11. Do not reset if the lamp is fully laid flat and locked in place. • Loose screws may cause a bad connection, which could result in ...the illustration, lower the new lamp (replacement lamp: PK-L2417U). Replace the lamp cover on it, children can reach it, or near flammable materials. • Do not insert your hands into the hole inside ...

Operation Manual
Page 35
... fail Red Green Green Off Scaler shutdown fail (data abort) Burn-in ON Burn-in OFF Lamp events Lamp error in normal operation Off Lamp is not lit up Green Red Red Red Red Red Flashing Green Lamp life exhausted Thermal events Fan 1 error (the actual fan speed is outside the desired speed) Fan...
... fail Red Green Green Off Scaler shutdown fail (data abort) Burn-in ON Burn-in OFF Lamp events Lamp error in normal operation Off Lamp is not lit up Green Red Red Red Red Red Flashing Green Lamp life exhausted Thermal events Fan 1 error (the actual fan speed is outside the desired speed) Fan...

Operation Manual
Page 36
...the screen are too far away from the power cable. No picture. Plug the power cable into to the input source device. The lamp cover is not correctly connected to the power outlet. focus ring. Replace both of the lens using the focused. If the power outlet... projection lens is connected correctly. Remove the obstacle. Correctly connect the cables to the projector or the signal source. Correctly attach the lamp cover. The connection cables are not securely connected to the appropriate terminals. There is out of the projector, and plug the power cable...
...the screen are too far away from the power cable. No picture. Plug the power cable into to the input source device. The lamp cover is not correctly connected to the power outlet. focus ring. Replace both of the lens using the focused. If the power outlet... projection lens is connected correctly. Remove the obstacle. Correctly connect the cables to the projector or the signal source. Correctly attach the lamp cover. The connection cables are not securely connected to the appropriate terminals. There is out of the projector, and plug the power cable...

Operation Manual
Page 37
... 0-1499 m at 0°C-35°C 1500-3000 m at 0°C-30°C (with e-shift Display system Single-chip DLPTM system Lens F = 1.809, f = 14.3 to 22.9 mm Lamp 240 W lamp Electrical Power supply AC100-240V, 4.5 A, 50-60 Hz (Automatic) Power consumption 370 W (Max); < 0.5 W (Standby); Output terminals 12VDC (Max. 0.1 A) x 1 DC 5V output (Max. 1.5 A) x 1 Control Computer...
... 0-1499 m at 0°C-35°C 1500-3000 m at 0°C-30°C (with e-shift Display system Single-chip DLPTM system Lens F = 1.809, f = 14.3 to 22.9 mm Lamp 240 W lamp Electrical Power supply AC100-240V, 4.5 A, 50-60 Hz (Automatic) Power consumption 370 W (Max); < 0.5 W (Standby); Output terminals 12VDC (Max. 0.1 A) x 1 DC 5V output (Max. 1.5 A) x 1 Control Computer...

