
Instructions
Page 6
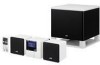
Contents Introduction 2 Precautions 2 Getting Started 3 Connection 5 Basic Operations 7 Unit 7 Remote Control 9 Setting the Clock and Daily Timer ...... 11 Setting the Clock 11 Setting the Daily Timer 11 Playing Back from iPod 13 To Connect iPod ...
Contents Introduction 2 Precautions 2 Getting Started 3 Connection 5 Basic Operations 7 Unit 7 Remote Control 9 Setting the Clock and Daily Timer ...... 11 Setting the Clock 11 Setting the Daily Timer 11 Playing Back from iPod 13 To Connect iPod ...

Instructions
Page 8
CAUTION: To avoid risk of each piece supplied. • Remote control (1) • Lithium coin battery CR2025 (1) (The battery has been installed when shipped from the factory.) • Speaker cords 1.5m (2) • Speaker cord 2.5m (1) ... pull out the insulation sheet. Lithium coin battery (product number: CR2025) (Rear side) 3 Prepare the Remote Control When you have all the following items. The number in the Remote Control Insert the battery into the remote control by matching the polarity (+ and -) correctly. Getting Started Supplied Accessories After unpacking, check to prevent...
CAUTION: To avoid risk of each piece supplied. • Remote control (1) • Lithium coin battery CR2025 (1) (The battery has been installed when shipped from the factory.) • Speaker cords 1.5m (2) • Speaker cord 2.5m (1) ... pull out the insulation sheet. Lithium coin battery (product number: CR2025) (Rear side) 3 Prepare the Remote Control When you have all the following items. The number in the Remote Control Insert the battery into the remote control by matching the polarity (+ and -) correctly. Getting Started Supplied Accessories After unpacking, check to prevent...

Instructions
Page 12
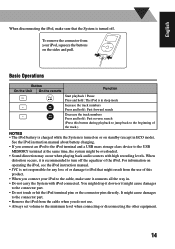
... Back from USB" (P.15). 7 See "Playing Back from iPod" (P.13). 4 See "Playing Back from Other Equipment" (P.19). Unit Display STANDBY lamp Remote control sensor Operation 4 buttons Basic Operations COMPACT COMPONENT SYSTEM NX-PS1 VOLUME 1 Adjust the volume STANDBY FUNCTION USB MEMORY AUX PHONES 2 Select a source 3 STANDBY/ON button USB MEMORY terminal PHONES jack Opening...
... Back from USB" (P.15). 7 See "Playing Back from iPod" (P.13). 4 See "Playing Back from Other Equipment" (P.19). Unit Display STANDBY lamp Remote control sensor Operation 4 buttons Basic Operations COMPACT COMPONENT SYSTEM NX-PS1 VOLUME 1 Adjust the volume STANDBY FUNCTION USB MEMORY AUX PHONES 2 Select a source 3 STANDBY/ON button USB MEMORY terminal PHONES jack Opening...

Instructions
Page 14
... set (P.11) iPod (P.13) USB MEMORY (P.15) USB MEMORY (P.15) 9 See "Playing Back from USB mass storage class device" (P.15). Remote Control Sleep timer 6 8 7 10 Adjust the tone 1 STANDBY/ON button 2 Change the display information 3 Select a source 9 Dimmer/ECO mode ...4 Adjust the volume FADE MUTING button 5 Operating on the Remote Control Buttons Functions 1 Turns on or off (standby) the power Changes the display information. 2 USB MEMORY mode : Clock display ⇔ File information...
... set (P.11) iPod (P.13) USB MEMORY (P.15) USB MEMORY (P.15) 9 See "Playing Back from USB mass storage class device" (P.15). Remote Control Sleep timer 6 8 7 10 Adjust the tone 1 STANDBY/ON button 2 Change the display information 3 Select a source 9 Dimmer/ECO mode ...4 Adjust the volume FADE MUTING button 5 Operating on the Remote Control Buttons Functions 1 Turns on or off (standby) the power Changes the display information. 2 USB MEMORY mode : Clock display ⇔ File information...
Instructions
Page 19
...iPod, squeeze the buttons on the sides and pull. Basic Operations Button On the Unit On the remote Function Start playback / Pause Press and hold : The iPod is in sleep mode Increase the track... product. • When you do not use. • Always set volume to iPod that the System is turned off the equalizer of or damage to the minimum level when connecting or disconnecting the other equipment...occurs, it is turned on or on operating the iPod, see the iPod instruction manual. • JVC is not responsible for any loss of the iPod. For information on standby (except in ECO mode...
...iPod, squeeze the buttons on the sides and pull. Basic Operations Button On the Unit On the remote Function Start playback / Pause Press and hold : The iPod is in sleep mode Increase the track... product. • When you do not use. • Always set volume to iPod that the System is turned off the equalizer of or damage to the minimum level when connecting or disconnecting the other equipment...occurs, it is turned on or on operating the iPod, see the iPod instruction manual. • JVC is not responsible for any loss of the iPod. For information on standby (except in ECO mode...

Instructions
Page 20
Press and hold : Fast reverse search (Press this System. Press and hold : Fast forward search Decreases the track numbers. Track number Group number 15 Basic Operations Button On the Unit On the remote Starts playback / Pauses Function Stops playback Increases the track numbers. to its manual. ...AUX PHONES or DAP • When disconnecting the USB mass storage class device, make sure that the System is equipped with a USB MEMORY terminal on the front panel. This System cannot recognize a USB mass storage class device whose rating exceeds 5V/500mA. You can connect a USB...
Press and hold : Fast reverse search (Press this System. Press and hold : Fast forward search Decreases the track numbers. Track number Group number 15 Basic Operations Button On the Unit On the remote Starts playback / Pauses Function Stops playback Increases the track numbers. to its manual. ...AUX PHONES or DAP • When disconnecting the USB mass storage class device, make sure that the System is equipped with a USB MEMORY terminal on the front panel. This System cannot recognize a USB mass storage class device whose rating exceeds 5V/500mA. You can connect a USB...

Instructions
Page 25
...malfunction due to the main unit with a USB cable. The path between the remote control and the remote sensor on the System is empty. Signals cannot reach the remote sensor. Headphones are disabled. Sound from the remote control. Close the applications you finish. The battery is blocked. Timer Operations: Daily... plug it at the remote sensor on . No sound is a time limit. Set the clock first, then the timer again. 20 General: Power does not come on the font panel. Plug in . Operations are connected (P.7). Timer starts working only when the System is connected via USB ...
...malfunction due to the main unit with a USB cable. The path between the remote control and the remote sensor on the System is empty. Signals cannot reach the remote sensor. Headphones are disabled. Sound from the remote control. Close the applications you finish. The battery is blocked. Timer Operations: Daily... plug it at the remote sensor on . No sound is a time limit. Set the clock first, then the timer again. 20 General: Power does not come on the font panel. Plug in . Operations are connected (P.7). Timer starts working only when the System is connected via USB ...


