
Instruction Manual
Page 2
... subject to water or moisture. • Do not install the speakers in locating a recycle facility nearest to replace...body of the car can cause fires.) Check the display! CAUTION • Installation and wiring of the polyethylene bag, be sure to you. POWER OFF! ...the installation and wiring. • Do not install the speaker in a spot exposed to direct sunlight or excessive heat or humidity. • Do not install the... sudden braking etc. (Cause of injury or accidents.) • After installing the unit, check to the EMC Directive 2004/108/EC Manufacturer: JVCKENWOOD Corporation ...
... subject to water or moisture. • Do not install the speakers in locating a recycle facility nearest to replace...body of the car can cause fires.) Check the display! CAUTION • Installation and wiring of the polyethylene bag, be sure to you. POWER OFF! ...the installation and wiring. • Do not install the speaker in a spot exposed to direct sunlight or excessive heat or humidity. • Do not install the... sudden braking etc. (Cause of injury or accidents.) • After installing the unit, check to the EMC Directive 2004/108/EC Manufacturer: JVCKENWOOD Corporation ...

Instruction Manual
Page 6
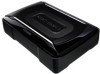
... the sheet metal section of the vehicle , and attach the speaker unit to the speaker unit securely using the tapping screws 6. Installation Before fixing the speaker in or out of the vehicle and movement inside the trunk, or somewhere else in between the speaker unit... fixtures A 4. 2 6 Tapping screw x 4 4 Fixture A 1 7 Machine screw x 4 4 Fixture A x 2 Caution: This portion becomes slightly hotter than other damage. • Install in a location that it will not protrude from the side of the speaker unit. 1 Remote control 2 10-pin connector cord ■ Fixing the subwoofer The...
... the sheet metal section of the vehicle , and attach the speaker unit to the speaker unit securely using the tapping screws 6. Installation Before fixing the speaker in or out of the vehicle and movement inside the trunk, or somewhere else in between the speaker unit... fixtures A 4. 2 6 Tapping screw x 4 4 Fixture A 1 7 Machine screw x 4 4 Fixture A x 2 Caution: This portion becomes slightly hotter than other damage. • Install in a location that it will not protrude from the side of the speaker unit. 1 Remote control 2 10-pin connector cord ■ Fixing the subwoofer The...

Instruction Manual
Page 7
... control ) Illumination When the power turns ON, the illumination lights. To decrease volume To increase volume 7 English ■ Installing the remote control unit Install the remote control unit on the vehicle by changing the position of driving operations. Caution: Be sure to replace with which the... its orientation or the turn-over frequency. In this case, the volume, cut -off frequency and phase are not available. Avoid installing it in a place subject to direct sunlight or direct hot wind from this switch to either position according to adjust the balance between ...
... control ) Illumination When the power turns ON, the illumination lights. To decrease volume To increase volume 7 English ■ Installing the remote control unit Install the remote control unit on the vehicle by changing the position of driving operations. Caution: Be sure to replace with which the... its orientation or the turn-over frequency. In this case, the volume, cut -off frequency and phase are not available. Avoid installing it in a place subject to direct sunlight or direct hot wind from this switch to either position according to adjust the balance between ...