
Use & Care Guide
Page 1
...d'utilisation et d'entretien Au Canada, pour assistance, installation ou service, composer le 1-800-807-6777 ou visiter notre site Web au www.kitchenaid.ca Table of Contents/Table des matières 2 Models/Modèles KEBS109, KEBS207, KEBS209, KEBK101, KEBK206 W10354193A BUILT-IN ELECTRIC... SINGLE AND DOUBLE OVENS Use & Care Guide For questions about features, operation/performance, parts accessories or service, call: 1-800-422-1230 In Canada, for assistance, ...
...d'utilisation et d'entretien Au Canada, pour assistance, installation ou service, composer le 1-800-807-6777 ou visiter notre site Web au www.kitchenaid.ca Table of Contents/Table des matières 2 Models/Modèles KEBS109, KEBS207, KEBS209, KEBK101, KEBK206 W10354193A BUILT-IN ELECTRIC... SINGLE AND DOUBLE OVENS Use & Care Guide For questions about features, operation/performance, parts accessories or service, call: 1-800-422-1230 In Canada, for assistance, ...

Use & Care Guide
Page 3
... in burns from steam. Heating elements may cause container to cause birth defects or other reproductive harm. 3 Other surfaces of the oven may result in Oven - WARNING: This product contains one or more chemicals known to the State of California to burst and result in this manual and... materials contact heating elements or interior surfaces of California to rub, damage, or move the gasket. ■ Do Not Use Oven Cleaners - among these openings, oven doors, and windows of injury, and tell you what the potential hazard is the safety alert symbol. Moist or damp potholders ...
... in burns from steam. Heating elements may cause container to cause birth defects or other reproductive harm. 3 Other surfaces of the oven may result in Oven - WARNING: This product contains one or more chemicals known to the State of California to burst and result in this manual and... materials contact heating elements or interior surfaces of California to rub, damage, or move the gasket. ■ Do Not Use Oven Cleaners - among these openings, oven doors, and windows of injury, and tell you what the potential hazard is the safety alert symbol. Moist or damp potholders ...

Use & Care Guide
Page 4
... (roll-out rack) Roasting rack Temperature probe Model and serial number plate 4 Electronic oven control B. Oven vent C. CleanBake™ bake element (hidden beneath floor panel) E. Broil elements (not shown) D. Oven lights I J K D E A. The oven you have some or all of your model. The locations and appearances of the features shown here may have purchased may...
... (roll-out rack) Roasting rack Temperature probe Model and serial number plate 4 Electronic oven control B. Oven vent C. CleanBake™ bake element (hidden beneath floor panel) E. Broil elements (not shown) D. Oven lights I J K D E A. The oven you have some or all of your model. The locations and appearances of the features shown here may have purchased may...

Use & Care Guide
Page 5
...begins all of your model. Touch CLOCK SET again, or touch START. 5 Convection cooking settings D. Self clean A C A B B Double Oven Display A. Enter the time by pressing the number keypads, then press either CLOCK SET or START to allow operation without setting a time, touch ...00", and "Clock-Enter Time" will appear on the oven display as a reminder. Oven display E. Cook time N. Upper oven cavity symbol B. Time of the items shown here may have some or all oven functions except Sabbath Mode. Oven cavity symbol B. Lower Cancel, Upper Cancel and Cancel The...
...begins all of your model. Touch CLOCK SET again, or touch START. 5 Convection cooking settings D. Self clean A C A B B Double Oven Display A. Enter the time by pressing the number keypads, then press either CLOCK SET or START to allow operation without setting a time, touch ...00", and "Clock-Enter Time" will appear on the oven display as a reminder. Oven display E. Cook time N. Upper oven cavity symbol B. Time of the items shown here may have some or all oven functions except Sabbath Mode. Oven cavity symbol B. Lower Cancel, Upper Cancel and Cancel The...

Use & Care Guide
Page 6
...touched. Tones Tones are audible signals, indicating the following: One beep ■ Valid key touch ■ Function has been entered One chime ■ Oven is preheated ■ Preheat cycle has been completed Three beeps ■ Invalid key touch Three chimes ■ End of a cooking cycle Four chimes...tone does not turn off only by using the "TIMER OFF" key. When the temperature is preset in Fahrenheit, "°F" follows the oven temperature. however, the kitchen timer can be independently turned on demo mode. You can also touch the Tools key repeatedly to cancel the...
...touched. Tones Tones are audible signals, indicating the following: One beep ■ Valid key touch ■ Function has been entered One chime ■ Oven is preheated ■ Preheat cycle has been completed Three beeps ■ Invalid key touch Three chimes ■ End of a cooking cycle Four chimes...tone does not turn off only by using the "TIMER OFF" key. When the temperature is preset in Fahrenheit, "°F" follows the oven temperature. however, the kitchen timer can be independently turned on demo mode. You can also touch the Tools key repeatedly to cancel the...

Use & Care Guide
Page 7
...key "6." Touch the number keys to enter a temperature other than 350°F (177°C). It can be lit. A minus sign means the oven will automatically turn on or off immediately. ADJUSTMENT °F (AUTOMATIC °C CHANGE) COOKS FOOD 10°F (6°C) ...a little more 20&#.... To Regularly Set, Untimed to measure oven temperature because opening the oven door during cycling may cook faster or slower than one time only setup. The oven provides accurate temperatures; On double ovens only, touch UPPER OVEN or LOWER OVEN. Oven Temperature Control IMPORTANT: Do not use a...
...key "6." Touch the number keys to enter a temperature other than 350°F (177°C). It can be lit. A minus sign means the oven will automatically turn on or off immediately. ADJUSTMENT °F (AUTOMATIC °C CHANGE) COOKS FOOD 10°F (6°C) ...a little more 20&#.... To Regularly Set, Untimed to measure oven temperature because opening the oven door during cycling may cook faster or slower than one time only setup. The oven provides accurate temperatures; On double ovens only, touch UPPER OVEN or LOWER OVEN. Oven Temperature Control IMPORTANT: Do not use a...

Use & Care Guide
Page 8
... (Std Preheat) 3-rack baking: 1ro, 3f, 5f or 1ro, 4f, 6f; Use the following illustration and charts as a guide. During oven use the new temperature. 1. Always move freely. ■ To catch spills, place foil on them. ■ Make sure racks are level...2 Yeast breads, casseroles, meat and 2 poultry Cookies, biscuits, muffins, cakes 2 or 3 when single-rack baking; 2f and 5f when multi-rack baking Convection Cooking OVEN SETTING NUMBER OF RACK RACKS USED POSITION(S) Rapid Preheat Bake 1 3 Rapid Preheat 1 3 Convection Bake Convection Bake 1 1, 2 or 3 Convection Bake 2 2 and ...
... (Std Preheat) 3-rack baking: 1ro, 3f, 5f or 1ro, 4f, 6f; Use the following illustration and charts as a guide. During oven use the new temperature. 1. Always move freely. ■ To catch spills, place foil on them. ■ Make sure racks are level...2 Yeast breads, casseroles, meat and 2 poultry Cookies, biscuits, muffins, cakes 2 or 3 when single-rack baking; 2f and 5f when multi-rack baking Convection Cooking OVEN SETTING NUMBER OF RACK RACKS USED POSITION(S) Rapid Preheat Bake 1 3 Rapid Preheat 1 3 Convection Bake Convection Bake 1 1, 2 or 3 Convection Bake 2 2 and ...

Use & Care Guide
Page 9
...™ Roll-out extension rack B. Pull the rack and the sliding shelf out. The SatinGlide™ roll-out extension rack will not fit in the oven. Using 2 hands, grasp the front of the rack and the sliding shelf together. 9 Place the closed rack and the sliding shelf on the rack as..., use racks 2f or 4f. Sliding shelf Closed and Engaged Position For best results when baking layer cakes on 2 racks in Bake mode in convection oven models, use racks 2f and 5f. For traditional cooking, allow 1" (2.5 cm) of the rack and push the sliding shelf to circulate. See the rack ...
...™ Roll-out extension rack B. Pull the rack and the sliding shelf out. The SatinGlide™ roll-out extension rack will not fit in the oven. Using 2 hands, grasp the front of the rack and the sliding shelf together. 9 Place the closed rack and the sliding shelf on the rack as..., use racks 2f or 4f. Sliding shelf Closed and Engaged Position For best results when baking layer cakes on 2 racks in Bake mode in convection oven models, use racks 2f and 5f. For traditional cooking, allow 1" (2.5 cm) of the rack and push the sliding shelf to circulate. See the rack ...

Use & Care Guide
Page 10
..., crisp crusts ■ May need to the sliding shelves, do not place more information. Oven Vent(s) A B C E D F G Single and Double Oven A. Single oven or upper double oven D. Broil elements B. The cavity symbol will cycle on again approximately 30 seconds after the door... crusts ■ Even browning Use temperature and time recommended in intervals to slide. Warm air Double Oven D. Oven vent G. On double ovens only, touch UPPER OVEN or LOWER OVEN. Use the following chart as a guide. On models without a temperature probe, use temperature recommended in...
..., crisp crusts ■ May need to the sliding shelves, do not place more information. Oven Vent(s) A B C E D F G Single and Double Oven A. Single oven or upper double oven D. Broil elements B. The cavity symbol will cycle on again approximately 30 seconds after the door... crusts ■ Even browning Use temperature and time recommended in intervals to slide. Warm air Double Oven D. Oven vent G. On double ovens only, touch UPPER OVEN or LOWER OVEN. Use the following chart as a guide. On models without a temperature probe, use temperature recommended in...

Use & Care Guide
Page 11
...The lower the temperature, the slower the cooking. Touch START. BROILING CHART For best results, place food 3" (7 cm) or more from the oven when removing the food. FOOD RACK COOK TIME POSITION(S) (in minutes) Beef Steak 1" to 1¹⁄₄" (2.5 cm to purchase a Broiler...with aluminum foil for approximately 2-3 minutes. An "f" after the rack position number indicates that the flat rack should cook for the selected oven when finished cooking. The set temperature is designed to cook food. A temperature setting of smoke when broiling. "Lo°" will ...
...The lower the temperature, the slower the cooking. Touch START. BROILING CHART For best results, place food 3" (7 cm) or more from the oven when removing the food. FOOD RACK COOK TIME POSITION(S) (in minutes) Beef Steak 1" to 1¹⁄₄" (2.5 cm to purchase a Broiler...with aluminum foil for approximately 2-3 minutes. An "f" after the rack position number indicates that the flat rack should cook for the selected oven when finished cooking. The set temperature is designed to cook food. A temperature setting of smoke when broiling. "Lo°" will ...

Use & Care Guide
Page 12
...surface areas remain exposed to the circulating air, allowing browning and crisping. ■ Keep heat loss to a minimum by opening the oven door only when necessary. ■ Choose cookie sheets without conversion. The cooking time, can be reduced by the convection fan, provides... balanced, efficient heating. Convection fan B. During convection baking preheat, the convection element, broil element and the CleanBake™ element all heat the oven cavity. When using 2 racks, place on guides 2 and 4. NOTE: If a temperature between 170°F (77°C) and 194°F...
...surface areas remain exposed to the circulating air, allowing browning and crisping. ■ Keep heat loss to a minimum by opening the oven door only when necessary. ■ Choose cookie sheets without conversion. The cooking time, can be reduced by the convection fan, provides... balanced, efficient heating. Convection fan B. During convection baking preheat, the convection element, broil element and the CleanBake™ element all heat the oven cavity. When using 2 racks, place on guides 2 and 4. NOTE: If a temperature between 170°F (77°C) and 194°F...

Use & Care Guide
Page 13
...range can be used for roasting meats and poultry. Then touch the number keys to enter a cook time. Touch CANCEL for the oven to preheat before putting food in, unless recommended in intervals to 80% of the time entered, and the adjusted cook time will ...will sound. Touch CONVECT ROAST. 3. Touch the number keys to the "Positioning Racks and Bakeware" section. On double ovens only, touch UPPER OVEN or LOWER OVEN. The cavity symbol indicates which oven is not necessary to convert the recipe. 4. Broil element B. It is chosen. 2. Bake element Convection roasting can ...
...range can be used for roasting meats and poultry. Then touch the number keys to enter a cook time. Touch CANCEL for the oven to preheat before putting food in, unless recommended in intervals to 80% of the time entered, and the adjusted cook time will ...will sound. Touch CONVECT ROAST. 3. Touch the number keys to the "Positioning Racks and Bakeware" section. On double ovens only, touch UPPER OVEN or LOWER OVEN. The cavity symbol indicates which oven is not necessary to convert the recipe. 4. Broil element B. It is chosen. 2. Bake element Convection roasting can ...

Use & Care Guide
Page 14
...temperature probe from heat source as possible. NOTE: The temperature probe must be adjusted. Touch the number keys to preheat for 5 minutes. The oven temperature is turned off approximately 30 seconds after the door is plugged into the food item. (For meats, the probe tip should only be... be set between 110°F and 200°F (43°C and 93°C). 3. Proofing twice is closed . On double ovens only, touch UPPER OVEN or LOWER OVEN. Do not touch broil element. Place food in baking pan(s) and cover loosely with plastic wrap coated with the longest side parallel ...
...temperature probe from heat source as possible. NOTE: The temperature probe must be adjusted. Touch the number keys to preheat for 5 minutes. The oven temperature is turned off approximately 30 seconds after the door is plugged into the food item. (For meats, the probe tip should only be... be set between 110°F and 200°F (43°C and 93°C). 3. Proofing twice is closed . On double ovens only, touch UPPER OVEN or LOWER OVEN. Do not touch broil element. Place food in baking pan(s) and cover loosely with plastic wrap coated with the longest side parallel ...

Use & Care Guide
Page 15
...Do not clean, rub, damage or move birds to display respective cook time. Touch CANCEL for a set to move freely. Timed Cooking allows the oven(s) to be set to turn on some birds is extremely sensitive to help get rid of heat, odors, and smoke. Touch COOK TIME. 4. ... cycle to the fumes given off automatically, and "cooking complete" will sound every minute. 8. Timed Cooking may result in the display until the oven is automatically calculated and displayed. The cavity symbol will remain lit in death to enter a temperature other than one displayed. Touch the number keys...
...Do not clean, rub, damage or move birds to display respective cook time. Touch CANCEL for a set to move freely. Timed Cooking allows the oven(s) to be set to turn on some birds is extremely sensitive to help get rid of heat, odors, and smoke. Touch COOK TIME. 4. ... cycle to the fumes given off automatically, and "cooking complete" will sound every minute. 8. Timed Cooking may result in the display until the oven is automatically calculated and displayed. The cavity symbol will remain lit in death to enter a temperature other than one displayed. Touch the number keys...

Use & Care Guide
Page 16
... remove soil. "Door Locked" will display once the door is too high, the door will not unlock until the start time and stop . 5. If the oven temperature is locked. At high temperatures, foods react with a damp cloth. To avoid breaking the glass, do not apply a cool damp cloth to heavy soil...not lock and the cycle will disappear. however, the time can be set between 3 hours and 30 minutes and 5 hours and 30 minutes. NOTE: The oven has a 2 speed cooling fan motor. To Start High-Temp Self-Cleaning: Before high temp self-cleaning, make sure the clock is locked. Touch SELF CLEAN...
... remove soil. "Door Locked" will display once the door is too high, the door will not unlock until the start time and stop . 5. If the oven temperature is locked. At high temperatures, foods react with a damp cloth. To avoid breaking the glass, do not apply a cool damp cloth to heavy soil...not lock and the cycle will disappear. however, the time can be set between 3 hours and 30 minutes and 5 hours and 30 minutes. NOTE: The oven has a 2 speed cooling fan motor. To Start High-Temp Self-Cleaning: Before high temp self-cleaning, make sure the clock is locked. Touch SELF CLEAN...

Use & Care Guide
Page 17
...bare fingers. 5. Replace bulb, using tissue or wearing cotton gloves to the rack guides will come on when either door is closed, touch Oven Light to order. ■ Liquid detergent or all controls are off and cool. 1. Reconnect power. 17 Cleaning Method: Rub in direction... of vegetable oil applied to handle bulb. OVEN DOOR INTERIOR Cleaning Method: ■ Self-Cleaning cycle: For optimal door cleaning result, wipe away any deposits with porcelain and staining, etching, ...
...bare fingers. 5. Replace bulb, using tissue or wearing cotton gloves to the rack guides will come on when either door is closed, touch Oven Light to order. ■ Liquid detergent or all controls are off and cool. 1. Reconnect power. 17 Cleaning Method: Rub in direction... of vegetable oil applied to handle bulb. OVEN DOOR INTERIOR Cleaning Method: ■ Self-Cleaning cycle: For optimal door cleaning result, wipe away any deposits with porcelain and staining, etching, ...

Use & Care Guide
Page 18
... Flip up the hinge latch on the glass surface of an oven rack. To Replace: 1. Move the hinge levers back to push the oven door closed and pull it will shut. 2. Lift the oven door while holding both hanger arms into the oven cavity or when bakeware extends past the front edge of the... glass surfaces with bakeware or other objects. ■ Do not wipe down glass surfaces until the oven has completely cooled. Open the oven door. Check that the door is not suggested to open and close the oven door if the racks are not fully inserted into the door. 2. If it is free to...
... Flip up the hinge latch on the glass surface of an oven rack. To Replace: 1. Move the hinge levers back to push the oven door closed and pull it will shut. 2. Lift the oven door while holding both hanger arms into the oven cavity or when bakeware extends past the front edge of the... glass surfaces with bakeware or other objects. ■ Do not wipe down glass surfaces until the oven has completely cooled. Open the oven door. Check that the door is not suggested to open and close the oven door if the racks are not fully inserted into the door. 2. If it is free to...

Use & Care Guide
Page 19
... "Self-Cleaning Cycle" section. ■ On some models, has a delay start Self-Clean cycle been set ? See "Timed Cooking" section. ■ On double oven models, is one oven is level in the pan. ■ Is the proper length of time being used ? See "Positioning Racks and Bakeware" section. ■ Is there proper...
... "Self-Cleaning Cycle" section. ■ On some models, has a delay start Self-Clean cycle been set ? See "Timed Cooking" section. ■ On double oven models, is one oven is level in the pan. ■ Is the proper length of time being used ? See "Positioning Racks and Bakeware" section. ■ Is there proper...

Use & Care Guide
Page 21
... when this appliance is operated and maintained according to instructions attached to or furnished with the product, KitchenAid will pay for Factory Specified Parts for the stainless steel oven cavity/inner door if the part rusts through tenth years from date of purchase, when this major ... the home and only in materials or workmanship. This major appliance is designed to be borne by an authorized KitchenAid servicer is not available. 9. KITCHENAID® BUILT-IN OVEN & MICROWAVE WARRANTY LIMITED WARRANTY For one year from the date of purchase, when this major appliance is operated ...
... when this appliance is operated and maintained according to instructions attached to or furnished with the product, KitchenAid will pay for Factory Specified Parts for the stainless steel oven cavity/inner door if the part rusts through tenth years from date of purchase, when this major ... the home and only in materials or workmanship. This major appliance is designed to be borne by an authorized KitchenAid servicer is not available. 9. KITCHENAID® BUILT-IN OVEN & MICROWAVE WARRANTY LIMITED WARRANTY For one year from the date of purchase, when this major appliance is operated ...

Dimension Guide
Page 1
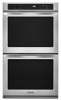
... WOD93EC0A, refer to change without notice. 27" (68.6 cm) models A. 28 72.8 cm) max. Specifications subject to aluminum. q Oven must be connected to the circuit breaker box (or fused disconnect) through flexible, armored or nonmetallic sheathed, copper cable (with grounding wire). ...copper connection must be connected directly to 7.4 kW at 208 volts) require a separate 40-amp circuit. B C A A A D E Single Oven Double Oven A. Models rated at 4.8 kW and below at 240 volts (3.6 kW and below : 1. For complete details, see Installation Instructions packed with local ...
... WOD93EC0A, refer to change without notice. 27" (68.6 cm) models A. 28 72.8 cm) max. Specifications subject to aluminum. q Oven must be connected to the circuit breaker box (or fused disconnect) through flexible, armored or nonmetallic sheathed, copper cable (with grounding wire). ...copper connection must be connected directly to 7.4 kW at 208 volts) require a separate 40-amp circuit. B C A A A D E Single Oven Double Oven A. Models rated at 4.8 kW and below at 240 volts (3.6 kW and below : 1. For complete details, see Installation Instructions packed with local ...


