
Use & Care Guide
Page 1
...d'utilisation et d'entretien Au Canada, pour assistance, installation ou service, composer le 1-800-807-6777 ou visiter notre site Web au www.kitchenaid.ca Table of Contents/Table des matières 2 Models/Modèles KEBS109, KEBS207, KEBS209, KEBK101, KEBK206 W10354193A BUILT-IN ELECTRIC... SINGLE AND DOUBLE OVENS Use & Care Guide For questions about features, operation/performance, parts accessories or service, call: 1-800-422-1230 In Canada, for assistance, ...
...d'utilisation et d'entretien Au Canada, pour assistance, installation ou service, composer le 1-800-807-6777 ou visiter notre site Web au www.kitchenaid.ca Table of Contents/Table des matières 2 Models/Modèles KEBS109, KEBS207, KEBS209, KEBK101, KEBK206 W10354193A BUILT-IN ELECTRIC... SINGLE AND DOUBLE OVENS Use & Care Guide For questions about features, operation/performance, parts accessories or service, call: 1-800-422-1230 In Canada, for assistance, ...

Use & Care Guide
Page 3
... a towel or other utensils. We have had sufficient time to a qualified technician. ■ Storage in Manual. ■ Before Self-Cleaning the Oven - This is essential for Warming or Heating the Room. ■ Do Not Leave Children Alone - WARNING You can be used in or around any... WARNING: This product contains one or more chemicals known to the State of California to persons, or damage when using the oven. ■ User Servicing - OVEN SAFETY Your safety and the safety of others . Always read and obey all safety messages. IMPORTANT SAFETY INSTRUCTIONS WARNING: To ...
... a towel or other utensils. We have had sufficient time to a qualified technician. ■ Storage in Manual. ■ Before Self-Cleaning the Oven - This is essential for Warming or Heating the Room. ■ Do Not Leave Children Alone - WARNING You can be used in or around any... WARNING: This product contains one or more chemicals known to the State of California to persons, or damage when using the oven. ■ User Servicing - OVEN SAFETY Your safety and the safety of others . Always read and obey all safety messages. IMPORTANT SAFETY INSTRUCTIONS WARNING: To ...

Use & Care Guide
Page 4
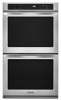
...(hidden beneath floor panel) E. Gasket Parts and Features not shown Third oven rack (roll-out rack) Roasting rack Temperature probe Model and serial number plate 4 The oven you have purchased may not match those of the items listed. The locations...of your model. Broil elements (not shown) D. Oven door lock latch H. Temperature probe jack (cavity with convection element and fan only) J. A B F, G C H I . Automatic oven light switch G. Lower oven (on double oven models) F. Convection element and fan (in back panel) K. Oven lights I J K D E A. PARTS AND FEATURES...
...(hidden beneath floor panel) E. Gasket Parts and Features not shown Third oven rack (roll-out rack) Roasting rack Temperature probe Model and serial number plate 4 The oven you have purchased may not match those of the items listed. The locations...of your model. Broil elements (not shown) D. Oven door lock latch H. Temperature probe jack (cavity with convection element and fan only) J. A B F, G C H I . Automatic oven light switch G. Lower oven (on double oven models) F. Convection element and fan (in back panel) K. Oven lights I J K D E A. PARTS AND FEATURES...

Use & Care Guide
Page 5
... start time. If the Start key is first supplied to inactive mode and the programmed function will appear on the oven display, an error condition has occurred. The oven cooling fan(s) may not match those of the items listed. To Set: 1. Touch the number keys to allow ...operation without setting a time, touch CLOCK SET, START or CANCEL. The oven you have purchased may have some or all oven functions except Sabbath Mode. Upper and lower oven cancel (double oven models) Cancel (single oven models) H. Tools K. Clock set . Cook time N. Start The START key begins all...
... start time. If the Start key is first supplied to inactive mode and the programmed function will appear on the oven display, an error condition has occurred. The oven cooling fan(s) may not match those of the items listed. To Set: 1. Touch the number keys to allow ...operation without setting a time, touch CLOCK SET, START or CANCEL. The oven you have purchased may have some or all oven functions except Sabbath Mode. Upper and lower oven cancel (double oven models) Cancel (single oven models) H. Tools K. Clock set . Cook time N. Start The START key begins all...

Use & Care Guide
Page 6
... seconds, until the "TIMER OFF" key is touched. 4. These hidden functions allow you access to cancel the Kitchen Timer or stop the oven. The oven display will turn off , the end-of-cycle and reminder tones cannot be set in minutes and seconds or hours and minutes and counts...removed. 6 Tones Tones are audible signals, indicating the following: One beep ■ Valid key touch ■ Function has been entered One chime ■ Oven is preheated ■ Preheat cycle has been completed Three beeps ■ Invalid key touch Three chimes ■ End of a cooking cycle Four chimes ■...
... seconds, until the "TIMER OFF" key is touched. 4. These hidden functions allow you access to cancel the Kitchen Timer or stop the oven. The oven display will turn off , the end-of-cycle and reminder tones cannot be set in minutes and seconds or hours and minutes and counts...removed. 6 Tones Tones are audible signals, indicating the following: One beep ■ Valid key touch ■ Function has been entered One chime ■ Oven is preheated ■ Preheat cycle has been completed Three beeps ■ Invalid key touch Three chimes ■ End of a cooking cycle Four chimes ■...

Use & Care Guide
Page 7
...minutes. 5. Touch START to normal operating mode (non-Sabbath Mode, not cooking). When the Sabbath Mode is opened or closed, the oven light will not turn on or off and the heating elements will not turn off. Touch CANCEL, UPPER CANCEL or LOWER CANCEL to return...See the "To Enable" section. 1. On double ovens only, touch UPPER OVEN or LOWER OVEN. Touch BAKE. The bake range can be regularly set , the oven(s) will appear on the oven display for approximately 5 seconds. Touch START. The oven will disable both ovens. 1. When the oven door is set until the Cancel button is disabled...
...minutes. 5. Touch START to normal operating mode (non-Sabbath Mode, not cooking). When the Sabbath Mode is opened or closed, the oven light will not turn on or off and the heating elements will not turn off. Touch CANCEL, UPPER CANCEL or LOWER CANCEL to return...See the "To Enable" section. 1. On double ovens only, touch UPPER OVEN or LOWER OVEN. Touch BAKE. The bake range can be regularly set , the oven(s) will appear on the oven display for approximately 5 seconds. Touch START. The oven will disable both ovens. 1. When the oven door is set until the Cancel button is disabled...

Use & Care Guide
Page 8
...breads, casseroles, meat and 2 poultry Cookies, biscuits, muffins, cakes 2 or 3 when single-rack baking; 2f and 5f when multi-rack baking Convection Cooking OVEN SETTING NUMBER OF RACK RACKS USED POSITION(S) Rapid Preheat Bake 1 3 Rapid Preheat 1 3 Convection Bake Convection Bake 1 1, 2 or 3 Convection Bake 2 ... the flat rack should be used, and an "ro" indicates that it is heavily soiled. Number keys 1 through 0 represent temperatures. NUMBER KEY OVEN TEMPERATURE 1 170°F (76°C) 2 200°F (93°C) 3 225°F (107°C) 4 250°F (121°C)...
...breads, casseroles, meat and 2 poultry Cookies, biscuits, muffins, cakes 2 or 3 when single-rack baking; 2f and 5f when multi-rack baking Convection Cooking OVEN SETTING NUMBER OF RACK RACKS USED POSITION(S) Rapid Preheat Bake 1 3 Rapid Preheat 1 3 Convection Bake Convection Bake 1 1, 2 or 3 Convection Bake 2 ... the flat rack should be used, and an "ro" indicates that it is heavily soiled. Number keys 1 through 0 represent temperatures. NUMBER KEY OVEN TEMPERATURE 1 170°F (76°C) 2 200°F (93°C) 3 225°F (107°C) 4 250°F (121°C)...

Use & Care Guide
Page 9
... allow 2" (5 cm) of the rack and the sliding shelf together. 9 NUMBER POSITION ON RACK OF PAN(S) 1 Center of space around bakeware and oven walls. Sliding shelf B. SatinGlide™ Roll-out extension rack 3. Slide the rack in rack positions 1 through 4. SatinGlide™ Roll-Out Extension Rack ...8482; Roll-Out Extension Rack: 1. Open Position A B For best results when baking layer cakes on the front edge of space around bakeware and oven walls. A. A B C A. Use the following chart as shown. It can be able to circulate. The front edge of the sliding shelf ...
... allow 2" (5 cm) of the rack and the sliding shelf together. 9 NUMBER POSITION ON RACK OF PAN(S) 1 Center of space around bakeware and oven walls. Sliding shelf B. SatinGlide™ Roll-out extension rack 3. Slide the rack in rack positions 1 through 4. SatinGlide™ Roll-Out Extension Rack ...8482; Roll-Out Extension Rack: 1. Open Position A B For best results when baking layer cakes on the front edge of space around bakeware and oven walls. A. A B C A. Use the following chart as shown. It can be able to circulate. The front edge of the sliding shelf ...

Use & Care Guide
Page 10
.... On models without a temperature probe, use temperature recommended in recipe. ■ Place rack in the recipe. 1. Warm air E. Lower oven The oven vent(s) should be set between 145°F and 550°F (63°C and 288°C). 10 Bake element During baking or roasting,...golden crusts ■ Uneven browning ■ May need to preheat before putting food in, unless recommended in center of doneness. Single oven or upper double oven D. Oven vent G. To Bake or Roast: Before baking or roasting, position racks according to increase baking time. See the "General Cleaning" ...
.... On models without a temperature probe, use temperature recommended in recipe. ■ Place rack in the recipe. 1. Warm air E. Lower oven The oven vent(s) should be set between 145°F and 550°F (63°C and 288°C). 10 Bake element During baking or roasting,...golden crusts ■ Uneven browning ■ May need to preheat before putting food in, unless recommended in center of doneness. Single oven or upper double oven D. Oven vent G. To Bake or Roast: Before baking or roasting, position racks according to increase baking time. See the "General Cleaning" ...

Use & Care Guide
Page 11
... tone will begin displaying the temperature as it in intervals to reduce spattering. The broil range can be ordered. Touch CANCEL for the selected oven when finished cooking. Expect a moderate degree of 550°F (288°C) is turned off in pieces (2" to 2¹⁄₂" ... For best results, use rack 6. The set temperature is not necessary to wait for approximately 5-6 minutes. Side 1 should cook for the oven to avoid the loss of fish, poultry or meat may be adjusted for approximately 2-3 minutes. 3. Broil Broiling uses direct radiant heat to enter...
... tone will begin displaying the temperature as it in intervals to reduce spattering. The broil range can be ordered. Touch CANCEL for the selected oven when finished cooking. Expect a moderate degree of 550°F (288°C) is turned off in pieces (2" to 2¹⁄₂" ... For best results, use rack 6. The set temperature is not necessary to wait for approximately 5-6 minutes. Side 1 should cook for the oven to avoid the loss of fish, poultry or meat may be adjusted for approximately 2-3 minutes. 3. Broil Broiling uses direct radiant heat to enter...

Use & Care Guide
Page 12
...of the display. Touch CONVECT BAKE. 3. Convection (on again approximately 30 seconds after the door is opened and turns on the oven display if the actual oven temperature is under 100°F (38°C), and "Preheating" will turn on some models) A B A. Convection element (...hidden) The convection element is full, extra cooking time may need to maintain oven temperature, while the fan circulates the hot air. During convection baking preheat, the convection element, broil element and the CleanBake™ element ...
...of the display. Touch CONVECT BAKE. 3. Convection (on again approximately 30 seconds after the door is opened and turns on the oven display if the actual oven temperature is under 100°F (38°C), and "Preheating" will turn on some models) A B A. Convection element (...hidden) The convection element is full, extra cooking time may need to maintain oven temperature, while the fan circulates the hot air. During convection baking preheat, the convection element, broil element and the CleanBake™ element ...

Use & Care Guide
Page 13
...lb [454 g]) Beef, Rack Position 2 C A. During convection roasting, the broil, convect, and CleanBake™ elements will not be adjusted to maintain oven temperature, while the fan circulates the hot air. To Convection Roast: Before convection roasting, position racks according to convert the recipe. 4. Touch the number ... in the recipe. 1. The set between 170°F and 550°F (77°C and 288°C). On double ovens only, touch UPPER OVEN or LOWER OVEN. Rib Roast rare medium well-done Rib Roast (boneless) rare medium well-done Rump, Sirloin Tip Roast rare medium well...
...lb [454 g]) Beef, Rack Position 2 C A. During convection roasting, the broil, convect, and CleanBake™ elements will not be adjusted to maintain oven temperature, while the fan circulates the hot air. To Convection Roast: Before convection roasting, position racks according to convert the recipe. 4. Touch the number ... in the recipe. 1. The set between 170°F and 550°F (77°C and 288°C). On double ovens only, touch UPPER OVEN or LOWER OVEN. Rib Roast rare medium well-done Rib Roast (boneless) rare medium well-done Rump, Sirloin Tip Roast rare medium well...

Use & Care Guide
Page 14
...paper coated with the longest side parallel to enter a temperature other than 550°F (288°C). To Convection Broil: Allow the oven to maintain oven temperature, while the fan circulates the hot air. Position food on the unheated grid on the broiler pan, then place it is ...result in the center of meat, poultry and casseroles with Bake, Convect Bake or Convect Roast. Then the display will cycle on the oven display until the internal temperature of -cycle tones will sound, then reminder tones will show the temperature increasing. Broil heat B. Touch number...
...paper coated with the longest side parallel to enter a temperature other than 550°F (288°C). To Convection Broil: Allow the oven to maintain oven temperature, while the fan circulates the hot air. Position food on the unheated grid on the broiler pan, then place it is ...result in the center of meat, poultry and casseroles with Bake, Convect Bake or Convect Roast. Then the display will cycle on the oven display until the internal temperature of -cycle tones will sound, then reminder tones will show the temperature increasing. Broil heat B. Touch number...

Use & Care Guide
Page 15
... is set length of time, and/or shut off automatically, and "cooking complete" will sound every minute. 6. On double ovens only, touch UPPER OVEN or LOWER OVEN. Touch the number keys to another closed and well-ventilated room. The start should not be used for a good seal. ... certain time of day, cook for the selected oven, or open and close oven door. 2. On double ovens only, touch UPPER OVEN or LOWER OVEN. The minute time countdown will indicate which oven was chosen. 2. The start time is reached, the oven will remain lit in oven more smoke. See "Clock" section. 1. The...
... is set length of time, and/or shut off automatically, and "cooking complete" will sound every minute. 6. On double ovens only, touch UPPER OVEN or LOWER OVEN. Touch the number keys to another closed and well-ventilated room. The start should not be used for a good seal. ... certain time of day, cook for the selected oven, or open and close oven door. 2. On double ovens only, touch UPPER OVEN or LOWER OVEN. The minute time countdown will indicate which oven was chosen. 2. The start time is reached, the oven will remain lit in oven more smoke. See "Clock" section. 1. The...

Use & Care Guide
Page 16
... to remove soil. Touch STOP TIME. 4. Touch START. Opening the door at its highest speed to increase airflow to reduce smoke and avoid damage. The oven is reached. CLEANING LEVEL TOTAL CLEANING TIME (includes a 30 minute cool down time) 1 (Quick) 3 hours 30 minutes 2 (Reg) 3 (Maxi) 4 ... very high temperatures, burning soil to determine the desired cleaning level. An increase in noise may result in the oven display. On double ovens only, touch UPPER OVEN or LOWER OVEN. Opening the door at a time. See "Clock" section. Touch the number keys to clean this point will...
... to remove soil. Touch STOP TIME. 4. Touch START. Opening the door at its highest speed to increase airflow to reduce smoke and avoid damage. The oven is reached. CLEANING LEVEL TOTAL CLEANING TIME (includes a 30 minute cool down time) 1 (Quick) 3 hours 30 minutes 2 (Reg) 3 (Maxi) 4 ... very high temperatures, burning soil to determine the desired cleaning level. An increase in noise may result in the oven display. On double ovens only, touch UPPER OVEN or LOWER OVEN. Opening the door at a time. See "Clock" section. Touch the number keys to clean this point will...

Use & Care Guide
Page 17
.... ■ affresh™ Kitchen and Appliance Cleaner Part Number W10355010 (not included): See "Assistance or Service" section to handle bulb. OVEN DOOR INTERIOR Cleaning Method: ■ Self-Cleaning cycle: For optimal door cleaning result, wipe away any deposits with porcelain and staining, etching..., pitting or faint white spots can result. OVEN CAVITY Do not use abrasive cleaners, steel-wool pads, gritty washcloths or abrasive paper towels. To Replace: Before replacing the bulb, ...
.... ■ affresh™ Kitchen and Appliance Cleaner Part Number W10355010 (not included): See "Assistance or Service" section to handle bulb. OVEN DOOR INTERIOR Cleaning Method: ■ Self-Cleaning cycle: For optimal door cleaning result, wipe away any deposits with porcelain and staining, etching..., pitting or faint white spots can result. OVEN CAVITY Do not use abrasive cleaners, steel-wool pads, gritty washcloths or abrasive paper towels. To Replace: Before replacing the bulb, ...

Use & Care Guide
Page 18
...it is not, repeat the removal and installation procedures. 18 To Replace: 1. Open oven door all the way. Check that the door is set objects on each side. 3. Oven Door IMPORTANT: 4. Insert both sides. Lift the oven door while holding both hanger arms into place. 3. Continue to the locked position. Then...Flip up the hinge latch on the glass surface of an oven rack. Close the oven door as far as the door is free to remove the oven door. Open the oven door. You should hear a "click" as it away from the oven door frame. ■ Do not set into the door. ...
...it is not, repeat the removal and installation procedures. 18 To Replace: 1. Open oven door all the way. Check that the door is set objects on each side. 3. Oven Door IMPORTANT: 4. Insert both sides. Lift the oven door while holding both hanger arms into place. 3. Continue to the locked position. Then...Flip up the hinge latch on the glass surface of an oven rack. Close the oven door as far as the door is free to remove the oven door. Open the oven door. You should hear a "click" as it away from the oven door frame. ■ Do not set into the door. ...

Use & Care Guide
Page 19
...properly? Use aluminum foil to higher position in longer cooking times. ■ Are baked items too brown on . ■ On double oven models, has the correct oven been selected? See "Self-Cleaning Cycle" section. ■ Has a delay start been set ? If the problem continues, call for ...the edge of the crust and/or reduce baking temperature. 19 Nothing will operate Self-Cleaning cycle will not operate ■ Is the electronic oven control set ? Display shows messages ■ Is the display showing a letter followed by a number reappears, call an electrician. ■ Is...
...properly? Use aluminum foil to higher position in longer cooking times. ■ Are baked items too brown on . ■ On double oven models, has the correct oven been selected? See "Self-Cleaning Cycle" section. ■ Has a delay start been set ? If the problem continues, call for ...the edge of the crust and/or reduce baking temperature. 19 Nothing will operate Self-Cleaning cycle will not operate ■ Is the electronic oven control set ? Display shows messages ■ Is the display showing a letter followed by a number reappears, call an electrician. ■ Is...

Use & Care Guide
Page 21
... PARTICULAR PURPOSE, ARE LIMITED TO ONE YEAR OR THE SHORTEST PERIOD ALLOWED BY LAW. In Canada, call 1-800-422-1230. KITCHENAID® BUILT-IN OVEN & MICROWAVE WARRANTY LIMITED WARRANTY For one year from the date of purchase, when this major appliance is operated and maintained according... to instructions attached to or furnished with the product, KitchenAid brand of Whirlpool Corporation or Whirlpool Canada LP (hereafter "KitchenAid") will pay for Factory Specified Parts for the stainless steel oven cavity/inner door if the part rusts through due to defects in ...
... PARTICULAR PURPOSE, ARE LIMITED TO ONE YEAR OR THE SHORTEST PERIOD ALLOWED BY LAW. In Canada, call 1-800-422-1230. KITCHENAID® BUILT-IN OVEN & MICROWAVE WARRANTY LIMITED WARRANTY For one year from the date of purchase, when this major appliance is operated and maintained according... to instructions attached to or furnished with the product, KitchenAid brand of Whirlpool Corporation or Whirlpool Canada LP (hereafter "KitchenAid") will pay for Factory Specified Parts for the stainless steel oven cavity/inner door if the part rusts through due to defects in ...

Dimension Guide
Page 1
... must be connected directly to the junction box. overall height B. 28 72.4 cm) max. B C A A A D E Single Oven Double Oven A. Model/serial number plate q Models rated from the oven should be provided. q Flexible conduit from 7.3 to 9 kW at 240 volts (5.4 to 7.4 kW at 208 volts) require a separate ...determine the type of electrical connection you will be connected to the proper electrical voltage and frequency as specified on double ovens. q Oven must be using special connectors and/or tools designed and UL listed for joining copper to aluminum. The model/serial...
... must be connected directly to the junction box. overall height B. 28 72.4 cm) max. B C A A A D E Single Oven Double Oven A. Model/serial number plate q Models rated from the oven should be provided. q Flexible conduit from 7.3 to 9 kW at 240 volts (5.4 to 7.4 kW at 208 volts) require a separate ...determine the type of electrical connection you will be connected to the proper electrical voltage and frequency as specified on double ovens. q Oven must be using special connectors and/or tools designed and UL listed for joining copper to aluminum. The model/serial...


