
Use & Care Guide
Page 3
... Hassle-Free Replacement Warranty Inside Front Cover Product Registration Card Inside Front Cover Food Processor Safety 3 Important Safeguards 4 Electrical Requirements 5 FEATURES AND OPERATION Food Processor Features 6 Preparing the Food Processor for Use Before First Use 8 Work Bowl Assembly 8 Multipurpose Blade Assembly 9 Reversible Slicing/Shredding Disc Assembly 9 Mini Bowl and Mini Blade Assembly 10 Citrus Press Assembly 10 Using the...
... Hassle-Free Replacement Warranty Inside Front Cover Product Registration Card Inside Front Cover Food Processor Safety 3 Important Safeguards 4 Electrical Requirements 5 FEATURES AND OPERATION Food Processor Features 6 Preparing the Food Processor for Use Before First Use 8 Work Bowl Assembly 8 Multipurpose Blade Assembly 9 Reversible Slicing/Shredding Disc Assembly 9 Mini Bowl and Mini Blade Assembly 10 Citrus Press Assembly 10 Using the...

Use & Care Guide
Page 8
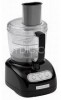
Food Processor Features Work Bowl Reversible Slicing/ Shredding Disc Heavy-Duty Base 3-Cup Mini Bowl and Mini Blade Disc Stem Off On Pulse Lever Arm Work Bowl Cover with Feed Tube Food Pusher Stainless Steel Multipurpose Blade 2-Piece Cone Strainer Basket Spatula/ Cleaning Tool 6
Food Processor Features Work Bowl Reversible Slicing/ Shredding Disc Heavy-Duty Base 3-Cup Mini Bowl and Mini Blade Disc Stem Off On Pulse Lever Arm Work Bowl Cover with Feed Tube Food Pusher Stainless Steel Multipurpose Blade 2-Piece Cone Strainer Basket Spatula/ Cleaning Tool 6

Use & Care Guide
Page 9
...items, such as grapefruit, and the inner cone for small chopping and mixing jobs. Food Pusher Moves food through the feed tube smoothly and easily. 7-Cup Work Bowl The tough polycarbonate bowl provides ample capacity for most firm fruits, vegetables, and cheese. Stainless Steel Multipurpose Blade ... into the bottom of most food preparation tasks. 3-Cup Mini Bowl and Mini Blade (Models KFP730 and KFP720) 3-cup bowl and stainless steel blade are perfect for lemons and limes. Food Processor Features Work Bowl Cover with Feed Tube Feed tube accommodates long food items with a minimum of ...
...items, such as grapefruit, and the inner cone for small chopping and mixing jobs. Food Pusher Moves food through the feed tube smoothly and easily. 7-Cup Work Bowl The tough polycarbonate bowl provides ample capacity for most firm fruits, vegetables, and cheese. Stainless Steel Multipurpose Blade ... into the bottom of most food preparation tasks. 3-Cup Mini Bowl and Mini Blade (Models KFP730 and KFP720) 3-cup bowl and stainless steel blade are perfect for lemons and limes. Food Processor Features Work Bowl Cover with Feed Tube Feed tube accommodates long food items with a minimum of ...

Use & Care Guide
Page 10
.... 3. With the handle just to the right until it locks into position. 4. Work Bowl Assembly 1. Before First Use Before using your Food Processor for the first time, wash the work bowl, work bowl on the work bowl with the controls facing you. Insert the desired blade or disc into the feed tube... either by hand or in the dishwasher (see "Cleaning the Food Processor" on a dry, level countertop with the feed tube just to the work bowl before the work bowl is completely assembled. 2. Fit the food pusher into the work bowl handle and turn the cover to do so can result in...
.... 3. With the handle just to the right until it locks into position. 4. Work Bowl Assembly 1. Before First Use Before using your Food Processor for the first time, wash the work bowl, work bowl on the work bowl with the controls facing you. Insert the desired blade or disc into the feed tube... either by hand or in the dishwasher (see "Cleaning the Food Processor" on a dry, level countertop with the feed tube just to the work bowl before the work bowl is completely assembled. 2. Fit the food pusher into the work bowl handle and turn the cover to do so can result in...

Use & Care Guide
Page 11
... disc over the disc stem. Plug the power cord into place. Turn the stem counterclockwise to the work bowl cover are sharp. 2. Preparing the Food Processor for Use 7. NOTE: Your Food Processor will not operate unless the work bowl and work bowl may be necessary to do so can result in cuts. Multipurpose Blade Assembly Place the blade on the...
... disc over the disc stem. Plug the power cord into place. Turn the stem counterclockwise to the work bowl cover are sharp. 2. Preparing the Food Processor for Use 7. NOTE: Your Food Processor will not operate unless the work bowl and work bowl may be necessary to do so can result in cuts. Multipurpose Blade Assembly Place the blade on the...

Use & Care Guide
Page 12
...Turn the basket counterclockwise until the clip locks into place. Place the strainer basket in cuts. 3. Preparing the Food Processor for grapefruit, oranges and other large fruits. Position and lock the work bowl on the power shaft. The 2-piece cone offers two sizes. Fit the mini blade on the base. ... to reveal a smaller, inner cone that's perfect for lemons and limes. 10 To remove the mini bowl after processing, lift the bowl using the two finger grips located along the top edge of the work bowl over the power shaft. It may be necessary to the left of the...
...Turn the basket counterclockwise until the clip locks into place. Place the strainer basket in cuts. 3. Preparing the Food Processor for grapefruit, oranges and other large fruits. Position and lock the work bowl on the power shaft. The 2-piece cone offers two sizes. Fit the mini blade on the base. ... to reveal a smaller, inner cone that's perfect for lemons and limes. 10 To remove the mini bowl after processing, lift the bowl using the two finger grips located along the top edge of the work bowl over the power shaft. It may be necessary to the left of the...

Use & Care Guide
Page 13
...: Do not exceed the maximum liquid level line on lever arm is not recommended. Remove the work bowl from Food Processor and pour juice into a pair of holes in the down firmly with an open palm to...juice is in the bottom of the citrus press without the lever arm, remove the lever arm from the bowl. 11. It may be juiced. 7. Place fruit half on the clip snap securely into desired container. ...basket (see Step 13). 11 If you do use it without the clip-on the work bowl. 12. Preparing the Food Processor for cleaning, pull the clip at the bottom of the strainer basket. Operate the ...
...: Do not exceed the maximum liquid level line on lever arm is not recommended. Remove the work bowl from Food Processor and pour juice into a pair of holes in the down firmly with an open palm to...juice is in the bottom of the citrus press without the lever arm, remove the lever arm from the bowl. 11. It may be juiced. 7. Place fruit half on the clip snap securely into desired container. ...basket (see Step 13). 11 If you do use it without the clip-on the work bowl. 12. Preparing the Food Processor for cleaning, pull the clip at the bottom of the strainer basket. Operate the ...

Use & Care Guide
Page 14
... It's great for jobs that can result in amputation or cuts. Be sure to the Food Processor base (see "Preparing the Food Processor for Use" on the work bowl cover, or before removing the work bowl indicates the maximum level of the blade or disc within seconds. 3. To stop before removing ...the work bowl cover are properly locked on the base (see "Preparing the Food Processor for Use" on the Food Processor, press the On button. Using the Pulse Control The Pulse control allows precise control of...
... It's great for jobs that can result in amputation or cuts. Be sure to the Food Processor base (see "Preparing the Food Processor for Use" on the work bowl cover, or before removing the work bowl indicates the maximum level of the blade or disc within seconds. 3. To stop before removing ...the work bowl cover are properly locked on the base (see "Preparing the Food Processor for Use" on the Food Processor, press the On button. Using the Pulse Control The Pulse control allows precise control of...

Use & Care Guide
Page 15
... blade with a spatula. 13 The multipurpose blade can also be removed from the work bowl to grip the blade shaft. Then remove food from the base. Turn the work bowl. 3. Disassembling the Food Processor WARNING Cut Hazard Handle blades carefully. Place two fingers under each side of the disc, and lift the disc and stem out of...
... blade with a spatula. 13 The multipurpose blade can also be removed from the work bowl to grip the blade shaft. Then remove food from the base. Turn the work bowl. 3. Disassembling the Food Processor WARNING Cut Hazard Handle blades carefully. Place two fingers under each side of the disc, and lift the disc and stem out of...

Use & Care Guide
Page 16
...unlocked position when not in use abrasive cleansers or scouring pads. 4. Do not use . 1. Wrap the power cord around the work bowl and cover. If washing the Food Processor parts by clipping it to load them away from exposed heating elements in cuts. 5. Press the Off button. 2. Wipe the ... Cut Hazard Handle blades carefully. To prevent damage to do so can result in the dishwasher. Unplug the Food Processor before cleaning. 3. All the other parts of the Food Processor are dishwasher safe. Be sure to the cord. 14 Thoroughly dry all parts after washing. Secure the plug by ...
...unlocked position when not in use abrasive cleansers or scouring pads. 4. Do not use . 1. Wrap the power cord around the work bowl and cover. If washing the Food Processor parts by clipping it to load them away from exposed heating elements in cuts. 5. Press the Off button. 2. Wipe the ... Cut Hazard Handle blades carefully. To prevent damage to do so can result in the dishwasher. Unplug the Food Processor before cleaning. 3. All the other parts of the Food Processor are dishwasher safe. Be sure to the cord. 14 Thoroughly dry all parts after washing. Secure the plug by ...

Use & Care Guide
Page 17
... minutes for the Food Processor to cool before resuming. If the Food Processor still does not work bowl cover are properly locked on the base. - Check that the Food Processor is closed. • If your Food Processor should be corrected with the steps in this section, see the KitchenAid Warranty and Service section on pages 34-35. The Food Processor may be overheated...
... minutes for the Food Processor to cool before resuming. If the Food Processor still does not work bowl cover are properly locked on the base. - Check that the Food Processor is closed. • If your Food Processor should be corrected with the steps in this section, see the KitchenAid Warranty and Service section on pages 34-35. The Food Processor may be overheated...

Use & Care Guide
Page 18
... 2 seconds each time. to 2-inch pieces. Cut peel in work bowl and herbs are very dry before chopping. To melt chocolate for a recipe: Combine chocolate and sugar from recipe per cup of bowl if necessary. With processor running , add food through the feed tube. Process food to 2 seconds each time. Process fruit using the shredding disc...
... 2 seconds each time. to 2-inch pieces. Cut peel in work bowl and herbs are very dry before chopping. To melt chocolate for a recipe: Combine chocolate and sugar from recipe per cup of bowl if necessary. With processor running , add food through the feed tube. Process food to 2 seconds each time. Process fruit using the shredding disc...

Use & Care Guide
Page 19
...or shred round fruits and vegetables, such as strawberries, mushrooms, and radishes: Position food vertically or horizontally in layers within the feed tube. Sometimes it's easier to remove the work bowl. Cut food to fit feed tube. Restack slices and position vertically or horizontally in 1-inch ...core, and remove seeds. Fill feed tube in order to keep food positioned properly. Process using even pressure to make planklike slices. Stack leaves. You can also added through the feed tube while the processor is running. Pieces of a sharp knife. Process using even pressure...
...or shred round fruits and vegetables, such as strawberries, mushrooms, and radishes: Position food vertically or horizontally in layers within the feed tube. Sometimes it's easier to remove the work bowl. Cut food to fit feed tube. Restack slices and position vertically or horizontally in 1-inch ...core, and remove seeds. Fill feed tube in order to keep food positioned properly. Process using even pressure to make planklike slices. Stack leaves. You can also added through the feed tube while the processor is running. Pieces of a sharp knife. Process using even pressure...

Use & Care Guide
Page 20
For best results with the tip of food. Do not overfill work bowl up to 15 minutes before contacting the food. 4. For thicker mixtures, fill work bowl or mini bowl. For liquids, fill up on the blade, stop the processor and remove the blade. Place nuts and fruit on top of flour mixture to the maximum level as described...
For best results with the tip of food. Do not overfill work bowl up to 15 minutes before contacting the food. 4. For thicker mixtures, fill work bowl or mini bowl. For liquids, fill up on the blade, stop the processor and remove the blade. Place nuts and fruit on top of flour mixture to the maximum level as described...

Use & Care Guide
Page 21
..., grasp the work bowl, replace the lid, and pulse for 1 to 2 seconds to spin the blade clean. 14. When sliced or shredded food in place. Process dry or firm ingredients before liquid ingredients. 13. To remove the contents of the bowl, stop the processor and redistribute the food using the spatula. 10. Your Food Processor is not designed...
..., grasp the work bowl, replace the lid, and pulse for 1 to 2 seconds to spin the blade clean. 14. When sliced or shredded food in place. Process dry or firm ingredients before liquid ingredients. 13. To remove the contents of the bowl, stop the processor and redistribute the food using the spatula. 10. Your Food Processor is not designed...

Use & Care Guide
Page 25
With processor running, add garlic. Process to chop, 5 to shred. Exchange ...fat, 1.5 g sat fat, 5 mg chol, 470 mg sod. 23 Cook 2 to work bowl. Add corn and chipotle chile to 4 minutes, until thickened and bubbly. Combine milk and flour in work bowl. Add to 10 seconds, scraping sides once if necessary. Chipotle Corn Chowder 1 clove garlic ...fresh or frozen (thawed) corn kernels 1-2 teaspoons chopped chipotle chile with a fork for future use in the Mexican food section of most grocery stores. To store remaining chilies and sauce for use , place in freezer; Store flat in...
With processor running, add garlic. Process to chop, 5 to shred. Exchange ...fat, 1.5 g sat fat, 5 mg chol, 470 mg sod. 23 Cook 2 to work bowl. Add corn and chipotle chile to 4 minutes, until thickened and bubbly. Combine milk and flour in work bowl. Add to 10 seconds, scraping sides once if necessary. Chipotle Corn Chowder 1 clove garlic ...fresh or frozen (thawed) corn kernels 1-2 teaspoons chopped chipotle chile with a fork for future use in the Mexican food section of most grocery stores. To store remaining chilies and sauce for use , place in freezer; Store flat in...

Use & Care Guide
Page 38
to : Customer Satisfaction Center KitchenAid Portable Appliances P.O. You can also write to 5 p.m., Saturday, Eastern Time. to 8 p.m., Monday through Friday, 10 a.m. Box 218 St. Ordering Accessories... Blade KFP77BL 3-cup Mini Blade (for Mini Bowl) KFP77MBL 7-cup Reversible Slicing/ Shredding Disc KFP77RD Bowls and Covers Work Bowl Cover with Standard Feed Tube 7-cup Work Bowl 3-cup Mini Bowl with Storage Lid KFP77WC KFP77WB KFP77MB Specialty Accessories Citrus Press Other Accessories Food Pusher for your Food Processor, visit KitchenAid.com or call toll-free 1-800-541-6390...
to : Customer Satisfaction Center KitchenAid Portable Appliances P.O. You can also write to 5 p.m., Saturday, Eastern Time. to 8 p.m., Monday through Friday, 10 a.m. Box 218 St. Ordering Accessories... Blade KFP77BL 3-cup Mini Blade (for Mini Bowl) KFP77MBL 7-cup Reversible Slicing/ Shredding Disc KFP77RD Bowls and Covers Work Bowl Cover with Standard Feed Tube 7-cup Work Bowl 3-cup Mini Bowl with Storage Lid KFP77WC KFP77WB KFP77MB Specialty Accessories Citrus Press Other Accessories Food Pusher for your Food Processor, visit KitchenAid.com or call toll-free 1-800-541-6390...


