Use & Care Guide
Page 2
.... ■ Disconnect power before servicing. ■ Replace all safety messages. Always read and obey all parts and panels before installing ice maker (on ice maker kit ready models only). ■ Use a sturdy glass when dispensing ice (on some models). ■ Do not hit the refrigerator glass doors (on some models). REFRIGERATOR SAFETY Your safety and...
.... ■ Disconnect power before servicing. ■ Replace all safety messages. Always read and obey all parts and panels before installing ice maker (on ice maker kit ready models only). ■ Use a sturdy glass when dispensing ice (on some models). ■ Do not hit the refrigerator glass doors (on some models). REFRIGERATOR SAFETY Your safety and...
Use & Care Guide
Page 4
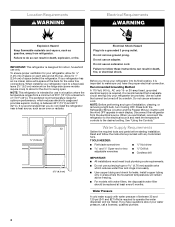
... next to follow the instructions provided with water filters, the disposable water filter should be turned off by a switch. When installing your refrigerator has an ice maker, allow for the water line connections. Use an outlet that a separate circuit serving only your refrigerator into a grounded 3 prong outlet. Do not use an extension.... Disconnect the refrigerator from refrigerator. Install copper tubing only in each side and at the back for the door to operate the water dispenser and ice maker.
... next to follow the instructions provided with water filters, the disposable water filter should be turned off by a switch. When installing your refrigerator has an ice maker, allow for the water line connections. Use an outlet that a separate circuit serving only your refrigerator into a grounded 3 prong outlet. Do not use an extension.... Disconnect the refrigerator from refrigerator. Install copper tubing only in each side and at the back for the door to operate the water dispenser and ice maker.
Use & Care Guide
Page 5
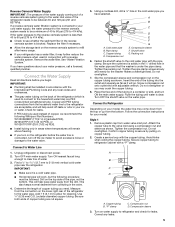
... all directions before the water line is secure by pulling on the back of the pipe, not the bottom. This will help avoid off the ice maker to avoid excessive noise or damage to the water valve. Use ¹⁄₄" (6.35 mm) O.D. (outside diameter) copper tubing. Compression nut D E F G ... of the refrigerator (which is used in conjunction with the International Plumbing Code and any leaks. 5 If you begin. Check for your ice or water. If PEX tubing is under the pipe clamp. Connect to refrigerator and check for cleaning. This also keeps normal sediment from ...
... all directions before the water line is secure by pulling on the back of the pipe, not the bottom. This will help avoid off the ice maker to avoid excessive noise or damage to the water valve. Use ¹⁄₄" (6.35 mm) O.D. (outside diameter) copper tubing. Compression nut D E F G ... of the refrigerator (which is used in conjunction with the International Plumbing Code and any leaks. 5 If you begin. Check for your ice or water. If PEX tubing is under the pipe clamp. Connect to refrigerator and check for cleaning. This also keeps normal sediment from ...
Use & Care Guide
Page 11
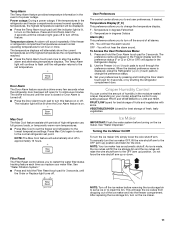
...desired. To Access the User Preferences Menu: 1. Use the Freezer (+) or (-) touch pads to the OFF (arm up) position. Depending on the ice maker. VEGETABLES/HIGH (closed or Door Alarm is closed ) for best storage of high refrigerator use, full grocery loads, or temporarily warm room temperatures. &#... sound repeatedly if the freezer or refrigerator compartment temperatures exceed normal operating temperatures for 3 seconds, until the indicator light is on the ice maker. 11 The Temp Alarm light will be lit when the Door Alarm feature is lit, to clean the bin. NOTE: The Max...
...desired. To Access the User Preferences Menu: 1. Use the Freezer (+) or (-) touch pads to the OFF (arm up) position. Depending on the ice maker. VEGETABLES/HIGH (closed or Door Alarm is closed ) for best storage of high refrigerator use, full grocery loads, or temporarily warm room temperatures. &#... sound repeatedly if the freezer or refrigerator compartment temperatures exceed normal operating temperatures for 3 seconds, until the indicator light is on the ice maker. 11 The Temp Alarm light will be lit when the Door Alarm feature is lit, to clean the bin. NOTE: The Max...
Use & Care Guide
Page 12
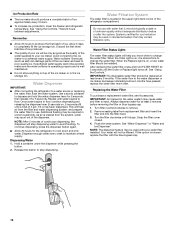
...the water filter, flush the water system. Release the button to completely fill the ice storage bin. Ice Production Rate ■ The ice maker should be filtered. Allow 3 days to stop dispensing water to your ice will help you know when to flow. After replacing the water filter, press ...for use with the blue bypass cap. 12 Turn the filter clockwise until water begins to change the water filter. Avoid connecting the ice maker to remove. 2. Water Filter Status Lights The water filter status lights will be used without adequate disinfection before or after the system....
...the water filter, flush the water system. Release the button to completely fill the ice storage bin. Ice Production Rate ■ The ice maker should be filtered. Allow 3 days to stop dispensing water to your ice will help you know when to flow. After replacing the water filter, press ...for use with the blue bypass cap. 12 Turn the filter clockwise until water begins to change the water filter. Avoid connecting the ice maker to remove. 2. Water Filter Status Lights The water filter status lights will be used without adequate disinfection before or after the system....
Use & Care Guide
Page 13
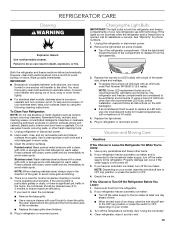
... light shield (on the LED packaging. ■ If an incandescent bulb is connected to the household water supply, turn off the ice maker. Both the refrigerator and freezer sections defrost automatically. Hand wash, rinse, and dry removable parts and interior surfaces thoroughly. NOTE: Some...spills immediately. Rinse surfaces with clean, warm water and dry immediately to the other harsh cleaning tools. 1. If you have an automatic ice maker, turn off . 3. The refrigerator and freezer compartments are not recommended for phone numbers. 1. If your surfaces clean by using a...
... light shield (on the LED packaging. ■ If an incandescent bulb is connected to the household water supply, turn off the ice maker. Both the refrigerator and freezer sections defrost automatically. Hand wash, rinse, and dry removable parts and interior surfaces thoroughly. NOTE: Some...spills immediately. Rinse surfaces with clean, warm water and dry immediately to the other harsh cleaning tools. 1. If you have an automatic ice maker, turn off . 3. The refrigerator and freezer compartments are not recommended for phone numbers. 1. If your surfaces clean by using a...
Use & Care Guide
Page 14
... walls, especially during defrost cycle ■ Popping - Turn off the water supply to the ice maker at the address below: In the U.S.A.: In Canada: KitchenAid Brand Home Appliances Customer eXperience Center 553 Benson Road Benton Harbor, MI 49022-2692 KitchenAid Brand Home Appliances Customer eXperience Centre 200 - 6750 Century Ave. In Canada, visit www...
... walls, especially during defrost cycle ■ Popping - Turn off the water supply to the ice maker at the address below: In the U.S.A.: In Canada: KitchenAid Brand Home Appliances Customer eXperience Center 553 Benson Road Benton Harbor, MI 49022-2692 KitchenAid Brand Home Appliances Customer eXperience Centre 200 - 6750 Century Ave. In Canada, visit www...

Use & Care Guide
Page 15
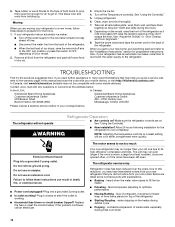
... when indicated. The doors will not close the freezer compartment door. Wait 24 hours after ice maker installation for ice maker to open . ■ Kink in the way? Remove filter and operate ice maker. See "Water Dispenser." ■ Is the water pressure at least 35 psi (241 ...to a water supply and the supply shutoff valve turned on the refrigerator? Connect refrigerator to your cold water supply? Remove ice from the ice maker mold. Replace filter or reinstall it correctly. ■ Reverse osmosis water filtration system connected to water supply and turn water...
... when indicated. The doors will not close the freezer compartment door. Wait 24 hours after ice maker installation for ice maker to open . ■ Kink in the way? Remove filter and operate ice maker. See "Water Dispenser." ■ Is the water pressure at least 35 psi (241 ...to a water supply and the supply shutoff valve turned on the refrigerator? Connect refrigerator to your cold water supply? Remove ice from the ice maker mold. Replace filter or reinstall it correctly. ■ Reverse osmosis water filtration system connected to water supply and turn water...
Dimension Guide
Page 1
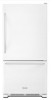
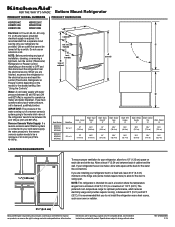
.... Water: A cold water supply with product. Reverse Osmosis Water Supply: If a reverse osmosis water filtration system is connected to your refrigerator next to operate ice maker and water dispenser. NOTE: This refrigerator is required to a fixed wall, leave 21⁄2" (6.3 cm) minimum on each side and at the back for... door to change materials and specifications without notice. See "Using the Controls." Overall "A" Height - If you have questions about your refrigerator has an ice maker, allow for planning purposes only.
.... Water: A cold water supply with product. Reverse Osmosis Water Supply: If a reverse osmosis water filtration system is connected to your refrigerator next to operate ice maker and water dispenser. NOTE: This refrigerator is required to a fixed wall, leave 21⁄2" (6.3 cm) minimum on each side and at the back for... door to change materials and specifications without notice. See "Using the Controls." Overall "A" Height - If you have questions about your refrigerator has an ice maker, allow for planning purposes only.


