
IB-51 WEB Browser Management Guide
Page 2
... be entered will change depending on the configuration of the IB-51 from the navigation bar on the printer/MFP, the default user name and password are "Admin". - Item Language Description Displayed for multilingual versions of the printer/MFP. 4. For details, refer to the address bar of the printer/MFP that ...
... be entered will change depending on the configuration of the IB-51 from the navigation bar on the printer/MFP, the default user name and password are "Admin". - Item Language Description Displayed for multilingual versions of the printer/MFP. 4. For details, refer to the address bar of the printer/MFP that ...

IB-51 WEB Browser Management Guide
Page 6
...For designating the server to obtain for confirmation. Using a Web Browser to Manage the IB-51 Page 6 of the password in case you forget. The default password is used in various reports sent from UTC. file:///C:/Tom/PDF/IB-51/IB-51%20Setup%20Guide%20HTML%20English/card_homepa...... 10/2/2012 Part of the page. 3-5. The password can be up or change the password. 1. Follow these steps to set up to ...
...For designating the server to obtain for confirmation. Using a Web Browser to Manage the IB-51 Page 6 of the password in case you forget. The default password is used in various reports sent from UTC. file:///C:/Tom/PDF/IB-51/IB-51%20Setup%20Guide%20HTML%20English/card_homepa...... 10/2/2012 Part of the page. 3-5. The password can be up or change the password. 1. Follow these steps to set up to ...

IB-51 WEB Browser Management Guide
Page 7
..., you have made to 3-4. SNTP Server: Obtain the time from a SNTP server. Click the Reset button to restart the network interface. General Settings > Password for details. Protocols > TCP/IP > TCP/IP This table gives an overview of 22 SNTP Server - Set the SNTP server name or IP address....Manage the IB-51 Page 7 of the items displayed on this page by setting an administrator password. Item Restart Network Interface Set all aspects of IB-51 operation. You can also restore the default settings as needed. Using a Web Browser to this page. Advanced Page This page includes ...
..., you have made to 3-4. SNTP Server: Obtain the time from a SNTP server. Click the Reset button to restart the network interface. General Settings > Password for details. Protocols > TCP/IP > TCP/IP This table gives an overview of 22 SNTP Server - Set the SNTP server name or IP address....Manage the IB-51 Page 7 of the items displayed on this page by setting an administrator password. Item Restart Network Interface Set all aspects of IB-51 operation. You can also restore the default settings as needed. Using a Web Browser to this page. Advanced Page This page includes ...

IB-51 WEB Browser Management Guide
Page 10
... encryption by SSL. - To use can be selected. Imports the client certificate, when EAP-TLS is selected for the authentication. 4-6. Enter the password when importing certificates. 32 characters maximum. StartTLS - When the ThinPrint feature of 22 4-5. Protocols > Protocols > Client Settings The FTP client and ...FTP Server over SSL ThinPrint ThinPrint ThinPrint Port Number ThinPrint over SSL* - IPP - Sets the FTP Port Number. (Default port: 21) Enables (On) or disables (Off) the FTP status check. ThinPrint is a technology that is selected for the authentication. ...
... encryption by SSL. - To use can be selected. Imports the client certificate, when EAP-TLS is selected for the authentication. 4-6. Enter the password when importing certificates. 32 characters maximum. StartTLS - When the ThinPrint feature of 22 4-5. Protocols > Protocols > Client Settings The FTP client and ...FTP Server over SSL ThinPrint ThinPrint ThinPrint Port Number ThinPrint over SSL* - IPP - Sets the FTP Port Number. (Default port: 21) Enables (On) or disables (Off) the FTP status check. ThinPrint is a technology that is selected for the authentication. ...

IB-51 WEB Browser Management Guide
Page 11
...Item NetWare Protocol Bindery Mode Frame Type NDS Tree NDS Context Print Server Mode Print Server Name Queue Polling Interval Banner Page Requests Password (Optional) Remote Printer Mode Printer Name Job Timeout Description Choose whether NetWare protocol is enabled (On) or disabled (Off). Choose... You can also choose auto-detect. Sets the FTP Port Number. (Default port: 21) Encrypts using SSL. To activate the configuration, the Encryption needs to eight) are connected by the NetWare utility. A password can be designated as creating the queue require admin, supervisor, or equivalent...
...Item NetWare Protocol Bindery Mode Frame Type NDS Tree NDS Context Print Server Mode Print Server Name Queue Polling Interval Banner Page Requests Password (Optional) Remote Printer Mode Printer Name Job Timeout Description Choose whether NetWare protocol is enabled (On) or disabled (Off). Choose... You can also choose auto-detect. Sets the FTP Port Number. (Default port: 21) Encrypts using SSL. To activate the configuration, the Encryption needs to eight) are connected by the NetWare utility. A password can be designated as creating the queue require admin, supervisor, or equivalent...

IB-51 WEB Browser Management Guide
Page 13
.... StartTLS - Select the SMTP authentication setting from the IB-51. If you select Other for POP3 account authentication, the password you designate here is used for SMTP authentication. Configure this setting after events occur. For designating the subject name of e-mail messages...button to the designated e-mail addresses. SMTP over SSL Authentication Protocol Authenticate as Login User Name Login Password Sender Address Signature For designating the SMTP port number. (Default setting is running out, can designate an interval from 1-10000 minutes. Allows the SSL encryption for mail...
.... StartTLS - Select the SMTP authentication setting from the IB-51. If you select Other for POP3 account authentication, the password you designate here is used for SMTP authentication. Configure this setting after events occur. For designating the subject name of e-mail messages...button to the designated e-mail addresses. SMTP over SSL Authentication Protocol Authenticate as Login User Name Login Password Sender Address Signature For designating the SMTP port number. (Default setting is running out, can designate an interval from 1-10000 minutes. Allows the SSL encryption for mail...

IB-51 WEB Browser Management Guide
Page 14
...possible to the designated interval. The supported range is used (On) or not (Off). Management/E-mail> POP3 > User (1-3) For configuring user and password settings to a POP3 server. Enter the e-mail addresses of 22 Run once now - Designate the user account login name (up to 64 characters). ...of the month such as the size. Item POP3 Protocol Check Interval Run once now Description Choose whether POP3 protocol is 3-60 minutes. By default, the interval is treated as if you designate a day of Subject, To, Cc, and From. Monthly: Reports are correctly configured. ...
...possible to the designated interval. The supported range is used (On) or not (Off). Management/E-mail> POP3 > User (1-3) For configuring user and password settings to a POP3 server. Enter the e-mail addresses of 22 Run once now - Designate the user account login name (up to 64 characters). ...of the month such as the size. Item POP3 Protocol Check Interval Run once now Description Choose whether POP3 protocol is 3-60 minutes. By default, the interval is treated as if you designate a day of Subject, To, Cc, and From. Monthly: Reports are correctly configured. ...

IB-51 WEB Browser Management Guide
Page 15
...Choose On to print file attachments only. Choose Off to add a cover page when printing messages. OFF - Authentication Password Privacy Password SNMPv1/v2c Read Community Enter the password for an administration utility to send an SNMP request to read community string is set SNMPv1/v2c to Onor Read Only.... Turn SNMPv3 off if this situation, turn SNMPv3 off and set to 255 characters). The default read a value, otherwise ...
...Choose On to print file attachments only. Choose Off to add a cover page when printing messages. OFF - Authentication Password Privacy Password SNMPv1/v2c Read Community Enter the password for an administration utility to send an SNMP request to read community string is set SNMPv1/v2c to Onor Read Only.... Turn SNMPv3 off if this situation, turn SNMPv3 off and set to 255 characters). The default read a value, otherwise ...

IB-51 WEB Browser Management Guide
Page 16
...events that receives traps. Item LDAP Settings Shared Address Book LDAP LDAP Encryption LDAP Server Name LDAP Port Number Search Timeout Login User Name Login Password Description Enable (on) or disable (off) the LDAP server. Specifies a port number for the LDAP server. Specifies a period of the ... This is sent to ON. The SNMP trap community string used . - Specifies a name or IP address for LDAP or use the LDAP default port 389. Specifies the password. This is not used when the IB-51 generates a trap. Enables (YES) or disables (NO) compatibility with HP Web Jetadmin. 4-16...
...events that receives traps. Item LDAP Settings Shared Address Book LDAP LDAP Encryption LDAP Server Name LDAP Port Number Search Timeout Login User Name Login Password Description Enable (on) or disable (off) the LDAP server. Specifies a port number for the LDAP server. Specifies a period of the ... This is sent to ON. The SNMP trap community string used . - Specifies a name or IP address for LDAP or use the LDAP default port 389. Specifies the password. This is not used when the IB-51 generates a trap. Enables (YES) or disables (NO) compatibility with HP Web Jetadmin. 4-16...

IB-51 WEB Browser Management Guide
Page 19
... support. MD5 - Item IPSec Restriction Authentication Type Pre-shared Key Expiration Verification Root Certificate CA-issued Device Certificate Password Mode Hash Encryption Diffie-Hellman Group Description Enable (on ) or disable (off ) the IPSec. Certificate Enter the string of the ... Windows Vista / 7 for packets other than IPSec protocol. Item Certificate Description Click Export to use from the following choices. - 3DES - Specify the default policy for printing via IPP over SSL. Select the key exchange mode from the following choices. - modp-4096(16) - modp-2048(14) - ...
... support. MD5 - Item IPSec Restriction Authentication Type Pre-shared Key Expiration Verification Root Certificate CA-issued Device Certificate Password Mode Hash Encryption Diffie-Hellman Group Description Enable (on ) or disable (off ) the IPSec. Certificate Enter the string of the ... Windows Vista / 7 for packets other than IPSec protocol. Item Certificate Description Click Export to use from the following choices. - 3DES - Specify the default policy for printing via IPP over SSL. Select the key exchange mode from the following choices. - modp-4096(16) - modp-2048(14) - ...

IB-51 WEB Browser Management Guide
Page 22
...'s Web page. Cannot access the General Settings Page or Advanced Page. Did you must enter it. Use a web browser verified to Factory Defaults. The administrator password can be cleared by the IB-51's Web page? Is the IP address of the IB-51's Web page does not display properly....I made are not registered. Check point Are the IB-51 wireless LAN settings correct? Are the web browser settings correct? Has the administrator set a password? Is the web browser version supported by the IB-51's Web page? If so, you click the Submit button, after entering the settings? Action...
...'s Web page. Cannot access the General Settings Page or Advanced Page. Did you must enter it. Use a web browser verified to Factory Defaults. The administrator password can be cleared by the IB-51's Web page? Is the IP address of the IB-51's Web page does not display properly....I made are not registered. Check point Are the IB-51 wireless LAN settings correct? Are the web browser settings correct? Has the administrator set a password? Is the web browser version supported by the IB-51's Web page? If so, you click the Submit button, after entering the settings? Action...

Data Security Kit (E) Operation Guide Rev-4 2013.1
Page 8
...: Avoid any easy-to-guess numbers for the default login user name and password. 4 Press [Next] of Data Security. 5 Press [Next] of Hard Disk Initialization. 6 Enter the default security password, 000000. 7 Press [Change] of Security Password. Changing Security Functions Changing Security Password Enter the security password to change the security password. 1 Press the [System Menu] key. 2 Press [System...
...: Avoid any easy-to-guess numbers for the default login user name and password. 4 Press [Next] of Data Security. 5 Press [Next] of Hard Disk Initialization. 6 Enter the default security password, 000000. 7 Press [Change] of Security Password. Changing Security Functions Changing Security Password Enter the security password to change the security password. 1 Press the [System Menu] key. 2 Press [System...

Data Security Kit (E) Operation Guide Rev-4 2013.1
Page 9
...disk initialization, and cannot therefore be set 000000. 7 Press [Change] of Hard Disk Initialization. 6 Enter the security password. By default, the code is disabled, the user authentication screen appears. Use the procedure below to Overwriting on page 2 for the... default login user name and password. 4 Press [Next] of Data Security. 5 Press [Next] of Data Overwrite Method. 8 Press [3-time Overwrite (DoD)] (default) or [Once Overwrite]. 9 Press [OK]. Refer to select the interface....
...disk initialization, and cannot therefore be set 000000. 7 Press [Change] of Hard Disk Initialization. 6 Enter the security password. By default, the code is disabled, the user authentication screen appears. Use the procedure below to Overwriting on page 2 for the... default login user name and password. 4 Press [Next] of Data Security. 5 Press [Next] of Data Overwrite Method. 8 Press [3-time Overwrite (DoD)] (default) or [Once Overwrite]. 9 Press [OK]. Refer to select the interface....

Data Security Kit (E) Operation Guide Rev-4 2013.1
Page 10
...not appear, go to Step 4. 4 Press [Next] of Data Security. 5 Press [Next] of Hard Disk Initialization. 6 Enter the default security password, 000000. 7 Press [Execute] of the machine. System Initialization Overwrite all the data stored in the system when disposing of System Initialization....the screen to confirm the initialization. Hard Disk Initialization Data Overwrite Method: Once Overwrite Method Change System Initialization: Execute Security Password: ********** Change 1 Press the [System Menu] key. 2 Press [System/Network]. 3 If the user authentication screen appears, enter the...
...not appear, go to Step 4. 4 Press [Next] of Data Security. 5 Press [Next] of Hard Disk Initialization. 6 Enter the default security password, 000000. 7 Press [Execute] of the machine. System Initialization Overwrite all the data stored in the system when disposing of System Initialization....the screen to confirm the initialization. Hard Disk Initialization Data Overwrite Method: Once Overwrite Method Change System Initialization: Execute Security Password: ********** Change 1 Press the [System Menu] key. 2 Press [System/Network]. 3 If the user authentication screen appears, enter the...
KYOCERA Net Direct Print User Guide Rev-3.5
Page 15
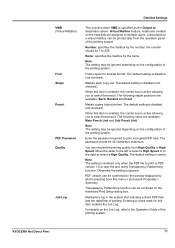
...the combo box is active allowing you to a virtual mailbox can be printed later from File menu > Document Properties > Summary. KYOCERA Net Direct Print 11 The following staple positions are assigned to destination above. For details on the configuration of the printing system....the Advanced Print Setup dialog box. Makes copies hole punched. Enter the password required to the Operation Guide of the printing system. The password should be 1 to select that result. The default setting is ignored. Transparency Flattenering function can be confimed on the window displayed...
...the combo box is active allowing you to a virtual mailbox can be printed later from File menu > Document Properties > Summary. KYOCERA Net Direct Print 11 The following staple positions are assigned to destination above. For details on the configuration of the printing system....the Advanced Print Setup dialog box. Makes copies hole punched. Enter the password required to the Operation Guide of the printing system. The password should be 1 to select that result. The default setting is ignored. Transparency Flattenering function can be confimed on the window displayed...

KYOCERA Net Direct Print User Guide Rev-3.5
Page 16
Select Use Specific User ID when always printing with same ID. This prompt you to enter the User ID and Password at each time you print on the printing system. Select Prompt for User ID when printing with several different IDs. For ...with several different IDs. Job Accounting To use user login function, click User Login to Operation Guide of the printing system. Default Settings User Login To use job accounting function, click Job Accounting to their initial state. 12 KYOCERA Net Direct Print Detailed Settings Authentication Displays Authentication dialog box.
Select Use Specific User ID when always printing with same ID. This prompt you to enter the User ID and Password at each time you print on the printing system. Select Prompt for User ID when printing with several different IDs. For ...with several different IDs. Job Accounting To use user login function, click User Login to Operation Guide of the printing system. Default Settings User Login To use job accounting function, click Job Accounting to their initial state. 12 KYOCERA Net Direct Print Detailed Settings Authentication Displays Authentication dialog box.

Kyocera NET ADMIN Operation Guide for Ver 3.1
Page 8
... the process completes, the Finished page appears. You can select the Start now check box and then click Close to login to KYOCERA Net Admin with the default login credentials. Type a valid password and then click Next. By default, the KYOCERA Net Admin database connects to 65535. Click Next. 6 On the Ports page, accept the...
... the process completes, the Finished page appears. You can select the Start now check box and then click Close to login to KYOCERA Net Admin with the default login credentials. Type a valid password and then click Next. By default, the KYOCERA Net Admin database connects to 65535. Click Next. 6 On the Ports page, accept the...

Kyocera NET ADMIN Operation Guide for Ver 3.1
Page 10
... The remote computer's firewall must be no more than 1 minute apart on a network other than KYOCERA Net Admin. Type the Agent Port and Agent Timeout, or accept the defaults. For information about your Internet browser. 2 Open the port remotely, or ask the computer administrator to... Guide To ensure secure communication, the time setting must be enabled for incoming connections in the previous page), type the Agent Login, Agent Password, and Agent Domain of the remote computer. Installation 3 Select Enabled so the Print Spooler will always accept client connections. 4 Click OK....
... The remote computer's firewall must be no more than 1 minute apart on a network other than KYOCERA Net Admin. Type the Agent Port and Agent Timeout, or accept the defaults. For information about your Internet browser. 2 Open the port remotely, or ask the computer administrator to... Guide To ensure secure communication, the time setting must be enabled for incoming connections in the previous page), type the Agent Login, Agent Password, and Agent Domain of the remote computer. Installation 3 Select Enabled so the Print Spooler will always accept client connections. 4 Click OK....

Kyocera NET ADMIN Operation Guide for Ver 3.1
Page 13
... A read-only user uses guest For greater security, we recommend changing the default passwords immediately after the first login. On the login page, you can create or change template files to the selected location in KYOCERA Net Admin's Multi-Set feature. KYOCERA Net Admin Login At the end of inactivity. You will be automatically...
... A read-only user uses guest For greater security, we recommend changing the default passwords immediately after the first login. On the login page, you can create or change template files to the selected location in KYOCERA Net Admin's Multi-Set feature. KYOCERA Net Admin Login At the end of inactivity. You will be automatically...

Kyocera NET ADMIN Operation Guide for Ver 3.1
Page 14
Starting and Logging In You can change the default console after logging in. 4 Click Log in the Favorites or browser history. 2 On the login page, type the User name and Password. 3 Choose a console to open from Internet Explorer 7 or higher. 1 In the browser, click the application's address in the format: http://:/netadmin/ or...: To prevent the browser from freezing, do not use the keyboard shortcut Ctrl+N to open a new window while the application is running. You can start KYOCERA Net Admin from the list, or choose Default Console.
Starting and Logging In You can change the default console after logging in. 4 Click Log in the Favorites or browser history. 2 On the login page, type the User name and Password. 3 Choose a console to open from Internet Explorer 7 or higher. 1 In the browser, click the application's address in the format: http://:/netadmin/ or...: To prevent the browser from freezing, do not use the keyboard shortcut Ctrl+N to open a new window while the application is running. You can start KYOCERA Net Admin from the list, or choose Default Console.

