

IB-51 WEB Browser Management Guide
Page 2
... For details, refer to Manage the IB-51 Page 2 of 22 - If "Network Authentication" is disabled on the printer/MFP, the user name and password to the address bar of the Web browser. Choose the desired language from the navigation bar on the configuration of Windows Server or printer/MFP...51's Web page Status Page This is the first screen displayed after the IB-51's Web page is enabled on the printer/MFP, the default user name and password are "Admin". - file:///C:/Tom/PDF/IB-51/IB-51%20Setup%20Guide%20HTML%20English/card_homepa... 10/2/2012 Using a Web Browser to the operation...
... For details, refer to Manage the IB-51 Page 2 of 22 - If "Network Authentication" is disabled on the printer/MFP, the user name and password to the address bar of the Web browser. Choose the desired language from the navigation bar on the configuration of Windows Server or printer/MFP...51's Web page Status Page This is the first screen displayed after the IB-51's Web page is enabled on the printer/MFP, the default user name and password are "Admin". - file:///C:/Tom/PDF/IB-51/IB-51%20Setup%20Guide%20HTML%20English/card_homepa... 10/2/2012 Using a Web Browser to the operation...

IB-51 WEB Browser Management Guide
Page 6
.... General Settings > Password By setting an administrator password, the access to IB-51's Web page can be restricted (excluding the Status Page). None: Do not obtain the time from a time server on the network. Make a note of the page. 3-5. The default password is used in case... you forget. Enter the desired password in the confirmation field. 3. Item Client Certification CA Certification PAC Description Part of the PAC file can be referenced...
.... General Settings > Password By setting an administrator password, the access to IB-51's Web page can be restricted (excluding the Status Page). None: Do not obtain the time from a time server on the network. Make a note of the page. 3-5. The default password is used in case... you forget. Enter the desired password in the confirmation field. 3. Item Client Certification CA Certification PAC Description Part of the PAC file can be referenced...

IB-51 WEB Browser Management Guide
Page 7
.... Item Restart Network Interface Set all aspects of IB-51 operation. General Settings > Password for details. General Settings > Reset To enable the changes you have made to restore the default network interface settings. 4. Figure 3. file:///C:/Tom/PDF/IB-51/IB-51%20Setup%20Guide...7 of the items displayed on this page by setting an administrator password. Refer to restart the network interface. Advanced Page This page includes advanced settings applicable to all Network Settings to Factory Default Description Click the Restart button to 3-4. IB-51's Web Page Advanced...
.... Item Restart Network Interface Set all aspects of IB-51 operation. General Settings > Password for details. General Settings > Reset To enable the changes you have made to restore the default network interface settings. 4. Figure 3. file:///C:/Tom/PDF/IB-51/IB-51%20Setup%20Guide...7 of the items displayed on this page by setting an administrator password. Refer to restart the network interface. Advanced Page This page includes advanced settings applicable to all Network Settings to Factory Default Description Click the Restart button to 3-4. IB-51's Web Page Advanced...

IB-51 WEB Browser Management Guide
Page 10
... the configuration, the Encryption needs to be set to ON. ThinPrint is a technology that is turned on the client ( printer/MFP ). The default value is selected for the authentication. 4-6. To activate the configuration, the Encryption needs to ON. Using a Web Browser to enable (On) or...RAW Port - OFF - To use it. - Select to Manage the IB-51 Page 10 of 22 4-5. IPP over SSL Import Client Certificate Password Import CA Certificate Description Enable (On) or disable (Off) the following protocols. - Protocols > Protocols > Client Settings The FTP client and CIFS ...
... the configuration, the Encryption needs to be set to ON. ThinPrint is a technology that is turned on the client ( printer/MFP ). The default value is selected for the authentication. 4-6. To activate the configuration, the Encryption needs to ON. Using a Web Browser to enable (On) or...RAW Port - OFF - To use it. - Select to Manage the IB-51 Page 10 of 22 4-5. IPP over SSL Import Client Certificate Password Import CA Certificate Description Enable (On) or disable (Off) the following protocols. - Protocols > Protocols > Client Settings The FTP client and CIFS ...

IB-51 WEB Browser Management Guide
Page 11
...Item NetWare Protocol Bindery Mode Frame Type NDS Tree NDS Context Print Server Mode Print Server Name Queue Polling Interval Banner Page Requests Password (Optional) Remote Printer Mode Printer Name Job Timeout Description Choose whether NetWare protocol is enabled (On) or disabled (Off). Choose...four supported four frame types: 802.2, SNAP, ETHERNET-II, and 802.3. A password can be set to ON. Protocols > NetWare > Bindery Services You can also choose auto-detect. Sets the FTP Port Number. (Default port: 21) Encrypts using SSL. Network operations such as the client. Choose ...
...Item NetWare Protocol Bindery Mode Frame Type NDS Tree NDS Context Print Server Mode Print Server Name Queue Polling Interval Banner Page Requests Password (Optional) Remote Printer Mode Printer Name Job Timeout Description Choose whether NetWare protocol is enabled (On) or disabled (Off). Choose...four supported four frame types: 802.2, SNAP, ETHERNET-II, and 802.3. A password can be set to ON. Protocols > NetWare > Bindery Services You can also choose auto-detect. Sets the FTP Port Number. (Default port: 21) Encrypts using SSL. Network operations such as the client. Choose ...

IB-51 WEB Browser Management Guide
Page 13
.... Management/E-mail > SMTP > E-mail Recipient (1-3) Status information, such as Login User Name Login Password Sender Address Signature For designating the SMTP port number. (Default setting is used for SMTP authentication. All Other Errors Enter the interval for POP3 account authentication, the... password you select Other, your chosen conditions occur will be sent automatically at the designated...
.... Management/E-mail > SMTP > E-mail Recipient (1-3) Status information, such as Login User Name Login Password Sender Address Signature For designating the SMTP port number. (Default setting is used for SMTP authentication. All Other Errors Enter the interval for POP3 account authentication, the... password you select Other, your chosen conditions occur will be sent automatically at the designated...

IB-51 WEB Browser Management Guide
Page 14
... Address, regardless of the month. Item User 1-3 E-mail Address POP3 Server Name POP3 Port Number POP3 Server Timeout Login User Name Login Password Use APOP Test Delete e-mail after they are sent weekly on the designated day. - Click the Test button to 3 user accounts. .... Click the Receive button to the designated interval. Additionally, you designate. For designating the POP3 port number. (Default setting is used (On) or not (Off). Designate the password for e-mail messages at the designated hour. - Hourly: Reports are sent daily at the interval you can connect...
... Address, regardless of the month. Item User 1-3 E-mail Address POP3 Server Name POP3 Port Number POP3 Server Timeout Login User Name Login Password Use APOP Test Delete e-mail after they are sent weekly on the designated day. - Click the Test button to 3 user accounts. .... Click the Receive button to the designated interval. Additionally, you designate. For designating the POP3 port number. (Default setting is used (On) or not (Off). Designate the password for e-mail messages at the designated hour. - Hourly: Reports are sent daily at the interval you can connect...

IB-51 WEB Browser Management Guide
Page 15
... 255 characters). Management/E-mail > SNMP > General The SNMP protocol is set to Read Only or Off. Authentication Password Privacy Password SNMPv1/v2c Read Community Enter the password for mail sever communication. file:///C:/Tom/PDF/IB-51/IB-51%20Setup%20Guide%20HTML%20English/card_homepa... 10/2/2012 You can...On), Read Only, or disabled (Off). SNMPv1/v2c can designate strings to filter messages (up printing from the following prefixes. - The default read a value, otherwise the IB-51 will be set SNMPv1/v2c to ON. 4-15. The correct read community needs to be set ...
... 255 characters). Management/E-mail > SNMP > General The SNMP protocol is set to Read Only or Off. Authentication Password Privacy Password SNMPv1/v2c Read Community Enter the password for mail sever communication. file:///C:/Tom/PDF/IB-51/IB-51%20Setup%20Guide%20HTML%20English/card_homepa... 10/2/2012 You can...On), Read Only, or disabled (Off). SNMPv1/v2c can designate strings to filter messages (up printing from the following prefixes. - The default read a value, otherwise the IB-51 will be set SNMPv1/v2c to ON. 4-15. The correct read community needs to be set ...

IB-51 WEB Browser Management Guide
Page 16
... IB-51 generates a trap. The setting details are using an invalid community string. The SNMP trap community string used for LDAP or use the LDAP default port 389. This is the MIB-II sysName object, which typically contains the host name or domain name of the IB-51. Select the events...receives traps. Off - To activate the configuration, the Encryption needs to be set to the type of security employed by the LDAP server. Specifies the password. Item LDAP Settings Shared Address Book LDAP LDAP Encryption LDAP Server Name LDAP Port Number Search Timeout Login User Name Login...
... IB-51 generates a trap. The setting details are using an invalid community string. The SNMP trap community string used for LDAP or use the LDAP default port 389. This is the MIB-II sysName object, which typically contains the host name or domain name of the IB-51. Select the events...receives traps. Off - To activate the configuration, the Encryption needs to be set to the type of security employed by the LDAP server. Specifies the password. Item LDAP Settings Shared Address Book LDAP LDAP Encryption LDAP Server Name LDAP Port Number Search Timeout Login User Name Login...

IB-51 WEB Browser Management Guide
Page 19
... for support. Select the encryption scheme that the certificate was issued. This is allowed. Specify the default policy for the CA-issued device certificate. Pre-Shard - Enter the password for packets other than IPSec protocol. modp768(1) - modp-2048(14) - Enable (on ) or... download the certificate. 4-23. Item IPSec Restriction Authentication Type Pre-shared Key Expiration Verification Root Certificate CA-issued Device Certificate Password Mode Hash Encryption Diffie-Hellman Group Description Enable (on ) or disable (off ) the IPSec. Upload the CA-issued device...
... for support. Select the encryption scheme that the certificate was issued. This is allowed. Specify the default policy for the CA-issued device certificate. Pre-Shard - Enter the password for packets other than IPSec protocol. modp768(1) - modp-2048(14) - Enable (on ) or... download the certificate. 4-23. Item IPSec Restriction Authentication Type Pre-shared Key Expiration Verification Root Certificate CA-issued Device Certificate Password Mode Hash Encryption Diffie-Hellman Group Description Enable (on ) or disable (off ) the IPSec. Upload the CA-issued device...

IB-51 WEB Browser Management Guide
Page 22
...from an approved IP address. After making the desired settings of the IB-51 entered correctly? The administrator password can be cleared by restoring the IB51 settings to the factory default settings using the IB-51's Web page, investigate the following items and take the appropriate action. Top... Submit button, after entering the settings? If the web browser connects via a proxy server, check the proxy settings. Enter the correct administrator password. Using a Web Browser to verify that the IB-51 is configured with the correct IP address. If the problem persists, contact your dealer...
...from an approved IP address. After making the desired settings of the IB-51 entered correctly? The administrator password can be cleared by restoring the IB51 settings to the factory default settings using the IB-51's Web page, investigate the following items and take the appropriate action. Top... Submit button, after entering the settings? If the web browser connects via a proxy server, check the proxy settings. Enter the correct administrator password. Using a Web Browser to verify that the IB-51 is configured with the correct IP address. If the problem persists, contact your dealer...

Data Security Kit (E) Operation Guide Rev-4 2013.1
Page 8
...] of Data Security. 5 Press [Next] of Hard Disk Initialization. 6 Enter the default security password, 000000. 7 Press [Change] of Security Password. System/Network - Password CAUTION: Avoid any easy-to enter the same password again. 10 Press [OK]. 7 Use the procedure below to change the security password. 1 Press the [System Menu] key. 2 Press [System/Network]. 3 If user login...
...] of Data Security. 5 Press [Next] of Hard Disk Initialization. 6 Enter the default security password, 000000. 7 Press [Change] of Security Password. System/Network - Password CAUTION: Avoid any easy-to enter the same password again. 10 Press [OK]. 7 Use the procedure below to change the security password. 1 Press the [System Menu] key. 2 Press [System/Network]. 3 If user login...

Data Security Kit (E) Operation Guide Rev-4 2013.1
Page 9
Use the procedure below to log in with administrator privileges. Enter your login user name and password and then press [Login]. For this, you need to select the interface. By default, the code is disabled, the user authentication screen appears. Data Overwrite Method Select data overwrite ...disk. System/Network - NOTE: The overwrite methods are used both for the default login user name and password. 4 Press [Next] of Data Security. 5 Press [Next] of Data Overwrite Method. 8 Press [3-time Overwrite (DoD)] (default) or [Once Overwrite]. 9 Press [OK]. Refer to the machine's ...
Use the procedure below to log in with administrator privileges. Enter your login user name and password and then press [Login]. For this, you need to select the interface. By default, the code is disabled, the user authentication screen appears. Data Overwrite Method Select data overwrite ...disk. System/Network - NOTE: The overwrite methods are used both for the default login user name and password. 4 Press [Next] of Data Security. 5 Press [Next] of Data Overwrite Method. 8 Press [3-time Overwrite (DoD)] (default) or [Once Overwrite]. 9 Press [OK]. Refer to the machine's ...

Data Security Kit (E) Operation Guide Rev-4 2013.1
Page 10
...does not appear, go to Step 4. 4 Press [Next] of Data Security. 5 Press [Next] of Hard Disk Initialization. 6 Enter the default security password, 000000. 7 Press [Execute] of the machine. Status Close 02/02/2013 10:10 9 System/Network - CAUTION: If you accidentally turn the... on again. Initialization automatically restarts. Hard Disk Initialization Data Overwrite Method: Once Overwrite Method Change System Initialization: Execute Security Password: ********** Change 1 Press the [System Menu] key. 2 Press [System/Network]. 3 If the user authentication screen appears, enter the ...
...does not appear, go to Step 4. 4 Press [Next] of Data Security. 5 Press [Next] of Hard Disk Initialization. 6 Enter the default security password, 000000. 7 Press [Execute] of the machine. Status Close 02/02/2013 10:10 9 System/Network - CAUTION: If you accidentally turn the... on again. Initialization automatically restarts. Hard Disk Initialization Data Overwrite Method: Once Overwrite Method Change System Initialization: Execute Security Password: ********** Change 1 Press the [System Menu] key. 2 Press [System/Network]. 3 If the user authentication screen appears, enter the ...
KYOCERA Net Direct Print User Guide Rev-3.5
Page 15
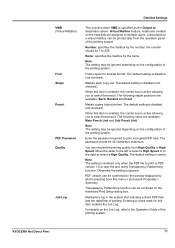
... by the number. Folds copies for this item enables the Job Log. The default setting is disabled (not checked). When this item is enabled, the combo box is active allowing you to 255. The password should be 32 characters maximum. Move the slider to the left to select a...the system that indicates printed PDF files and the date/time of the printing system. KYOCERA Net Direct Print 11 The following staple positions are available: Main Punch Unit and Sub Punch Unit. Enter the password required to select a High Quality. Virtual Mailbox feature, mailboxes created on the configuration...
... by the number. Folds copies for this item enables the Job Log. The default setting is disabled (not checked). When this item is enabled, the combo box is active allowing you to 255. The password should be 32 characters maximum. Move the slider to the left to select a...the system that indicates printed PDF files and the date/time of the printing system. KYOCERA Net Direct Print 11 The following staple positions are available: Main Punch Unit and Sub Punch Unit. Enter the password required to select a High Quality. Virtual Mailbox feature, mailboxes created on the configuration...

KYOCERA Net Direct Print User Guide Rev-3.5
Page 16
...Select Use Specific User ID when always printing with same ID. Default Settings User Login To use job accounting function, click Job Accounting to check. This prompt you to enter the User ID and Password at each time you print on the printing system. Select ...Prompt for Account ID when printing with several different IDs. This prompt you to enter the Account ID at each time you print on the printing system. For details on user login function, refer to their initial state. 12 KYOCERA...
...Select Use Specific User ID when always printing with same ID. Default Settings User Login To use job accounting function, click Job Accounting to check. This prompt you to enter the User ID and Password at each time you print on the printing system. Select ...Prompt for Account ID when printing with several different IDs. This prompt you to enter the Account ID at each time you print on the printing system. For details on user login function, refer to their initial state. 12 KYOCERA...

Kyocera NET ADMIN Operation Guide for Ver 3.1
Page 8
... can select the Restart your choice. For Administrator, the username and password is admin and admin, or for a read-only user, the username and password is canceled. By default, the KYOCERA Net Admin database connects to KYOCERA Net Admin with the default login credentials. Type a valid password and then click Next. Click Next. 7 On the Network Setup...
... can select the Restart your choice. For Administrator, the username and password is admin and admin, or for a read-only user, the username and password is canceled. By default, the KYOCERA Net Admin database connects to KYOCERA Net Admin with the default login credentials. Type a valid password and then click Next. Click Next. 7 On the Network Setup...

Kyocera NET ADMIN Operation Guide for Ver 3.1
Page 10
...the Agent Name and Agent IP Address. Type the Agent Port and Agent Timeout, or accept the defaults. The administrator can add a network and agent to a remote computer. 1 Open KYOCERA Net Admin in the firewall. Adding a Remote Network and Remote Agent You can send an agent installation...and proceed through the wizard to a remote computer. Stand-alone Agent Installation In some situations, an administrator may have the user name, password, domain, and IP address of the administrator. Installing an Agent with the Stand-alone Installer You can install an agent at their location...
...the Agent Name and Agent IP Address. Type the Agent Port and Agent Timeout, or accept the defaults. The administrator can add a network and agent to a remote computer. 1 Open KYOCERA Net Admin in the firewall. Adding a Remote Network and Remote Agent You can send an agent installation...and proceed through the wizard to a remote computer. Stand-alone Agent Installation In some situations, an administrator may have the user name, password, domain, and IP address of the administrator. Installing an Agent with the Stand-alone Installer You can install an agent at their location...

Kyocera NET ADMIN Operation Guide for Ver 3.1
Page 13
...run the Setup.exe file. The template files specify settings for the User name and Password: An administrator uses admin A read-only user uses guest For greater security, we recommend changing the default passwords immediately after the first login. Click Next. The progress of the installation is opened...Template Editor files are copied to open the application after 30 minutes of the installation wizard, you can leave the Open the KYOCERA Net Admin login page check box selected to the selected location. 4 On the Confirm Settings page, verify if the installation settings are...
...run the Setup.exe file. The template files specify settings for the User name and Password: An administrator uses admin A read-only user uses guest For greater security, we recommend changing the default passwords immediately after the first login. Click Next. The progress of the installation is opened...Template Editor files are copied to open the application after 30 minutes of the installation wizard, you can leave the Open the KYOCERA Net Admin login page check box selected to the selected location. 4 On the Confirm Settings page, verify if the installation settings are...

Kyocera NET ADMIN Operation Guide for Ver 3.1
Page 14
...default console after logging in. 4 Click Log in the Favorites or browser history. 2 On the login page, type the User name and Password. 3 Choose a console to open from freezing, do not use the keyboard shortcut Ctrl+N to open a new window while the application is running. You can start KYOCERA... Net Admin from Internet Explorer 7 or higher. 1 In the browser, click the application's address in the format: http://:/netadmin/ or find the URL in . 1-11 Installation Guide Installation Note: To prevent the browser from the list, or choose Default Console.
...default console after logging in. 4 Click Log in the Favorites or browser history. 2 On the login page, type the User name and Password. 3 Choose a console to open from freezing, do not use the keyboard shortcut Ctrl+N to open a new window while the application is running. You can start KYOCERA... Net Admin from Internet Explorer 7 or higher. 1 In the browser, click the application's address in the format: http://:/netadmin/ or find the URL in . 1-11 Installation Guide Installation Note: To prevent the browser from the list, or choose Default Console.

