
KM-NET Viewer Operation Guide Rev-5.2-2010.10
Page 22
... on the device, and then in the Login section of individuals and their contact information that contain web servers can be stored for faxing and scanning operations. Displaying Device Home Page Printing devices that is not needed. Alternatively, click the Device Home Page icon, or right-click on the device. E-mail...
... on the device, and then in the Login section of individuals and their contact information that contain web servers can be stored for faxing and scanning operations. Displaying Device Home Page Printing devices that is not needed. Alternatively, click the Device Home Page icon, or right-click on the device. E-mail...
KM-NET Viewer Operation Guide Rev-5.2-2010.10
Page 36
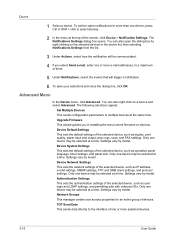
... maximum of devices. Device Network Settings This sets the network settings of the selected device, such as IP address, e-mail settings, SNMP settings, FTP and SMB client settings, and protocol settings. To set the same notifications for an entire group of three. 5 Under Notifications, select the events that will trigger a ...dialog box, click OK. Upgrade Firmware This wizard guides you select Send e-mail, enter one or more selected devices. 3-16 User Guide plus copy, scan, and FAX settings. Only one or more e-mail addresses, to select devices. 2 In the menu at a time.
... maximum of devices. Device Network Settings This sets the network settings of the selected device, such as IP address, e-mail settings, SNMP settings, FTP and SMB client settings, and protocol settings. To set the same notifications for an entire group of three. 5 Under Notifications, select the events that will trigger a ...dialog box, click OK. Upgrade Firmware This wizard guides you select Send e-mail, enter one or more selected devices. 3-16 User Guide plus copy, scan, and FAX settings. Only one or more e-mail addresses, to select devices. 2 In the menu at a time.
Kyocera Command Center Operation Guide Rev 6.3
Page 18
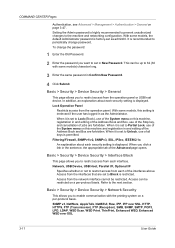
... System menu on a per -protocol basis. SNMP v3, NetWare, AppleTalk, NetBEUI, Raw, IPP, IPP over SSL, HTTP, HTTPS, FTP (Transmission), FTP (Reception), SMB, SNMP, SMTP, POP3, LPD, LDAP, WSD Scan, WSD Print, ThinPrint, Enhanced WSD, Enhanced WSD over SSL 3-11 User Guide This can be restricted. With some models, this machine, registration...
... System menu on a per -protocol basis. SNMP v3, NetWare, AppleTalk, NetBEUI, Raw, IPP, IPP over SSL, HTTP, HTTPS, FTP (Transmission), FTP (Reception), SMB, SNMP, SMTP, POP3, LPD, LDAP, WSD Scan, WSD Print, ThinPrint, Enhanced WSD, Enhanced WSD over SSL 3-11 User Guide This can be restricted. With some models, this machine, registration...

Kyocera Command Center Operation Guide Rev 6.3
Page 25
... Switches the SMB Protocol On or Off. The string will be saved. COMMAND CENTER Pages Selects the file quality mode (1 [Low] to 5 [High]) in the subject line as follows: Enter one of the items displayed on the FTP page. The default setting is set to be scanned. Original Orientation Switches... between Auto and 100%. FTP Switches FTP On or Off. SMB Port Number Sets the SMB default Port Number or use the SMB default port 139 (For Windows Vista/7, use the FTP default port 21. ...
... Switches the SMB Protocol On or Off. The string will be saved. COMMAND CENTER Pages Selects the file quality mode (1 [Low] to 5 [High]) in the subject line as follows: Enter one of the items displayed on the FTP page. The default setting is set to be scanned. Original Orientation Switches... between Auto and 100%. FTP Switches FTP On or Off. SMB Port Number Sets the SMB default Port Number or use the SMB default port 139 (For Windows Vista/7, use the FTP default port 21. ...

Scan To SMB (PC) Setup Guide Rev-3
Page 3
... computer] Creating a Shared Folder (see page 12) Enter the destination data using the Scan to SMB (PC) function. For how to configure your computer and the machine that you can convert scanned original images to digital data and send it on the touch panel. • Name ... • Name of Processes for Data Transmission STEP 1 [Operations on the destination computer. Ready to Addr Book Status Next Dest. Using the Scan to SMB (PC) function, you must configure Windows Firewall options. Flow of destination folder • Domain name\user name STEP 3 [Operations on the ...
... computer] Creating a Shared Folder (see page 12) Enter the destination data using the Scan to SMB (PC) function. For how to configure your computer and the machine that you can convert scanned original images to digital data and send it on the touch panel. • Name ... • Name of Processes for Data Transmission STEP 1 [Operations on the destination computer. Ready to Addr Book Status Next Dest. Using the Scan to SMB (PC) function, you must configure Windows Firewall options. Flow of destination folder • Domain name\user name STEP 3 [Operations on the ...

Scan To SMB (PC) Setup Guide Rev-3
Page 4
NOTE: You can select from the following three file formats: PDF, TIFF, JPEG and XPS. About Scan to SMB (PC) To use Scan to SMB (PC) function, the machine must be connected to the Operation Guide. The next section explains how to send data to receive data. To select a file format, refer to a TCP/IP network. Scan Convert scanned images to digital data Send and store digital data in a shared folder of any computer IMPORTANT: To use Scan to SMB (PC) function, a "shared folder" must be set up with the destination computer to a domain controlled computer. 2
NOTE: You can select from the following three file formats: PDF, TIFF, JPEG and XPS. About Scan to SMB (PC) To use Scan to SMB (PC) function, the machine must be connected to the Operation Guide. The next section explains how to send data to receive data. To select a file format, refer to a TCP/IP network. Scan Convert scanned images to digital data Send and store digital data in a shared folder of any computer IMPORTANT: To use Scan to SMB (PC) function, a "shared folder" must be set up with the destination computer to a domain controlled computer. 2

Scan To SMB (PC) Setup Guide Rev-3
Page 5
...want use for Windows Vista) If the destination of files is a Windows Vista-based computer, you must configure Windows Firewall exceptions. IMPORTANT: Log on to SMB (PC). From the Start menu, select Control Panel and click Allow a program through Windows Firewall. 2 At the User Account Control consent prompt, click... Sharing, then click the Apply button. 4 Click the Add port... button. The Add a Port dialog box appears. 3 Configuring Windows Firewall (for the Scan to Windows with administrator privileges. 1 On the Windows Firewall Settings dialog box, click the Exceptions tab.
...want use for Windows Vista) If the destination of files is a Windows Vista-based computer, you must configure Windows Firewall exceptions. IMPORTANT: Log on to SMB (PC). From the Start menu, select Control Panel and click Allow a program through Windows Firewall. 2 At the User Account Control consent prompt, click... Sharing, then click the Apply button. 4 Click the Add port... button. The Add a Port dialog box appears. 3 Configuring Windows Firewall (for the Scan to Windows with administrator privileges. 1 On the Windows Firewall Settings dialog box, click the Exceptions tab.

Scan To SMB (PC) Setup Guide Rev-3
Page 6
The new port is added to the list of the programs or ports. 7 Click the OK button to close the Add a Port dialog box. To use port 445, change port numbers, consult your network administrator. 4 Item [Name] [Port number] [Protocol] Information to be entered Type a name for Scan to SMB (PC). NOTE: You can communicate using port 445 for the port you want to change SMB port number to 445 via the COMMAND CENTER. When you want to add. 5 Enter the information on the port you want to add. 139 Click TCP. 6 Click the OK button to close the Windows Firewall Settings dialog box.
The new port is added to the list of the programs or ports. 7 Click the OK button to close the Add a Port dialog box. To use port 445, change port numbers, consult your network administrator. 4 Item [Name] [Port number] [Protocol] Information to be entered Type a name for Scan to SMB (PC). NOTE: You can communicate using port 445 for the port you want to change SMB port number to 445 via the COMMAND CENTER. When you want to add. 5 Enter the information on the port you want to add. 139 Click TCP. 6 Click the OK button to close the Windows Firewall Settings dialog box.


