

6053ci Series Operation Guide
Page 7
... the USB Drive Information 5-73 Removing USB Drive 5-73 Using the Internet Browser 5-74 Launching and Exiting the Browser 5-74 Using the Browser Screen 5-75 Manual Staple ...5-76 6 Using Various Functions 6-1 Functions Available on the Machine 6-2 About Functions Available on the Machine 6-2 How to Select Functions 6-2 Copy ...6-2 Send ...6-5 Custom Box (Store...
... the USB Drive Information 5-73 Removing USB Drive 5-73 Using the Internet Browser 5-74 Launching and Exiting the Browser 5-74 Using the Browser Screen 5-75 Manual Staple ...5-76 6 Using Various Functions 6-1 Functions Available on the Machine 6-2 About Functions Available on the Machine 6-2 How to Select Functions 6-2 Copy ...6-2 Send ...6-5 Custom Box (Store...

6053ci Series Operation Guide
Page 24
.... Install the following versions of emulation. FAX Operation Guide Explains how to set various parameters and send and save with KYOCERA Net Viewer. KYOCERA Net Viewer User Guide Explains how to check and change settings. Command Center RX User Guide Explains how to access the... how to print PDF files without using the ID card. KYOCERA Net Direct Print Operation Guide Explains how to overwrite and encrypt data. Card Authentication Kit (B) Operation Guide Explains how to view the manuals on the network Scan images and save scanned documents. PRESCRIBE Commands...
.... Install the following versions of emulation. FAX Operation Guide Explains how to set various parameters and send and save with KYOCERA Net Viewer. KYOCERA Net Viewer User Guide Explains how to check and change settings. Command Center RX User Guide Explains how to access the... how to print PDF files without using the ID card. KYOCERA Net Direct Print Operation Guide Explains how to overwrite and encrypt data. Card Authentication Kit (B) Operation Guide Explains how to view the manuals on the network Scan images and save scanned documents. PRESCRIBE Commands...

6053ci Series Operation Guide
Page 43
... Areas-Copy (page 8-23) Erase Shadowed Areas-Send (page 8-23) Erase Shadowed Areas-Store (page 8-23 Optional Keyboard Type (page 8-23) System Stamp (page 8-23) Manual Staple (page 8-29) Offset Documents by Job (page 8-29) Low Toner Alert Level (page 8-30) Toner Waste Full Alert (page 8-30) Offset One Page Documents...
... Areas-Copy (page 8-23) Erase Shadowed Areas-Send (page 8-23) Erase Shadowed Areas-Store (page 8-23 Optional Keyboard Type (page 8-23) System Stamp (page 8-23) Manual Staple (page 8-29) Offset Documents by Job (page 8-29) Low Toner Alert Level (page 8-30) Toner Waste Full Alert (page 8-30) Offset One Page Documents...

6053ci Series Operation Guide
Page 56
... can leak from the machine. Legal and Safety Information > Notice Laser Safety (Europe) Laser radiation could be hazardous to the laser scanner unit inside this manual may result in a user access area. Regarding CLASS 1 laser products, information is classified as Class 1 laser product under IEC/EN 60825-1:2014. For this reason...
... can leak from the machine. Legal and Safety Information > Notice Laser Safety (Europe) Laser radiation could be hazardous to the laser scanner unit inside this manual may result in a user access area. Regarding CLASS 1 laser products, information is classified as Class 1 laser product under IEC/EN 60825-1:2014. For this reason...

6053ci Series Operation Guide
Page 57
... optical system, enclosed in the other section of the rating label is safe to laser products marketed in the United States. The position of this manual. 5. without certification, and applies to the laser unit is cut off when the front cover is opened. 1-6 Shown at below indicates compliance with the CDRH...
... optical system, enclosed in the other section of the rating label is safe to laser products marketed in the United States. The position of this manual. 5. without certification, and applies to the laser unit is cut off when the front cover is opened. 1-6 Shown at below indicates compliance with the CDRH...

6053ci Series Operation Guide
Page 74
Installing and Setting up the Machine > Part Names (With Optional Equipments Attached) Part Names (With Optional Equipments Attached) 12 1 11 10 3 2 4 5 9 23 96 7 8 5 1 Tray 1 to 7 (tray 1 is the top tray) 2 Tray A 3 Tray B 4 Job Separator Tray 5 Folding Tray 6 Cassette 3 Optional Equipment (page 11-2) *1 JS-7100 is standard on 2553ci. 7 6 7 Cassette 4 8 Cassette 5 9 Finisher Tray 10 Job Separator Tray*1 11 Original Cover 12 Control Section of the Finisher Manual Staple (page 5-76) 2-5
Installing and Setting up the Machine > Part Names (With Optional Equipments Attached) Part Names (With Optional Equipments Attached) 12 1 11 10 3 2 4 5 9 23 96 7 8 5 1 Tray 1 to 7 (tray 1 is the top tray) 2 Tray A 3 Tray B 4 Job Separator Tray 5 Folding Tray 6 Cassette 3 Optional Equipment (page 11-2) *1 JS-7100 is standard on 2553ci. 7 6 7 Cassette 4 8 Cassette 5 9 Finisher Tray 10 Job Separator Tray*1 11 Original Cover 12 Control Section of the Finisher Manual Staple (page 5-76) 2-5

6053ci Series Operation Guide
Page 100
...6053ci Login User Name 2500 3200 3500 4000 5000 6000 Login Password 2500 3200 3500 4000 5000 6000 IPv4 setting 1 Display the screen. [System Menu/Counter] key > [System/Network] > "Network" [Next] > "Wired Network Settings" [Next] > "TCP/IP Setting" [Next] > "IPv4" [Change] 2 Configure the settings. When [Manual...disabled, the user authentication screen appears. When using DHCP server [DHCP]: Set to configure this setting. Select [Auto (DHCP)] or [Manual]. Enter a login user name and password, and select [Login]. Installing and Setting up the Machine > Network Setup NOTE If user ...
...6053ci Login User Name 2500 3200 3500 4000 5000 6000 Login Password 2500 3200 3500 4000 5000 6000 IPv4 setting 1 Display the screen. [System Menu/Counter] key > [System/Network] > "Network" [Next] > "Wired Network Settings" [Next] > "TCP/IP Setting" [Next] > "IPv4" [Change] 2 Configure the settings. When [Manual...disabled, the user authentication screen appears. When using DHCP server [DHCP]: Set to configure this setting. Select [Auto (DHCP)] or [Manual]. Enter a login user name and password, and select [Login]. Installing and Setting up the Machine > Network Setup NOTE If user ...

6053ci Series Operation Guide
Page 199
Max. number of sheets Paper width Paper length Paper weight Media type 1 sheet (manual feed), 10 sheets (when optional banner tray is attached*1) 210 mm to 304.8 mm (8.26" to 12") 488.1 mm to 1,220 mm (19.22" to ...
Max. number of sheets Paper width Paper length Paper weight Media type 1 sheet (manual feed), 10 sheets (when optional banner tray is attached*1) 210 mm to 304.8 mm (8.26" to 12") 488.1 mm to 1,220 mm (19.22" to ...
6053ci Series Operation Guide
Page 213
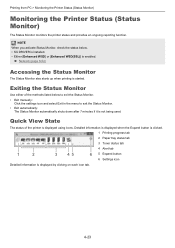
... 6 5 Expand button 6 Settings icon Detailed information is enabled. NOTE When you activate Status Monitor, check the status below to exit the Status Monitor. • Exit manually: Click the settings icon and select Exit in the menu to exit the Status Monitor. • Exit automatically: The Status Monitor automatically shuts down after...
... 6 5 Expand button 6 Settings icon Detailed information is enabled. NOTE When you activate Status Monitor, check the status below to exit the Status Monitor. • Exit manually: Click the settings icon and select Exit in the menu to exit the Status Monitor. • Exit automatically: The Status Monitor automatically shuts down after...

6053ci Series Operation Guide
Page 217
... the USB Drive Information 5-73 Removing USB Drive 5-73 Using the Internet Browser 5-74 Launching and Exiting the Browser 5-74 Using the Browser Screen 5-75 Manual Staple 5-76
... the USB Drive Information 5-73 Removing USB Drive 5-73 Using the Internet Browser 5-74 Launching and Exiting the Browser 5-74 Using the Browser Screen 5-75 Manual Staple 5-76

6053ci Series Operation Guide
Page 223
... are using a paper weight of 106 g/m2 or more, set the media type to Thick and set the weight of 1,220 mm (48.03"): 1 sheet (manual feed), 10 sheets (when optional banner tray is attached) • Index tab dividers: 15 sheets NOTE • When you load custom size paper, enter the...
... are using a paper weight of 106 g/m2 or more, set the media type to Thick and set the weight of 1,220 mm (48.03"): 1 sheet (manual feed), 10 sheets (when optional banner tray is attached) • Index tab dividers: 15 sheets NOTE • When you load custom size paper, enter the...

6053ci Series Operation Guide
Page 292
.... 1 2 3 1 Stapling position lamps 2 Stapling position key 3 Stapling key / lamp 1 Press the stapling position key on the Machine > Manual Staple Manual Staple You can staple copied paper manually without any print operation. Bond) 91 - 105 g/m2 (24.3 - 28.0 lb. Bond) A4, A4-R, B5, Letter, Letter-R, 16K 65 sheets 55...Finisher: 4,000-sheet Finisher (page 11-31) 100-sheet Staple Finisher (page 11-32) • If there are no staples when manual stapling is useful when you have forgotten to set the staple sort mode before starting copying, or when you want to staple originals. Maximum...
.... 1 2 3 1 Stapling position lamps 2 Stapling position key 3 Stapling key / lamp 1 Press the stapling position key on the Machine > Manual Staple Manual Staple You can staple copied paper manually without any print operation. Bond) 91 - 105 g/m2 (24.3 - 28.0 lb. Bond) A4, A4-R, B5, Letter, Letter-R, 16K 65 sheets 55...Finisher: 4,000-sheet Finisher (page 11-31) 100-sheet Staple Finisher (page 11-32) • If there are no staples when manual stapling is useful when you have forgotten to set the staple sort mode before starting copying, or when you want to staple originals. Maximum...

6053ci Series Operation Guide
Page 293
... 8-29) 5-77 Press the stapling position key to the center point between the two side guides (A and B). Operate after which manual staple mode is performed for approx. 10 seconds, the manual staple mode will be changed. If the edge of the paper ( ) will be used. • The stapling lamp lights when... the front guide (A). If the far side of the paper well and place the paper front side down in progress. CAUTION Be sure that manual stapling is finished. Once the paper is placed, the stapling position key cannot be stapled at two points, place the paper with the center ...
... 8-29) 5-77 Press the stapling position key to the center point between the two side guides (A and B). Operate after which manual staple mode is performed for approx. 10 seconds, the manual staple mode will be changed. If the edge of the paper ( ) will be used. • The stapling lamp lights when... the front guide (A). If the far side of the paper well and place the paper front side down in progress. CAUTION Be sure that manual stapling is finished. Once the paper is placed, the stapling position key cannot be stapled at two points, place the paper with the center ...

6053ci Series Operation Guide
Page 334
.... Select [1] to [+3] (Vivid) Results in more vivid color. Saturation is used with full color and auto color. Item Off Auto Manual Description Does not adjust the ground color. Grayish Original Vivid Results in more vivid color. Item [-1] to [-3] (Grayish) [+1] to [5]... (Lighter - Results in paler color. Darker) to adjust the background density manually. NOTE This feature is disabled if Auto Color detects black and white originals. Results in paler color. Using Various Functions > Functions Background ...
.... Select [1] to [+3] (Vivid) Results in more vivid color. Saturation is used with full color and auto color. Item Off Auto Manual Description Does not adjust the ground color. Grayish Original Vivid Results in more vivid color. Item [-1] to [-3] (Grayish) [+1] to [5]... (Lighter - Results in paler color. Darker) to adjust the background density manually. NOTE This feature is disabled if Auto Color detects black and white originals. Results in paler color. Using Various Functions > Functions Background ...

6053ci Series Operation Guide
Page 337
... [# Keys] to 400% (in 1% increments between 25% and 400%. Select [+] or [-] to use the numeric keys for entry. 6-44 Using Various Functions > Functions Zoom Entry Manually reduces or enlarges the original image in 1% increments) Description Select a preset ratio. Select [Auto] to change the displayed magnification as desired. Use the numeric keys...
... [# Keys] to 400% (in 1% increments between 25% and 400%. Select [+] or [-] to use the numeric keys for entry. 6-44 Using Various Functions > Functions Zoom Entry Manually reduces or enlarges the original image in 1% increments) Description Select a preset ratio. Select [Auto] to change the displayed magnification as desired. Use the numeric keys...

6053ci Series Operation Guide
Page 341
...optional OCR Scan Activation Kit is applied automatically on the rear page depending on the back. Back Page Auto, Manual For duplex copying, select [Back Page] and select [Auto] or [Manual]. The setting selections are the same as for entry. Select [Original Orientation] to choose orientation of the ...margin width can set the margin width and the back page margin. NOTE The default setting for "Left/ Right" and "Top/Bottom". When [Manual] is displayed. Original Orientation Centering*3 Original Orientation Top Edge on Top, Top Edge on Left, Auto*2 Top Edge on Top, Top Edge on...
...optional OCR Scan Activation Kit is applied automatically on the rear page depending on the back. Back Page Auto, Manual For duplex copying, select [Back Page] and select [Auto] or [Manual]. The setting selections are the same as for entry. Select [Original Orientation] to choose orientation of the ...margin width can set the margin width and the back page margin. NOTE The default setting for "Left/ Right" and "Top/Bottom". When [Manual] is displayed. Original Orientation Centering*3 Original Orientation Top Edge on Top, Top Edge on Left, Auto*2 Top Edge on Top, Top Edge on...

6053ci Series Operation Guide
Page 354
...be numbered. Style None, Bold, Italic, Bold/Italic Set the font style of page number. Select a font style by selecting [+] or [-]. Select [Denominator #] and select [Manual]. Select [# Keys] to use the numeric keys for entry. Font Courier, Letter Gothic Set the font of page number. Density 10 to 100% (in 10... contains blank pages, add a check mark if you do not want page numbering through to the last page, select [Last Page]. Last Page Auto, Manual (-10 to 0) If you require blank pages to be used when the optional OCR Scan Activation Kit is installed. 6-61
...be numbered. Style None, Bold, Italic, Bold/Italic Set the font style of page number. Select a font style by selecting [+] or [-]. Select [Denominator #] and select [Manual]. Select [# Keys] to use the numeric keys for entry. Font Courier, Letter Gothic Set the font of page number. Density 10 to 100% (in 10... contains blank pages, add a check mark if you do not want page numbering through to the last page, select [Last Page]. Last Page Auto, Manual (-10 to 0) If you require blank pages to be used when the optional OCR Scan Activation Kit is installed. 6-61

6053ci Series Operation Guide
Page 392
... Information of the selected job is reached. NOTE To check the information of jobs is displayed. Sending the Log History You can either send it manually as needed or have it sent automatically whenever a set number of the next/previous page, select [ ] or [ ]. 2 To exit from the list. End Date Type...
... Information of the selected job is reached. NOTE To check the information of jobs is displayed. Sending the Log History You can either send it manually as needed or have it sent automatically whenever a set number of the next/previous page, select [ ] or [ ]. 2 To exit from the list. End Date Type...

6053ci Series Operation Guide
Page 400
...Sound Keyboard Layout Original/Paper Settings Measurement Error Handling Paper Output Orientation Confirmation Color Toner Empty Action Function Defaults Optional Keyboard Type System Stamp Manual Staple Offset Documents by Job. Select the screen appearing right after the warm-up (default screen). Configure settings for available settings such .... Configure settings for buzzer sound during the machine operations. Select the type of remaining toner to notify the administrator when to use Manual Staple. Select inch or metric for the unit for printing once the color toner runs out.
...Sound Keyboard Layout Original/Paper Settings Measurement Error Handling Paper Output Orientation Confirmation Color Toner Empty Action Function Defaults Optional Keyboard Type System Stamp Manual Staple Offset Documents by Job. Select the screen appearing right after the warm-up (default screen). Configure settings for available settings such .... Configure settings for buzzer sound during the machine operations. Select the type of remaining toner to notify the administrator when to use Manual Staple. Select inch or metric for the unit for printing once the color toner runs out.

6053ci Series Operation Guide
Page 416
..." increments) Top/Bottom: -0.75 to Back Page Select the Border Erase Method for Back Page of the files. Value: Off, Auto, Manual (Darker 5) Prevent Bleed-thru (Copy) Set the default value for high compressed PDF files. To specify border erase widths in the middle of... the EcoPrint default. Value: PDF, TIFF, JPEG, XPS, OpenXPS, High Comp. Value: Compression Ratio Priority, Standard, Quality Priority 8-20 Value: Off, Auto, Manual (Darker 5) BackgrndDens. (Send/ Store) Set the default Backgrnd Density (Send/Store). Value: 1 (Low) to 2" (in 0.01" increments) NOTE To specify...
..." increments) Top/Bottom: -0.75 to Back Page Select the Border Erase Method for Back Page of the files. Value: Off, Auto, Manual (Darker 5) Prevent Bleed-thru (Copy) Set the default value for high compressed PDF files. To specify border erase widths in the middle of... the EcoPrint default. Value: PDF, TIFF, JPEG, XPS, OpenXPS, High Comp. Value: Compression Ratio Priority, Standard, Quality Priority 8-20 Value: Off, Auto, Manual (Darker 5) BackgrndDens. (Send/ Store) Set the default Backgrnd Density (Send/Store). Value: 1 (Low) to 2" (in 0.01" increments) NOTE To specify...


