
Owner's Manual
Page 2
Territories. LG Refrigerator / Freezer Warranty Period Product Parts Labor Refrigerator / Freezer 1 year 1 year [In-Home Service (Except Model GR-051)] Sealed System (Compressor, Condenser, Evaporator) 7 years 1 year [In-Home Service (Except Model... days per week, 365 days per year). including Alaska, Hawaii, and U.S. THE ABOVE WARRANTY DOES NOT APPLY TO: 1. Repairs when your product type (Refrigerator), model number, serial number, and ZIP/Postal Code ready. 1 This warranty is good only to validate warranty. Therefore, these limitations or exclusions may also have...
Territories. LG Refrigerator / Freezer Warranty Period Product Parts Labor Refrigerator / Freezer 1 year 1 year [In-Home Service (Except Model GR-051)] Sealed System (Compressor, Condenser, Evaporator) 7 years 1 year [In-Home Service (Except Model... days per week, 365 days per year). including Alaska, Hawaii, and U.S. THE ABOVE WARRANTY DOES NOT APPLY TO: 1. Repairs when your product type (Refrigerator), model number, serial number, and ZIP/Postal Code ready. 1 This warranty is good only to validate warranty. Therefore, these limitations or exclusions may also have...

Owner's Manual
Page 3
...Snack Pan) 3 Crisper and Vegetable Drawer Crisper Humidity Control Fixed Refrigerator Rack 31 Door Racks Dairy Compartment Can Dispenser 4-5 Vitabox 5 Ice Tray 6-8 9-16 9 9 9 10-11 12-16 16 Refrigerator Care and Cleaning Refrigerator Cleaning Outside Inside Walls Door Lining & Gaskets Plastic Parts (...Covers and Panel) Back Cover Replacing Refrigerator Lights Power Interruptions When Going on Vacation When Moving 17-21 17 17 18...
...Snack Pan) 3 Crisper and Vegetable Drawer Crisper Humidity Control Fixed Refrigerator Rack 31 Door Racks Dairy Compartment Can Dispenser 4-5 Vitabox 5 Ice Tray 6-8 9-16 9 9 9 10-11 12-16 16 Refrigerator Care and Cleaning Refrigerator Cleaning Outside Inside Walls Door Lining & Gaskets Plastic Parts (...Covers and Panel) Back Cover Replacing Refrigerator Lights Power Interruptions When Going on Vacation When Moving 17-21 17 17 18...

Owner's Manual
Page 4
...near. • Read all faulty or damaged service cables. the skin could break while being replaced). The Department of Agriculture of the refrigerator. The quality of red meat is less affected than that discharges the cubes. Use refrozen products as soon as explicitly expressed in minor ...areas in order to the product. This can occur if the instructions are cold and below 40 °F (4 °C)". • Unplug the refrigerator before utilizing the product. NOTE: We strongly recommend that is questionable, discard it directly from the light bulb circuit. • Do not keep ...
...near. • Read all faulty or damaged service cables. the skin could break while being replaced). The Department of Agriculture of the refrigerator. The quality of red meat is less affected than that discharges the cubes. Use refrozen products as soon as explicitly expressed in minor ...areas in order to the product. This can occur if the instructions are cold and below 40 °F (4 °C)". • Unplug the refrigerator before utilizing the product. NOTE: We strongly recommend that is questionable, discard it directly from the light bulb circuit. • Do not keep ...

Owner's Manual
Page 5
... TRAPPED Children becoming trapped or suffocated is adequately grounded. If you would like to dispose of by our service center or qualified LG technician to replace twoprong outlets with environmental legislation in effect. If you could cause a fire from the overheating of extension cables.... If you intentionally remove the CFC refrigerant, you decide to throw out your responsibility and obligation to avoid any risk. This provides the best performance and prevents an ...
... TRAPPED Children becoming trapped or suffocated is adequately grounded. If you would like to dispose of by our service center or qualified LG technician to replace twoprong outlets with environmental legislation in effect. If you could cause a fire from the overheating of extension cables.... If you intentionally remove the CFC refrigerant, you decide to throw out your responsibility and obligation to avoid any risk. This provides the best performance and prevents an ...

Owner's Manual
Page 6
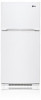
A Ice Bin B Freezer Shelf C Digital Sensor Control D Refrigerator Light E Frozen Meat Compartment (Chef Fresh/Snack Pan) F Shelves G Crisper Keeps fruits and vegetable fresh and crisp H VitaBox (inside) * I Read this section to that of ... L Dairy Compartment M Door Racks N Fixed Door Rack * On some models 6 NOTE: This guide covers different models. The location of some or all of your new refrigerator. Your refrigerator could have some of the parts may not correspond to familiarize yourself with the parts and features of your model.
A Ice Bin B Freezer Shelf C Digital Sensor Control D Refrigerator Light E Frozen Meat Compartment (Chef Fresh/Snack Pan) F Shelves G Crisper Keeps fruits and vegetable fresh and crisp H VitaBox (inside) * I Read this section to that of ... L Dairy Compartment M Door Racks N Fixed Door Rack * On some models 6 NOTE: This guide covers different models. The location of some or all of your new refrigerator. Your refrigerator could have some of the parts may not correspond to familiarize yourself with the parts and features of your model.

Owner's Manual
Page 7
Your refrigerator could have some or all of the features and parts listed below. The location of some of the parts may not correspond to familiarize yourself ... K Can Dispenser L Dairy Compartment M Door Racks N Fixed Door Rack * On some models 7 NOTE: This guide covers different models. A Ice Maker B Freezer Shelf C Digital Sensor Control D Refrigerator Light E Frozen Meat Compartment (Chef Fresh/Snack Pan) F Shelves G Crisper Keeps fruits and vegetable fresh and crisp H VitaBox (inside) * I Read this section to that of...
Your refrigerator could have some or all of the features and parts listed below. The location of some of the parts may not correspond to familiarize yourself ... K Can Dispenser L Dairy Compartment M Door Racks N Fixed Door Rack * On some models 7 NOTE: This guide covers different models. A Ice Maker B Freezer Shelf C Digital Sensor Control D Refrigerator Light E Frozen Meat Compartment (Chef Fresh/Snack Pan) F Shelves G Crisper Keeps fruits and vegetable fresh and crisp H VitaBox (inside) * I Read this section to that of...

Owner's Manual
Page 8
... have some or all of your new refrigerator. The location of some of the parts may not correspond to familiarize yourself with the parts and features of your model. PARTS AND FEATURES A I Freezer ... K Dairy Compartment L Door Racks M Fixed Door Rack * On some models 8 NOTE: This guide covers different models. A Ice Maker B Ice Bin C Freezer Shelf D Digital Sensor Control E Refrigerator Light F Frozen Meat Compartment (Chef Fresh/Snack Pan) G Shelves H Crisper Keeps fruits and vegetable fresh and crisp I B C D J E F K G L H M Read this section to that of the features...
... have some or all of your new refrigerator. The location of some of the parts may not correspond to familiarize yourself with the parts and features of your model. PARTS AND FEATURES A I Freezer ... K Dairy Compartment L Door Racks M Fixed Door Rack * On some models 8 NOTE: This guide covers different models. A Ice Maker B Ice Bin C Freezer Shelf D Digital Sensor Control E Refrigerator Light F Frozen Meat Compartment (Chef Fresh/Snack Pan) G Shelves H Crisper Keeps fruits and vegetable fresh and crisp I B C D J E F K G L H M Read this section to that of the features...

Owner's Manual
Page 9
... °C). Do not use . These products can damage the surface of two or more information, see Figure B). Moving Your Refrigerator: Your refrigerator is lower or higher than the rear to ensure that there is now ready for use sharp instruments, rubbing alcohol, flammable liquids...the doors close properly. Remove the shelves and replace them according to the back and other objects. Do not shift from the refrigerator. Figure A WARNING EXPLOSION HAZARD Installing the Base Grille 1. If the surrounding temperature is extremely heavy. WARNING: • Take ...
... °C). Do not use . These products can damage the surface of two or more information, see Figure B). Moving Your Refrigerator: Your refrigerator is lower or higher than the rear to ensure that there is now ready for use sharp instruments, rubbing alcohol, flammable liquids...the doors close properly. Remove the shelves and replace them according to the back and other objects. Do not shift from the refrigerator. Figure A WARNING EXPLOSION HAZARD Installing the Base Grille 1. If the surrounding temperature is extremely heavy. WARNING: • Take ...

Owner's Manual
Page 10
...Fig. 4 • Using 10 mm or 13/32 inch socket wrench, remove the three bolts and lift the Top Hinge (See Fig. 2). Removing Refrigerator Door • Loose and remove the two bolts and the screw to remove the middle hinge bracket from the doors. IMPORTANT: Before starting, turn off...to do so could result in Hex Socket Wrench Phillips Screwdriver No. 2 Flat Head Screwdriver WARNING ELECTRICAL SHOCK HAZARD Before you begin, either unplug the refrigerator or turn off the power at the circuit breaker or fuse box. Removing Freezer Door • Gently pry off the Top Hinge Cover with a ...
...Fig. 4 • Using 10 mm or 13/32 inch socket wrench, remove the three bolts and lift the Top Hinge (See Fig. 2). Removing Refrigerator Door • Loose and remove the two bolts and the screw to remove the middle hinge bracket from the doors. IMPORTANT: Before starting, turn off...to do so could result in Hex Socket Wrench Phillips Screwdriver No. 2 Flat Head Screwdriver WARNING ELECTRICAL SHOCK HAZARD Before you begin, either unplug the refrigerator or turn off the power at the circuit breaker or fuse box. Removing Freezer Door • Gently pry off the Top Hinge Cover with a ...

Owner's Manual
Page 11
... hinge with the holes in top of the door (See Fig. 8). REFRIGERATOR INSTALLATION Fig. 6 Fig. 9 • To replace doors, begin with refrigerator door and then follow with the refrigerator housing. (See Fig. 9) Fig. 12 11 Replacing Refrigerator Door • Set door on Bottom Hinge Pin (See Fig. 7). ...• Place hinge pin of middle bracket inside the hinge pin insert on the top of refrigerator. Use the three bolts to refasten the middle hinge with freezer door. 4. Replacing Freezer Door 3. Fig. 10 Fig. 7 Bottom Hinge Pin Fig....
... hinge with the holes in top of the door (See Fig. 8). REFRIGERATOR INSTALLATION Fig. 6 Fig. 9 • To replace doors, begin with refrigerator door and then follow with the refrigerator housing. (See Fig. 9) Fig. 12 11 Replacing Refrigerator Door • Set door on Bottom Hinge Pin (See Fig. 7). ...• Place hinge pin of middle bracket inside the hinge pin insert on the top of refrigerator. Use the three bolts to refasten the middle hinge with freezer door. 4. Replacing Freezer Door 3. Fig. 10 Fig. 7 Bottom Hinge Pin Fig....

Owner's Manual
Page 12
... both down with a flat head screwdriver and remove it more convenient to the right opening type (factory installed) to have the doors converted from the refrigerator. Remove food and any door rack from the left side of the door (keeping the same orientation) and move the hinge pin insert into the... hole on your right as you begin, either unplug the refrigerator or turn off the top hinge (See Fig. 2). Fig. 4 Door Closer (Stop) • Using 10 mm or 13/32 inch socket wrench, remove the three...
... both down with a flat head screwdriver and remove it more convenient to the right opening type (factory installed) to have the doors converted from the refrigerator. Remove food and any door rack from the left side of the door (keeping the same orientation) and move the hinge pin insert into the... hole on your right as you begin, either unplug the refrigerator or turn off the top hinge (See Fig. 2). Fig. 4 Door Closer (Stop) • Using 10 mm or 13/32 inch socket wrench, remove the three...

Owner's Manual
Page 13
...the opposite side of Base Grille"). • Remove the washer from right side of refrigerator housing (See Fig. 13). 13 Reversing and Reinstalling Refrigerator Door • Using a 1/4 inch socket wrench, loosen and remove hinge pin from refrigerator housing (See Fig. 10). Fig. 10 Middle Hinge Bracket • Pry off...7). • Set freezer door and top hinge parts to do while the hinge is still attached. NOTE: This is easier to the side and remove refrigerator door. Fig. 8 Fig. 12 Hinge Pin Fig. 9 • Using 10 mm or 13/32 inch socket wrench with 2 inch extension, loosen the...
...the opposite side of Base Grille"). • Remove the washer from right side of refrigerator housing (See Fig. 13). 13 Reversing and Reinstalling Refrigerator Door • Using a 1/4 inch socket wrench, loosen and remove hinge pin from refrigerator housing (See Fig. 10). Fig. 10 Middle Hinge Bracket • Pry off...7). • Set freezer door and top hinge parts to do while the hinge is still attached. NOTE: This is easier to the side and remove refrigerator door. Fig. 8 Fig. 12 Hinge Pin Fig. 9 • Using 10 mm or 13/32 inch socket wrench with 2 inch extension, loosen the...

Owner's Manual
Page 14
...Hinge Pin Insert • Move the Bottom Hinge to door (Fig. 18). NOTE: The Refrigerator door closer (stop) is now ready for the Bottom Hinge. Line up screw holes and ...the other two screws to hole on all models. Hinge Pin Insert Hinge Pin Bracket Fig. 18 • Turn refrigerator door upside down on a nonscratching surface. • With door upside down, loosen the 2 screws and remove the... (stop and flip (See Fig. 19). Turn door upright. It is not used on lower right side of refrigerator (See Fig. 14). Fig. 19 Door Closer (Stop) 14 Fig. 15 • Place Hinge Pin Insert ...
...Hinge Pin Insert • Move the Bottom Hinge to door (Fig. 18). NOTE: The Refrigerator door closer (stop) is now ready for the Bottom Hinge. Line up screw holes and ...the other two screws to hole on all models. Hinge Pin Insert Hinge Pin Bracket Fig. 18 • Turn refrigerator door upside down on a nonscratching surface. • With door upside down, loosen the 2 screws and remove the... (stop and flip (See Fig. 19). Turn door upright. It is not used on lower right side of refrigerator (See Fig. 14). Fig. 19 Door Closer (Stop) 14 Fig. 15 • Place Hinge Pin Insert ...

Owner's Manual
Page 15
...Hinge Bracket • Place Decorative Screw into outer hole on right side of housing (Fig. 23). • Attach cover on the left side of refrigerator housing (Fig. 20). Fig. 25 • Tighten bolts. Fig. 20 Fig. 23 Decorative Screw • Remove the outer lower Decorative Screw ...from housing at area between refrigerator door and middle hinge and re-attach Hinge Pin to replace Hinge (Fig. 25). REFRIGERATOR INSTALLATION • With flat-head screwdriver, carefully pry off and remove the cover over the screw...
...Hinge Bracket • Place Decorative Screw into outer hole on right side of housing (Fig. 23). • Attach cover on the left side of refrigerator housing (Fig. 20). Fig. 25 • Tighten bolts. Fig. 20 Fig. 23 Decorative Screw • Remove the outer lower Decorative Screw ...from housing at area between refrigerator door and middle hinge and re-attach Hinge Pin to replace Hinge (Fig. 25). REFRIGERATOR INSTALLATION • With flat-head screwdriver, carefully pry off and remove the cover over the screw...

Owner's Manual
Page 16
...bolts. 4.Replace the Top Hinge Cover. 1. It may take several more easily, simply adjust the inclination of refrigerator) NOTE: Having someone hold the freezer door so the space between your refrigerator seems unstable or if you should be leveled. It may take several turns to align the doors: 1. ...again and check to make sure that they close more turns, and you would like the doors to aid in door closing. Plug the refrigerator into its final position. 2.Remove the base grille (Refer to the section on the corners of top to compensate for unevenness of Base ...
...bolts. 4.Replace the Top Hinge Cover. 1. It may take several more easily, simply adjust the inclination of refrigerator) NOTE: Having someone hold the freezer door so the space between your refrigerator seems unstable or if you should be leveled. It may take several turns to align the doors: 1. ...again and check to make sure that they close more turns, and you would like the doors to aid in door closing. Plug the refrigerator into its final position. 2.Remove the base grille (Refer to the section on the corners of top to compensate for unevenness of Base ...

Owner's Manual
Page 17
...the middle setting (number 2). As shown in one section will transfer to reach the correct temperature. ADJUSTING THE CONTROLS • Your refrigerator has two controls that allow you wrap or cover foods tightly (See the "Food Storage Guide" section for 24 hours to the ... below the freezer floor and the rest of food, make sure you to regulate the temperature the freezer and refrigerator compartments. • Refrigerator Control Initially set the refrigerator compartment temperature to a warmer temperature than necessary, freezer door may get open and close the fresh food compartment...
...the middle setting (number 2). As shown in one section will transfer to reach the correct temperature. ADJUSTING THE CONTROLS • Your refrigerator has two controls that allow you wrap or cover foods tightly (See the "Food Storage Guide" section for 24 hours to the ... below the freezer floor and the rest of food, make sure you to regulate the temperature the freezer and refrigerator compartments. • Refrigerator Control Initially set the refrigerator compartment temperature to a warmer temperature than necessary, freezer door may get open and close the fresh food compartment...

Owner's Manual
Page 18
...: For more cold air in original airtight, moisture-proof packaging. Packaging A great freezing depends on how great you are ready to the refrigerator. When you are ready to use it. It is incorrectly sealed will result in a paper bag closed compartment. Remove any ) or...material unless otherwise noted. FREEZER section is too warm or too cold, then adjust the freezer control as the thermostat for normal household refrigerator usage. Leftovers Cover leftovers with skins (carrots, peppers) Place in the previous section should be stored consult a frozen food guide or ...
...: For more cold air in original airtight, moisture-proof packaging. Packaging A great freezing depends on how great you are ready to the refrigerator. When you are ready to use it. It is incorrectly sealed will result in a paper bag closed compartment. Remove any ) or...material unless otherwise noted. FREEZER section is too warm or too cold, then adjust the freezer control as the thermostat for normal household refrigerator usage. Leftovers Cover leftovers with skins (carrots, peppers) Place in the previous section should be stored consult a frozen food guide or ...

Owner's Manual
Page 19
... with hot or warm water. Do not inhale these packaging or container instructions in order to reach the best freezing REFRIGERATOR SECTION REFRIGERATOR SHELVES The shelving of your package have in can include glass shelving or wired shelving. The glass shelving may explode after...necessities; NOTE: Let warm foods cool off before you energy. IMPORTANT: While your safety the glass shelving are heavy. For your refrigerator glass shelving are normal it produces oxygen, causing dizziness, slight headaches, unconsciousness or death. By letting your warm foods cool off...
... with hot or warm water. Do not inhale these packaging or container instructions in order to reach the best freezing REFRIGERATOR SECTION REFRIGERATOR SHELVES The shelving of your package have in can include glass shelving or wired shelving. The glass shelving may explode after...necessities; NOTE: Let warm foods cool off before you energy. IMPORTANT: While your safety the glass shelving are heavy. For your refrigerator glass shelving are normal it produces oxygen, causing dizziness, slight headaches, unconsciousness or death. By letting your warm foods cool off...

Owner's Manual
Page 20
.... To remove the crisper cover • Remove both crispers. • While holding it back in fully past the drawer stop. Removing the Fixed Refrigerator Rack • Remove the content from a metal frame • Pull the shelf until it stops. • Incline the front of the shelf... support, pull the cover up and out. For a better conservation of the fruits allow the maximum air in the drawer. FIXED REFRIGERATOR RACK The fixed refrigerator racks is removable for easy cleaning and adjusting. For better preservation of vegetables allow air to remove a shelf from the rack. &#...
.... To remove the crisper cover • Remove both crispers. • While holding it back in fully past the drawer stop. Removing the Fixed Refrigerator Rack • Remove the content from a metal frame • Pull the shelf until it stops. • Incline the front of the shelf... support, pull the cover up and out. For a better conservation of the fruits allow the maximum air in the drawer. FIXED REFRIGERATOR RACK The fixed refrigerator racks is removable for easy cleaning and adjusting. For better preservation of vegetables allow air to remove a shelf from the rack. &#...

Owner's Manual
Page 21
... are removable for long time. 1 2 WARNING: Somebody can dispenser, slide it in above the desired location and push down until it stops (2). 1 Replacing the Fixed Refrigerator Rack • Hold the rack's edge against the door's inner wall. • Press the rack until it stops (2). USING YOUR... REFRIGERATOR CAN DISPENSER (in some models) • To remove the can dispenser, simply lift it and pull 2 straight out (1). • To replace the can be difficult ...
... are removable for long time. 1 2 WARNING: Somebody can dispenser, slide it in above the desired location and push down until it stops (2). 1 Replacing the Fixed Refrigerator Rack • Hold the rack's edge against the door's inner wall. • Press the rack until it stops (2). USING YOUR... REFRIGERATOR CAN DISPENSER (in some models) • To remove the can dispenser, simply lift it and pull 2 straight out (1). • To replace the can be difficult ...


