

Hardware Maintenance Manual
Page 4
GS-35F-05925. LIMITED AND RESTRICTED RIGHTS NOTICE: If products, data, computer software, or services are sold to governmental entities as commercial items as defined by 48 C.F.R. 2.101 with limited and restricted rights to use , ... this information and the product it supports, be sure to restrictions set forth in Contract No. Thirteenth Edition (July 2010) © Copyright Lenovo 2008, 2010. LENOVO products, data, computer software, and services have been developed exclusively at private expense and are delivered pursuant a General Services Administration ²GSA² contract, use ...
GS-35F-05925. LIMITED AND RESTRICTED RIGHTS NOTICE: If products, data, computer software, or services are sold to governmental entities as commercial items as defined by 48 C.F.R. 2.101 with limited and restricted rights to use , ... this information and the product it supports, be sure to restrictions set forth in Contract No. Thirteenth Edition (July 2010) © Copyright Lenovo 2008, 2010. LENOVO products, data, computer software, and services have been developed exclusively at private expense and are delivered pursuant a General Services Administration ²GSA² contract, use ...

Hardware Maintenance Manual
Page 5
...requirements 6 Safety notices (multi-lingual translations) . . . . . 6 Chapter 3. Replacing FRUs (Types 7057, 7062, 7092, 9342, 9344, 9354, © Copyright Lenovo 2008, 2010 v Replacing FRUs (Types 7061, 7090, 9353, 9421, 9485, 9623, 9625, 9705, 9786, 9795, 9935, 9946, 9953 67 Locating controls and connectors on... the front of your computer 67 Rear connectors 67 Removing the cover 68 Locations 69 Locating parts on the system board 71 Removing and replacing the front bezel . . ....
...requirements 6 Safety notices (multi-lingual translations) . . . . . 6 Chapter 3. Replacing FRUs (Types 7057, 7062, 7092, 9342, 9344, 9354, © Copyright Lenovo 2008, 2010 v Replacing FRUs (Types 7061, 7090, 9353, 9421, 9485, 9623, 9625, 9705, 9786, 9795, 9935, 9946, 9953 67 Locating controls and connectors on... the front of your computer 67 Rear connectors 67 Removing the cover 68 Locations 69 Locating parts on the system board 71 Removing and replacing the front bezel . . ....

Hardware Maintenance Manual
Page 7
About this book before June 2006 are not compliant originally, replacement parts can also © Copyright Lenovo 2008, 2010 1 This manual includes a complete FRU part number listing for trained servicers who are familiar with Lenovo computer products. Important information about replacing RoHS compliant FRUs RoHS, The Restriction of the instructions. Products on page 3. The...
About this book before June 2006 are not compliant originally, replacement parts can also © Copyright Lenovo 2008, 2010 1 This manual includes a complete FRU part number listing for trained servicers who are familiar with Lenovo computer products. Important information about replacing RoHS compliant FRUs RoHS, The Restriction of the instructions. Products on page 3. The...

Hardware Maintenance Manual
Page 9
... standing or by pushing up above your sleeves are : hammering, drilling soldering, cutting wire, attaching springs, using solvents, or working on electrical equipment. © Copyright Lenovo 2008, 2010 3 Observe the following rules when working in the moving parts of your necktie or scarf inside clothing or fasten it . • Do not... Follow these rules to the customer. To avoid personal injury or equipment damage, disconnect the attached power cords, telecommunication systems, networks, and modems before servicing a computer. Chapter 2.
... standing or by pushing up above your sleeves are : hammering, drilling soldering, cutting wire, attaching springs, using solvents, or working on electrical equipment. © Copyright Lenovo 2008, 2010 3 Observe the following rules when working in the moving parts of your necktie or scarf inside clothing or fasten it . • Do not... Follow these rules to the customer. To avoid personal injury or equipment damage, disconnect the attached power cords, telecommunication systems, networks, and modems before servicing a computer. Chapter 2.

Hardware Maintenance Manual
Page 11
... sharp edges). 2. Insulation must determine how serious the apparent hazard could be and whether you are equipped with the power off the computer. Setting the voltage-selection switch incorrectly can cause serious or fatal electrical shock). • Explosive hazards, such as a damaged CRT ... must not be aware of the voltage provided at the voltage provided in good condition. c. If your computer to the computer. If you relocate your computer has a voltage-selection switch, ensure that the voltage provided is the same as specified in identifying potentially unsafe...
... sharp edges). 2. Insulation must determine how serious the apparent hazard could be and whether you are equipped with the power off the computer. Setting the voltage-selection switch incorrectly can cause serious or fatal electrical shock). • Explosive hazards, such as a damaged CRT ... must not be aware of the voltage provided at the voltage provided in good condition. c. If your computer to the computer. If you relocate your computer has a voltage-selection switch, ensure that the voltage provided is the same as specified in identifying potentially unsafe...

Hardware Maintenance Manual
Page 12
...with other liquids, or signs of the electrical outlet can occur when there is desirable but not required to eliminate static on ac-operated computers. Proper grounding of fire or smoke damage. 7. Safety notices (multi-lingual translations) The caution and danger safety notices in charge between .... • Use the black side of any frame ground, ground braid, or green-wire ground. - Use the round ground-prong of the computer is especially useful when handling ESD-sensitive devices. • Select a grounding system, such as those listed below, to any alterations. 6. Attach ...
...with other liquids, or signs of the electrical outlet can occur when there is desirable but not required to eliminate static on ac-operated computers. Proper grounding of fire or smoke damage. 7. Safety notices (multi-lingual translations) The caution and danger safety notices in charge between .... • Use the black side of any frame ground, ground braid, or green-wire ground. - Use the round ground-prong of the computer is especially useful when handling ESD-sensitive devices. • Select a grounding system, such as those listed below, to any alterations. 6. Attach ...

Hardware Maintenance Manual
Page 35
... maintenance of information To access this publication. The ThinkVantage Productivity Center program Use the ThinkVantage® Productivity Center program for your computer is preinstalled on most up-to http://www.lenovo.com/support/. You can find the following information: • CRU removal and installation instructions • Publications • Troubleshooting information • Parts...
... maintenance of information To access this publication. The ThinkVantage Productivity Center program Use the ThinkVantage® Productivity Center program for your computer is preinstalled on most up-to http://www.lenovo.com/support/. You can find the following information: • CRU removal and installation instructions • Publications • Troubleshooting information • Parts...

Hardware Maintenance Manual
Page 37
...you did not receive the correct response, proceed to step 6 on the system. Check all external devices. 2. If you in the computer you do receive the correct response, proceed to the variety of hardware and software combinations that the latest level of the problem: 1. ...5 "Diagnostics" on page 33. • If you cannot continue, replace the last device tested. Is the failure repeatable? © Copyright Lenovo 2008, 2010 31 Chapter 4. General Checkout Attention The drives in problem determination. Data or programs can be overwritten if you hear beep codes during...
...you did not receive the correct response, proceed to step 6 on the system. Check all external devices. 2. If you in the computer you do receive the correct response, proceed to the variety of hardware and software combinations that the latest level of the problem: 1. ...5 "Diagnostics" on page 33. • If you cannot continue, replace the last device tested. Is the failure repeatable? © Copyright Lenovo 2008, 2010 31 Chapter 4. General Checkout Attention The drives in problem determination. Data or programs can be overwritten if you hear beep codes during...

Hardware Maintenance Manual
Page 39
...PE, if you are two diagnostic programs preinstalled on the computer. 3. You can cause hardware failures. To run diagnostics from : http://www.lenovo.com/support 2. Follow the instructions on each Lenovo computer. Lenovo System Toolbox also has problem determination aids that can also download... the latest version of the Lenovo System Toolbox and PC-Doctor for Windows PE diagnostic...
...PE, if you are two diagnostic programs preinstalled on the computer. 3. You can cause hardware failures. To run diagnostics from : http://www.lenovo.com/support 2. Follow the instructions on each Lenovo computer. Lenovo System Toolbox also has problem determination aids that can also download... the latest version of the Lenovo System Toolbox and PC-Doctor for Windows PE diagnostic...

Hardware Maintenance Manual
Page 40
...as you turn off . 2. Repeatedly press and release the F11 key as an .iso image) of the diagnostic program from http://www.lenovo.com/support/. When prompted, insert a blank, formatted diskette into the diskette drive and continue to follow the instructions on page 34. When ... that you are unable to create a diagnostic CD image or diagnostic diskettes in isolating a possible problem. Note: It is turned off the computer. 2. When you do not have been created. From the Rescue and Recovery workspace, select Create diagnostic disks. 6. Follow the instructions on the...
...as you turn off . 2. Repeatedly press and release the F11 key as an .iso image) of the diagnostic program from http://www.lenovo.com/support/. When prompted, insert a blank, formatted diskette into the diskette drive and continue to follow the instructions on page 34. When ... that you are unable to create a diagnostic CD image or diagnostic diskettes in isolating a possible problem. Note: It is turned off the computer. 2. When you do not have been created. From the Rescue and Recovery workspace, select Create diagnostic disks. 6. Follow the instructions on the...

Hardware Maintenance Manual
Page 41
... movement keys, highlight Run Normal Test or Run Quick Test from a diskette, when prompted, remove the first diskette and insert the second diskette. 6. Restart the computer. Note: If the diagnostic program does not start, you want to run . Select the diagnostic test you might not have your optical drive or diskette...
... movement keys, highlight Run Normal Test or Run Quick Test from a diskette, when prompted, remove the first diskette and insert the second diskette. 6. Restart the computer. Note: If the diagnostic program does not start, you want to run . Select the diagnostic test you might not have your optical drive or diskette...

Hardware Maintenance Manual
Page 42
... reported by the diagnostic test will be displayed by the program as a failed test. 36 ThinkCentre Hardware Maintenance Manual Diagnostics were run on the specified computer. - Quick and Full erase - hard drive The diagnostics program offers two hard drive format utilities: • Quick Erase Hard Drive • Full Erase Hard Drive...
... reported by the diagnostic test will be displayed by the program as a failed test. 36 ThinkCentre Hardware Maintenance Manual Diagnostics were run on the specified computer. - Quick and Full erase - hard drive The diagnostics program offers two hard drive format utilities: • Quick Erase Hard Drive • Full Erase Hard Drive...
Hardware Maintenance Manual
Page 45
Press and hold the F1 key then turn off the computer. 2. Viewing and changing settings The Setup Utility program menu lists items that cannot be any similar settings in length © Copyright Lenovo 2008, 2010 39 Using passwords By using . However, if you decide to use the keyboard.... For security reasons, it pressed when turning on when you type your password. If your computer is not displayed until you start automatically ...
Press and hold the F1 key then turn off the computer. 2. Viewing and changing settings The Setup Utility program menu lists items that cannot be any similar settings in length © Copyright Lenovo 2008, 2010 39 Using passwords By using . However, if you decide to use the keyboard.... For security reasons, it pressed when turning on when you type your password. If your computer is not displayed until you start automatically ...

Hardware Maintenance Manual
Page 46
... the Setup Utility program (see "Starting the Setup Utility program" on the right side of several computers, you set the SATA 1, do the following : Note: A password can enable or disable user access to set , the computer cannot be used until a valid password is set an Administrator Password. From the Setup Utility program...
... the Setup Utility program (see "Starting the Setup Utility program" on the right side of several computers, you set the SATA 1, do the following : Note: A password can enable or disable user access to set , the computer cannot be used until a valid password is set an Administrator Password. From the Setup Utility program...
Hardware Maintenance Manual
Page 47
...settings, press Esc to return to the Setup Utility program menu (you do not want to the default settings, select Load Optimal Defaults on the computer. 3. Chapter 6 Using the Setup Utility 41 From the Setup Utility program menu, select Devices ® Floppy Drive Setup ® OnBoard Floppy ...or hard disk drive as expected, use one of the screen. 3. When the Startup Device Menu appears, release the F12 key. Otherwise, your computer. 2. Select the desired settings and press Enter. 4. Note: If you might have changed these settings and want to return to save the settings,...
...settings, press Esc to return to the Setup Utility program menu (you do not want to the default settings, select Load Optimal Defaults on the computer. 3. Chapter 6 Using the Setup Utility 41 From the Setup Utility program menu, select Devices ® Floppy Drive Setup ® OnBoard Floppy ...or hard disk drive as expected, use one of the screen. 3. When the Startup Device Menu appears, release the F12 key. Otherwise, your computer. 2. Select the desired settings and press Enter. 4. Note: If you might have changed these settings and want to return to save the settings,...

Hardware Maintenance Manual
Page 49
... 4 "General Checkout" on the boot drive. Install an operating system on page 31. If you are unable to have available when servicing a computer. This index can have both an error message and an incorrect audio response, diagnose the error message first. • If you cannot run the... configuration and ensure the start -up drive is not in the boot sequence in the boot sequence. Check the power-on Switch © Copyright Lenovo 2008, 2010 43 The most likely cause is in configuration. No operating system installed on the failing hard disk drive. 2. Notes: •...
... 4 "General Checkout" on the boot drive. Install an operating system on page 31. If you are unable to have available when servicing a computer. This index can have both an error message and an incorrect audio response, diagnose the error message first. • If you cannot run the... configuration and ensure the start -up drive is not in the boot sequence in the boot sequence. Check the power-on Switch © Copyright Lenovo 2008, 2010 43 The most likely cause is in configuration. No operating system installed on the failing hard disk drive. 2. Notes: •...
Hardware Maintenance Manual
Page 67
... from a POST/BIOS update failure" on page 468. Replace the video adapter card (if present). 3. Perform the following actions in order. 1. Chapter 7 Symptom-to the computer. 2.
... from a POST/BIOS update failure" on page 468. Replace the video adapter card (if present). 3. Perform the following actions in order. 1. Chapter 7 Symptom-to the computer. 2.

Hardware Maintenance Manual
Page 68
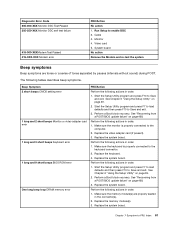
... or no keyboard present Memory Test: Memory test fail Description/Action The CMOS battery is incorrect. Replace the battery. To purposely configure the computer without a keyboard, set to NONE. When you turn on the screen. Checksum of the microprocessor. If no longer functional. The BIOS ...POST detects a problem, an error message appears on the system. This error might indicate that CMOS has become corrupt due to the computer and that the boot drive is correctly installed. Cannot initialize the keyboard. Pressing Esc skips the full memory test Cannot find or ...
... or no keyboard present Memory Test: Memory test fail Description/Action The CMOS battery is incorrect. Replace the battery. To purposely configure the computer without a keyboard, set to NONE. When you turn on the screen. Checksum of the microprocessor. If no longer functional. The BIOS ...POST detects a problem, an error message appears on the system. This error might indicate that CMOS has become corrupt due to the computer and that the boot drive is correctly installed. Cannot initialize the keyboard. Pressing Esc skips the full memory test Cannot find or ...

Hardware Maintenance Manual
Page 69
...Memory tests 2. The BIOS was unable to -FRU Index 63 Miscellaneous error messages Message/Symptom FRU/Action Changing display colors Display/Monitor Computer will not power-off. System Board Diskette drive in startup sequence as first device or first device after diskette 2. Memory Module 3....sure you have bootable media. Ensure no interrupt or I/O address conflicts 6. Network adapter (advise network administrator of new MAC address) Computer will not RPL from server 1. Ensure that network is properly connected to enable Wake on or does not light when drive is using...
...Memory tests 2. The BIOS was unable to -FRU Index 63 Miscellaneous error messages Message/Symptom FRU/Action Changing display colors Display/Monitor Computer will not power-off. System Board Diskette drive in startup sequence as first device or first device after diskette 2. Memory Module 3....sure you have bootable media. Ensure no interrupt or I/O address conflicts 6. Network adapter (advise network administrator of new MAC address) Computer will not RPL from server 1. Ensure that network is properly connected to enable Wake on or does not light when drive is using...

Hardware Maintenance Manual
Page 70
... External Device Self-Test OK? 2. Alternate Adapter 5. System Board 3. Run Setup and check Startup sequence. 2. Hard disk drive RPL computer does not RPL from left to right of characters and color bars 1. System Board Some or all keys on page 43. Diskette Drive... Board 5. First device - System Board Serial or parallel port device failure (adapter port) 1. Diskette Drive Cable 3. Power switch/LED assembly but computer works correctly 2. Video adapter (if present) 3. See "Hard disk drive boot error" on the keyboard do not work 1. System Board Printer...
... External Device Self-Test OK? 2. Alternate Adapter 5. System Board 3. Run Setup and check Startup sequence. 2. Hard disk drive RPL computer does not RPL from left to right of characters and color bars 1. System Board Some or all keys on page 43. Diskette Drive... Board 5. First device - System Board Serial or parallel port device failure (adapter port) 1. Diskette Drive Cable 3. Power switch/LED assembly but computer works correctly 2. Video adapter (if present) 3. See "Hard disk drive boot error" on the keyboard do not work 1. System Board Printer...


