
User Manual
Page 3
...169; Copyright Lenovo 2009. Getting started 1-1 Shipping contents ...1-1 Attaching the base and handling your monitor ...1-1 Product ...monitor ...1-3 Connecting and turning on your monitor ...1-3 Registering your monitor ...2-8 Detaching the monitor stand ...2-9 Wall Mounting (Optional) ...2-9 Chapter 3. Service and Support A-1 Registering your option ...A-1 Online technical support ...A-1 Telephone technical support ...A-1 Appendix B. ii Reference information 3-1 Monitor specifications ...3-1 Troubleshooting ...3-3 Manual image setup ...3-4 Manually installing the monitor driver...
...169; Copyright Lenovo 2009. Getting started 1-1 Shipping contents ...1-1 Attaching the base and handling your monitor ...1-1 Product ...monitor ...1-3 Connecting and turning on your monitor ...1-3 Registering your monitor ...2-8 Detaching the monitor stand ...2-9 Wall Mounting (Optional) ...2-9 Chapter 3. Service and Support A-1 Registering your option ...A-1 Online technical support ...A-1 Telephone technical support ...A-1 Appendix B. ii Reference information 3-1 Monitor specifications ...3-1 Troubleshooting ...3-3 Manual image setup ...3-4 Manually installing the monitor driver...

User Manual
Page 5
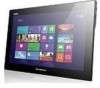
... the screen area. Getting started This User's Guide contains detailed information on page 2-9. © Copyright Lenovo 2009. 1-1 Chapter 1. Shipping contents The product package should include the following items: · Setup Poster · Monitor Safety, Troubleshooting, and Warranty Guide · Reference and Driver CD · ThinkVision L1711p Flat Panel Monitor · Power Cord · Analog Signal Cable -
... the screen area. Getting started This User's Guide contains detailed information on page 2-9. © Copyright Lenovo 2009. 1-1 Chapter 1. Shipping contents The product package should include the following items: · Setup Poster · Monitor Safety, Troubleshooting, and Warranty Guide · Reference and Driver CD · ThinkVision L1711p Flat Panel Monitor · Power Cord · Analog Signal Cable -

User Manual
Page 10
... the Automatic Image Setup key. See "Manual image setup" on -screen instructions. To install the monitor driver, insert the Reference and Driver CD, click Install driver, and follow the on page 3-4. 1-6 L1711p Flat Panel Monitor User's Guide To optimize your monitor image, if using the DVI cable. Note: If automatic image setup does not establish the image...
... the Automatic Image Setup key. See "Manual image setup" on -screen instructions. To install the monitor driver, insert the Reference and Driver CD, click Install driver, and follow the on page 3-4. 1-6 L1711p Flat Panel Monitor User's Guide To optimize your monitor image, if using the DVI cable. Note: If automatic image setup does not establish the image...

User Manual
Page 21
... the power supply combined. Monitor specifications Table 3-1. Chapter 3. Video input (Analog) Video input (Digital) Viewable image size Maximum height Maximum width Pixel pitch Supply voltage Max supply current Normal operation ..., 75 ohm 0.7 V 1280 pixels (max) 1024 lines (max) 165 MHz DVI VESA TMDS (Panel Link.) 1280 pixels (max) 1024 lines (max) 165 MHz © Copyright Lenovo 2009. 3-1 Reference information This section contains monitor specifications, instructions to manually install the monitor driver, troubleshooting information, and service information.
... the power supply combined. Monitor specifications Table 3-1. Chapter 3. Video input (Analog) Video input (Digital) Viewable image size Maximum height Maximum width Pixel pitch Supply voltage Max supply current Normal operation ..., 75 ohm 0.7 V 1280 pixels (max) 1024 lines (max) 165 MHz DVI VESA TMDS (Panel Link.) 1280 pixels (max) 1024 lines (max) 165 MHz © Copyright Lenovo 2009. 3-1 Reference information This section contains monitor specifications, instructions to manually install the monitor driver, troubleshooting information, and service information.
User Manual
Page 25
... drive). 14. Installing the monitor driver in Windows Vista To install the monitor driver in light picture. 4. Open the "Update Driver Software-Generic PnP Monitor" window by one horizontal sweep. Select the "L1711pC.inf" file and click the Open button. Insert Lenovo Monitor CD into Windows Vista operating ...system. 4. Press to the following : 1. Then click the Driver tab. 11. Click Start Control Panel, and then click the Hardware and Sound icon...
... drive). 14. Installing the monitor driver in Windows Vista To install the monitor driver in light picture. 4. Open the "Update Driver Software-Generic PnP Monitor" window by one horizontal sweep. Select the "L1711pC.inf" file and click the Open button. Insert Lenovo Monitor CD into Windows Vista operating ...system. 4. Press to the following : 1. Then click the Driver tab. 11. Click Start Control Panel, and then click the Hardware and Sound icon...

User Manual
Page 26
...Monitor tab. 8. Lenovo recommends using either 1280 x 1024 at a refresh rate of 60 Hz, or 640 x 480 at a refresh rate of 60 Hz. 3-6 L1711p Flat Panel Monitor User's Guide Select "Don't search. and then click Next. 11. Note: On LCD monitors, unlike CRTs, a faster refresh rate does not improve display quality. Installing the monitor driver... XP. 4. Click on the Update Driver, If appears "Can Windows connect to your hard disk drive. 16. Select Lenovo L1711pC and click Next. Click the Drivers tab. 10. Note: On LCD monitors, unlike CRTs, a faster refresh rate...
...Monitor tab. 8. Lenovo recommends using either 1280 x 1024 at a refresh rate of 60 Hz, or 640 x 480 at a refresh rate of 60 Hz. 3-6 L1711p Flat Panel Monitor User's Guide Select "Don't search. and then click Next. 11. Note: On LCD monitors, unlike CRTs, a faster refresh rate does not improve display quality. Installing the monitor driver... XP. 4. Click on the Update Driver, If appears "Can Windows connect to your hard disk drive. 16. Select Lenovo L1711pC and click Next. Click the Drivers tab. 10. Note: On LCD monitors, unlike CRTs, a faster refresh rate...

User Manual
Page 27
... the system. Click the Advanced Settings. 6. Note: On LCD monitors, unlike CRTs, a faster refresh rate does not improve display quality. Click on the Browse button and navigate to the following directory: X:\Monitor Drivers (where X is connected correctly. 3. Reference information 3-7 Turn on the OK button. 13. Lenovo recommends using either 1280 x 1024 at a refresh rate of...
... the system. Click the Advanced Settings. 6. Note: On LCD monitors, unlike CRTs, a faster refresh rate does not improve display quality. Click on the Browse button and navigate to the following directory: X:\Monitor Drivers (where X is connected correctly. 3. Reference information 3-7 Turn on the OK button. 13. Lenovo recommends using either 1280 x 1024 at a refresh rate of...


