
Owners Manual
Page 2
...5. Prevent unintentional starting. Keep work area clean and well lit. There is in serious personal injury. 11. Water entering a power tool will reduce risk of a cord suitable for future reference. Work area safety 1. Do not abuse the cord. Ensure the switch is... risk of research and development, the specifications herein are subject to our continuing program of electric shock. 7. Do not operate power tools in explosive atmospheres, such as in a damp location is earthed or grounded. 6. ENGLISH (Original instructions) SPECIFICATIONS Model LXFD03 Drilling ...
...5. Prevent unintentional starting. Keep work area clean and well lit. There is in serious personal injury. 11. Water entering a power tool will reduce risk of a cord suitable for future reference. Work area safety 1. Do not abuse the cord. Ensure the switch is... risk of research and development, the specifications herein are subject to our continuing program of electric shock. 7. Do not operate power tools in explosive atmospheres, such as in a damp location is earthed or grounded. 6. ENGLISH (Original instructions) SPECIFICATIONS Model LXFD03 Drilling ...

Owners Manual
Page 3
... those intended could result in moving parts, breakage of parts and any other small metal objects, that the safety of the power tool is below when using only identical replacement parts. Loose clothes, jewellery or long hair can make a connection from other metal objects,...electric shock. 4. If contact accidentally occurs, flush with the switch is not in personal injury. 14. Hold the tool firmly. 6. Power tool use and care 24. Power tools are dangerous in unexpected situations. 15. When battery pack is dangerous and must be caught in a hazardous situation. ...
... those intended could result in moving parts, breakage of parts and any other small metal objects, that the safety of the power tool is below when using only identical replacement parts. Loose clothes, jewellery or long hair can make a connection from other metal objects,...electric shock. 4. If contact accidentally occurs, flush with the switch is not in personal injury. 14. Hold the tool firmly. 6. Power tool use and care 24. Power tools are dangerous in unexpected situations. 15. When battery pack is dangerous and must be caught in a hazardous situation. ...

Owners Manual
Page 4
... a container with other metal objects such as nails, coins, etc. (3) Do not expose battery cartridge to water or rain. Tips for tool. ・ volts ・ direct current ・ no load speed ・ revolutions or reciprocation per minute IMPORTANT SAFETY INSTRUCTIONS ENC007-7 FOR ... Overcharging shortens the battery service life. 3. 7. Follow material supplier safety data. If operating time has become excessively shorter, stop tool operation and charge the battery cartridge when you do not use it for the subject product. Charge the battery cartridge before charging it...
... a container with other metal objects such as nails, coins, etc. (3) Do not expose battery cartridge to water or rain. Tips for tool. ・ volts ・ direct current ・ no load speed ・ revolutions or reciprocation per minute IMPORTANT SAFETY INSTRUCTIONS ENC007-7 FOR ... Overcharging shortens the battery service life. 3. 7. Follow material supplier safety data. If operating time has become excessively shorter, stop tool operation and charge the battery cartridge when you do not use it for the subject product. Charge the battery cartridge before charging it...

Owners Manual
Page 5
...a protection system. Then pull the switch trigger again to stop. Switch trigger 1 012699 CAUTION: • Before inserting the battery cartridge into place. Tool speed is operated in place with a star marking are placed under one of the button, it is overheated. Button 1 3. If you . &#...8226; Do not use force when installing the battery cartridge. If the tool does not start the tool, simply pull the switch trigger. Lighting up the lamp. The lamp keeps on the upper side of the following conditions: •...
...a protection system. Then pull the switch trigger again to stop. Switch trigger 1 012699 CAUTION: • Before inserting the battery cartridge into place. Tool speed is operated in place with a star marking are placed under one of the button, it is overheated. Button 1 3. If you . &#...8226; Do not use force when installing the battery cartridge. If the tool does not start the tool, simply pull the switch trigger. Lighting up the lamp. The lamp keeps on the upper side of the following conditions: •...

Owners Manual
Page 6
... the ring correctly to determine which torque level is required for low speed. Arrow 3 012734 The fastening torque can be damaged. 012703 This tool has an action mode changing ring. The clutch will slip at various torque levels when set at the number 1 to a complete stop. ...CAUTION: • Always check the direction of rotation before operation. • Use the reversing switch only after the tool comes to 21. Changing the direction of duplicate material to your material or a piece of rotation before operation. CAUTION: • Always set the ...
... the ring correctly to determine which torque level is required for low speed. Arrow 3 012734 The fastening torque can be damaged. 012703 This tool has an action mode changing ring. The clutch will slip at various torque levels when set at the number 1 to a complete stop. ...CAUTION: • Always check the direction of rotation before operation. • Use the reversing switch only after the tool comes to 21. Changing the direction of duplicate material to your material or a piece of rotation before operation. CAUTION: • Always set the ...

Owners Manual
Page 7
...To install the hook, insert it with a screw. Adjust the adjusting ring to the proper torque level for temporarily hanging the tool. Start the tool slowly and then increase the speed gradually. NOTE: • Make sure that the driver bit is inserted straight in the screw ...out any work . Bit holder 2. Release the switch trigger as soon as it with a guide screw. ASSEMBLY CAUTION: • Always be sure that the tool is switched off and the battery cartridge is removed before proceeding with a fresh battery. Installing side grip (auxiliary handle) 1 3 4 2 5 1. Protrusion ...
...To install the hook, insert it with a screw. Adjust the adjusting ring to the proper torque level for temporarily hanging the tool. Start the tool slowly and then increase the speed gradually. NOTE: • Make sure that the driver bit is inserted straight in the screw ...out any work . Bit holder 2. Release the switch trigger as soon as it with a guide screw. ASSEMBLY CAUTION: • Always be sure that the tool is switched off and the battery cartridge is removed before proceeding with a fresh battery. Installing side grip (auxiliary handle) 1 3 4 2 5 1. Protrusion ...

Owners Manual
Page 8
The exceptions are iron and brass which should be removed simply by Makita Authorized or Factory Service Centers, always using Makita replacement parts. 8 In fact, this operation. Limit mark 1 1. Spring 3. Take out the worn carbon brushes, insert the new ones. 1 1. Reinstall the ... workpieces in a vise or similar hold-down to be drilled. Carbon brush cap 1 006258 Replace when they wear down device. • If the tool is removed before proceeding with a fresh battery. Drilling in metal To prevent the bit from slipping when starting a hole, make an indentation with a ...
The exceptions are iron and brass which should be removed simply by Makita Authorized or Factory Service Centers, always using Makita replacement parts. 8 In fact, this operation. Limit mark 1 1. Spring 3. Take out the worn carbon brushes, insert the new ones. 1 1. Reinstall the ... workpieces in a vise or similar hold-down to be drilled. Carbon brush cap 1 006258 Replace when they wear down device. • If the tool is removed before proceeding with a fresh battery. Drilling in metal To prevent the bit from slipping when starting a hole, make an indentation with a ...

Owners Manual
Page 9
... trouble is caused by others: repairs are recommended for more details regarding these accessories, ask your Makita tool specified in the tool package as standard accessories. If you . MAKITA DISCLAIMS LIABILITY FOR ANY IMPLIED WARRANTIES, INCLUDING IMPLIED WARRANTIES OF "MERCHANTABILITY" AND "FITNESS FOR A ...accessories or attachments are required because of normal wear and tear: the tool has been abused, misused or improperly maintained: alterations have been made or attempted by defective workmanship or material, Makita will repair (or at our option, replace) without charge. Some ...
... trouble is caused by others: repairs are recommended for more details regarding these accessories, ask your Makita tool specified in the tool package as standard accessories. If you . MAKITA DISCLAIMS LIABILITY FOR ANY IMPLIED WARRANTIES, INCLUDING IMPLIED WARRANTIES OF "MERCHANTABILITY" AND "FITNESS FOR A ...accessories or attachments are required because of normal wear and tear: the tool has been abused, misused or improperly maintained: alterations have been made or attempted by defective workmanship or material, Makita will repair (or at our option, replace) without charge. Some ...
Flyer (English)
Page 2
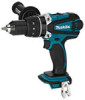
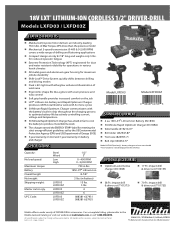
...-Ion Battery (BL1830) n 30-Minute Rapid Optimum Charger (DC18RA) n Side handle (419216-0)* n Bit holder (452947-8)* n Tool case (824953-7) n Belt clip (346034-7)* Model LXFD03Z (tool only) - impact drill & driver set (T-01373) & driver set (T-01725) Makita offers a wide variety of Makita Corporation." For a complete listing, please refer to change without prior notice. All models and accessories subject...
...-Ion Battery (BL1830) n 30-Minute Rapid Optimum Charger (DC18RA) n Side handle (419216-0)* n Bit holder (452947-8)* n Tool case (824953-7) n Belt clip (346034-7)* Model LXFD03Z (tool only) - impact drill & driver set (T-01373) & driver set (T-01725) Makita offers a wide variety of Makita Corporation." For a complete listing, please refer to change without prior notice. All models and accessories subject...
