Owners Manual
Page 4
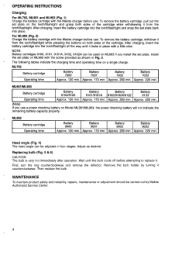
...ML702, ML901 and ML902 (Fig. 1) Charge the battery cartridge with a little click. After charging, insert the battery cartridge into the torch/flashlight all the way until the bulb cools off before use . NOTE: Battery cartridges 9100, 9101, 9101A, 9102, 9102A can be adjusted in place with the Makita...out the set plate. Head angle (Fig. 4) The head angle can be carried out by turning it from the torch/flashlight. Remove the bulb holder by Makita Authorized Service Center. 4 For ML903 (Fig. 2) Charge the battery cartridge with the screw provided as desired. To remove ...
...ML702, ML901 and ML902 (Fig. 1) Charge the battery cartridge with a little click. After charging, insert the battery cartridge into the torch/flashlight all the way until the bulb cools off before use . NOTE: Battery cartridges 9100, 9101, 9101A, 9102, 9102A can be adjusted in place with the Makita...out the set plate. Head angle (Fig. 4) The head angle can be carried out by turning it from the torch/flashlight. Remove the bulb holder by Makita Authorized Service Center. 4 For ML903 (Fig. 2) Charge the battery cartridge with the screw provided as desired. To remove ...