
Installation Instructions
Page 1
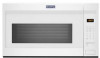
These installation instructions cover different models. Table of your particular model may differ slightly from the illustration in Rear Wall 8 Attach Mounting Plate to and including 36" (91.4 cm) wide. See the "Installation Requirements" section for wall venting only 10 Install the Microwave Oven 10 Complete Installation 11 VENTING DESIGN SPECIFICATIONS 12 ASSISTANCE 14...
These installation instructions cover different models. Table of your particular model may differ slightly from the illustration in Rear Wall 8 Attach Mounting Plate to and including 36" (91.4 cm) wide. See the "Installation Requirements" section for wall venting only 10 Install the Microwave Oven 10 Complete Installation 11 VENTING DESIGN SPECIFICATIONS 12 ASSISTANCE 14...

Installation Instructions
Page 2
...and weatherproof caulking compound ■ 3/4" (1.9 cm) hole saw ■ Duct tape Parts Needed For information on model, charcoal filters may be sure to exist above the microwave oven so that the door can grab the handle integrated inside the door. ■ Some cabinet and building ...outlet inside the perforation is at least 6" (15.2 cm) of clearance between the wall and the microwave oven so that the damper blade can open fully. ■ Some models have a pocket handle. For other damages. Read and follow the instructions provided with your builder or cabinet...
...and weatherproof caulking compound ■ 3/4" (1.9 cm) hole saw ■ Duct tape Parts Needed For information on model, charcoal filters may be sure to exist above the microwave oven so that the door can grab the handle integrated inside the door. ■ Some cabinet and building ...outlet inside the perforation is at least 6" (15.2 cm) of clearance between the wall and the microwave oven so that the damper blade can open fully. ■ Some models have a pocket handle. For other damages. Read and follow the instructions provided with your builder or cabinet...

Installation Instructions
Page 4
... plate vertically as shown. NOTE: To avoid damage to the microwave oven, and set aside. Wall Venting Installation Only A 1. A B A. A A. Damper plate B. A A. Connector 5. INSTALLATION INSTRUCTIONS Remove Mounting Plate Depending on your model, the mounting plate may be in the foam packaging, or... it aside. 3. Tape the microwave oven door closed so that the door does not swing open while the microwave oven is being handled. Keep the damper assembly in...
... plate vertically as shown. NOTE: To avoid damage to the microwave oven, and set aside. Wall Venting Installation Only A 1. A B A. A A. Damper plate B. A A. Connector 5. INSTALLATION INSTRUCTIONS Remove Mounting Plate Depending on your model, the mounting plate may be in the foam packaging, or... it aside. 3. Tape the microwave oven door closed so that the door does not swing open while the microwave oven is being handled. Keep the damper assembly in...

Installation Instructions
Page 10
Check that the damper blade hinge is being handled. Handle the microwave oven gently. 1. Remove the two packing spacers from the microwave oven. A A. If it does not have packing spaces, install your model, it may require bolts longer or shorter than 3" (7.6 cm). NOTE: If venting through the... wall, make sure the damper assembly fits easily into microwave oven. Using two or more people, lift microwave oven off of microwave oven still tilted, thread ...
Check that the damper blade hinge is being handled. Handle the microwave oven gently. 1. Remove the two packing spacers from the microwave oven. A A. If it does not have packing spaces, install your model, it may require bolts longer or shorter than 3" (7.6 cm). NOTE: If venting through the... wall, make sure the damper assembly fits easily into microwave oven. Using two or more people, lift microwave oven off of microwave oven still tilted, thread ...

Installation Instructions
Page 14
...our website listed in the "Tools and Parts" section) A A. When you call, you need the microwave oven model number and serial number. Accessories Filler Panel Kits are available from your model and serial numbers located on the front frame of the installation hardware needs to use when installing this... microwave oven in a 36" (91.4 cm) or 42" (106.7 cm) wide opening , behind the microwave oven door on the front facing of ...
...our website listed in the "Tools and Parts" section) A A. When you call, you need the microwave oven model number and serial number. Accessories Filler Panel Kits are available from your model and serial numbers located on the front frame of the installation hardware needs to use when installing this... microwave oven in a 36" (91.4 cm) or 42" (106.7 cm) wide opening , behind the microwave oven door on the front facing of ...


