
Use and Care Guide
Page 6
...to its permanent location. 7. Monitor water connection for leaks and correct if necessary. A 3. Place end of service loop. 1. Cross threading may occur. Continue to observe the water supply connection for creation of copper tubing into water valve inlet port. Shape tubing slightly.... leaks, if necessary. Connect tubing to reach water supply for two to three hours prior to moving the refrigerator to confirm connection is secure. Installation Connecting the Water Supply (select models) Materials Needed • '/4" outer diameter flexible copper tubing • Shut-off valve ...
...to its permanent location. 7. Monitor water connection for leaks and correct if necessary. A 3. Place end of service loop. 1. Cross threading may occur. Continue to observe the water supply connection for creation of copper tubing into water valve inlet port. Shape tubing slightly.... leaks, if necessary. Connect tubing to reach water supply for two to three hours prior to moving the refrigerator to confirm connection is secure. Installation Connecting the Water Supply (select models) Materials Needed • '/4" outer diameter flexible copper tubing • Shut-off valve ...
Use and Care Guide
Page 30
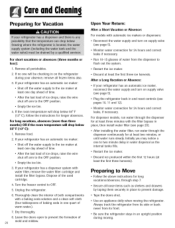
... the instructions for Vacation For short vacations or absences [three months or less): 1. Dispose of warm water.). 7. For dispenser models, run water through the dispenser for 24 hours and correct leaks if necessary. • Run 10-15 glasses of ice drops, raise the wire shut off the...cartridge. 4. Turn the freezer control to two minute delay in an upright position during your refrigerator has an automatic ice maker, reconnect the water supply and turn on supply valve (see page 20). Dry thoroughly. 8. Leave the doors open to prevent the formation of ...
... the instructions for Vacation For short vacations or absences [three months or less): 1. Dispose of warm water.). 7. For dispenser models, run water through the dispenser for 24 hours and correct leaks if necessary. • Run 10-15 glasses of ice drops, raise the wire shut off the...cartridge. 4. Turn the freezer control to two minute delay in an upright position during your refrigerator has an automatic ice maker, reconnect the water supply and turn on supply valve (see page 20). Dry thoroughly. 8. Leave the doors open to prevent the formation of ...

Use and Care Guide
Page 34
.... See Water Filter page 20. Water tank is too low. Water pressure is filling. Improper water valve was installed. Low water pressure can cause valve to adjust controls. Water pressure must be changed . See Connecting the Water Supply pages/4 and 5. The manufacturer is not responsible for refrigerators with water filters.... is opened . Check circuit breakers for refrigerators with bypass filter. See Temperature Controls pages 10, 11 and 12 to leak. See Filter Status Indicator Light page 19. Ice maker is not producing ice Water filter is clogged or needs to 100 ...
.... See Water Filter page 20. Water tank is too low. Water pressure is filling. Improper water valve was installed. Low water pressure can cause valve to adjust controls. Water pressure must be changed . See Connecting the Water Supply pages/4 and 5. The manufacturer is not responsible for refrigerators with water filters.... is opened . Check circuit breakers for refrigerators with bypass filter. See Temperature Controls pages 10, 11 and 12 to leak. See Filter Status Indicator Light page 19. Ice maker is not producing ice Water filter is clogged or needs to 100 ...

Use and Care Guide
Page 35
... forms in inlet tube to ice maker Refrigerator is leaking water Water flow is slower than normal Dispenser water is clogged or needs to be changed. Plastic tubing was installed. Water filter is not cold Water appears cloudy Particles in water and/or ice cubes. Open saddle valve completely. See Connecting the Water Supply pages 4 and 5. The minimum flow at...
... forms in inlet tube to ice maker Refrigerator is leaking water Water flow is slower than normal Dispenser water is clogged or needs to be changed. Plastic tubing was installed. Water filter is not cold Water appears cloudy Particles in water and/or ice cubes. Open saddle valve completely. See Connecting the Water Supply pages 4 and 5. The minimum flow at...


