Product Manual
Page 4
... electrician if in a safe place and pass them on the data plate correspond with current safety requirements. To guarantee the electrical safety of this Operating manual. If there is any future user. It is complete. 4 Keep these operating instructions in doubt. ~ Before installation or service, disconnect the power supply to the...
... electrician if in a safe place and pass them on the data plate correspond with current safety requirements. To guarantee the electrical safety of this Operating manual. If there is any future user. It is complete. 4 Keep these operating instructions in doubt. ~ Before installation or service, disconnect the power supply to the...
Product Manual
Page 11
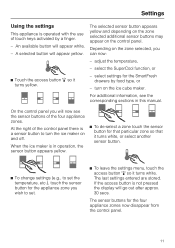
... display will go out after approx. 30 secs. If the access button is operated with the use of the control panel there is in this manual. A selected button will now see the corresponding sections in operation, the sensor button appears yellow. ^ To de-select a zone touch the sensor button for that...
... display will go out after approx. 30 secs. If the access button is operated with the use of the control panel there is in this manual. A selected button will now see the corresponding sections in operation, the sensor button appears yellow. ^ To de-select a zone touch the sensor button for that...
Product Manual
Page 12
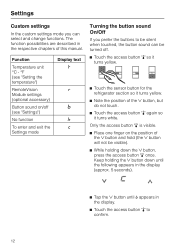
... . ^ Touch the access button "p" so it turns yellow. ^ Touch the sensor button for the refrigerator section so it turns yellow. ^ Note the position of this manual. Keep holding the X button down until the following appears in the display (approx. 5 seconds). ^ Tap the X button until = appears in the respective chapters of the...
... . ^ Touch the access button "p" so it turns yellow. ^ Touch the sensor button for the refrigerator section so it turns yellow. ^ Note the position of this manual. Keep holding the X button down until the following appears in the display (approx. 5 seconds). ^ Tap the X button until = appears in the respective chapters of the...
Product Manual
Page 70
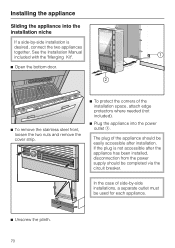
... appliance into the installation niche If a side-by -side installations, a separate outlet must be used for each appliance. ^ Unscrew the plinth. 70 See the Installation Manual included with the "Merging Kit". ^ Open the bottom door. ^ To remove the stainless steel front, loosen the two nuts and remove the cover strip. ^ To...
... appliance into the installation niche If a side-by -side installations, a separate outlet must be used for each appliance. ^ Unscrew the plinth. 70 See the Installation Manual included with the "Merging Kit". ^ Open the bottom door. ^ To remove the stainless steel front, loosen the two nuts and remove the cover strip. ^ To...
Product Manual
Page 80
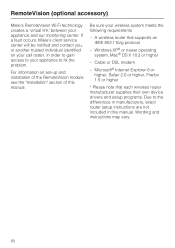
...you, or another trusted individual identified on set-up and installation of the RemoteVision module see the "Installation" section of this manual. A wireless router that each wireless router manufacturer supplies their own device drivers and setup programs. Due to the differences in... manufacturers, exact router setup instructions are not included in order to gain access to fix the problem. RemoteVision (optional accessory) Miele's RemoteVision Wi-Fi technology creates a 'virtual link' between your appliance and our monitoring center. Windows XP® or newer operating ...
...you, or another trusted individual identified on set-up and installation of the RemoteVision module see the "Installation" section of this manual. A wireless router that each wireless router manufacturer supplies their own device drivers and setup programs. Due to the differences in... manufacturers, exact router setup instructions are not included in order to gain access to fix the problem. RemoteVision (optional accessory) Miele's RemoteVision Wi-Fi technology creates a 'virtual link' between your appliance and our monitoring center. Windows XP® or newer operating ...
Product Manual
Page 81
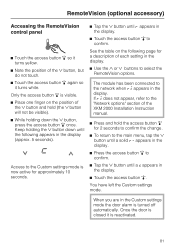
... to confirm. ^ Tap the X button until a ; You have left the Custom settings mode. See the table on the position of the XKM 2000 Installation Instruction manual. ^ Press and hold (the X button will not be visible). ^ While holding the X button down the X button, press the access button "p" once. appears in the display...
... to confirm. ^ Tap the X button until a ; You have left the Custom settings mode. See the table on the position of the XKM 2000 Installation Instruction manual. ^ Press and hold (the X button will not be visible). ^ While holding the X button down the X button, press the access button "p" once. appears in the display...