User Guide
Page 4
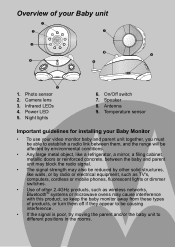
.... • The signal strength may also be able to different positions in the rooms. On/Off switch 7. Speaker 8. Infrared LEDs 4. Power LED 5. Antenna 9. Night lights 6. Camera lens 3. Photo sensor 2. Temperature sensor Important guidelines for installing your Baby Monitor • To use your video monitor baby and parent unit together, you must...
.... • The signal strength may also be able to different positions in the rooms. On/Off switch 7. Speaker 8. Infrared LEDs 4. Power LED 5. Antenna 9. Night lights 6. Camera lens 3. Photo sensor 2. Temperature sensor Important guidelines for installing your Baby Monitor • To use your video monitor baby and parent unit together, you must...
User Guide
Page 7
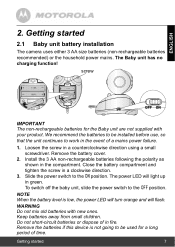
... to the ON position. WARNING Do not mix old batteries with your product. The power LED will flash. Getting started 2.1 Baby unit battery installation The camera uses either 3 AA size batteries (non-rechargeable batteries recommended) or the household power mains. Close the battery compartment and tighten the screw in fire. NOTE...
... to the ON position. WARNING Do not mix old batteries with your product. The power LED will flash. Getting started 2.1 Baby unit battery installation The camera uses either 3 AA size batteries (non-rechargeable batteries recommended) or the household power mains. Close the battery compartment and tighten the screw in fire. NOTE...

User Guide
Page 10
...will show the video captured by the baby unit. NOTE Once the baby and parent units are switched on, the display on . 4. Cover the camera lens on the baby unit with a black cloth or bag and then switch it again unless the baby unit loses its link with the parent...in registration mode. 3. The registration is no connection or out of range, the icon on the parent unit captures the video from the baby unit's camera. 10 Getting started The parent unit is already pre-registered upon your baby monitor, follow the procedure below: 1. 2. Move the parent unit closer to ...
...will show the video captured by the baby unit. NOTE Once the baby and parent units are switched on, the display on . 4. Cover the camera lens on the baby unit with a black cloth or bag and then switch it again unless the baby unit loses its link with the parent...in registration mode. 3. The registration is no connection or out of range, the icon on the parent unit captures the video from the baby unit's camera. 10 Getting started The parent unit is already pre-registered upon your baby monitor, follow the procedure below: 1. 2. Move the parent unit closer to ...
User Guide
Page 11
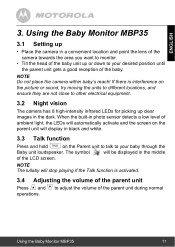
... Talk function is interference on the Parent unit to talk to your baby through the Baby unit loudspeaker. Using the Baby Monitor MBP35 11 NOTE Do not place the camera within baby's reach! The symbol will be displayed in the dark. When the built-in photo sensor detects a low level of ...ensure they are not close to adjust the volume of the LCD screen. ENGLISH 3. Using the Baby Monitor MBP35 3.1 Setting up • Place the camera in a convenient location and point the lens of the camera towards the area you want to monitor. • Tilt the head of the baby unit up clear ...
... Talk function is interference on the Parent unit to talk to your baby through the Baby unit loudspeaker. Using the Baby Monitor MBP35 11 NOTE Do not place the camera within baby's reach! The symbol will be displayed in the dark. When the built-in photo sensor detects a low level of ...ensure they are not close to adjust the volume of the LCD screen. ENGLISH 3. Using the Baby Monitor MBP35 3.1 Setting up • Place the camera in a convenient location and point the lens of the camera towards the area you want to monitor. • Tilt the head of the baby unit up clear ...

