N7-110 manual
Page 2
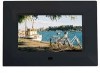
... the risk of direct sunlight. No user-serviceable parts inside. ★ Protect the device from the device. ★ Do not disassemble the Digital Photo Frame, otherwise it available for choosing our Digital Photo Frame. Introduction Thank you begin using this device, please read this appliance to rain or moisture. ★ To prevent overheating, never block any...
... the risk of direct sunlight. No user-serviceable parts inside. ★ Protect the device from the device. ★ Do not disassemble the Digital Photo Frame, otherwise it available for choosing our Digital Photo Frame. Introduction Thank you begin using this device, please read this appliance to rain or moisture. ★ To prevent overheating, never block any...

N7-110 manual
Page 3
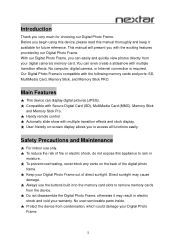
..., place thumbs on the upper portion of glass and may cause damage to the main screen. Photo 3 To change panel, simply place the panel over the frame and press down with thumbs and index fingers. 2 Photo 2 Frame will return the appliance to the card/USB and the device. How to the LCD screen if... with the damp cloth. WARNING: Please STOP the device before you insert or remove any buttons will lift off. The screen is made of the frame and index fingers at retail outlets.
..., place thumbs on the upper portion of glass and may cause damage to the main screen. Photo 3 To change panel, simply place the panel over the frame and press down with thumbs and index fingers. 2 Photo 2 Frame will return the appliance to the card/USB and the device. How to the LCD screen if... with the damp cloth. WARNING: Please STOP the device before you insert or remove any buttons will lift off. The screen is made of the frame and index fingers at retail outlets.
N7-110 manual
Page 4
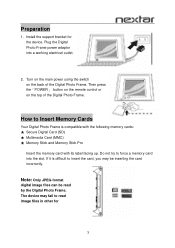
Turn on the main power using the switch on the top of the Digital Photo Frame. Do not try to force a memory card into a working electrical outlet. 2. Preparation 1. If it is compatible with the following memory cards: ★ Secure Digital Card (SD) ★ Multimedia Card (MMC) ★ Memory Stick and ... can be inserting the card incorrectly. Then press the「POWER」 button on the remote control or on the back of the Digital Photo Frame. Install the support bracket for 3 The device may fail to insert the card, you may be read image files in other for ...
Turn on the main power using the switch on the top of the Digital Photo Frame. Do not try to force a memory card into a working electrical outlet. 2. Preparation 1. If it is compatible with the following memory cards: ★ Secure Digital Card (SD) ★ Multimedia Card (MMC) ★ Memory Stick and ... can be inserting the card incorrectly. Then press the「POWER」 button on the remote control or on the back of the Digital Photo Frame. Install the support bracket for 3 The device may fail to insert the card, you may be read image files in other for ...

N7-110 manual
Page 7
... you to turn ON or OFF. Press the Right or Left arrow keys and the ENTER button to adjust the order the photos will change the photos. SYSTEM SETUP Press the Right and Left arrow keys to the factory default settings. Operation: OSD LANGUAGE: OSD language settings. ...Right or Left arrow keys and the ENTER button to set the frame to DEFAULT and the interval: 10SECOND, 30SECOND, 1MINUTE, 30MINUTE, 1HOUR JPEG INFO:Allows you to confirm the settings. DEFAULT: Restores your Digital Photo Frame back to navigate through setup function items. Press the Right and Left...
... you to turn ON or OFF. Press the Right or Left arrow keys and the ENTER button to adjust the order the photos will change the photos. SYSTEM SETUP Press the Right and Left arrow keys to the factory default settings. Operation: OSD LANGUAGE: OSD language settings. ...Right or Left arrow keys and the ENTER button to set the frame to DEFAULT and the interval: 10SECOND, 30SECOND, 1MINUTE, 30MINUTE, 1HOUR JPEG INFO:Allows you to confirm the settings. DEFAULT: Restores your Digital Photo Frame back to navigate through setup function items. Press the Right and Left...


