
Pro-line Network Cam
Page 1
Panasonic Network Camera Website: http://www.panasonic.com/netcam for future reference. Operating Instructions Network Camera Indoor Use Only Model No. BB-HCM381A (AC Adaptor Type) BB-HCE481A (PoE Type) Please read this manual before using, and save this manual for customers in the USA or Puerto Rico
Panasonic Network Camera Website: http://www.panasonic.com/netcam for future reference. Operating Instructions Network Camera Indoor Use Only Model No. BB-HCM381A (AC Adaptor Type) BB-HCE481A (PoE Type) Please read this manual before using, and save this manual for customers in the USA or Puerto Rico

Pro-line Network Cam
Page 2
... and use the Network Camera properly. For example, the camera can be used simultaneously. No port for both the camera and to the camera requires a built-in part depending on IPv6-only networks. *2 BB-HCE481A works with all applicable federal, state and local statutes. *1 To connect using an Ethernet cable without the AC adaptor. IPv6*1 Network Camera Your Panasonic Network Camera supports IPv6...
... and use the Network Camera properly. For example, the camera can be used simultaneously. No port for both the camera and to the camera requires a built-in part depending on IPv6-only networks. *2 BB-HCE481A works with all applicable federal, state and local statutes. *1 To connect using an Ethernet cable without the AC adaptor. IPv6*1 Network Camera Your Panasonic Network Camera supports IPv6...

Pro-line Network Cam
Page 3
...the image at the timing of signal detection of the camera. Preset Position ........ Output Control ........ Remote Pan/Tilt/Zoom/Focus The following control features are available to operate Network Camera from Network Camera on TV and record them on your PC. Network Camera has a 42x magnifying capacity: a 21x optical zoom and... about 58,000 images (320 x 240 resolution and standard quality) for about 41 days. *1 The camera supports 2 GB, 1 GB, 512 MB, 256 MB, 128 MB or 64 MB Panasonic SD memory card (customer-provided). 3 If you enable 1-minute interval timer buffer/transfer to 1 GB ...
...the image at the timing of signal detection of the camera. Preset Position ........ Output Control ........ Remote Pan/Tilt/Zoom/Focus The following control features are available to operate Network Camera from Network Camera on TV and record them on your PC. Network Camera has a 42x magnifying capacity: a 21x optical zoom and... about 58,000 images (320 x 240 resolution and standard quality) for about 41 days. *1 The camera supports 2 GB, 1 GB, 512 MB, 256 MB, 128 MB or 64 MB Panasonic SD memory card (customer-provided). 3 If you enable 1-minute interval timer buffer/transfer to 1 GB ...

Pro-line Network Cam
Page 4
... only in part on a single page. Abbreviations • UPnP is the abbreviation for Universal Plug and Play. • "Network Camera" is called "CD-ROM" in English, French, German, Italian, Spanish, Russian, Simplified Chinese, Korean or Japanese. Multi-Language Display The... Top page, Single Camera and Multi-Camera page can be displayed in this manual. Additionally, static images from Microsoft Corporation. • All other countries. • SD mark...
... only in part on a single page. Abbreviations • UPnP is the abbreviation for Universal Plug and Play. • "Network Camera" is called "CD-ROM" in English, French, German, Italian, Spanish, Russian, Simplified Chinese, Korean or Japanese. Multi-Language Display The... Top page, Single Camera and Multi-Camera page can be displayed in this manual. Additionally, static images from Microsoft Corporation. • All other countries. • SD mark...

Pro-line Network Cam
Page 5
Operating Instructions Table of Contents 1 Camera Monitoring 8 1.1 1.1.1 1.1.2 1.1.3 1.2 1.2.1 1.2.2 1.2.3 1.3 BB-HCM381A Feature Locations 8 Front View 8 Rear View 9 Bottom View 9 BB-HCE481A Feature Locations 10 Front View 10 Rear View 11 Bottom View 11 How to Turn on the Camera 12 1.4 1.4.1 1.5 1.5.1 1.5.2 1.5.3 1.5.4 1.5.5 1.5.6 1.5.7 1.6 Accessing the Camera 13 To Access the Camera in IPv6 15 Viewing the Single Camera page 17 Displaying the Banner 20...
Operating Instructions Table of Contents 1 Camera Monitoring 8 1.1 1.1.1 1.1.2 1.1.3 1.2 1.2.1 1.2.2 1.2.3 1.3 BB-HCM381A Feature Locations 8 Front View 8 Rear View 9 Bottom View 9 BB-HCE481A Feature Locations 10 Front View 10 Rear View 11 Bottom View 11 How to Turn on the Camera 12 1.4 1.4.1 1.5 1.5.1 1.5.2 1.5.3 1.5.4 1.5.5 1.5.6 1.5.7 1.6 Accessing the Camera 13 To Access the Camera in IPv6 15 Viewing the Single Camera page 17 Displaying the Banner 20...

Pro-line Network Cam
Page 6
...68 Registering with the DynamicDNS Service 70 DynamicDNS Service (IPv4/IPv6 75 Setting the Date and Time 77 Changing Camera Settings 80 Adjusting Audio 86 3 Registering Users 88 3.1 Changing the Authentication Setting and Administrator User Name and Password 88... Buffering or Transferring Images by Alarm Signal 107 4.4 Buffering or Transferring Images by Motion Detection Signal.... 119 4.5 Transferring Camera Images in Transport Mode 131 4.6 Transferring Camera Images in Tunnel Mode 132 4.7 Setting the Motion Detection 133 4.8 Setting Alarm Log Notification 137 4.9 4.9.1 4.9.2 4.9.3...
...68 Registering with the DynamicDNS Service 70 DynamicDNS Service (IPv4/IPv6 75 Setting the Date and Time 77 Changing Camera Settings 80 Adjusting Audio 86 3 Registering Users 88 3.1 Changing the Authentication Setting and Administrator User Name and Password 88... Buffering or Transferring Images by Alarm Signal 107 4.4 Buffering or Transferring Images by Motion Detection Signal.... 119 4.5 Transferring Camera Images in Transport Mode 131 4.6 Transferring Camera Images in Tunnel Mode 132 4.7 Setting the Motion Detection 133 4.8 Setting Alarm Log Notification 137 4.9 4.9.1 4.9.2 4.9.3...

Pro-line Network Cam
Page 7
... 155 Confirming Session Status 155 Confirming Alarm Logs 156 Restarting the Camera 157 Updating the Camera Firmware 158 Creating the Configuration File 160 Loading Settings from a Configuration File 161 Resetting the Camera to Factory Default 162 Support page 163 The Help page 163 ... 7.6.1 7.6.2 7.6.3 7.7 Setting Your PC 186 Setting Proxy Server Settings on a Web Browser 186 Setting UPnP™ to Display Camera Shortcut in My Network Places......189 Setting the Internet Temporary File Setting on the Web Browser...........189 ASCII Character Table 190 7.8 File Size and Number of ...
... 155 Confirming Session Status 155 Confirming Alarm Logs 156 Restarting the Camera 157 Updating the Camera Firmware 158 Creating the Configuration File 160 Loading Settings from a Configuration File 161 Resetting the Camera to Factory Default 162 Support page 163 The Help page 163 ... 7.6.1 7.6.2 7.6.3 7.7 Setting Your PC 186 Setting Proxy Server Settings on a Web Browser 186 Setting UPnP™ to Display Camera Shortcut in My Network Places......189 Setting the Internet Temporary File Setting on the Web Browser...........189 ASCII Character Table 190 7.8 File Size and Number of ...

Pro-line Network Cam
Page 8
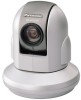
Operating Instructions 1 Camera Monitoring 1TableofContents 1.1 BB-HCM381A Feature Locations 1.1.1 Front View Auto Focus/Zoom Lens Wide: 5 mm (3/16 inches) -Infinity Tele: 1 m (3 feet 3 inches) -Infinity Indicator The indicator color shows camera status (see page 140). SD Memory Card Cover Protects the SD Memory Card ...that.) Orange blinking (About a 2-second interval) Red blinking*3 *1 The indicator turns orange if the camera is not connected to the LAN. *2 The indicator blinks orange if the camera is not connected to the LAN. *3 See page 3 and 4 the Troubleshooting on the CD-ROM...
Operating Instructions 1 Camera Monitoring 1TableofContents 1.1 BB-HCM381A Feature Locations 1.1.1 Front View Auto Focus/Zoom Lens Wide: 5 mm (3/16 inches) -Infinity Tele: 1 m (3 feet 3 inches) -Infinity Indicator The indicator color shows camera status (see page 140). SD Memory Card Cover Protects the SD Memory Card ...that.) Orange blinking (About a 2-second interval) Red blinking*3 *1 The indicator turns orange if the camera is not connected to the LAN. *2 The indicator blinks orange if the camera is not connected to the LAN. *3 See page 3 and 4 the Troubleshooting on the CD-ROM...

Pro-line Network Cam
Page 9
Hook for ceiling mounting (See Installation Guide). Hole for Ceiling Plate A Used for AC Adaptor Cord Used to default (see page 166). MAC Address and Serial Number are indicated on the label. 9 Audio/Video terminal (See Getting Started) 1.1.3 Bottom View FACTORY DEFAULT RESET button Resets settings to secure the AC adaptor cord. Operating Instructions External I/O (See page 164) DC IN jack Connects the camera to your LAN. 1.1.2 Rear View Ethernet (LAN) port Connects the camera to the AC adaptor.
Hook for ceiling mounting (See Installation Guide). Hole for Ceiling Plate A Used for AC Adaptor Cord Used to default (see page 166). MAC Address and Serial Number are indicated on the label. 9 Audio/Video terminal (See Getting Started) 1.1.3 Bottom View FACTORY DEFAULT RESET button Resets settings to secure the AC adaptor cord. Operating Instructions External I/O (See page 164) DC IN jack Connects the camera to your LAN. 1.1.2 Rear View Ethernet (LAN) port Connects the camera to the AC adaptor.

Pro-line Network Cam
Page 10
Operating Instructions 1.2 BB-HCE481A Feature Locations 1.2.1 Front View Auto Focus/Zoom Lens Wide: 5 mm (3/16 inches) -Infinity Tele: 1 m (3 feet 3 inches) -Infinity Indicator The indicator color shows camera status (see page 140). SD Memory Card Cover Protects the SD Memory Card from dust. ... Green blinking Green Green blinking Green Orange blinking Orange blinking Turning off (The camera restarts after that.) Orange blinking (About a 2-second interval) Orange*2 Red blinking*2 *1 The indicator blinks orange if the camera is not connected to the LAN. *2 See page 5 and 6 the...
Operating Instructions 1.2 BB-HCE481A Feature Locations 1.2.1 Front View Auto Focus/Zoom Lens Wide: 5 mm (3/16 inches) -Infinity Tele: 1 m (3 feet 3 inches) -Infinity Indicator The indicator color shows camera status (see page 140). SD Memory Card Cover Protects the SD Memory Card from dust. ... Green blinking Green Green blinking Green Orange blinking Orange blinking Turning off (The camera restarts after that.) Orange blinking (About a 2-second interval) Orange*2 Red blinking*2 *1 The indicator blinks orange if the camera is not connected to the LAN. *2 See page 5 and 6 the...

Pro-line Network Cam
Page 11
1.2.2 Rear View Audio/Video terminal (See Getting Started) 1.2.3 Bottom View FACTORY DEFAULT RESET button Resets settings to your PoE hub. MAC Address and Serial Number are indicated on the label. 11 Hole for Ceiling Plate A Used for ceiling mounting. (See Installation Guide) Operating Instructions External I/O (See page 164) PoE IN port Connects the camera to default (see page 166).
1.2.2 Rear View Audio/Video terminal (See Getting Started) 1.2.3 Bottom View FACTORY DEFAULT RESET button Resets settings to your PoE hub. MAC Address and Serial Number are indicated on the label. 11 Hole for Ceiling Plate A Used for ceiling mounting. (See Installation Guide) Operating Instructions External I/O (See page 164) PoE IN port Connects the camera to default (see page 166).

Pro-line Network Cam
Page 12
...the outlet turns the camera off. Operating Instructions 1.3 How to Turn on the Camera Connecting the AC cord (for BB-HCM381A) or the Ethernet cable (for BBHCE481A) turns the camera on, and disconnecting the AC cord (for BBHCM381A) or Ethernet cable (for BB-HCE481A) turns the camera off . *1 BB-HCE481A does not support ...the AC adaptor and needs the PoE hub. 12 BB-HCM381A • Connecting the plug of the AC cord to the outlet turns the camera on. • Disconnecting the plug of the ...
...the outlet turns the camera off. Operating Instructions 1.3 How to Turn on the Camera Connecting the AC cord (for BB-HCM381A) or the Ethernet cable (for BBHCE481A) turns the camera on, and disconnecting the AC cord (for BBHCM381A) or Ethernet cable (for BB-HCE481A) turns the camera off . *1 BB-HCE481A does not support ...the AC adaptor and needs the PoE hub. 12 BB-HCM381A • Connecting the plug of the AC cord to the outlet turns the camera on. • Disconnecting the plug of the ...

Pro-line Network Cam
Page 13
... 50 for details about the port number. • For IPv6 connection, see "Camera Image/Page Display Troubleshooting" on page 9 of the Troubleshooting on the keyboard. • When the port number is displayed. The Enter Network Password window is 80 (default), you set on the Security: Administrator page, the...on the address bar, and press [Enter] on the CD-ROM. Start up the web browser on the address bar. • If the camera image is set previously, and click [OK]. Enter "http://(IPv6-registered URL):Port Number" on your equipment meets the requirements. Enter the user...
... 50 for details about the port number. • For IPv6 connection, see "Camera Image/Page Display Troubleshooting" on page 9 of the Troubleshooting on the keyboard. • When the port number is displayed. The Enter Network Password window is 80 (default), you set on the Security: Administrator page, the...on the address bar, and press [Enter] on the CD-ROM. Start up the web browser on the address bar. • If the camera image is set previously, and click [OK]. Enter "http://(IPv6-registered URL):Port Number" on your equipment meets the requirements. Enter the user...

Pro-line Network Cam
Page 14
...page. Operating Instructions 4. A BCD E F G Select a language Version Number Displays IPv4, IPv6 or IPsec connection. Click the following tabs to the camera (page 92) B To Multi-Camera page (page 36) D To Setup page (page 45) F To Support page (page 163) Note • When users other than an administrator ...are accessing the camera, the [Setup] and [Maintenance] tabs are not displayed. Additionally, when [Do not permit access from guest users] or [Permit access from guest users...
...page. Operating Instructions 4. A BCD E F G Select a language Version Number Displays IPv4, IPv6 or IPsec connection. Click the following tabs to the camera (page 92) B To Multi-Camera page (page 36) D To Setup page (page 45) F To Support page (page 163) Note • When users other than an administrator ...are accessing the camera, the [Setup] and [Maintenance] tabs are not displayed. Additionally, when [Do not permit access from guest users] or [Permit access from guest users...

Pro-line Network Cam
Page 15
...entering its IP address in IPv6, subscribe to provide the additional IP addresses that was registered using packet filtering. See the Panasonic Network Camera support website at http:// panasonic.co.jp/pcc/products/en/netwkcam/ for "Internet Protocol Version 6". • IPv6 was created to the ISP's "IPv4... name services. What is IPv6? • IPv6 is disabled on IPv6-only networks. Ask your Panasonic Network Camera will be ready! • For more information, visit http://www.ipv6.org/. The camera does not function on the router, enable the TCP packets from the WAN side...
...entering its IP address in IPv6, subscribe to provide the additional IP addresses that was registered using packet filtering. See the Panasonic Network Camera support website at http:// panasonic.co.jp/pcc/products/en/netwkcam/ for "Internet Protocol Version 6". • IPv6 was created to the ISP's "IPv4... name services. What is IPv6? • IPv6 is disabled on IPv6-only networks. Ask your Panasonic Network Camera will be ready! • For more information, visit http://www.ipv6.org/. The camera does not function on the router, enable the TCP packets from the WAN side...

Pro-line Network Cam
Page 16
Enter "ipconfig". • If the IPv6 address is automatically assigned. Install it on your PC 1. To access the camera in IPv6, you use Windows XP Service Pack 2, click [Start] [Control Panel] [Security Center] [Windows Firewall] [Advanced] tab [Settings] button of... will not be displayed in the ICMP Settings window. 3. Confirming that You Can Access the Camera Confirm that the image is not installed, "Succeeded" will be displayed. Operating Instructions Setting up the Camera Usually, an IPv6 address is properly assigned to a domain name service such as Viewnetcam.com,...
Enter "ipconfig". • If the IPv6 address is automatically assigned. Install it on your PC 1. To access the camera in IPv6, you use Windows XP Service Pack 2, click [Start] [Control Panel] [Security Center] [Windows Firewall] [Advanced] tab [Settings] button of... will not be displayed in the ICMP Settings window. 3. Confirming that You Can Access the Camera Confirm that the image is not installed, "Succeeded" will be displayed. Operating Instructions Setting up the Camera Usually, an IPv6 address is properly assigned to a domain name service such as Viewnetcam.com,...

Pro-line Network Cam
Page 17
...Motion Detection will be changed on the operation bar (see page 13). • The Top page is displayed. 2. Note • When the camera image is set to operate with IPv4, IPv6, or IPsec. The image will also increase the refresh interval. 17 SD memory recording, using ... refreshed. • The refresh interval is not displayed immediately or correctly, click [Refresh] on the network condition, PC performance and what object you view. Banner (optional) (See page 20) 3. Access the camera (see page 23). • The refresh interval may change depending on the web browser's tool bar...
...Motion Detection will be changed on the operation bar (see page 13). • The Top page is displayed. 2. Note • When the camera image is set to operate with IPv4, IPv6, or IPsec. The image will also increase the refresh interval. 17 SD memory recording, using ... refreshed. • The refresh interval is not displayed immediately or correctly, click [Refresh] on the network condition, PC performance and what object you view. Banner (optional) (See page 20) 3. Access the camera (see page 23). • The refresh interval may change depending on the web browser's tool bar...

Pro-line Network Cam
Page 18
...may increase and image quality may decrease in a dark place. (See page 80). • The following error messages can be displayed. The camera allows a maximum of 30 simultaneous accesses when the Refresh Interval is also limited to a maximum of 30 simultaneous accesses. • To reduce the... data traffic, the video can also switch to 30 simultaneous accesses. If viewing the Single Camera page, you can be displayed outside the Operation ended. The image will see a gray screen. Users who try to the [Favorites] on ...
...may increase and image quality may decrease in a dark place. (See page 80). • The following error messages can be displayed. The camera allows a maximum of 30 simultaneous accesses when the Refresh Interval is also limited to a maximum of 30 simultaneous accesses. • To reduce the... data traffic, the video can also switch to 30 simultaneous accesses. If viewing the Single Camera page, you can be displayed outside the Operation ended. The image will see a gray screen. Users who try to the [Favorites] on ...

Pro-line Network Cam
Page 19
... (Motion JPEG) for the first time, a Security Warning for ActiveX® Controls will be heard immediately. This may be used for the camera, enter it on the CD-ROM. • ActiveX Controls can be downloaded from being displayed. Note • When the IP address was ... 19 Wait for a moment. • If you cannot see page 186). • In some corporate network environments, a firewall may prevent motion video from the Panasonic Network Camera support website at http://panasonic.co.jp/pcc/products/en/netwkcam/. If you cannot install ActiveX Controls or you use a proxy server, ...
... (Motion JPEG) for the first time, a Security Warning for ActiveX® Controls will be heard immediately. This may be used for the camera, enter it on the CD-ROM. • ActiveX Controls can be downloaded from being displayed. Note • When the IP address was ... 19 Wait for a moment. • If you cannot see page 186). • In some corporate network environments, a firewall may prevent motion video from the Panasonic Network Camera support website at http://panasonic.co.jp/pcc/products/en/netwkcam/. If you cannot install ActiveX Controls or you use a proxy server, ...

Pro-line Network Cam
Page 21
...your mouse, click any portion of the screen. 1. Click it is within the pan/tilt range of the camera, the image will not operate. 21 Move the cursor to Center is centered. • See page 25 for..., Click to Center does not work beyond the pan/tilt end (see page 23). • The camera may not center exactly on the clicked point depending on the General User page (see page 93), the... function will automatically move to place the selected point in the center of the camera image. As long as it . • The clicked point is not permitted on the lens direction. ...
...your mouse, click any portion of the screen. 1. Click it is within the pan/tilt range of the camera, the image will not operate. 21 Move the cursor to Center is centered. • See page 25 for..., Click to Center does not work beyond the pan/tilt end (see page 23). • The camera may not center exactly on the clicked point depending on the General User page (see page 93), the... function will automatically move to place the selected point in the center of the camera image. As long as it . • The clicked point is not permitted on the lens direction. ...


