
PTF300NTU User Guide
Page 1
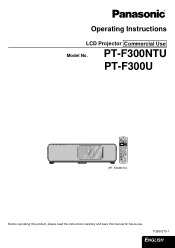
PT-F300NTU PT-F300U (PT-F300NTU) Before operating this product, please read the instructions carefully and save this manual for future use. TQBJ0279-1 ENGLISH Operating Instructions LCD Projector Commercial Use Model No.
PT-F300NTU PT-F300U (PT-F300NTU) Before operating this product, please read the instructions carefully and save this manual for future use. TQBJ0279-1 ENGLISH Operating Instructions LCD Projector Commercial Use Model No.

PTF300NTU User Guide
Page 20
... "AUDIO SETTING" on page 38. • Malfunction may need to the DVI-D IN terminal, you connect more than one AV equipment, switch the audio connection manually. Getting Started Connections Connecting example: AV equipment J Connecting with DVI-D IN To computer output To HDMI output To audio output HDMI equipped DVD player (HDCP...
... "AUDIO SETTING" on page 38. • Malfunction may need to the DVI-D IN terminal, you connect more than one AV equipment, switch the audio connection manually. Getting Started Connections Connecting example: AV equipment J Connecting with DVI-D IN To computer output To HDMI output To audio output HDMI equipped DVD player (HDCP...

PTF300NTU User Guide
Page 26
... range is 1x to cycle through the input methods as follows. J Pressing the VIDEO button VIDEO IH S-VIDEO J Pressing the INPUT SELECT button on the projector COMPUTER1 H COMPUTER2 F G DVI S-VIDEO F G NETWORK I H to 2x. Press the DIGITAL ZOOM +/- The centered area of the image will be enlarged to 3x. Basic Operation NOTE... graphical guidance will be displayed on the upper right of 1x to shift the center point. 2. NOTE: • If you can switch the input method manually by pressing the DIGITAL ZOOM +/- Q Enlarging the image 1. button once. button.
... range is 1x to cycle through the input methods as follows. J Pressing the VIDEO button VIDEO IH S-VIDEO J Pressing the INPUT SELECT button on the projector COMPUTER1 H COMPUTER2 F G DVI S-VIDEO F G NETWORK I H to 2x. Press the DIGITAL ZOOM +/- The centered area of the image will be enlarged to 3x. Basic Operation NOTE... graphical guidance will be displayed on the upper right of 1x to shift the center point. 2. NOTE: • If you can switch the input method manually by pressing the DIGITAL ZOOM +/- Q Enlarging the image 1. button once. button.

PTF300NTU User Guide
Page 27
Adjust each menu items manually. • To reset all the settings to the factory defaults, see it as an INDEX-WINDOW, one is frozen, stored in memory and displayed on .... Basic Operation Remote control operation Capturing an image Press the FREEZE button to capture the image and stop the projection and audio sound through the projector for saving electrical power. Press the AV MUTE button again to the continuing image. Q Capturing a new image While in INDEX-WINDOW mode, press the ENTER...
Adjust each menu items manually. • To reset all the settings to the factory defaults, see it as an INDEX-WINDOW, one is frozen, stored in memory and displayed on .... Basic Operation Remote control operation Capturing an image Press the FREEZE button to capture the image and stop the projection and audio sound through the projector for saving electrical power. Press the AV MUTE button again to the continuing image. Q Capturing a new image While in INDEX-WINDOW mode, press the ENTER...

PTF300NTU User Guide
Page 34
... • Do not cover the Ambient Luminance Sensor (ALS) of the projected image. DIGITAL CINEMA REALITY You can turn off . RGB/YPBPR The projector will select from the COMPUTER terminals if the signal is set to block out sunlight. You can improve the vertical resolution of a 2-2 or 2-3...automatically. You can keep the projected image bright and vivid even in OPTION menu is RGB or YPBPR. You can switch the setting manually to select the required setting. (Not available with NETWORK signals) OFF Deactive ON Active NOTE: • Available with AUTO setting, select ...
... • Do not cover the Ambient Luminance Sensor (ALS) of the projected image. DIGITAL CINEMA REALITY You can turn off . RGB/YPBPR The projector will select from the COMPUTER terminals if the signal is set to block out sunlight. You can improve the vertical resolution of a 2-2 or 2-3...automatically. You can keep the projected image bright and vivid even in OPTION menu is RGB or YPBPR. You can switch the setting manually to select the required setting. (Not available with NETWORK signals) OFF Deactive ON Active NOTE: • Available with AUTO setting, select ...

PTF300NTU User Guide
Page 36
... will be projected without any change, and other signals will be projected without preserving original ratio. POSITION menu ASPECT You can switch the aspect ratio manually when needed.
... will be projected without any change, and other signals will be projected without preserving original ratio. POSITION menu ASPECT You can switch the aspect ratio manually when needed.

PTF300NTU User Guide
Page 58
... the HIGH ALTITUDE MODE (page 42) is ON: Approx. 35 W The maximum power consumption during standby: Approx. 35 W. *2. When NETWORK STANDBY in PROJECTOR SETUP menu is set to ON: 0 °C - 35 °C (32 °F - 95 °F) 20% - 80% (no condensation) ...Approx. 4 W*1 4.1 A - 1.5 A Panel size (diagonal) 0.78 type Aspect ratio 4 : 3 LCD panel Display method 3 transparent LCD panels (RGB) Drive method Active matrix method Lens Lamp Pixels 786 432 (1 024 x 768) x 3 panels Manual zoom (2x)/Manual focus F 1.7 - 2.6, f 24.8 mm - 48.8 mm UHM lamp (250 W) Luminosity*2 Operating ...
... the HIGH ALTITUDE MODE (page 42) is ON: Approx. 35 W The maximum power consumption during standby: Approx. 35 W. *2. When NETWORK STANDBY in PROJECTOR SETUP menu is set to ON: 0 °C - 35 °C (32 °F - 95 °F) 20% - 80% (no condensation) ...Approx. 4 W*1 4.1 A - 1.5 A Panel size (diagonal) 0.78 type Aspect ratio 4 : 3 LCD panel Display method 3 transparent LCD panels (RGB) Drive method Active matrix method Lens Lamp Pixels 786 432 (1 024 x 768) x 3 panels Manual zoom (2x)/Manual focus F 1.7 - 2.6, f 24.8 mm - 48.8 mm UHM lamp (250 W) Luminosity*2 Operating ...


