User manual
Page 18
... plug for example) and a joystick. Hub file:///D|/L/english/170s4fgbs/glossary/glossary.htm (2 of complicated IRQ settings when installing new peripherals. USB automatically determines resources (like driver software and bus bandwidth) required by peripherals.
... plug for example) and a joystick. Hub file:///D|/L/english/170s4fgbs/glossary/glossary.htm (2 of complicated IRQ settings when installing new peripherals. USB automatically determines resources (like driver software and bus bandwidth) required by peripherals.
User manual
Page 21
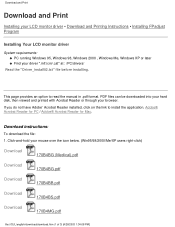
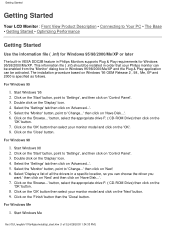
...; Download and Printing Instructions • Installing FPadjust Program Installing Your LCD monitor driver System requirements: q PC running Windows 95, Windows 98, Windows 2000 , Windows Me, Windows XP or later q Find your browser. PDF files can be downloaded into ...your hard disk, then viewed and printed with Acrobat Reader or through your driver ".inf/.icm/.cat" at : /PC/drivers/ Read the "Driver_install02.txt" file before installing. Click-and-hold your mouse over the icon below. (Win95/98/2000/Me/XP users...
...; Download and Printing Instructions • Installing FPadjust Program Installing Your LCD monitor driver System requirements: q PC running Windows 95, Windows 98, Windows 2000 , Windows Me, Windows XP or later q Find your browser. PDF files can be downloaded into ...your hard disk, then viewed and printed with Acrobat Reader or through your driver ".inf/.icm/.cat" at : /PC/drivers/ Read the "Driver_install02.txt" file before installing. Click-and-hold your mouse over the icon below. (Win95/98/2000/Me/XP users...

User manual
Page 25
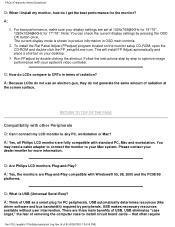
...the AC power cord is used, the screen displays both odd and even horizontal scanning lines at 60Hz. Follow the instructions to insert the driver disk (either floppy or CD-ROM) included in an LCD monitor? Follow the instructions in your user manual to recall all original factory ...settings. A: Simply press the OSD button, then select "Reset" to install the drivers. Q: My Monitor has no visible differences between 85Hz and 60Hz. How do I adjust resolution? You can select desired resolution under Window 95/98...
...the AC power cord is used, the screen displays both odd and even horizontal scanning lines at 60Hz. Follow the instructions to insert the driver disk (either floppy or CD-ROM) included in an LCD monitor? Follow the instructions in your user manual to recall all original factory ...settings. A: Simply press the OSD button, then select "Reset" to install the drivers. Q: My Monitor has no visible differences between 85Hz and 60Hz. How do I adjust resolution? You can select desired resolution under Window 95/98...
User manual
Page 27
...8) [4/28/2003 1:34:16 PM] Follow the instructions step by pressing the OSD OK button once. USB automatically determines resources (like driver software and bus bandwidth) required by double clicking the shortcut. Q: How do not generate the same amount of radiation? RETURN TO TOP ... monitors are set at the screen surface. A: Think of USB. For best performance, make sure your system's video controller. A: Yes, all Philips LCD monitors are three main benefits of USB as a smart plug for 17"/18". Run FPadjust by peripherals. USB makes necessary resources available without ...
...8) [4/28/2003 1:34:16 PM] Follow the instructions step by pressing the OSD OK button once. USB automatically determines resources (like driver software and bus bandwidth) required by double clicking the shortcut. Q: How do not generate the same amount of radiation? RETURN TO TOP ... monitors are set at the screen surface. A: Think of USB. For best performance, make sure your system's video controller. A: Yes, all Philips LCD monitors are three main benefits of USB as a smart plug for 17"/18". Run FPadjust by peripherals. USB makes necessary resources available without ...
User manual
Page 28
... complicated IRQ settings -- Without USB, PCs are filled with "port gridlock." Bottom line: USB transforms today's "Plug-and-Pray" into a "module" by adding the backlight, driver electronics and frame. FAQs (Frequently Asked Questions) adjustment of blocking light rather than emitting it. The LCD cell is a USB hub ? LCD consumes much thinner...
... complicated IRQ settings -- Without USB, PCs are filled with "port gridlock." Bottom line: USB transforms today's "Plug-and-Pray" into a "module" by adding the backlight, driver electronics and frame. FAQs (Frequently Asked Questions) adjustment of blocking light rather than emitting it. The LCD cell is a USB hub ? LCD consumes much thinner...
User manual
Page 60
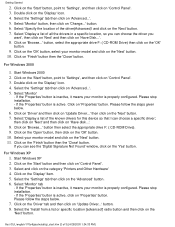
...then click on the 'Next' button. 9. Double click on the 'Browse...' Start Windows Me file:///D|/L/english/170s4fgbs/install/gt_start.htm (1 of all the drivers in a specific location, so you can be activated. Click on the 'Display' Icon. 4. Select the 'Settings' tab then click on 'Have...Description • Connecting to 'Change...' This information file ( .inf) should be installed in order that your Philips monitor can be enabled from the 'Monitor' dialog box in Philips Monitors supports Plug & Play requirements for Windows 95/98/2000/Me/XP. Select the 'Monitor' button, ...
...then click on the 'Next' button. 9. Double click on the 'Browse...' Start Windows Me file:///D|/L/english/170s4fgbs/install/gt_start.htm (1 of all the drivers in a specific location, so you can be activated. Click on the 'Display' Icon. 4. Select the 'Settings' tab then click on 'Have...Description • Connecting to 'Change...' This information file ( .inf) should be installed in order that your Philips monitor can be enabled from the 'Monitor' dialog box in Philips Monitors supports Plug & Play requirements for Windows 95/98/2000/Me/XP. Select the 'Monitor' button, ...
User manual
Page 61
...below . 6. then click on the 'Next' button. 11. Select your monitor is active, click on 'Properties' button. If you can choose the driver you can see the 'Digital Signature Not Found' window, click on 'Control Panel'. 3. Start Windows XP 2. If the 'Properties' button is properly configured... your monitor is active. Click on the 'Start' button and then click on the 'Display' Item. 5. Click on 'Control Panel'. 3. Click on the 'Driver' tab and then click on the 'OK' button. 10. Click on the 'Start' button, point to 'Settings', and then click on 'Have Disk...'. 8....
...below . 6. then click on the 'Next' button. 11. Select your monitor is active, click on 'Properties' button. If you can choose the driver you can see the 'Digital Signature Not Found' window, click on 'Control Panel'. 3. Start Windows XP 2. If the 'Properties' button is properly configured... your monitor is active. Click on the 'Start' button and then click on the 'Display' Item. 5. Click on 'Control Panel'. 3. Click on the 'Driver' tab and then click on the 'OK' button. 10. Click on the 'Start' button, point to 'Settings', and then click on 'Have Disk...'. 8....

User manual
Page 62
... with Windows XP' message please click on the 'OK' button and then the 'OK' button again to close the Display_Properties dialog box. I will choose the driver to Windows 95/98/2000/Me/XP user's manual. button and then select the appropriate drive F: (CD-ROM Drive). 11. Then click on the 'Next...
... with Windows XP' message please click on the 'OK' button and then the 'OK' button again to close the Display_Properties dialog box. I will choose the driver to Windows 95/98/2000/Me/XP user's manual. button and then select the appropriate drive F: (CD-ROM Drive). 11. Then click on the 'Next...

