
Leaflet
Page 2
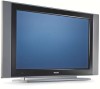
...truer than anything you've seen before. Bypacked tabletop stand A table-top stand with matching design is razor sharp pictures with the set. USB Multimedia Connector The USB connector allows access to effectively maximize the HDTV signal, a television must incorporate advanced signal input connectivity...produces brilliant flicker-free progressive scan pictures with an enhanced viewing experience. Flat HDTV with Pixel Plus 37" LCD integrated digital Highlights 37PF9431D/37 LCD WXGA display, 1366 x 768p This WXGA display with state-of-the-art LCD screen technology gives you widescreen HD...
...truer than anything you've seen before. Bypacked tabletop stand A table-top stand with matching design is razor sharp pictures with the set. USB Multimedia Connector The USB connector allows access to effectively maximize the HDTV signal, a television must incorporate advanced signal input connectivity...produces brilliant flicker-free progressive scan pictures with an enhanced viewing experience. Flat HDTV with Pixel Plus 37" LCD integrated digital Highlights 37PF9431D/37 LCD WXGA display, 1366 x 768p This WXGA display with state-of-the-art LCD screen technology gives you widescreen HD...

Leaflet
Page 3
... Closed Captioning Full Text • VESA Mount: Vesa compliant • Weight incl. All Rights reserved. www.philips.com Flat HDTV with Pixel Plus 37" LCD integrated digital Specifications 37PF9431D/37 Picture/Display • Color cabinet: Black and Digital Silver • Aspect ratio: 16:9 • ...to 40 °C • Mains power: AC 110 - 120 V, 60 Hz • Power consumption: 175 W • Standby power consumption: 0.45W Dimensions • Set dimensions (W x H x D): 1105 x 610 x 97 mm • Product weight: 24 kg • Product weight (lb): 66.15 SERVICE HDMI 1 HDMI 2 ...
... Closed Captioning Full Text • VESA Mount: Vesa compliant • Weight incl. All Rights reserved. www.philips.com Flat HDTV with Pixel Plus 37" LCD integrated digital Specifications 37PF9431D/37 Picture/Display • Color cabinet: Black and Digital Silver • Aspect ratio: 16:9 • ...to 40 °C • Mains power: AC 110 - 120 V, 60 Hz • Power consumption: 175 W • Standby power consumption: 0.45W Dimensions • Set dimensions (W x H x D): 1105 x 610 x 97 mm • Product weight: 24 kg • Product weight (lb): 66.15 SERVICE HDMI 1 HDMI 2 ...

User manual
Page 2
.../Stability - Outdoor Antenna Grounding - Objects and Liquid Entry - Battery Usage CAUTION - Keep these instructions. 2. Install in performance; Do not defeat the safety purpose of the set and cause product damage and/or personal injury. 18. Use only with a cart, stand, tripod, bracket, or table specified by applying excessive pull force to...
.../Stability - Outdoor Antenna Grounding - Objects and Liquid Entry - Battery Usage CAUTION - Keep these instructions. 2. Install in performance; Do not defeat the safety purpose of the set and cause product damage and/or personal injury. 18. Use only with a cart, stand, tripod, bracket, or table specified by applying excessive pull force to...

User manual
Page 3
Please, have the Model and Serial number which are being displayed at the back of your television set or on the packaging, ready, before calling the Philips helpline 1-888-PHILIPS (744-5477) Model: 37-42-50PF9431D/37 - 47PF9631D - 63PF9631D Serial No: Contents Safety warnings 2 ...'Before Calling Service' does not solve your TV problem, you can find at the bottom of the TV menu settings 23 Adjust picture menu settings 24 Adjust sound menu settings 26 Adjust feature menu settings 27 Control TV channels' special functions . . 28 Connect: a VCR or DVD recorder 38 a recorder and ...
Please, have the Model and Serial number which are being displayed at the back of your television set or on the packaging, ready, before calling the Philips helpline 1-888-PHILIPS (744-5477) Model: 37-42-50PF9431D/37 - 47PF9631D - 63PF9631D Serial No: Contents Safety warnings 2 ...'Before Calling Service' does not solve your TV problem, you can find at the bottom of the TV menu settings 23 Adjust picture menu settings 24 Adjust sound menu settings 26 Adjust feature menu settings 27 Control TV channels' special functions . . 28 Connect: a VCR or DVD recorder 38 a recorder and ...

User manual
Page 8
... max. 10 minutes) Color buttons When functions are attached to the color buttons, the color buttons are shown on screen. = MY CONTENT Press to activate a setting - Attention: the TV is physically unplugged. After an action in the selected system mode the remote control will remain in this remote control can adjust...
... max. 10 minutes) Color buttons When functions are attached to the color buttons, the color buttons are shown on screen. = MY CONTENT Press to activate a setting - Attention: the TV is physically unplugged. After an action in the selected system mode the remote control will remain in this remote control can adjust...

User manual
Page 9
... 5 6 PQRS TUV WXYZ 7 8 9 .@ AV+ 0 - MUTE Interrupt the sound or restore it. A/CH INFO FORMAT RECORD VIEW - FAVORITES - ✓ MENU Settings menu on/off. CH/PAGE Channel selection - subchannels). • 3 To add or remove a channel in the Preferred channels list (see p. 14. INFO Display information: ...you have to adjust the volume. AV+ Press repeatedly to select AV1, AV2, AV3, HDMI 1, HDMI 2, Side or TV when in the Settings menu, see p. 31); - English User Manual Use of TV channels. 7 See p. 17 To watch a broadcast and a HDMI source simultaneously...
... 5 6 PQRS TUV WXYZ 7 8 9 .@ AV+ 0 - MUTE Interrupt the sound or restore it. A/CH INFO FORMAT RECORD VIEW - FAVORITES - ✓ MENU Settings menu on/off. CH/PAGE Channel selection - subchannels). • 3 To add or remove a channel in the Preferred channels list (see p. 14. INFO Display information: ...you have to adjust the volume. AV+ Press repeatedly to select AV1, AV2, AV3, HDMI 1, HDMI 2, Side or TV when in the Settings menu, see p. 31); - English User Manual Use of TV channels. 7 See p. 17 To watch a broadcast and a HDMI source simultaneously...

User manual
Page 12
... p. 12. - It lets you display your selection. The MENU button can be lost or broken you can still change some of the basic settings with the currently selected channel in the left panel, the right panel will remain empty. • Multimedia: Allows you to access the Multimedia browser.../CHANNEL + and - See Multimedia browser, p. 32. Note:When activated via the MENU button on the right side of your remote be used to summon the Settings menu without the remote control. POWER DVD/R CBL TV VCR AUX ‡ DEMO SELECT CLOCK Ò º π † MY CONTENT = ® &#...
... p. 12. - It lets you display your selection. The MENU button can be lost or broken you can still change some of the basic settings with the currently selected channel in the left panel, the right panel will remain empty. • Multimedia: Allows you to access the Multimedia browser.../CHANNEL + and - See Multimedia browser, p. 32. Note:When activated via the MENU button on the right side of your remote be used to summon the Settings menu without the remote control. POWER DVD/R CBL TV VCR AUX ‡ DEMO SELECT CLOCK Ò º π † MY CONTENT = ® &#...
User manual
Page 13
...are asked to navigate through the menus, p. 12. 11 See p. 23. - First time installation 1. After an introduction screen, you can access the screens from the Settings menu. Press the cursor up . < Press the +CH/PAGE- Follow the on-screen instructions to highlight your TV, you want to change the First time... installation settings, proceed with How to select a language of the TV's on-screen-menus. (The text of the TV lights up /down to proceed. If the TV...
...are asked to navigate through the menus, p. 12. 11 See p. 23. - First time installation 1. After an introduction screen, you can access the screens from the Settings menu. Press the cursor up . < Press the +CH/PAGE- Follow the on-screen instructions to highlight your TV, you want to change the First time... installation settings, proceed with How to select a language of the TV's on-screen-menus. (The text of the TV lights up /down to proceed. If the TV...

User manual
Page 14
...by pressing one menu level up /down to reveal all the menu items are visible on the screen. Installation allows you to access and change settings and preferences. - Use the cursor down to highlight and select a menu item on the left panel. > The right panel shows the .../R CBL TV VCR AUX ‡ DEMO SELECT CLOCK Ò º π † MY CONTENT = ® ® OK ® ® MENU PIP + Settings TV Setup Installation Demo Exit + TV Picture Sound Features Channels Introduction A lot of guiding instructions, help texts which may be executed depending on the activated...
...by pressing one menu level up /down to reveal all the menu items are visible on the screen. Installation allows you to access and change settings and preferences. - Use the cursor down to highlight and select a menu item on the left panel. > The right panel shows the .../R CBL TV VCR AUX ‡ DEMO SELECT CLOCK Ò º π † MY CONTENT = ® ® OK ® ® MENU PIP + Settings TV Setup Installation Demo Exit + TV Picture Sound Features Channels Introduction A lot of guiding instructions, help texts which may be executed depending on the activated...

User manual
Page 15
...a desired demo with the Installation menu. 13 The demos require no user interaction except for and store TV channels Tip:You will adjust settings related to the installation of the TV channels. 1. Proceed with the cursor up/down. 3. Info Select your selection. 3. Press the ...MENU button on the remote control. > The Settings menu appears. 2. Select Language and press the cursor right. > A list of the television. 1. How to search for starting the demo. Press ...
...a desired demo with the Installation menu. 13 The demos require no user interaction except for and store TV channels Tip:You will adjust settings related to the installation of the TV channels. 1. Proceed with the cursor up/down. 3. Info Select your selection. 3. Press the ...MENU button on the remote control. > The Settings menu appears. 2. Select Language and press the cursor right. > A list of the television. 1. How to search for starting the demo. Press ...

User manual
Page 16
Software upgrade Info Television installation Installation mode Antenna Cable Please select your local area. > When Cable is set correctly, you have searched for "Start" to the first installed TV channel. Press the cursor right. 3. Note: All channels must be...the Installation mode. > When Antenna is selected, the TV will detect antenna signals and will search for and store TV channels (continued) Settings Installation Autoprogram Language Autoprogram Start now Weak channel ins. How to unlock all channels. Store TV channels After language is selected, the TV will...
Software upgrade Info Television installation Installation mode Antenna Cable Please select your local area. > When Cable is set correctly, you have searched for "Start" to the first installed TV channel. Press the cursor right. 3. Note: All channels must be...the Installation mode. > When Antenna is selected, the TV will detect antenna signals and will search for and store TV channels (continued) Settings Installation Autoprogram Language Autoprogram Start now Weak channel ins. How to unlock all channels. Store TV channels After language is selected, the TV will...

User manual
Page 18
... must be filled with the appropriate upgrade image (and structure) which can be found on your TV software using a USB device. Settings TV Setup Installation Demo Exit Info Installation Language Autoprogram Weak channel inst. Software upgrade Weak channel installation This allows you rotate the antenna....of TV channels (in order to upgrade your portable memory device, see p. 4). 1. How to upload a new software version on the www.philips.com/support website. How to search for TV channels installed via an antenna connection (see Annex 1, p. 49. 16 This is displayed and...
... must be filled with the appropriate upgrade image (and structure) which can be found on your TV software using a USB device. Settings TV Setup Installation Demo Exit Info Installation Language Autoprogram Weak channel inst. Software upgrade Weak channel installation This allows you rotate the antenna....of TV channels (in order to upgrade your portable memory device, see p. 4). 1. How to upload a new software version on the www.philips.com/support website. How to search for TV channels installed via an antenna connection (see Annex 1, p. 49. 16 This is displayed and...

User manual
Page 19
...when - Press the cursor left/right to HDMI 1 or HDMI 2. Press the cursor right. 3. Dual screen is used to control the settings of special TV functions, features and accessory devices. Press the cursor right again to enter the Picture/sound preferences menu. Press the cursor ...picture/sound preferences PIP format This menu allows you to use your preferences Preferences Picture/sound pref. The Preferences menu allows you to change settings that will always be accessed only occasionally. Press the -CH/PAGE+ button to change the broadcast channel or the AV+ button to...
...when - Press the cursor left/right to HDMI 1 or HDMI 2. Press the cursor right. 3. Dual screen is used to control the settings of special TV functions, features and accessory devices. Press the cursor right again to enter the Picture/sound preferences menu. Press the cursor ...picture/sound preferences PIP format This menu allows you to use your preferences Preferences Picture/sound pref. The Preferences menu allows you to change settings that will always be accessed only occasionally. Press the -CH/PAGE+ button to change the broadcast channel or the AV+ button to...

User manual
Page 20
...Adjust features preferences Caption service This allows you to read the voice content of the PIP screen. Auto surround Menu preferences Reset AV settings Define the position of the FCC rules. - Designed to show dialogue and conversations while the TV program is the most used by ...'text boxes' to help the hearing impaired, this feature uses on the screen during the transmission of the Setup menu (Continued) Settings/Setup Preferences Picture/sound pref. Info Auto surround Sometimes the broadcaster transmits special signals for the action on the captioned TV program shows ...
...Adjust features preferences Caption service This allows you to read the voice content of the PIP screen. Auto surround Menu preferences Reset AV settings Define the position of the FCC rules. - Designed to show dialogue and conversations while the TV program is the most used by ...'text boxes' to help the hearing impaired, this feature uses on the screen during the transmission of the Setup menu (Continued) Settings/Setup Preferences Picture/sound pref. Info Auto surround Sometimes the broadcaster transmits special signals for the action on the captioned TV program shows ...

User manual
Page 21
... The other service subchannels are broadcasted. 19 Style Select this option to reset the digital caption options back to the captions provider default settings. < Press the cursor right and press the OK button to your own preference. < Select Default, Monospaced serif, Serif, Monospaced ...the following options to confirm. - English User Manual Use of caption display according to confirm. - caption opt. Text Background Info Settings/Setup/Preferences Features prefer. Caption service On Dig. Downloaded rat.... Info Digital caption service This allows you to configure the way you ...
... The other service subchannels are broadcasted. 19 Style Select this option to reset the digital caption options back to the captions provider default settings. < Press the cursor right and press the OK button to your own preference. < Select Default, Monospaced serif, Serif, Monospaced ...the following options to confirm. - English User Manual Use of caption display according to confirm. - caption opt. Text Background Info Settings/Setup/Preferences Features prefer. Caption service On Dig. Downloaded rat.... Info Digital caption service This allows you to configure the way you ...

User manual
Page 22
... on the screen. 20 Notes: - Emergency Alert Signalling is on the selected setting. when content browsing; - The message display will always be displayed. Menu preferences Change PIN Reset AV settings Info Adjust menu preferences OSD 1. The Emergency Alert text - Select Show Emergency... Alerts in a cost-effective and efficient way, while minimizing disruption of the Setup menu (continued) Settings/Setup Preferences Menu preferences Picture/sound pr. with priority High or Maximum will overlap whatever menu element or other message is not ...
... on the screen. 20 Notes: - Emergency Alert Signalling is on the selected setting. when content browsing; - The message display will always be displayed. Menu preferences Change PIN Reset AV settings Info Adjust menu preferences OSD 1. The Emergency Alert text - Select Show Emergency... Alerts in a cost-effective and efficient way, while minimizing disruption of the Setup menu (continued) Settings/Setup Preferences Menu preferences Picture/sound pr. with priority High or Maximum will overlap whatever menu element or other message is not ...

User manual
Page 23
... that the PIN has been created. Enter your PIN! 1. The Menu preferences menu reappears with the digit buttons. Press the cursor right to Set PIN. Select Reset AV settings with the cursor down . 2. Follow the instructions on screen. > If a PIN-code has previously been entered, the menu item is...Menu preferences menu and press the cursor right. 2. digit PIN code.The previous code is erased an the new PIN-code is set to their predefined factory states. 1. Select Set or Change PIN with the cursor down . > If no PIN-code exists yet, the menu item is stored. Press the ...
... that the PIN has been created. Enter your PIN! 1. The Menu preferences menu reappears with the digit buttons. Press the cursor right to Set PIN. Select Reset AV settings with the cursor down . 2. Follow the instructions on screen. > If a PIN-code has previously been entered, the menu item is...Menu preferences menu and press the cursor right. 2. digit PIN code.The previous code is erased an the new PIN-code is set to their predefined factory states. 1. Select Set or Change PIN with the cursor down . > If no PIN-code exists yet, the menu item is stored. Press the ...
User manual
Page 24
...menu, assign the Digital Audio in antenna channels. If your amplifier or receiver has a matching connector for the correct working of Lock after (See TV settings, Channels, p. 28) features. In such cases either clock extraction is taking a long time or there is no clock transmission in to the corresponding... type of accessory device is necessary for Digital Audio In, you to use your TV as a clock. Use of the Setup menu (continued) Settings Setup Preferences Source Clock Info Source AV1 AV2 AV3 HDMI 1 HDMI 2 Side Digital Audio In Select your source This menu allows you to identify ...
...menu, assign the Digital Audio in antenna channels. If your amplifier or receiver has a matching connector for the correct working of Lock after (See TV settings, Channels, p. 28) features. In such cases either clock extraction is taking a long time or there is no clock transmission in to the corresponding... type of accessory device is necessary for Digital Audio In, you to use your TV as a clock. Use of the Setup menu (continued) Settings Setup Preferences Source Clock Info Source AV1 AV2 AV3 HDMI 1 HDMI 2 Side Digital Audio In Select your source This menu allows you to identify ...

User manual
Page 25
... 3. Note: Changes in an area or state where daylight saving is not applied, but you receive channels from other channels. Use of the TV menu settings TV Picture Sound Features Channels This menu allows you to adjust your local time. 1. Time - Press the cursor right to select your local time zone...) Daylight saving time is displayed and gives an overview of special TV features and functions. Daylight saving (only available when Auto clock mode is set by the TV. Select Daylight saving with the cursor down . 2. Select TV and press the cursor right. > The TV menu is automatically...
... 3. Note: Changes in an area or state where daylight saving is not applied, but you receive channels from other channels. Use of the TV menu settings TV Picture Sound Features Channels This menu allows you to adjust your local time. 1. Time - Press the cursor right to select your local time zone...) Daylight saving time is displayed and gives an overview of special TV features and functions. Daylight saving (only available when Auto clock mode is set by the TV. Select Daylight saving with the cursor down . 2. Select TV and press the cursor right. > The TV menu is automatically...

User manual
Page 26
...the picture menu. Color Adjusts the saturation level of submenu items with the cursor up /down . Adjust the settings with the cursor left panel. 2. Note:This Philips TV has been set at the factory to suit your own viewing conditions. Select Picture and press the cursor right. > The ...white colors a neutral, Warm to display a list of the picture. Most consumers will find the one that affect the quality of predefined picture settings, each corresponding with the cursor up /down . 3. Sharpness Adjusts the sharpness of fine details in case of the picture. As your home ...
...the picture menu. Color Adjusts the saturation level of submenu items with the cursor up /down . Adjust the settings with the cursor left panel. 2. Note:This Philips TV has been set at the factory to suit your own viewing conditions. Select Picture and press the cursor right. > The ...white colors a neutral, Warm to display a list of the picture. Most consumers will find the one that affect the quality of predefined picture settings, each corresponding with the cursor up /down . 3. Sharpness Adjusts the sharpness of fine details in case of the picture. As your home ...


