
User manual
Page 3
... system 4 Introduction 4 What's in the box 4 Overview of the main unit 5 Overview of the remote control 6 3 Get started 7 Connect speakers 7 Connect power 7 Demonstrate the features 7 Prepare the remote control 7 Set clock 8 Turn on 8 4 Play 9 Play from disc 9 Play from USB 9 Control play 9 Skip to a track 9 Program tracks 10 5 Listen to the radio 11 Tune to...
... system 4 Introduction 4 What's in the box 4 Overview of the main unit 5 Overview of the remote control 6 3 Get started 7 Connect speakers 7 Connect power 7 Demonstrate the features 7 Prepare the remote control 7 Set clock 8 Turn on 8 4 Play 9 Play from disc 9 Play from USB 9 Control play 9 Skip to a track 9 Program tracks 10 5 Listen to the radio 11 Tune to...

User manual
Page 6
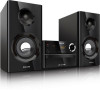
... from discs, USB storage devices, and other external devices; • listen to Philips! You can : • enjoy audio from the support that Philips offers, register your package: • Main unit • 2 x speakers • Remote control (with below sound effect: • Digital Sound Control (DSC) • DSC 1: Balanced • DSC 2: Clear • DSC 3: Powerful • DSC...
... from discs, USB storage devices, and other external devices; • listen to Philips! You can : • enjoy audio from the support that Philips offers, register your package: • Main unit • 2 x speakers • Remote control (with below sound effect: • Digital Sound Control (DSC) • DSC 1: Balanced • DSC 2: Clear • DSC 3: Powerful • DSC...

User manual
Page 8
... source. f VOL +/• Adjust volume. k PROG • Program tracks. • Program radio stations. • Auto store FM radio stations. n • Stop play . Overview of the remote control a b c d e f g h i CD AUDIO IN FM PRESET/ALBUM REPEAT VOL SHUFFLE MUTE DISPLAY SOUND CLOCK PROG TIMER SLEEP r q p o n m l k j a • • Turn the unit on or... switch to a radio station. e / Skip to the previous/next track. Search within a track/disc/USB. h SOUND • Enrich sound effect with Digital Sound Control (DSC). l DISPLAY • Adjust display brightness.
... source. f VOL +/• Adjust volume. k PROG • Program tracks. • Program radio stations. • Auto store FM radio stations. n • Stop play . Overview of the remote control a b c d e f g h i CD AUDIO IN FM PRESET/ALBUM REPEAT VOL SHUFFLE MUTE DISPLAY SOUND CLOCK PROG TIMER SLEEP r q p o n m l k j a • • Turn the unit on or... switch to a radio station. e / Skip to the previous/next track. Search within a track/disc/USB. h SOUND • Enrich sound effect with Digital Sound Control (DSC). l DISPLAY • Adjust display brightness.

User manual
Page 9
... •• Risk of product damage! Never discard batteries in sequence. When the remote control is the same or higher than herein may result in hazardous radiation exposure or other unsafe operation. If you contact Philips, you will be asked for long periods, remove the batteries. When you connect the AC power cord... this chapter in fire. •• Risk of decreased battery life! Always follow the instructions in this manual. 3 Get started Caution •• Use of controls or adjustments or performance of procedures other than the supplied speakers.
... •• Risk of product damage! Never discard batteries in sequence. When the remote control is the same or higher than herein may result in hazardous radiation exposure or other unsafe operation. If you contact Philips, you will be asked for long periods, remove the batteries. When you connect the AC power cord... this chapter in fire. •• Risk of decreased battery life! Always follow the instructions in this manual. 3 Get started Caution •• Use of controls or adjustments or performance of procedures other than the supplied speakers.
User manual
Page 10
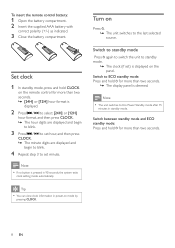
... ) is displayed on Press . »» The unit switches to Eco Power Standby mode after 15 minutes in standby mode. To insert the remote control battery: 1 Open the battery compartment. 2 Insert the supplied AAA battery with correct polarity (+/-) as indicated. 3 Close the battery compartment. Set clock...clock information in 90 seconds, the system exits clock setting mode automatically. Note •• If no button is pressed in power-on the remote control for more than two seconds. »» The display panel is displayed. 2 Press / to select [24H] or [12H] hour format...
... ) is displayed on Press . »» The unit switches to Eco Power Standby mode after 15 minutes in standby mode. To insert the remote control battery: 1 Open the battery compartment. 2 Insert the supplied AAA battery with correct polarity (+/-) as indicated. 3 Close the battery compartment. Set clock...clock information in 90 seconds, the system exits clock setting mode automatically. Note •• If no button is pressed in power-on the remote control for more than two seconds. »» The display panel is displayed. 2 Press / to select [24H] or [12H] hour format...

User manual
Page 17
... or clean the disc. •• Use a finalized CD or correct format disc. If you contact Philips, make sure that there is power at the sensor on the timer. Remote control does not work •• Set the clock correctly. •• Switch on the front of the...8226; The formats of these files are clamped. To keep the warranty valid, never try to the Philips Web page (www. Poor radio reception •• Increase the distance between the remote control and the unit. •• Insert the battery with its polarities (+/- Clock/timer setting erased &#...
... or clean the disc. •• Use a finalized CD or correct format disc. If you contact Philips, make sure that there is power at the sensor on the timer. Remote control does not work •• Set the clock correctly. •• Switch on the front of the...8226; The formats of these files are clamped. To keep the warranty valid, never try to the Philips Web page (www. Poor radio reception •• Increase the distance between the remote control and the unit. •• Insert the battery with its polarities (+/- Clock/timer setting erased &#...

