
Leaflet
Page 1
... anywhere • Adjust the sound to your Living Room into a Digital Home Theater - 5 DVD/CD Home Entertainment System Turn your seating position via joy stick remote control Deep & Powerful Bass • 85W Twin Port Subwoofer Digital Sound Reproduction • Full Digital 6-channel Class-D™ Amplifier • DTS, Dolby Digital, Dolby Prologic...
... anywhere • Adjust the sound to your Living Room into a Digital Home Theater - 5 DVD/CD Home Entertainment System Turn your seating position via joy stick remote control Deep & Powerful Bass • 85W Twin Port Subwoofer Digital Sound Reproduction • Full Digital 6-channel Class-D™ Amplifier • DTS, Dolby Digital, Dolby Prologic...

Leaflet
Page 2
Frequency Range: 120Hz~20kHz - Frequency Range: 120Hz~20kHz - Frequency Range: 30Hz~120Hz - analog:AUX,TV in (cinch) - 5 DVD/CD Home Entertainment System standard product information MX 3950D Playback formats • 5 Disc System • Video: DVD, DVD+R/RW,VCD, SVCD • Audio: CD, CD-R/RW, MP3-CD* • Pictures: Picture-CD (JPEG) with 40 Presets Amplifier • Full Digital 6-channel Class-D™ Amplifier • 6 x 85 watts RMS • 500 watts Total Power Loudspeakers • 4 dual-driver speakers (L, R, SL, SR) - Multi-Channel (5.1): DTS, Dolby Digital, MPEG -...
Frequency Range: 120Hz~20kHz - Frequency Range: 120Hz~20kHz - Frequency Range: 30Hz~120Hz - analog:AUX,TV in (cinch) - 5 DVD/CD Home Entertainment System standard product information MX 3950D Playback formats • 5 Disc System • Video: DVD, DVD+R/RW,VCD, SVCD • Audio: CD, CD-R/RW, MP3-CD* • Pictures: Picture-CD (JPEG) with 40 Presets Amplifier • Full Digital 6-channel Class-D™ Amplifier • 6 x 85 watts RMS • 500 watts Total Power Loudspeakers • 4 dual-driver speakers (L, R, SL, SR) - Multi-Channel (5.1): DTS, Dolby Digital, MPEG -...

User manual
Page 8
...15 Listening to the playback 15 Recording (digital 15 Functional Overview Main unit and remote control 16 Control buttons available on the remote only 17 Getting Started Step 1: Inserting batteries into the remote control 18 Using the remote control to operate the system 18 Step 2: Setting the clock 18 Step 3: ...Setting the TV 19 Changing the NTSC/PAL setting via the remote control 19 Selecting the color system that corresponds to your TV 19 Step 4: Selecting speaker layout 20 Changing seating control position 20 Setting...
...15 Listening to the playback 15 Recording (digital 15 Functional Overview Main unit and remote control 16 Control buttons available on the remote only 17 Getting Started Step 1: Inserting batteries into the remote control 18 Using the remote control to operate the system 18 Step 2: Setting the clock 18 Step 3: ...Setting the TV 19 Changing the NTSC/PAL setting via the remote control 19 Selecting the color system that corresponds to your TV 19 Step 4: Selecting speaker layout 20 Changing seating control position 20 Setting...

User manual
Page 9
... Eco Power standby mode ...... 39 Switching to standby mode (view clock) ... 39 Dimming system's display screen 39 Recording to an external device 39 Using the remote to operate your television ... 39 Troubleshooting 40-41 Specifications 42 Glossary 43 Limited Warranty 44 Contents pg 001-044_MX39-37-Eng1 9 9 2/25/03, 10:35...
... Eco Power standby mode ...... 39 Switching to standby mode (view clock) ... 39 Dimming system's display screen 39 Recording to an external device 39 Using the remote to operate your television ... 39 Troubleshooting 40-41 Specifications 42 Glossary 43 Limited Warranty 44 Contents pg 001-044_MX39-37-Eng1 9 9 2/25/03, 10:35...

User manual
Page 10
...cabinet and allow about 10 cm (4 inches) of free space all around the player for adequate ventilation. 10 cm (4 inches) 10 cm (4 inches) PHILIPS DVD Home Cinema System 10 cm (4 inches) Care of disc - Do not block the vents - Do not use a solution containing alcohol, spirits, ... Speaker cables (5x) Subwoofer cable Audio cable (white, red) Composite video cable (yellow) Component video cables (red/blue/green) FM wire antenna AM loop antenna Remote Control and two AA batteries DISC/ TV/AV MEDIA TUNER AUX/DI 1 2 3 4 5 6 7 8 9 SURR. 0 VOL SOUND SYSTEM MENU DISC MENU ...
...cabinet and allow about 10 cm (4 inches) of free space all around the player for adequate ventilation. 10 cm (4 inches) 10 cm (4 inches) PHILIPS DVD Home Cinema System 10 cm (4 inches) Care of disc - Do not block the vents - Do not use a solution containing alcohol, spirits, ... Speaker cables (5x) Subwoofer cable Audio cable (white, red) Composite video cable (yellow) Component video cables (red/blue/green) FM wire antenna AM loop antenna Remote Control and two AA batteries DISC/ TV/AV MEDIA TUNER AUX/DI 1 2 3 4 5 6 7 8 9 SURR. 0 VOL SOUND SYSTEM MENU DISC MENU ...

User manual
Page 15
... stereo (two channel, right and left) recordings. Listening to the playback 1 Connect the DVD system's DIGITAL IN jack to the AUDIO IN jacks on the remote to select "AUX" in order to activate the input source. Before starting operation, press AUX/DI on the VCR or cable/satellite box. To view... DVD playback while recording, you to the AUDIO OUT jacks on the remote to select "DIG IN" in order to your TV using a VCR. 3 Connect the DVD system's CVBS jack to the VIDEO IN jack on the VCR...
... stereo (two channel, right and left) recordings. Listening to the playback 1 Connect the DVD system's DIGITAL IN jack to the AUDIO IN jacks on the remote to select "AUX" in order to activate the input source. Before starting operation, press AUX/DI on the VCR or cable/satellite box. To view... DVD playback while recording, you to the AUDIO OUT jacks on the remote to select "DIG IN" in order to your TV using a VCR. 3 Connect the DVD system's CVBS jack to the VIDEO IN jack on the VCR...

User manual
Page 16
...- TUNER: tunes the radio frequency up/down or selects a preset radio station. (see page 23) - Turns on/off the seating control diagram on the remote to select the desired seating position. (see page 20) ! Adjusts the volume level. % BASS / TREBLE - DISC: *searches backward/forward or selects a.... CLOCK: sets the minutes and hours. (see page 35) S SEARCH T (PREV/NEXT) - DISC: toggles between FM and AM band. - Point the remote control towards this sensor. 5 Speaker display panel 6 System display panel 7 TUNING - or 24-hour clock display. (see page 23, 25) - DISC: stops...
...- TUNER: tunes the radio frequency up/down or selects a preset radio station. (see page 23) - Turns on/off the seating control diagram on the remote to select the desired seating position. (see page 20) ! Adjusts the volume level. % BASS / TREBLE - DISC: *searches backward/forward or selects a.... CLOCK: sets the minutes and hours. (see page 35) S SEARCH T (PREV/NEXT) - DISC: toggles between FM and AM band. - Point the remote control towards this sensor. 5 Speaker display panel 6 System display panel 7 TUNING - or 24-hour clock display. (see page 23, 25) - DISC: stops...

User manual
Page 17
... panel. (see page 39) ∞ SLEEP - Confirms a selection. ) DISC SKIP - Selects various repeat modes. (see page 35) ( OK - Adjusts TV volume (Philips TV only.) (see page 38) ≤ DIM - Switches to Eco Power standby mode. (see page 39) - *Switches to select a preset radio station. (see page...(see pages 27-28) * Joystick 1 2 3 4 - Sets the sleep timer function. (see page 24) ª ZOOM - In stop mode, turns on the remote only & SYSTEM MENU (DVD mode only) - During playback, returns to main menu. ⁄ SOUND - Selects next disc tray for more than two seconds. 17 17...
... panel. (see page 39) ∞ SLEEP - Confirms a selection. ) DISC SKIP - Selects various repeat modes. (see page 35) ( OK - Adjusts TV volume (Philips TV only.) (see page 38) ≤ DIM - Switches to Eco Power standby mode. (see page 39) - *Switches to select a preset radio station. (see page...(see pages 27-28) * Joystick 1 2 3 4 - Sets the sleep timer function. (see page 24) ª ZOOM - In stop mode, turns on the remote only & SYSTEM MENU (DVD mode only) - During playback, returns to main menu. ⁄ SOUND - Selects next disc tray for more than two seconds. 17 17...

User manual
Page 18
...If the DVD system is not to set in combination. - If you wish to operate the system 1 Aim the remote control directly at the remote sensor (iR) on the remote control (for example TV/AV, TUNER.) 3 Then select the desired function (for example). Batteries contain chemical substances, so...8226;TIMER again to confirm. 4 Press S / T to be set the minutes and hours. English Getting Started Step 1: Inserting batteries into the remote control 3 1 2 1 Open the battery compartment. 2 Insert two batteries type R06 or AA, following the indications (+-) inside the compartment. 3 Close the ...
...If the DVD system is not to set in combination. - If you wish to operate the system 1 Aim the remote control directly at the remote sensor (iR) on the remote control (for example TV/AV, TUNER.) 3 Then select the desired function (for example). Batteries contain chemical substances, so...8226;TIMER again to confirm. 4 Press S / T to be set the minutes and hours. English Getting Started Step 1: Inserting batteries into the remote control 3 1 2 1 Open the battery compartment. 2 Insert two batteries type R06 or AA, following the indications (+-) inside the compartment. 3 Close the ...

User manual
Page 19
... the connected TV is in the menu. Changing the NTSC/PAL setting via the remote control 1, 2 DISC/ TV/AV MEDIA TUNER AUX/DI 1 2 3 4 5 6 1 Press DISC/MEDIA on the remote to channel 3 or 4 if you see the blue Philips DVD background screen on the display panel. ➜ To change the video signal ...format will change the setting, repeat step 2. To remove the menu Press SYSTEM MENU. See your TV manual for a DVD to play on the remote to the correct video-in accordance with both NTSC and PAL. Selecting the color system that chooses different video modes. ➜ Or, set to ...
... the connected TV is in the menu. Changing the NTSC/PAL setting via the remote control 1, 2 DISC/ TV/AV MEDIA TUNER AUX/DI 1 2 3 4 5 6 1 Press DISC/MEDIA on the remote to channel 3 or 4 if you see the blue Philips DVD background screen on the display panel. ➜ To change the video signal ...format will change the setting, repeat step 2. To remove the menu Press SYSTEM MENU. See your TV manual for a DVD to play on the remote to the correct video-in accordance with both NTSC and PAL. Selecting the color system that chooses different video modes. ➜ Or, set to ...
User manual
Page 20
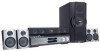
... Output Multi-channel Speakers Personal settings ... To change the seating position, see "Selecting speaker layout." 3 Use the joystick (1 2 3 4) on the remote (or VOLUME control on the front panel) to select your current seating position. ➜ During playback, you can hear the changing of the room....SEATING twice. ➜ "PERSONAL SETTING" appears and the system will adjust automatically to suit the selected speaker layout settings based on the remote to the personal speaker settings. To remove the menu Press SYSTEM MENU. 20 pg 001-044_MX39-37-Eng1 20 2/25/03, 10:29...
... Output Multi-channel Speakers Personal settings ... To change the seating position, see "Selecting speaker layout." 3 Use the joystick (1 2 3 4) on the remote (or VOLUME control on the front panel) to select your current seating position. ➜ During playback, you can hear the changing of the room....SEATING twice. ➜ "PERSONAL SETTING" appears and the system will adjust automatically to suit the selected speaker layout settings based on the remote to the personal speaker settings. To remove the menu Press SYSTEM MENU. 20 pg 001-044_MX39-37-Eng1 20 2/25/03, 10:29...

User manual
Page 21
...on Multichannel audio outputs. use the longer delay settings when the surround speakers are only active on the remote to navigate in the menu. If the language selected is not available on the remote to navigate in the menu. Except the DVD system's Menu Language, it will be automatically generated. 6... and press 4. 3 Use the joystick (1 2 3 4) on or off the sound output. These adjustments may include : A Turning on the remote to and press 2. Step 5: Setting language preference You can adjust the delay times (center and surround only) and volume level for individual speakers.
...on Multichannel audio outputs. use the longer delay settings when the surround speakers are only active on the remote to navigate in the menu. If the language selected is not available on the remote to navigate in the menu. Except the DVD system's Menu Language, it will be automatically generated. 6... and press 4. 3 Use the joystick (1 2 3 4) on or off the sound output. These adjustments may include : A Turning on the remote to and press 2. Step 5: Setting language preference You can adjust the delay times (center and surround only) and volume level for individual speakers.
User manual
Page 22
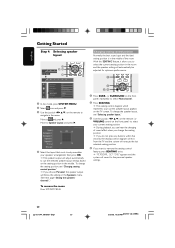
... up . 4 Repeat steps 3 for the same zone as your four-digit password (see page 32-33.) G To obtain the best surround effects, see the blue Philips DVD background screen on the TV. 3 Press one of the OPEN•CLOSE 0 button to close before closing the first tray, the first tray will... DVDs must enter your player. - Only one . Playing discs 1 Adjust SOURCE control until "DISC X" appears on the display panel (or press DISC/MEDIA on the remote.) 2 Turn on the TV power and set to play face up . Note: - DVD discs and players are labeled for Region 1 in order to the correct...
... up . 4 Repeat steps 3 for the same zone as your four-digit password (see page 32-33.) G To obtain the best surround effects, see the blue Philips DVD background screen on the TV. 3 Press one of the OPEN•CLOSE 0 button to close before closing the first tray, the first tray will... DVDs must enter your player. - Only one . Playing discs 1 Adjust SOURCE control until "DISC X" appears on the display panel (or press DISC/MEDIA on the remote.) 2 Turn on the TV power and set to play face up . Note: - DVD discs and players are labeled for Region 1 in order to the correct...

User manual
Page 23
... may appear on the TV screen once you can replace the discs on disc trays 2~5. buttons on the remote. To select a playback feature or item G Use the joystick (1 2 3 4) or numeric keypad (0-9) on the remote, then press ÉÅ or OK to start automatically. ➜ If you do not press any buttons within...
... may appear on the TV screen once you can replace the discs on disc trays 2~5. buttons on the remote. To select a playback feature or item G Use the joystick (1 2 3 4) or numeric keypad (0-9) on the remote, then press ÉÅ or OK to start automatically. ➜ If you do not press any buttons within...

User manual
Page 26
... between program on and off. You have to start automatically. ➜ With picture discs, 9 thumbnail pictures will play . Press ÉÅ to turn on the remote to move within the menu and press OK to select the desired file to select S or T in the current folder. In stop mode, you can...
... between program on and off. You have to start automatically. ➜ With picture discs, 9 thumbnail pictures will play . Press ÉÅ to turn on the remote to move within the menu and press OK to select the desired file to select S or T in the current folder. In stop mode, you can...

User manual
Page 27
... menu bars on the TV. STEP FORWARD Select to enter your choice. the disc menu (if available) will be different or restricted, depending on the remote to navigate in the menu. ➜ Press 1 2 to move within the enlarged picture on the TV screen without interrupting the disc playback. SYSTEM MENU 1 2 SEATING...
... menu bars on the TV. STEP FORWARD Select to enter your choice. the disc menu (if available) will be different or restricted, depending on the remote to navigate in the menu. ➜ Press 1 2 to move within the enlarged picture on the TV screen without interrupting the disc playback. SYSTEM MENU 1 2 SEATING...

User manual
Page 28
NOTE: Some of the setup menu options and press 2 to enter the menu. A wide picture will display on the remote to navigate in the menu. 4 Press OK to select one of the features in the Setup Menu are described in "Getting Started." English DVD Menu ...
NOTE: Some of the setup menu options and press 2 to enter the menu. A wide picture will display on the remote to navigate in the menu. 4 Press OK to select one of the features in the Setup Menu are described in "Getting Started." English DVD Menu ...

User manual
Page 29
... Sound Select this if you have connected the DVD system to your display device from only the two front speakers and subwoofer. button on the remote control (or SURROUND on /off Follow the steps of "Using the Setup Menu" and select : > Video Output TV Shape TV System Video Output Screen saver...
... Sound Select this if you have connected the DVD system to your display device from only the two front speakers and subwoofer. button on the remote control (or SURROUND on /off Follow the steps of "Using the Setup Menu" and select : > Video Output TV Shape TV System Video Output Screen saver...

User manual
Page 31
... enjoy the surround sound with Dolby Digital mode. pg 001-044_MX39-37-Eng1 31 31 2/25/03, 9:58 AM 3139 115 21993 turning on the remote will be softened and low volume outputs are brought upward to the original factory setting except for movies with its full dynamic range. English Night...
... enjoy the surround sound with Dolby Digital mode. pg 001-044_MX39-37-Eng1 31 31 2/25/03, 9:58 AM 3139 115 21993 turning on the remote will be softened and low volume outputs are brought upward to the original factory setting except for movies with its full dynamic range. English Night...

User manual
Page 32
... Defaults __ __ __ __ Enter code Set Parental control 1 In disc mode, press SYSTEM MENU. 2 Select icon and press 4. 3 Use the joystick (1 2 3 4) on the remote to navigate in region 1 players) Some DVDs may be viewed only by adults due to enter the four-digit password. Mature material; Material is unsuitable...
... Defaults __ __ __ __ Enter code Set Parental control 1 In disc mode, press SYSTEM MENU. 2 Select icon and press 4. 3 Use the joystick (1 2 3 4) on the remote to navigate in region 1 players) Some DVDs may be viewed only by adults due to enter the four-digit password. Mature material; Material is unsuitable...


