Owner's Manual
Page 3
... Protection 36 - Setting the Time - Setting the Dimmer (DIMMER) - Detaching the Front Panel - Setting the PGM Button - Switching the AUX Mode (AUX) - Door System Confirmation Operation of "DFS Alarm 44 Arming Alarm 44 Disarming Alarm 44 Entry Detection 44 Other Functions 45 Using the PGM ...-in CD Player's Error Message 49 Specifications 50 2 FRANÇAIS ITALIANO NEDERLANDS Using the PGM Button Displaying the Time 47 Using the AUX Source 47 - Setting the Warning Tone (WARN) - Speaker Volume Output Adjustment Selecting Door Switching Systems 43 - Replacing the Front Panel -...
... Protection 36 - Setting the Time - Setting the Dimmer (DIMMER) - Detaching the Front Panel - Setting the PGM Button - Switching the AUX Mode (AUX) - Door System Confirmation Operation of "DFS Alarm 44 Arming Alarm 44 Disarming Alarm 44 Entry Detection 44 Other Functions 45 Using the PGM ...-in CD Player's Error Message 49 Specifications 50 2 FRANÇAIS ITALIANO NEDERLANDS Using the PGM Button Displaying the Time 47 Using the AUX Source 47 - Setting the Warning Tone (WARN) - Speaker Volume Output Adjustment Selecting Door Switching Systems 43 - Replacing the Front Panel -...
Owner's Manual
Page 9
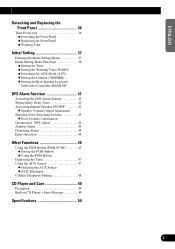
... TUNER button : TV = Tuner = OFF CD button : Built-in CD player = Multi-CD player = OFF Note: • External Unit refers to a Pioneer product (such as one External Unit can listen to page 11.) 1. To retract the VOLUME, press it becomes easier to roll. Tuner) Each press changes...button selects the desired source in the following order: Built-in CD player = TV = Tuner = Multi-CD player = External Unit = AUX 7 Remote Controller (for DEH-P6200) Each press of basic functions by this product. • In the following explains the initial operations required before you can be controlled by...
... TUNER button : TV = Tuner = OFF CD button : Built-in CD player = Multi-CD player = OFF Note: • External Unit refers to a Pioneer product (such as one External Unit can listen to page 11.) 1. To retract the VOLUME, press it becomes easier to roll. Tuner) Each press changes...button selects the desired source in the following order: Built-in CD player = TV = Tuner = Multi-CD player = External Unit = AUX 7 Remote Controller (for DEH-P6200) Each press of basic functions by this product. • In the following explains the initial operations required before you can be controlled by...
Owner's Manual
Page 40
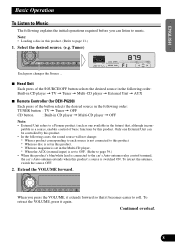
...night, when the vehicle's head lights are turned ON the display is possible to use auxiliary (AUX) equipment with this product. 1. Press the FUNCTION button and select the AUX Setting mode (AUX) in the Initial Setting Menu. 2. Press the FUNCTION button and select the Dimmer mode (DIMMER)...Setting Menu. 2. Switch the Dimmer ON/OFF with the 5/∞ buttons. You can switch this product. Switch the AUX ON/OFF with the 5/∞ buttons. 39 Initial Setting Switching the AUX Mode (AUX) It is dimmed. Activate the AUX mode when using external equipment with this function ON/OFF. 1.
...night, when the vehicle's head lights are turned ON the display is possible to use auxiliary (AUX) equipment with this product. 1. Press the FUNCTION button and select the AUX Setting mode (AUX) in the Initial Setting Menu. 2. Press the FUNCTION button and select the Dimmer mode (DIMMER)...Setting Menu. 2. Switch the Dimmer ON/OFF with the 5/∞ buttons. You can switch this product. Switch the AUX ON/OFF with the 5/∞ buttons. 39 Initial Setting Switching the AUX Mode (AUX) It is dimmed. Activate the AUX mode when using external equipment with this function ON/OFF. 1.

Owner's Manual
Page 48
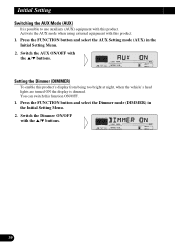
...page 8.) Each press changes the Source ... Refer to 5 in the same way. 47 Selecting the AUX Source • Select AUX. (Refer to use auxiliary (AUX) equipment with this product. Hold for AUX source can be changed. 1. AUX Title Input The display title for 2 seconds 2. Pressing the CLOCK button switches the Time display ON/...OFF. Select the AUX Title Input mode (TITLE IN) in the Initial Setting Menu ON, and then select the desired source. Other Functions Displaying the Time • ...
...page 8.) Each press changes the Source ... Refer to 5 in the same way. 47 Selecting the AUX Source • Select AUX. (Refer to use auxiliary (AUX) equipment with this product. Hold for AUX source can be changed. 1. AUX Title Input The display title for 2 seconds 2. Pressing the CLOCK button switches the Time display ON/...OFF. Select the AUX Title Input mode (TITLE IN) in the Initial Setting Menu ON, and then select the desired source. Other Functions Displaying the Time • ...


