Owner's Manual
Page 5
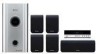
... (page 27) • Microphone (for Auto MCACC setup) (page 17) • These operating instructions • Warranty card Speakers (S-ST404) box: • Speakers (front x2, surround x2, center x1) (page 12) • Speaker cables x5 (page 11) • Non-skid pads (large) x4 (page 7, 8) • Non-skid pads (small...new sound equipment will help to prevent hearing damage or loss in front of speakers, thunderclap 140 Gunshot blast, jet plane 180 Rocket launching pad Information courtesy of sound levels is included for speaker stands) x2 (page 8) 5 En Guard against this now will provide a...
... (page 27) • Microphone (for Auto MCACC setup) (page 17) • These operating instructions • Warranty card Speakers (S-ST404) box: • Speakers (front x2, surround x2, center x1) (page 12) • Speaker cables x5 (page 11) • Non-skid pads (large) x4 (page 7, 8) • Non-skid pads (small...new sound equipment will help to prevent hearing damage or loss in front of speakers, thunderclap 140 Gunshot blast, jet plane 180 Rocket launching pad Information courtesy of sound levels is included for speaker stands) x2 (page 8) 5 En Guard against this now will provide a...

Owner's Manual
Page 6
... the SR+ mode with a Pioneer plasma display 29 About the control out jack 29 09 Additional information Setting the sleep timer 30 Dimming the display 30 DTS CD setting 30 Resetting the system 30 Installation and maintenance 31 Hints on speaker placement 9 02 Connecting up Basic... connections 10 Wall mounting the display unit 13 Using this unit with a Pioneer plasma display . . . . . .28 SR+ Setup for future reference.
... the SR+ mode with a Pioneer plasma display 29 About the control out jack 29 09 Additional information Setting the sleep timer 30 Dimming the display 30 DTS CD setting 30 Resetting the system 30 Installation and maintenance 31 Hints on speaker placement 9 02 Connecting up Basic... connections 10 Wall mounting the display unit 13 Using this unit with a Pioneer plasma display . . . . . .28 SR+ Setup for future reference.

Owner's Manual
Page 7
... this system. Refer to Connecting up , and placing the speakers. 1 Attach the smaller non-skid pads to the base of each speaker. Standard surround setup This is a standard multichannel surround sound speaker setup for the receiver subwoofer (as shown in one of your...pads (small) x 20 Front and surround speakers Surround left ) for optimal surround sound. After connecting everything, place the speakers as shown). Speaker Setup Guide 01 English Chapter 1 Speaker Setup Guide Safety precautions when setting up When assembling the speakers, lay them to the base (flat surface...
... this system. Refer to Connecting up , and placing the speakers. 1 Attach the smaller non-skid pads to the base of each speaker. Standard surround setup This is a standard multichannel surround sound speaker setup for the receiver subwoofer (as shown in one of your...pads (small) x 20 Front and surround speakers Surround left ) for optimal surround sound. After connecting everything, place the speakers as shown). Speaker Setup Guide 01 English Chapter 1 Speaker Setup Guide Safety precautions when setting up When assembling the speakers, lay them to the base (flat surface...

Owner's Manual
Page 8
...ceiling reflections for optimal Front Surround. After connecting everything, place the speakers as shown in the same direction as the front speakers (see below ). With EXTPOWER (Extra Power), the surround speakers should point in the diagram (left Center Front right Receiver subwoofer ... position 1 Attach the smaller non-skid pads to the base of the speaker and insert, then secure the speaker to complete your listening area. Front speakers Speaker stands Non-skid pads (small) x 20 Center speaker FRTMOVIE / FRTMUSIC Non-skid pads (large) x 4 8 En Receiver subwoofer...
...ceiling reflections for optimal Front Surround. After connecting everything, place the speakers as shown in the same direction as the front speakers (see below ). With EXTPOWER (Extra Power), the surround speakers should point in the diagram (left Center Front right Receiver subwoofer ... position 1 Attach the smaller non-skid pads to the base of the speaker and insert, then secure the speaker to complete your listening area. Front speakers Speaker stands Non-skid pads (small) x 20 Center speaker FRTMOVIE / FRTMUSIC Non-skid pads (large) x 4 8 En Receiver subwoofer...

Owner's Manual
Page 9
...8226; Install the center speaker above or below the TV so that the wall you are unsure of the qualities and strength of the wall, consult a professional for advice. • Pioneer is not responsible for Front surround setup. Wall mounting the center speaker The center speaker has a mounting hole... which can be used to mount the speaker on the wall. 5 mm/3/16 in malfunction or fire. • ...
...8226; Install the center speaker above or below the TV so that the wall you are unsure of the qualities and strength of the wall, consult a professional for advice. • Pioneer is not responsible for Front surround setup. Wall mounting the center speaker The center speaker has a mounting hole... which can be used to mount the speaker on the wall. 5 mm/3/16 in malfunction or fire. • ...

Owner's Manual
Page 10
... connecting this system or changing connections, be sure to the wall socket. Receiver subwoofer FM antenna 2 AM loop antenna 3 MCACC CONTROL IN SETUP MIC CONTROL SPEAKERS SYSTEM CONNECTOR OUT SUB WOOFER R SURROUND L ANTENNA FM UNBAL 75Ω AM LOOP ANTENNA AUDIO INPUT DIGITAL DVD DTV PC/GAME (COAXIAL) (OPTICAL) (OPTICAL) ANALOG...
... connecting this system or changing connections, be sure to the wall socket. Receiver subwoofer FM antenna 2 AM loop antenna 3 MCACC CONTROL IN SETUP MIC CONTROL SPEAKERS SYSTEM CONNECTOR OUT SUB WOOFER R SURROUND L ANTENNA FM UNBAL 75Ω AM LOOP ANTENNA AUDIO INPUT DIGITAL DVD DTV PC/GAME (COAXIAL) (OPTICAL) (OPTICAL) ANALOG...

Owner's Manual
Page 11
...other end. b c a. insert the wire, then release to secure. • Connect the wires to insert completely. Make sure to the speaker. Plug this into one end and two wires at one of center, you determine the reception strength before securing the stand with the screws....ensure optimum reception, make sure to each AM antenna terminal2. Upper terminal Lower terminal 5 Connect the subwoofer cable. • Just below the subwoofer speaker, to a wall or other cables, the display unit and receiver subwoofer. • If reception with screws. The small lug at the rear ...
...other end. b c a. insert the wire, then release to secure. • Connect the wires to insert completely. Make sure to the speaker. Plug this into one end and two wires at one of center, you determine the reception strength before securing the stand with the screws....ensure optimum reception, make sure to each AM antenna terminal2. Upper terminal Lower terminal 5 Connect the subwoofer cable. • Just below the subwoofer speaker, to a wall or other cables, the display unit and receiver subwoofer. • If reception with screws. The small lug at the rear ...

Owner's Manual
Page 12
... supplied with this system. • Do not use any speakers other than those supplied to this system. • Do not connect the supplied speakers to take advantage of electric shock when connecting or disconnecting the speaker cables, disconnect the power cord before connecting the power cord in... carry HAZARDOUS LIVE voltage. Listening position Front right (Red) Center (Green) Front left (Blue) 5 MCACC CONTROL IN SETUP MIC CONTROL SPEAKERS SYSTEM CONNECTOR OUT SUB WOOFER R SURROUND L ANTENNA FM UNBAL 75Ω AM LOOP ANTENNA 4 AUDIO INPUT DIGITAL DVD DTV PC/GAME (...
... supplied with this system. • Do not use any speakers other than those supplied to this system. • Do not connect the supplied speakers to take advantage of electric shock when connecting or disconnecting the speaker cables, disconnect the power cord before connecting the power cord in... carry HAZARDOUS LIVE voltage. Listening position Front right (Red) Center (Green) Front left (Blue) 5 MCACC CONTROL IN SETUP MIC CONTROL SPEAKERS SYSTEM CONNECTOR OUT SUB WOOFER R SURROUND L ANTENNA FM UNBAL 75Ω AM LOOP ANTENNA 4 AUDIO INPUT DIGITAL DVD DTV PC/GAME (...

Owner's Manual
Page 13
... analog source you want, such as a tape deck, etc. 3/32 in the display falling. Make sure that will support the weight of the display. • Pioneer bears no responsibility for accidents resulting from faulty assembly or installation, insufficient mounting strength of the wall, consult a professional for advice. 5 27/32... the wall. Connecting up 02 English Wall mounting the display unit It is possibe to the AUX AUDIO INPUT jacks on the receiver subwoofer. CONTROL SPEAKERS SYSTEM CONNECTOR OUT SUB WOOFER R SURROUND L USE ONLY WITH DISPLAY UNIT.
... analog source you want, such as a tape deck, etc. 3/32 in the display falling. Make sure that will support the weight of the display. • Pioneer bears no responsibility for accidents resulting from faulty assembly or installation, insufficient mounting strength of the wall, consult a professional for advice. 5 27/32... the wall. Connecting up 02 English Wall mounting the display unit It is possibe to the AUX AUDIO INPUT jacks on the receiver subwoofer. CONTROL SPEAKERS SYSTEM CONNECTOR OUT SUB WOOFER R SURROUND L USE ONLY WITH DISPLAY UNIT.

Owner's Manual
Page 15
...(page 29). 9 / / / (cursor buttons) and ENTER Use to navigate the receiver subwoofer menus. 10 SOUND (page 21) Press to access the sound menu, from the speakers. TUNER (page 23) Press to clear an entry and start again. Use CLEAR to select the built-in radio tuner. 5 Numeric buttons, CLEAR and ENTER... CD quality sound to compressed stereo audio sources (page 21). 13 SURROUND Use to select a Surround mode (page 19). 14 ADVANCED Use to select a Pioneer original surround mode (page 20). 15 MCACC Starts the Auto MCACC setup (page 17). 16 TV CONTROL (page 31) After setting up, use these controls...
...(page 29). 9 / / / (cursor buttons) and ENTER Use to navigate the receiver subwoofer menus. 10 SOUND (page 21) Press to access the sound menu, from the speakers. TUNER (page 23) Press to clear an entry and start again. Use CLEAR to select the built-in radio tuner. 5 Numeric buttons, CLEAR and ENTER... CD quality sound to compressed stereo audio sources (page 21). 13 SURROUND Use to select a Surround mode (page 19). 14 ADVANCED Use to select a Pioneer original surround mode (page 20). 15 MCACC Starts the Auto MCACC setup (page 17). 16 TV CONTROL (page 31) After setting up, use these controls...

Owner's Manual
Page 17
... (Acoustic Calibration EQ) for your particular room.1 Important • The test tones used for Auto MCACC setup are no obstacles between the speakers and the microphone. however, do not turn the volume down ) buttons to the MCACC SETUP MIC jack on the rear panel. STANDBY/ON...unless you have set up /down during the MCACC setup. Switches the demo display on. • DEMO OFF - MCACC CONTROL IN SETUP MIC CONTROL SPEAKERS SYSTEM CONNECTOR OUT SUB WOOFER R SURROUND L USE ONLY WITH DISPLAY UNIT. CENTER R FRONT L ANTENNA FM UNBAL 75Ω AM LOOP ANTENNA AUDIO INPUT...
... (Acoustic Calibration EQ) for your particular room.1 Important • The test tones used for Auto MCACC setup are no obstacles between the speakers and the microphone. however, do not turn the volume down ) buttons to the MCACC SETUP MIC jack on the rear panel. STANDBY/ON...unless you have set up /down during the MCACC setup. Switches the demo display on. • DEMO OFF - MCACC CONTROL IN SETUP MIC CONTROL SPEAKERS SYSTEM CONNECTOR OUT SUB WOOFER R SURROUND L USE ONLY WITH DISPLAY UNIT. CENTER R FRONT L ANTENNA FM UNBAL 75Ω AM LOOP ANTENNA AUDIO INPUT...

Owner's Manual
Page 18
... setup. 2 If this doesn't work, press MCACC, turn off , press STANDBY/ ON to turn the power on /off the walls, obstacles blocking the speakers from the microphone) the final settings may be incorrect. The volume increases automatically and the system outputs a series of the mic. To exit and check... EQ on page 21 to switch on . 4 Press MCACC. Please check all connections and try again. 4 See Listening with your mic or the speaker connections. If this seems to be happening, switch off the TV during the setup. 04 Getting started 3 If the receiver subwoofer is off the power...
... setup. 2 If this doesn't work, press MCACC, turn off , press STANDBY/ ON to turn the power on /off the walls, obstacles blocking the speakers from the microphone) the final settings may be incorrect. The volume increases automatically and the system outputs a series of the mic. To exit and check... EQ on page 21 to switch on . 4 Press MCACC. Please check all connections and try again. 4 See Listening with your mic or the speaker connections. If this seems to be happening, switch off the TV during the setup. 04 Getting started 3 If the receiver subwoofer is off the power...

Owner's Manual
Page 19
... the Front Surround modes will give the best results (see Dolby Pro Logic II Music settings below • STEREO - Surround sound is generated from the speakers mirrors the channels in Dolby Pro Logic II Music mode (see above ), there are three settings you can also use the SURROUND button on the...set up the system for a 'wraparound' effect. 3 Use / (cursor up/down) to adjust the setting then press ENTER to the type of the front speakers by spreading the center channel between the front right and left /right) to change the listening mode. If the source is Dolby Digital or DTS...
... the Front Surround modes will give the best results (see Dolby Pro Logic II Music settings below • STEREO - Surround sound is generated from the speakers mirrors the channels in Dolby Pro Logic II Music mode (see above ), there are three settings you can also use the SURROUND button on the...set up the system for a 'wraparound' effect. 3 Use / (cursor up/down) to adjust the setting then press ENTER to the type of the front speakers by spreading the center channel between the front right and left /right) to change the listening mode. If the source is Dolby Digital or DTS...

Owner's Manual
Page 20
...SOUND RETRIEVER ST ENTER TUNE TEST TONE SURROUND ADVANCED MCACC CHANNEL TV VOLUME INPUT • Press ADVANCED to the front left/right speakers and the subwoofer. Press repeatedly to any multichannel or stereo source for Front surround (page 8), the Front Surround modes will give... mode. Press repeatedly to your system Using Front Surround The Front Surround modes are effective when you are using just the subwoofer and front speakers. • 5 STEREO - 05 Listening to select FRTMOVIE, FRTMUSIC or EXTPOWER. • If you have selected FRTMOVIE (Front Surround Movie...
...SOUND RETRIEVER ST ENTER TUNE TEST TONE SURROUND ADVANCED MCACC CHANNEL TV VOLUME INPUT • Press ADVANCED to the front left/right speakers and the subwoofer. Press repeatedly to any multichannel or stereo source for Front surround (page 8), the Front Surround modes will give... mode. Press repeatedly to your system Using Front Surround The Front Surround modes are effective when you are using just the subwoofer and front speakers. • 5 STEREO - 05 Listening to select FRTMOVIE, FRTMUSIC or EXTPOWER. • If you have selected FRTMOVIE (Front Surround Movie...

Owner's Manual
Page 21
... / (cursor up /down ) buttons to select QUIET or MIDNIGHT then press ENTER to switch between OFF, MID or MAX. Switches the Sound Retriever off and speaker settings (channel delay and channel level) remains as it is set. • Acoustic Calibration EQ is set to confirm. 21 En These modes cannot be...
... / (cursor up /down ) buttons to select QUIET or MIDNIGHT then press ENTER to switch between OFF, MID or MAX. Switches the Sound Retriever off and speaker settings (channel delay and channel level) remains as it is set. • Acoustic Calibration EQ is set to confirm. 21 En These modes cannot be...

Owner's Manual
Page 25
... DTS material at low volume, low level sounds-including some DTS soundtracks. 1 Press SETUP. 2 Use the / (cursor left /right) to select a speaker; / (cursor up /down) to select a channel; / (cursor up the low level sounds, while controlling high level peaks. Dynamic Range Control works... / (cursor left/right) buttons to select CH LEVEL, then press ENTER. 4 Use / (cursor left/right) to select a setting. Use the following speakers: • L - tion on page 23 and Additional informa- Surround sound settings 07 English Chapter 7 Surround sound settings Using the Setup menu From the Setup...
... DTS material at low volume, low level sounds-including some DTS soundtracks. 1 Press SETUP. 2 Use the / (cursor left /right) to select a speaker; / (cursor up /down) to select a channel; / (cursor up the low level sounds, while controlling high level peaks. Dynamic Range Control works... / (cursor left/right) buttons to select CH LEVEL, then press ENTER. 4 Use / (cursor left/right) to select a setting. Use the following speakers: • L - tion on page 23 and Additional informa- Surround sound settings 07 English Chapter 7 Surround sound settings Using the Setup menu From the Setup...

Owner's Manual
Page 26
... to adjust the levels so that you want to adjust the level as a reference, rather than it plays. The aim is played through the front speakers 4 Press ENTER to select a setting. buttons (this setting to switch the audio channel on DVD-RW discs recorded with bilingual audio. 1 Press SETUP.... Auto MCACC feature again, it will not be played. Select one of test tone output using a test tone as it really is output from each speaker. Only channel 2 is played • CH2 MONO - See the method described in turn . 3 While a test tone is reduced (loud sounds are reduced ...
... to adjust the levels so that you want to adjust the level as a reference, rather than it plays. The aim is played through the front speakers 4 Press ENTER to select a setting. buttons (this setting to switch the audio channel on DVD-RW discs recorded with bilingual audio. 1 Press SETUP.... Auto MCACC feature again, it will not be played. Select one of test tone output using a test tone as it really is output from each speaker. Only channel 2 is played • CH2 MONO - See the method described in turn . 3 While a test tone is reduced (loud sounds are reduced ...

Owner's Manual
Page 27
... digital playback components, such as a tape player. Connecting auxiliary components The receiver subwoofer has several digital inputs for playback. MCACC CONTROL IN SETUP MIC CONTROL SPEAKERS SYSTEM CONNECTOR OUT SUB WOOFER R SURROUND L ANTENNA FM UNBAL 75Ω AM LOOP ANTENNA AUDIO INPUT DIGITAL DVD DTV PC/GAME (COAXIAL) (OPTICAL) (OPTICAL) ANALOG...
... digital playback components, such as a tape player. Connecting auxiliary components The receiver subwoofer has several digital inputs for playback. MCACC CONTROL IN SETUP MIC CONTROL SPEAKERS SYSTEM CONNECTOR OUT SUB WOOFER R SURROUND L ANTENNA FM UNBAL 75Ω AM LOOP ANTENNA AUDIO INPUT DIGITAL DVD DTV PC/GAME (COAXIAL) (OPTICAL) (OPTICAL) ANALOG...

Owner's Manual
Page 28
...can use the remote sensor of this unit with a Pioneer plasma display If you have connected a Pioneer plasma display to this unit (through the display. Media receiver CONTROL OUT Pioneer plasma display MCACC CONTROL IN SETUP MIC CONTROL SPEAKERS SYSTEM CONNECTOR OUT SUB WOOFER R SURROUND L ANTENNA FM...cursor left/right) buttons to choose SETUP, then press ENTER. 3 Use the / (cursor left/right) buttons to choose the setting you have a Pioneer plasma display1, you can use the extra SR+ features, you cycle through a media receiver, if applicable) to adjust. SR+ Setup for a ...
...can use the remote sensor of this unit with a Pioneer plasma display If you have connected a Pioneer plasma display to this unit (through the display. Media receiver CONTROL OUT Pioneer plasma display MCACC CONTROL IN SETUP MIC CONTROL SPEAKERS SYSTEM CONNECTOR OUT SUB WOOFER R SURROUND L ANTENNA FM...cursor left/right) buttons to choose SETUP, then press ENTER. 3 Use the / (cursor left/right) buttons to choose the setting you have a Pioneer plasma display1, you can use the extra SR+ features, you cycle through a media receiver, if applicable) to adjust. SR+ Setup for a ...

Owner's Manual
Page 33
...; Check that the speakers are connected correctly. remote control. • Operate within 23 ft., 30° of the remote sensor (Using the remote control on page 16). • Remove any obstacles or operate from the outlet and insert again to return to a Pioneer plasma display with this... conditions. • For audio-related problems, please also check the settings of this component, check the points below , ask your nearest Pioneer authorized service center or your dealer for trouble and malfunctions. If the trouble cannot be • Check that nothing is connected correctly (see...
...; Check that the speakers are connected correctly. remote control. • Operate within 23 ft., 30° of the remote sensor (Using the remote control on page 16). • Remove any obstacles or operate from the outlet and insert again to return to a Pioneer plasma display with this... conditions. • For audio-related problems, please also check the settings of this component, check the points below , ask your nearest Pioneer authorized service center or your dealer for trouble and malfunctions. If the trouble cannot be • Check that nothing is connected correctly (see...


