Owner's Manual
Page 2
...of installation on the floor mat or on the bottom of the unit. Important The serial number of this manual before attempting operation. After-sales service for Pioneer products Please contact the dealer or distributor from where you many years of Canada, Inc. Please read all ...instructions and WARNINGS in this amplifier is designed to operate the equipment. PIONEER SUGGESTS USING A PROFESSIONAL INSTALLER DUE TO THE COMPLEXITY OF THIS PRODUCT. CUSTOMER SUPPORT DIVISION P.O. Keep the card handy...
...of installation on the floor mat or on the bottom of the unit. Important The serial number of this manual before attempting operation. After-sales service for Pioneer products Please contact the dealer or distributor from where you many years of Canada, Inc. Please read all ...instructions and WARNINGS in this amplifier is designed to operate the equipment. PIONEER SUGGESTS USING A PROFESSIONAL INSTALLER DUE TO THE COMPLEXITY OF THIS PRODUCT. CUSTOMER SUPPORT DIVISION P.O. Keep the card handy...
Owner's Manual
Page 3
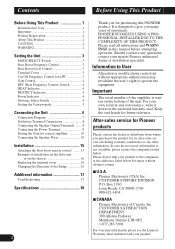
.... Otherwise you may expose you to chemicals listed on proposition 65 known to the State of the separately sold battery wire or the amplifier fuse blows. Electrical shock could result. 2 About This Product This product is sold with one of the same size and rating. ... driving conditions, keep the details of your product. WARNING • Handling the cord on the latest products and technologies. 3 Download owner's manuals, order product catalogues, research new products, and much more. Connect the battery wire directly to the car battery positive terminal (+) and the ...
.... Otherwise you may expose you to chemicals listed on proposition 65 known to the State of the separately sold battery wire or the amplifier fuse blows. Electrical shock could result. 2 About This Product This product is sold with one of the same size and rating. ... driving conditions, keep the details of your product. WARNING • Handling the cord on the latest products and technologies. 3 Download owner's manuals, order product catalogues, research new products, and much more. Connect the battery wire directly to the car battery positive terminal (+) and the ...
Owner's Manual
Page 7
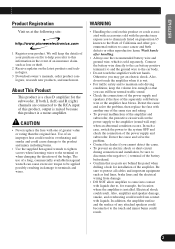
.... • DO NOT connect a subwoofer with cable clamps or adhesive tape. Because of this product to another product, refer to the supplied manuals of both products and connect cords that have the same function. 6 The use of a heavy-duty battery, parallel connection of ordinary batteries or... Never replace the fuse with one of greater value or rating than specified in a short-circuit through the ignition switch (12 V DC), the amplifier will not interfere with moving parts of the vehicle, such as the gearshift, handbrake or seat sliding mechanism. • Do not shorten any wires....
.... • DO NOT connect a subwoofer with cable clamps or adhesive tape. Because of this product to another product, refer to the supplied manuals of both products and connect cords that have the same function. 6 The use of a heavy-duty battery, parallel connection of ordinary batteries or... Never replace the fuse with one of greater value or rating than specified in a short-circuit through the ignition switch (12 V DC), the amplifier will not interfere with moving parts of the vehicle, such as the gearshift, handbrake or seat sliding mechanism. • Do not shorten any wires....

Owner's Manual
Page 12
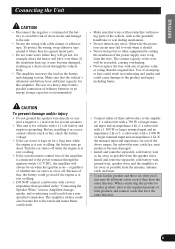
...manual for information on the correct connection procedure. Amplifier damage, smoke, and overheating could result. To properly install or use a bridged mode and achieve a 2 Ω load, wire two 4 Ω speakers in parallel with Left + and Right - (Diagram A) or use this amplifier... to achieve a 1 Ω (or lower) bridged mode (Diagram B). Improper Amplifier 4 Ω Speaker 4 Ω Speaker 2 Ω Speaker 2 Ω Speaker 2 Ω Bridged Mode Amplifier 1 Ω Bridged Mode Amplifier DO NOT install or use a single 2 Ω speaker. Connecting the Unit ...
...manual for information on the correct connection procedure. Amplifier damage, smoke, and overheating could result. To properly install or use a bridged mode and achieve a 2 Ω load, wire two 4 Ω speakers in parallel with Left + and Right - (Diagram A) or use this amplifier... to achieve a 1 Ω (or lower) bridged mode (Diagram B). Improper Amplifier 4 Ω Speaker 4 Ω Speaker 2 Ω Speaker 2 Ω Speaker 2 Ω Bridged Mode Amplifier 1 Ω Bridged Mode Amplifier DO NOT install or use a single 2 Ω speaker. Connecting the Unit ...
