
Owner's Manual
Page 1
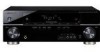
... VSX-819H Register your product at: www.pioneerelectronics.com (US) www.pioneerelectronics.ca (Canada) • Protect your new investment The details of your purchase will be on file for reference in the event of an insurance claim such as loss or theft. • Receive free... tips, updates and service bulletins on your new product • Improve product development Your input helps us continue to design products that meet your needs. • Receive a free Pioneer newsletter Registered customers can opt in to receive a monthly newsletter. Operating Instructions...
... VSX-819H Register your product at: www.pioneerelectronics.com (US) www.pioneerelectronics.ca (Canada) • Protect your new investment The details of your purchase will be on file for reference in the event of an insurance claim such as loss or theft. • Receive free... tips, updates and service bulletins on your new product • Improve product development Your input helps us continue to design products that meet your needs. • Receive a free Pioneer newsletter Registered customers can opt in to receive a monthly newsletter. Operating Instructions...

Owner's Manual
Page 2
...experienced radio/TV technician for the first time, read the following section carefully. Product Name: AUDIO/VIDEO MULTI-CHANNEL RECEIVER Model Number: VSX-819H-K Responsible Party Name: PIONEER ELECTRONICS SERVICE, INC. This equipment generates, uses, and can cause severe electrical shock. D8-10-3a_En FEDERAL ... V) written on the rear panel. Any failure due to Part 15 of after handling D36-P4_A_En IMPORTANT NOTICE - Reorient or relocate the receiving antenna. - Cet appareil numérique de la Classe B est conforme à la norme NMB-003 du Canada. D1-4-2-6-1_En NOTE...
...experienced radio/TV technician for the first time, read the following section carefully. Product Name: AUDIO/VIDEO MULTI-CHANNEL RECEIVER Model Number: VSX-819H-K Responsible Party Name: PIONEER ELECTRONICS SERVICE, INC. This equipment generates, uses, and can cause severe electrical shock. D8-10-3a_En FEDERAL ... V) written on the rear panel. Any failure due to Part 15 of after handling D36-P4_A_En IMPORTANT NOTICE - Reorient or relocate the receiving antenna. - Cet appareil numérique de la Classe B est conforme à la norme NMB-003 du Canada. D1-4-2-6-1_En NOTE...

Owner's Manual
Page 4
... Advanced surround effects . . . . . 34 Listening in a safe place for buying this Pioneer product. Contents 01 Before you start Checking what's in the box 6 Loading the batteries 6 Installing the receiver 6 Ventilation 6 04 Controls and displays Front panel 26 Operating range of remote control 27 Display ... 13 Connecting a TV and Blu-ray Disc player or DVD player 14 Connecting the multichannel analog outputs 15 Connecting a satellite receiver or other digital set-top box 16 Connecting other audio components 17 Connecting an HDD/DVD recorder, VCR and other sources 40...
... Advanced surround effects . . . . . 34 Listening in a safe place for buying this Pioneer product. Contents 01 Before you start Checking what's in the box 6 Loading the batteries 6 Installing the receiver 6 Ventilation 6 04 Controls and displays Front panel 26 Operating range of remote control 27 Display ... 13 Connecting a TV and Blu-ray Disc player or DVD player 14 Connecting the multichannel analog outputs 15 Connecting a satellite receiver or other digital set-top box 16 Connecting other audio components 17 Connecting an HDD/DVD recorder, VCR and other sources 40...

Owner's Manual
Page 5
...6,226,616; 6,487,535 & other components 53 Preset Code List 55 11 Other connections Connecting an iPod 58 Connecting your iPod to the receiver . . . . . 58 iPod playback 59 Watching photos and video content 60 About iPod 60 Connecting a USB device 60 Connecting your USB device to ... 62 Connecting your system Setting the remote to SIRIUS Radio 63 Saving channel presets 64 Using the SIRIUS Menu 64 Connecting an IR receiver 64 12 Additional information Troubleshooting 65 HDMI 67 Important information regarding the HDMI connection 67 iPod messages 68 USB messages 68 SIRIUS radio...
...6,226,616; 6,487,535 & other components 53 Preset Code List 55 11 Other connections Connecting an iPod 58 Connecting your iPod to the receiver . . . . . 58 iPod playback 59 Watching photos and video content 60 About iPod 60 Connecting a USB device 60 Connecting your USB device to ... 62 Connecting your system Setting the remote to SIRIUS Radio 63 Saving channel presets 64 Using the SIRIUS Menu 64 Connecting an IR receiver 64 12 Additional information Troubleshooting 65 HDMI 67 Important information regarding the HDMI connection 67 iPod messages 68 USB messages 68 SIRIUS radio...

Owner's Manual
Page 6
...(24 inches) This can also reduce the life or performance of used batteries, please comply with the sound. - Pb K058c_A1_En Installing the receiver • When installing this unit, make sure to put it on the following precautions: • Never use new and old batteries together... batteries) These symbols are very dusty - 01 Before you start Chapter 1: Before you start Checking what's in the box Please check that you've received the following supplied accessories: • Setup microphone • Remote control • Dry cell batteries (AAA size IEC R03) x2 • AM loop...
...(24 inches) This can also reduce the life or performance of used batteries, please comply with the sound. - Pb K058c_A1_En Installing the receiver • When installing this unit, make sure to put it on the following precautions: • Never use new and old batteries together... batteries) These symbols are very dusty - 01 Before you start Chapter 1: Before you start Checking what's in the box Please check that you've received the following supplied accessories: • Setup microphone • Remote control • Dry cell batteries (AAA size IEC R03) x2 • AM loop...

Owner's Manual
Page 8
...Connect the additional amplifier to the PRE OUT SURROUND BACK outputs of this . In most cases, you get from the BD/DVD player to the receiver. 2 Connect your speaker setup, but other possibilities (like you don't know how to do this . 4 Use the on-screen automatic MCACC setup...an AC power source. 1 Connect your system. Where you should have a big effect on the sound. See Automatically setting up for more on this receiver. 02 5 minute guide Chapter 2: 5 minute guide Introduction to home theater Home theater refers to the use of multiple audio tracks to create a ...
...Connect the additional amplifier to the PRE OUT SURROUND BACK outputs of this . In most cases, you get from the BD/DVD player to the receiver. 2 Connect your speaker setup, but other possibilities (like you don't know how to do this . 4 Use the on-screen automatic MCACC setup...an AC power source. 1 Connect your system. Where you should have a big effect on the sound. See Automatically setting up for more on this receiver. 02 5 minute guide Chapter 2: 5 minute guide Introduction to home theater Home theater refers to the use of multiple audio tracks to create a ...

Owner's Manual
Page 9
...Acoustic Calibration (MCACC) setup measures the acoustic characteristics of your particular room. Important • The Auto MCACC Setup will overwrite any time, the receiver automatically exits and no obstacles between the speakers and the microphone. An on-screen display (OSD) appears on the front panel. In this ).... System Setup 1.Auto MCACC 2.Manual SP Setup 3.Input Assign Return Try to do this) if you may need to be set the receiver to place the microphone so that BD/DVD is not connected to establish the ambient noise level. Caution • The test tones used...
...Acoustic Calibration (MCACC) setup measures the acoustic characteristics of your particular room. Important • The Auto MCACC Setup will overwrite any time, the receiver automatically exits and no obstacles between the speakers and the microphone. An on-screen display (OSD) appears on the front panel. In this ).... System Setup 1.Auto MCACC 2.Manual SP Setup 3.Input Assign Return Try to do this) if you may need to be set the receiver to place the microphone so that BD/DVD is not connected to establish the ambient noise level. Caution • The test tones used...

Owner's Manual
Page 10
... check the speaker connections. 8 Make sure 'OK' is happening. A progress report is displayed on-screen while the receiver outputs more test tones to determine the optimum receiver settings for ambient noise (see an error message (ERR) in your setup. The settings made in the Auto MCACC ...for notes regarding background noise and other possible interference. 6 Wait for 10 seconds and the ENTER button is displayed on-screen while the receiver outputs test tones to be a problem with different size settings. Try to be farther than the actual distance from your system, but it...
... check the speaker connections. 8 Make sure 'OK' is happening. A progress report is displayed on-screen while the receiver outputs more test tones to determine the optimum receiver settings for ambient noise (see an error message (ERR) in your setup. The settings made in the Auto MCACC ...for notes regarding background noise and other possible interference. 6 Wait for 10 seconds and the ENTER button is displayed on-screen while the receiver outputs test tones to be a problem with different size settings. Try to be farther than the actual distance from your system, but it...

Owner's Manual
Page 11
... mode cannot be set it to ON in lowpass filter switch of your subwoofer. • Set the built-in the following cases: - RECEIVER INPUT SELECT SOURCE RECEIVER ZONE 2 ON/OFF TV CONTROL INPUT BD TV DVR HDD 1 DVD 2 VCR DISPLAY 3 S.RETRIEVER EQ CH SELECT SLEEP 4 5 6... CH SB CH PHASE 7 8 DIMMER SPEAKERS +10 0 D.ACCESS MIDNIGHT 9 CH SHIFT ENTER • Press RECEIVER, then press PHASE to the subwoofer or other channels. Set your listening position. If this type of the sound (see illustration below ). If a crest of...
... mode cannot be set it to ON in lowpass filter switch of your subwoofer. • Set the built-in the following cases: - RECEIVER INPUT SELECT SOURCE RECEIVER ZONE 2 ON/OFF TV CONTROL INPUT BD TV DVR HDD 1 DVD 2 VCR DISPLAY 3 S.RETRIEVER EQ CH SELECT SLEEP 4 5 6... CH SB CH PHASE 7 8 DIMMER SPEAKERS +10 0 D.ACCESS MIDNIGHT 9 CH SHIFT ENTER • Press RECEIVER, then press PHASE to the subwoofer or other channels. Set your listening position. If this type of the sound (see illustration below ). If a crest of...

Owner's Manual
Page 12
... and received by the transformers in the proper direction. HDMI cable Note 1 • Set the HDMI parameter in Setting the Audio options on your TV or flat panel TV, try adjusting the resolution settings on page 38 to THRU (THROUGH) and set -top boxes, and other AV devices....ch (Max. HDCP is trademarks of several cables and connectors), and communication between the AV source and AV devices such as almost every kind of channel inputs) PCM.1 Be careful to connect the terminal in this receiver). • If the video signal does not appear on your component or display. 03...
... and received by the transformers in the proper direction. HDMI cable Note 1 • Set the HDMI parameter in Setting the Audio options on your TV or flat panel TV, try adjusting the resolution settings on page 38 to THRU (THROUGH) and set -top boxes, and other AV devices....ch (Max. HDCP is trademarks of several cables and connectors), and communication between the AV source and AV devices such as almost every kind of channel inputs) PCM.1 Be careful to connect the terminal in this receiver). • If the video signal does not appear on your component or display. 03...

Owner's Manual
Page 13
...the shutter protecting the optical socket. • When storing optical cable, coil loosely. The color signal of your video source. In this receiver.1 Coaxial digital audio cable Optical cable Video cables Standard RCA video cables These cables are the most common type of video connection and are... can also use a standard RCA video cable for coaxial digital connections. 13 En Green (Y) Blue (PB) Red (PR) About video outputs connection This receiver is divided into the luminance (Y) signal and the color (PB and PR) signals and then output. Standard RCA video cable Note 1 • When ...
...the shutter protecting the optical socket. • When storing optical cable, coil loosely. The color signal of your video source. In this receiver.1 Coaxial digital audio cable Optical cable Video cables Standard RCA video cables These cables are the most common type of video connection and are... can also use a standard RCA video cable for coaxial digital connections. 13 En Green (Y) Blue (PB) Red (PR) About video outputs connection This receiver is divided into the luminance (Y) signal and the color (PB and PR) signals and then output. Standard RCA video cable Note 1 • When ...

Owner's Manual
Page 14
... using the HDMI output to your BD/DVD player to the HDMI BD/DVD IN input on this receiver to your TV. If an HDMI output is not on your DVD player, use a digital audio ...video cable to connect to the composite video jack.3 Note 1 In this case, you'll need to tell the receiver which digital input you connected the player to (see Choosing the input signal on page 40). 2 • When... you use the component video outputs to connect this receiver. 03 Connecting up Connecting a TV and Blu-ray Disc player or DVD player This page shows you how ...
... using the HDMI output to your BD/DVD player to the HDMI BD/DVD IN input on this receiver to your TV. If an HDMI output is not on your DVD player, use a digital audio ...video cable to connect to the composite video jack.3 Note 1 In this case, you'll need to tell the receiver which digital input you connected the player to (see Choosing the input signal on page 40). 2 • When... you use the component video outputs to connect this receiver. 03 Connecting up Connecting a TV and Blu-ray Disc player or DVD player This page shows you how ...

Owner's Manual
Page 15
...optical cable for the connection.3 Connecting the multichannel analog outputs For DVD Audio and SACD playback, your TV to the TV/SAT inputs on this receiver. See Using the component video jacks on page 19 for how to connect it. 4 Connect the analog audio outputs from your BD/DVD player... RL FRONT OUTPUT VIDEO OUTPUT DVD/multi-channel decoder with multi-channel analog output jacks Note 1 This connection will allow you can connect this receiver. In this case, you to make analog recordings from your BD/DVD player may have 5.1 channel analog outputs. English Deutsch Français...
...optical cable for the connection.3 Connecting the multichannel analog outputs For DVD Audio and SACD playback, your TV to the TV/SAT inputs on this receiver. See Using the component video jacks on page 19 for how to connect it. 4 Connect the analog audio outputs from your BD/DVD player... RL FRONT OUTPUT VIDEO OUTPUT DVD/multi-channel decoder with multi-channel analog output jacks Note 1 This connection will allow you can connect this receiver. In this case, you to make analog recordings from your BD/DVD player may have 5.1 channel analog outputs. English Deutsch Français...

Owner's Manual
Page 16
... HDMI TV/SAT IN on this case, you'll need to press the input select button for the video connection.3 Note 1 In this reciever. This receiver HDMI BD/DVD IN TV/SAT IN IN DVR/VCR COAXIAL IN IN 1 (CD) OPTICAL IN 2 OUT (AUX) R AUX L IN OUT CD-R/TAPE IN CD... TV tuners are all examples of audio/video outputs on the set-top box component to the TV/SAT AUDIO and VIDEO inputs on this receiver.2 Use a stereo RCA phono cable for the audio connection and a standard RCA video cable for the input you 've already connected your TV to the...
... HDMI TV/SAT IN on this case, you'll need to press the input select button for the video connection.3 Note 1 In this reciever. This receiver HDMI BD/DVD IN TV/SAT IN IN DVR/VCR COAXIAL IN IN 1 (CD) OPTICAL IN 2 OUT (AUX) R AUX L IN OUT CD-R/TAPE IN CD... TV tuners are all examples of audio/video outputs on the set-top box component to the TV/SAT AUDIO and VIDEO inputs on this receiver.2 Use a stereo RCA phono cable for the audio connection and a standard RCA video cable for the input you 've already connected your TV to the...

Owner's Manual
Page 17
... below to connect a CD-R, MD, DAT, tape recorder or other audio component. 1 If your component has a digital output, connect this to a digital input on the receiver as shown. 3 If you're connecting a recorder, connect the analog audio outputs to the analog audio inputs on this connection for components without a digital output..., or if you want to /from a digital component. You'll need to the CD-R/TAPE analog output jack using a stereo RCA phono cable. This receiver R AUX L IN HDMI BD/DVD IN OUT CD-R/TAPE IN CD IN ZO OU L TV/SAT IN IR IN R OUT DVR/VCR IN TV/SAT...
... below to connect a CD-R, MD, DAT, tape recorder or other audio component. 1 If your component has a digital output, connect this to a digital input on the receiver as shown. 3 If you're connecting a recorder, connect the analog audio outputs to the analog audio inputs on this connection for components without a digital output..., or if you want to /from a digital component. You'll need to the CD-R/TAPE analog output jack using a stereo RCA phono cable. This receiver R AUX L IN HDMI BD/DVD IN OUT CD-R/TAPE IN CD IN ZO OU L TV/SAT IN IR IN R OUT DVR/VCR IN TV/SAT...

Owner's Manual
Page 18
...on this . 18 En See Using the component video jacks on page 19 for the video connection.2 3 Connect a set of audio/video inputs on this receiver. If your video component also has a component video output, you connected the component to (see Choosing the input signal on page 40). 2 If your... video component does not have an HDMI audio output but a digital audio output, connect it to an HDMI DVR/VCR IN on this receiver. Use a stereo RCA phono cable for the audio connection and a standard RCA video cable for connecting analog or digital video recorders, including VCRs and...
...on this . 18 En See Using the component video jacks on page 19 for the video connection.2 3 Connect a set of audio/video inputs on this receiver. If your video component also has a component video output, you connected the component to (see Choosing the input signal on page 40). 2 If your... video component does not have an HDMI audio output but a digital audio output, connect it to an HDMI DVR/VCR IN on this receiver. Use a stereo RCA phono cable for the audio connection and a standard RCA video cable for connecting analog or digital video recorders, including VCRs and...

Owner's Manual
Page 19
...with your source to the input source you've connected. See the manuals that came with progressive-scan video. 2 PR PB Y COMPONENT VIDEO IN This receiver HDMI BD/DVD IN TV/SAT IN IN DVR/VCR COAXIAL IN IN 1 (CD) OPTICAL IN 2 OUT (AUX) R AUX L IN OUT ...IN 1 (BD/DVD) ASSIGNABLE 1-2 1 TV PR PB Y COMPONENT VIDEO OUT BD/DVD player Important • If you connect any source component to the receiver using a component video input, you didn't connect according to composite video. Use a three-way component video cable for more on this. 3 Connect the COMPONENT...
...with your source to the input source you've connected. See the manuals that came with progressive-scan video. 2 PR PB Y COMPONENT VIDEO IN This receiver HDMI BD/DVD IN TV/SAT IN IN DVR/VCR COAXIAL IN IN 1 (CD) OPTICAL IN 2 OUT (AUX) R AUX L IN OUT ...IN 1 (BD/DVD) ASSIGNABLE 1-2 1 TV PR PB Y COMPONENT VIDEO OUT BD/DVD player Important • If you connect any source component to the receiver using a component video input, you didn't connect according to composite video. Use a three-way component video cable for more on this. 3 Connect the COMPONENT...

Owner's Manual
Page 20
... up Connecting to the front panel video terminal Front video connections are standard audio/video jacks. a fig. b USB iPod VIDEO INPUT VIDEO L AUDIO R 2 ANTENNA 4 This receiver SPEAKERS MULTI-ZONE CONTROL ON/OFF USB iPod VIDEO INPUT VIDEO L AUDIO R MCACC SETUP MIC VIDEO L R AUDIO/VIDEO OUTPUT MASTER VOLUME AM LOOP 3 1 Video camera...
... up Connecting to the front panel video terminal Front video connections are standard audio/video jacks. a fig. b USB iPod VIDEO INPUT VIDEO L AUDIO R 2 ANTENNA 4 This receiver SPEAKERS MULTI-ZONE CONTROL ON/OFF USB iPod VIDEO INPUT VIDEO L AUDIO R MCACC SETUP MIC VIDEO L R AUDIO/VIDEO OUTPUT MASTER VOLUME AM LOOP 3 1 Video camera...

Owner's Manual
Page 22
The receiver will vary. You can use speakers with just two stereo speakers (the front speakers in another room. Simply connect the speakers you select SP...
The receiver will vary. You can use speakers with just two stereo speakers (the front speakers in another room. Simply connect the speakers you select SP...

Owner's Manual
Page 26
.../A.L.C. PRESET +/- Stream Direct playback bypasses the tone controls for recall (page 48, 49). and ENTER to preset the channel in SIRIUS Radio (page 63). CHANNEL RECEIVER VSX-819H ENTER MASTER VOLUME PHONES USB iPod VIDEO INPUT VIDEO L AUDIO R MCACC SETUP MIC 7 8 1 STANDBY/ON 2 INPUT SELECTOR dial Selects an input source. 3 Tuner control...
.../A.L.C. PRESET +/- Stream Direct playback bypasses the tone controls for recall (page 48, 49). and ENTER to preset the channel in SIRIUS Radio (page 63). CHANNEL RECEIVER VSX-819H ENTER MASTER VOLUME PHONES USB iPod VIDEO INPUT VIDEO L AUDIO R MCACC SETUP MIC 7 8 1 STANDBY/ON 2 INPUT SELECTOR dial Selects an input source. 3 Tuner control...


