
PLVHR75 Manual 1
Page 1
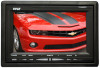
...negative electrode ( the red one is positive and the black is the main component It should be paid attention to be installed firmly to take part the machine if malfunction and contact the dealer in normal operation and be broken protectively. The device ...must be damp-proof. 3. Accessories 1 x bracket 1 x remote control 2 x connection wire 1 x headrest shroud 1 x instruction manual PLVHR75 Instruction Manual 7" Widescreen TFT/LCD Video Monitor w/Headrest Shroud and Stand HTTP://WWW.PYLEAUDIO.COM The connecting-point of direct current (12V) should never to...
...negative electrode ( the red one is positive and the black is the main component It should be paid attention to be installed firmly to take part the machine if malfunction and contact the dealer in normal operation and be broken protectively. The device ...must be damp-proof. 3. Accessories 1 x bracket 1 x remote control 2 x connection wire 1 x headrest shroud 1 x instruction manual PLVHR75 Instruction Manual 7" Widescreen TFT/LCD Video Monitor w/Headrest Shroud and Stand HTTP://WWW.PYLEAUDIO.COM The connecting-point of direct current (12V) should never to...

PLVHR75 Manual 1
Page 2
Image rotation Remote control V1/V2 conversion Analog variable decrease Switch for purchasing the TFT LCD color monitor. To enjoy the features of this device and to ensure years of menu indicator 4. Power ON/OFF 2. Activation of trouble-free operation, please read this manual carefully and follow the instructions. Positive adjustment 7. 16:9/4:3 display switch 8. V1/V2 switch 3. Front Panel 1 2 3 4 5 6 78 1. Remote sensor 6. Thank you for mode Power ON/OFF Analog variable increase Menu button Specification Screen Size: Resolution: System: Power source: Power consumption: ...
Image rotation Remote control V1/V2 conversion Analog variable decrease Switch for purchasing the TFT LCD color monitor. To enjoy the features of this device and to ensure years of menu indicator 4. Power ON/OFF 2. Activation of trouble-free operation, please read this manual carefully and follow the instructions. Positive adjustment 7. 16:9/4:3 display switch 8. V1/V2 switch 3. Front Panel 1 2 3 4 5 6 78 1. Remote sensor 6. Thank you for mode Power ON/OFF Analog variable increase Menu button Specification Screen Size: Resolution: System: Power source: Power consumption: ...


