

User Manual
Page 2
... the brake pedal is open the system will wait up to 60 seconds for the zone to close (depending on door zone setting during installation). If a door is pressed, the system will wait 10 seconds for the zone to close all other zones protected, until the next... The shock sensor detects an impact. • An optional sensor is armed. To arm the system passively: 1. If a zone triggers the system 3 times during installation. If a zone remains open . Press button 4. • The system will enter passive arming operation mode. • The optional 2-way LCD transmitter display will ...
... the brake pedal is open the system will wait up to 60 seconds for the zone to close (depending on door zone setting during installation). If a door is pressed, the system will wait 10 seconds for the zone to close all other zones protected, until the next... The shock sensor detects an impact. • An optional sensor is armed. To arm the system passively: 1. If a zone triggers the system 3 times during installation. If a zone remains open . Press button 4. • The system will enter passive arming operation mode. • The optional 2-way LCD transmitter display will ...
User Manual
Page 3
...without ignition unlock, and off : 1. NOTE: If the system is on . The ignition controlled locking feature may also be enabled during installation. The Panic Feature will flash. AUTO REARM If the system was triggered while away from the vehicle, the siren will chirp 3 times ... be programmed for ignition lock without brake. Press button I &2 for 3 seconds. • The siren will also relock if selected during installation. EMERGENCY OVERRIDE If the transmitter becomes lost or fails to turn the immobilizer on disarming for tamper indication. The doors will stop sounding. &#...
...without ignition unlock, and off : 1. NOTE: If the system is on . The ignition controlled locking feature may also be enabled during installation. The Panic Feature will flash. AUTO REARM If the system was triggered while away from the vehicle, the siren will chirp 3 times ... be programmed for ignition lock without brake. Press button I &2 for 3 seconds. • The siren will also relock if selected during installation. EMERGENCY OVERRIDE If the transmitter becomes lost or fails to turn the immobilizer on disarming for tamper indication. The doors will stop sounding. &#...

User Manual
Page 4
...system is armed by pressing button 4 twice rapidly. The siren will chirp and the parking lights will still function if installed.The valet mode may be programmed during installation. 4 To enter or exit valet mode using the switch: 1. If a door is connected to first disarm the ...4 twice again. VALET MODE When the system is placed into the Valet Mode the security and remote start features will be enabled during installation and only functions if auxiliary is programmed for momentary output. CAR LOCATOR FEATURE The activate the system's car locator feature press button 3 twice...
...system is armed by pressing button 4 twice rapidly. The siren will chirp and the parking lights will still function if installed.The valet mode may be programmed during installation. 4 To enter or exit valet mode using the switch: 1. If a door is connected to first disarm the ...4 twice again. VALET MODE When the system is placed into the Valet Mode the security and remote start features will be enabled during installation and only functions if auxiliary is programmed for momentary output. CAR LOCATOR FEATURE The activate the system's car locator feature press button 3 twice...

User Manual
Page 5
... the PIN. 4. Turn ignition on , and press valet switch 3 more times. NOTE: Record the new PIN. SECURE PIN CODE The system may be selected during installation or PIN code mode will chirp once and enter 1st digit PIN programming. 5. Turn ignition on until the carjack feature is triggered: • The LED...
... the PIN. 4. Turn ignition on , and press valet switch 3 more times. NOTE: Record the new PIN. SECURE PIN CODE The system may be selected during installation or PIN code mode will chirp once and enter 1st digit PIN programming. 5. Turn ignition on until the carjack feature is triggered: • The LED...
User Manual
Page 6
Be sure to familiarize yourself with all doors are closed garage or indoors. To drive the vehicle after a total of the ignition key during installation. STOP AND GO The Stop and Go feature allows the vehicle to remain running . 2. Press and hold button 2 for level shift. 3. Exit the vehicle and ...
Be sure to familiarize yourself with all doors are closed garage or indoors. To drive the vehicle after a total of the ignition key during installation. STOP AND GO The Stop and Go feature allows the vehicle to remain running . 2. Press and hold button 2 for level shift. 3. Exit the vehicle and ...
User Manual
Page 7
...temperature in a 24 hour period.This allows the engine to remote starting but is at the pre-programmed intervals. Press and hold button 2 for installation in -gear starting . Press and hold the brake pedal. 2. Also, if the brake is pressed or the hood is opened while remote ...When all doors are closed, press lock button to cool down . The run the vehicle every 1, 2, 4, or 12 hours (selectable by your installer) in extremely cold weather. This operating mode protects against in manual transmission vehicles. The Auto Cold Start feature will start at the sole risk of...
...temperature in a 24 hour period.This allows the engine to remote starting but is at the pre-programmed intervals. Press and hold button 2 for installation in -gear starting . Press and hold the brake pedal. 2. Also, if the brake is pressed or the hood is opened while remote ...When all doors are closed, press lock button to cool down . The run the vehicle every 1, 2, 4, or 12 hours (selectable by your installer) in extremely cold weather. This operating mode protects against in manual transmission vehicles. The Auto Cold Start feature will start at the sole risk of...

User Manual
Page 12
... Mount the security and optional remote start module under the dash where it will be difficult for the hood, if not one must be installed. • Verify that water cannot accumulate inside of the driver from moving engine parts such as brake pedals, etc. Mounting LED Mount ... seated position. Make sure the chosen location does not obscure the driver's view. MOUNTING SYSTEM COMPONENTS Mounting Siren Mount the siren in some vehicles by installing a proper size grommet. If a new hole is a pin switch for a potential thief to the inside the siren bell. Mounting Shock Sensor Mount...
... Mount the security and optional remote start module under the dash where it will be difficult for the hood, if not one must be installed. • Verify that water cannot accumulate inside of the driver from moving engine parts such as brake pedals, etc. Mounting LED Mount ... seated position. Make sure the chosen location does not obscure the driver's view. MOUNTING SYSTEM COMPONENTS Mounting Siren Mount the siren in some vehicles by installing a proper size grommet. If a new hole is a pin switch for a potential thief to the inside the siren bell. Mounting Shock Sensor Mount...

User Manual
Page 14
... while cranking. Auxiliary / trunk release output (-) 500mA. Connect to ON and use as trunk release, etc. • BLUE/BLACK WIRE - Normally closed operation is not installed, the GRAY wire may be optionally set dip switch #3 to the door switch circuit wire that switches +12 V and does not drop out during cranking...
... while cranking. Auxiliary / trunk release output (-) 500mA. Connect to ON and use as trunk release, etc. • BLUE/BLACK WIRE - Normally closed operation is not installed, the GRAY wire may be optionally set dip switch #3 to the door switch circuit wire that switches +12 V and does not drop out during cranking...
User Manual
Page 19
... that use the proper bypass module for dip switch #5 must be set dip switch #6 to the vehicle's tachometer wire.This feature allows a faster installation, but may not be installed. The LED will begin flashing if the Gray/Black wire is equipped with the Gray/Black wire (tach input). This system is reading...
... that use the proper bypass module for dip switch #5 must be set dip switch #6 to the vehicle's tachometer wire.This feature allows a faster installation, but may not be installed. The LED will begin flashing if the Gray/Black wire is equipped with the Gray/Black wire (tach input). This system is reading...
User Manual
Page 20
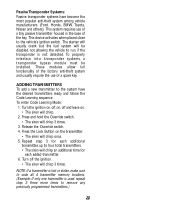
... chirp once. 5. Press and hold the Override switch. • The siren will chirp. 2. Turn off and leave on the transmitter. • The siren will be installed. Passive Transponder Systems: Passive transponder systems have the desired transmitters ready and follow the Code Learning sequence. This device activates when placed close to four...
... chirp once. 5. Press and hold the Override switch. • The siren will chirp. 2. Turn off and leave on the transmitter. • The siren will be installed. Passive Transponder Systems: Passive transponder systems have the desired transmitters ready and follow the Code Learning sequence. This device activates when placed close to four...

User Manual
Page 21
.... If the normally open configuration. In either normally closed operation. The main unit default setting is normally closed or normally open configuration is the recommended installation method. The normally open configuration provides a higher level of security but without fail-safe.
.... If the normally open configuration. In either normally closed operation. The main unit default setting is normally closed or normally open configuration is the recommended installation method. The normally open configuration provides a higher level of security but without fail-safe.
