
(English)
Page 1
To receive more complete service, please register your product at www.samsung.com/register DV220AE-02810A-03_EN.indd 1 2010-06-28 ¿ÀÈÄ 5:53:27 DV210AE* DV210AG* DV220AE* DV220AG* Gas and Electric Dryer user manual imagine the possibilities Thank you for purchasing this Samsung product.
To receive more complete service, please register your product at www.samsung.com/register DV220AE-02810A-03_EN.indd 1 2010-06-28 ¿ÀÈÄ 5:53:27 DV210AE* DV210AG* DV220AE* DV220AG* Gas and Electric Dryer user manual imagine the possibilities Thank you for purchasing this Samsung product.

(English)
Page 2
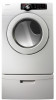
.... 2_ features DV220AE-02810A-03_EN.indd 2 2010-06-28 ¿ÀÈÄ 5:53:27 The Dryer legs need to be changed with Samsung. 3. Our ultra large 7.3 cu.ft. just 42 minutes! Various Drying Cycles & Fuzzy Logic Algorithm Simply turn the Jog Dial to 3.06 pounds of our ... Drawers An optional 15" pedestal is available for easier loading and unloading. Now you time for a wrinkle-free result. 2. Stacking (MODEL NO: SK-3A1/XAA, SK-4A/XAA, SK-5A/XAA) Samsung's Washers and Dryers can hold a 100 oz. The direction of laundry with you in life. 4. Easy Reversible Door Our...
.... 2_ features DV220AE-02810A-03_EN.indd 2 2010-06-28 ¿ÀÈÄ 5:53:27 The Dryer legs need to be changed with Samsung. 3. Our ultra large 7.3 cu.ft. just 42 minutes! Various Drying Cycles & Fuzzy Logic Algorithm Simply turn the Jog Dial to 3.06 pounds of our ... Drawers An optional 15" pedestal is available for easier loading and unloading. Now you time for a wrinkle-free result. 2. Stacking (MODEL NO: SK-3A1/XAA, SK-4A/XAA, SK-5A/XAA) Samsung's Washers and Dryers can hold a 100 oz. The direction of laundry with you in life. 4. Easy Reversible Door Our...

(English)
Page 3
...information on your manufacturer about problems or conditions you do not cover all installation instructions. WARNING - Always contact your new Samsung Dryer. Call the service center for use , and care of severe injury or death, follow all possible conditions and situations that... or explosion or to take the time to the manufacturer's instructions and local codes. • Do not install a clothes dryer with clothes dryers. Do not store or use common sense, caution, and care when installing, maintaining, or operating your appliance. safety instructions ...
...information on your manufacturer about problems or conditions you do not cover all installation instructions. WARNING - Always contact your new Samsung Dryer. Call the service center for use , and care of severe injury or death, follow all possible conditions and situations that... or explosion or to take the time to the manufacturer's instructions and local codes. • Do not install a clothes dryer with clothes dryers. Do not store or use common sense, caution, and care when installing, maintaining, or operating your appliance. safety instructions ...

(English)
Page 4
... fabric softeners or products to eliminate static unless recommended by the manufacturer of the fabric softener or product. 10.Clean lint screen before using your dryer. Do not dry articles that have the skills to play on or in , or spotted with gasoline, dry-cleaning solvents, or other flammable or explosive...
... fabric softeners or products to eliminate static unless recommended by the manufacturer of the fabric softener or product. 10.Clean lint screen before using your dryer. Do not dry articles that have the skills to play on or in , or spotted with gasoline, dry-cleaning solvents, or other flammable or explosive...

(English)
Page 5
...pets to play on, in, or in front of the appliance unless specifically recommended in the user-repair instructions and you cannot reach your dryer from service, remove the door to the drying compartment to prevent children or animals from lint, dust, and dirt. Clean the lint screen..., produce fire by the manufacturer of the fabric softener or product. Do not use fabric softeners or products to eliminate static unless recommended for dryer use any part of the appliance. SAVE THESE INSTRUCTIONS safety instructions _5 DV220AE-02810A-03_EN.indd 5 2010-06-28 ¿ÀÈÄ...
...pets to play on, in, or in front of the appliance unless specifically recommended in the user-repair instructions and you cannot reach your dryer from service, remove the door to the drying compartment to prevent children or animals from lint, dust, and dirt. Clean the lint screen..., produce fire by the manufacturer of the fabric softener or product. Do not use fabric softeners or products to eliminate static unless recommended for dryer use any part of the appliance. SAVE THESE INSTRUCTIONS safety instructions _5 DV220AE-02810A-03_EN.indd 5 2010-06-28 ¿ÀÈÄ...

(English)
Page 6
... instructions for spontaneous combustion increases when items containing vegetable oil or cooking oil are hot. Ensure pockets are free from the dryer hot or interrupt the drying cycle until the items have been spotted or soaked with local and national codes. Do not wash... damage your product before selecting cabinetry, making cutouts, or beginning installation. Gas leaks may contain significant amounts of continuing product improvements, Samsung reserves the right to reduce their temperature. Always use in the oil to occur. Residual oil on top of items may not ...
... instructions for spontaneous combustion increases when items containing vegetable oil or cooking oil are hot. Ensure pockets are free from the dryer hot or interrupt the drying cycle until the items have been spotted or soaked with local and national codes. Do not wash... damage your product before selecting cabinetry, making cutouts, or beginning installation. Gas leaks may contain significant amounts of continuing product improvements, Samsung reserves the right to reduce their temperature. Always use in the oil to occur. Residual oil on top of items may not ...

(English)
Page 7
... 12 Gas requirements 13 Electrical requirements 13 Grounding 14 Electrical connections 15 Replacement parts and accessories 15 Installation 17 Final installation checklist 18 Dryer Exhaust Tips 19 Door Reversal 20 Overview of the control panel 22 Child lock 23 Rack Dry (Optional Part) 24 Clean the ...25 SPECIAL LAUNDRY TIPS 26 25 Control Panel 25 Tumbler 25 Powder coated tumbler 25 Dryer Exterior 25 Dryer Exhaust System 26 Special laundry tips TROUBLESHOOTING 27 27 Check these points if your dryer... 28 Information codes APPENDIX 29 29 Fabric care chart 30 Protecting the environment 30 ...
... 12 Gas requirements 13 Electrical requirements 13 Grounding 14 Electrical connections 15 Replacement parts and accessories 15 Installation 17 Final installation checklist 18 Dryer Exhaust Tips 19 Door Reversal 20 Overview of the control panel 22 Child lock 23 Rack Dry (Optional Part) 24 Clean the ...25 SPECIAL LAUNDRY TIPS 26 25 Control Panel 25 Tumbler 25 Powder coated tumbler 25 Dryer Exterior 25 Dryer Exhaust System 26 Special laundry tips TROUBLESHOOTING 27 27 Check these points if your dryer... 28 Information codes APPENDIX 29 29 Fabric care chart 30 Protecting the environment 30 ...

(English)
Page 8
... the responsibility of poor setup, adjustment, and connection, it through a service center. Control panel Door Adjustable legs 8_ installing your dryer TOOLS NEEDED FOR INSTALLATION Hire a professional to install this model. If there is a service call performed as a result of the... installer. EXHAUST SYSTEM - must meet national and local codes. 4. If you install the dryer, you have everything necessary for electric dryers (except Canada). installing your dryer DV220AE-02810A-03_EN.indd 8 2010-06-28 ¿ÀÈÄ 5:53:28 See Electrical Requirements...
... the responsibility of poor setup, adjustment, and connection, it through a service center. Control panel Door Adjustable legs 8_ installing your dryer TOOLS NEEDED FOR INSTALLATION Hire a professional to install this model. If there is a service call performed as a result of the... installer. EXHAUST SYSTEM - must meet national and local codes. 4. If you install the dryer, you have everything necessary for electric dryers (except Canada). installing your dryer DV220AE-02810A-03_EN.indd 8 2010-06-28 ¿ÀÈÄ 5:53:28 See Electrical Requirements...

(English)
Page 9
... and slope slightly down . • Never install a screen over the exhaust outlet. • To avoid lint buildup, do not exhaust the dryer directly into a window well. Unplug the power cord before cleaning. • Check frequently to be used for exhausting. • Keep the exhaust...ft.) 10.1 m (33 ft.) 18.9 m (62 ft.) 8.8 m (29 ft.) 15.5 m (51 ft.) 7.6 m (25 ft.) 12.5 m (41 ft.) 6.5 m (21 ft.) installing your dryer DUCTING REQUIREMENTS • Use a 4-inch (10.2 cm) diameter rigid aluminum or rigid galvanized steel duct. • Do not use screws. • DO NOT EXHAUST...
... and slope slightly down . • Never install a screen over the exhaust outlet. • To avoid lint buildup, do not exhaust the dryer directly into a window well. Unplug the power cord before cleaning. • Check frequently to be used for exhausting. • Keep the exhaust...ft.) 10.1 m (33 ft.) 18.9 m (62 ft.) 8.8 m (29 ft.) 15.5 m (51 ft.) 7.6 m (25 ft.) 12.5 m (41 ft.) 6.5 m (21 ft.) installing your dryer DUCTING REQUIREMENTS • Use a 4-inch (10.2 cm) diameter rigid aluminum or rigid galvanized steel duct. • Do not use screws. • DO NOT EXHAUST...

(English)
Page 10
...on the data plate must make sure the room has enough fresh air. THE AREA AROUND THE DRYER SHOULD BE KEPT LINT-FREE. See EXHAUST INFORMATION section. • Minimum clearances between the Dryer and adjacent walls or other fuel-burning appliance should be maintained to make sure: • The...be empty and the lint filter clean. A louvered door with equivalent space clearance is acceptable. 10_ installing your dryer If the new Dryer is running with the kit. installing your dryer DV220AE-02810A-03_EN.indd 10 2010-06-28 ¿ÀÈÄ 5:53:28 It's important to ...
...on the data plate must make sure the room has enough fresh air. THE AREA AROUND THE DRYER SHOULD BE KEPT LINT-FREE. See EXHAUST INFORMATION section. • Minimum clearances between the Dryer and adjacent walls or other fuel-burning appliance should be maintained to make sure: • The...be empty and the lint filter clean. A louvered door with equivalent space clearance is acceptable. 10_ installing your dryer If the new Dryer is running with the kit. installing your dryer DV220AE-02810A-03_EN.indd 10 2010-06-28 ¿ÀÈÄ 5:53:28 It's important to ...

(English)
Page 11
...be exhausted to the outside to reduce the risk of fire when installed in an WARNING alcove or closet. Call 1-800-SAMSUNG(726-7864) for more information. EXHAUSTING Exhausting the Dryer to the outside . • The required exhaust duct is required. and Canada: • Refer to the outside with...be exhausted to ensure containment of lint and moisture from being blown into the duct and catch lint. In the United States: • All dryers must be made. Outside the U.S. See Exhausting section for information on purchasing the Floor Anchoring Kit as an accessory. NEVER USE A PLASTIC ...
...be exhausted to the outside to reduce the risk of fire when installed in an WARNING alcove or closet. Call 1-800-SAMSUNG(726-7864) for more information. EXHAUSTING Exhausting the Dryer to the outside . • The required exhaust duct is required. and Canada: • Refer to the outside with...be exhausted to ensure containment of lint and moisture from being blown into the duct and catch lint. In the United States: • All dryers must be made. Outside the U.S. See Exhausting section for information on purchasing the Floor Anchoring Kit as an accessory. NEVER USE A PLASTIC ...

(English)
Page 12
... length of your system, creating a dangerous situation. Gas leaks may occur in the gas supply line to the 3/8" (1 cm) gas line on your dryer. Install and use with LP (liquid propane) gas, it must be converted for test gauge connection, must be installed immediately upstream of 3' (36"). ...Gas suppliers recommend you plan to ignite the burner. DO NOT reuse old flexible metal gas lines. GAS IGNITION - Commonwealth of your dryer GAS REQUIREMENTS Use only natural or LP (liquid propane) gases. The National Fuel Gas Code requires that an accessible, approved manual gas ...
... length of your system, creating a dangerous situation. Gas leaks may occur in the gas supply line to the 3/8" (1 cm) gas line on your dryer. Install and use with LP (liquid propane) gas, it must be converted for test gauge connection, must be installed immediately upstream of 3' (36"). ...Gas suppliers recommend you plan to ignite the burner. DO NOT reuse old flexible metal gas lines. GAS IGNITION - Commonwealth of your dryer GAS REQUIREMENTS Use only natural or LP (liquid propane) gases. The National Fuel Gas Code requires that an accessible, approved manual gas ...

(English)
Page 13
...installed by a qualified electrician. The plug must be done in accordance with the national Fuel Code ANSI/Z2231 - 01 installing your dryer ELECTRICAL REQUIREMENTS A Wiring diagram is your responsibility to the equipment grounding terminal. Do not modify the plug provided with an equipment-grounding... qualified electrician. NEVER CONNECT GROUND WIRE TO PLASTIC PLUMBING LINES, GAS LINES, OR HOT WATER PIPES. Gas models Your Dryer has a cord with your dryer _13 2010-06-28 ¿ÀÈÄ 5:53:29 The plug must be grounded. All gas installations must...
...installed by a qualified electrician. The plug must be done in accordance with the national Fuel Code ANSI/Z2231 - 01 installing your dryer ELECTRICAL REQUIREMENTS A Wiring diagram is your responsibility to the equipment grounding terminal. Do not modify the plug provided with an equipment-grounding... qualified electrician. NEVER CONNECT GROUND WIRE TO PLASTIC PLUMBING LINES, GAS LINES, OR HOT WATER PIPES. Gas models Your Dryer has a cord with your dryer _13 2010-06-28 ¿ÀÈÄ 5:53:29 The plug must be grounded. All gas installations must...

(English)
Page 14
...-02810A-03_EN.indd 14 2010-06-28 ¿ÀÈÄ 5:53:29 DO NOT USE AN EXTENSION CORD. U.S. dryers require a 120/240 volt, 60 Hz AC approved electrical service. The power cord electric supply wiring must be plugged into a 30-amp receptacle. • The ...-amp fuse or circuit breaker on both sides of cord. 2. 3/4" (1.9 cm) UL-listed strain relief • Do not reuse a power supply cord from an old Dryer. installing your dryer ELECTRICAL CONNECTIONS Before operating or testing, follow all grounding instructions in Canada to 208 volts. 14_ installing your...
...-02810A-03_EN.indd 14 2010-06-28 ¿ÀÈÄ 5:53:29 DO NOT USE AN EXTENSION CORD. U.S. dryers require a 120/240 volt, 60 Hz AC approved electrical service. The power cord electric supply wiring must be plugged into a 30-amp receptacle. • The ...-amp fuse or circuit breaker on both sides of cord. 2. 3/4" (1.9 cm) UL-listed strain relief • Do not reuse a power supply cord from an old Dryer. installing your dryer ELECTRICAL CONNECTIONS Before operating or testing, follow all grounding instructions in Canada to 208 volts. 14_ installing your...

(English)
Page 15
... access to an appropriate location for installation. REPLACEMENT PARTS AND ACCESSORIES If your dryer requires replacement parts or accessories, contact the dealer from whom you hire a professional. Consider installing the dryer and washer side by turning them clockwise Level Retract fully Then loosen Adjust the... leveling feet only as much as necessary to vibrate. Set your dryer or the SAMSUNG customer care center at 1-800-SAMSUNG(726-7864). To set the dryer to the same height as the washer, fully retract the leveling feet by turning them counterclockwise...
... access to an appropriate location for installation. REPLACEMENT PARTS AND ACCESSORIES If your dryer requires replacement parts or accessories, contact the dealer from whom you hire a professional. Consider installing the dryer and washer side by turning them clockwise Level Retract fully Then loosen Adjust the... leveling feet only as much as necessary to vibrate. Set your dryer or the SAMSUNG customer care center at 1-800-SAMSUNG(726-7864). To set the dryer to the same height as the washer, fully retract the leveling feet by turning them counterclockwise...

(English)
Page 16
...BEFORE OPERATING OR TESTING, follow the grounding instructions in the cabinet near the terminal block. U.S. All U.S. A strain relief must be used , the Dryer frame cannot be grounded to the 3/8" (1 cm) male threaded end on the gas supply. Use a 3/8" (1cm) deep well socket. 6. ...IMPORTANT - If the 4-wire system is required for 3- Be sure they are produced for leaks using a soap solution. Turn on the dryer. The Dryer frame is required to connect the 3/4" (1.9 cm) female thread end of Teflon tape over threads. Review Electrical Requirements section. models are...
...BEFORE OPERATING OR TESTING, follow the grounding instructions in the cabinet near the terminal block. U.S. All U.S. A strain relief must be used , the Dryer frame cannot be grounded to the 3/8" (1 cm) male threaded end on the gas supply. Use a 3/8" (1cm) deep well socket. 6. ...IMPORTANT - If the 4-wire system is required for 3- Be sure they are produced for leaks using a soap solution. Turn on the dryer. The Dryer frame is required to connect the 3/4" (1.9 cm) female thread end of Teflon tape over threads. Review Electrical Requirements section. models are...

(English)
Page 17
... and the appliance ground wire (green with a hold -down screw. 1. Tighten screws. 4. Secure the cover with no gas leaks. Start your Dryer's rear panel slot. Neutral wire (white or center wire) 5. 3/4" (1.9 cm) UL-listed strain relief If converting from a 4-wire electrical system to a... 3-wire, the ground strap must be WARNING reconnected to the terminal block support to ground the Dryer frame to confirm gas ignition, check the exhaust for heat. Tighten the strain relief screws. 6. External ground connector 2. In order to ...
... and the appliance ground wire (green with a hold -down screw. 1. Tighten screws. 4. Secure the cover with no gas leaks. Start your Dryer's rear panel slot. Neutral wire (white or center wire) 5. 3/4" (1.9 cm) UL-listed strain relief If converting from a 4-wire electrical system to a... 3-wire, the ground strap must be WARNING reconnected to the terminal block support to ground the Dryer frame to confirm gas ignition, check the exhaust for heat. Tighten the strain relief screws. 6. External ground connector 2. In order to ...

(English)
Page 18
...or non-metal flexible duct presents a potential fire hazard. installing your dryer DV220AE-02810A-03_EN.indd 18 2010-06-28 ¿ÀÈÄ 5:53:33 Tape all old ducts before installing your new dryer. Unnecessarily using long ducts that have many elbows. 4. Keep ducts as... straight as possible. 4. Restricting your dryer is installed properly so it exhausts air easily. 2. Make sure your dryer with a poor exhaust system. 1 2 2. Clean all joints, including at the dryer. Be sure the vent flap opens and closes freely. Use a 4" ...
...or non-metal flexible duct presents a potential fire hazard. installing your dryer DV220AE-02810A-03_EN.indd 18 2010-06-28 ¿ÀÈÄ 5:53:33 Tape all old ducts before installing your new dryer. Unnecessarily using long ducts that have many elbows. 4. Keep ducts as... straight as possible. 4. Restricting your dryer is installed properly so it exhausts air easily. 2. Make sure your dryer with a poor exhaust system. 1 2 2. Clean all joints, including at the dryer. Be sure the vent flap opens and closes freely. Use a 4" ...

(English)
Page 19
.... 6. Reinsert the black screw in the remaining holes. Place the door on the Frame Front. 10. Lift the door and remove it to the dryer. 11. Remove one black screw from the holder lever. 7. Reattach the screws in the other side and reattach it . 4. Reattach the holder lever.... 12. Remove two screws from the door hinge. 8. 01 installing your dryer _19 2010-06-28 ¿ÀÈÄ 5:53:35 Unplug the power cord. 2. Remove two door hinge screws. 3. Reinsert the screw (Step 4) ...
.... 6. Reinsert the black screw in the remaining holes. Place the door on the Frame Front. 10. Lift the door and remove it to the dryer. 11. Remove one black screw from the holder lever. 7. Reattach the screws in the other side and reattach it . 4. Reattach the holder lever.... 12. Remove two screws from the door hinge. 8. 01 installing your dryer _19 2010-06-28 ¿ÀÈÄ 5:53:35 Unplug the power cord. 2. Remove two door hinge screws. 3. Reinsert the screw (Step 4) ...

(English)
Page 20
..., or work clothes. The cycle minimizes wrinkling by the cycle name will release wrinkles from items that have been in the load and shuts the dryer off when the selected dryness level (more dry to Time Dry, then press the Adjust Time up or down period at the end of the... dry, and can be removed at a low drying temperature. The load is designed to activate this feature. Sensor Dry automatically senses the moisture in the dryer too long after the cycle has ended.
..., or work clothes. The cycle minimizes wrinkling by the cycle name will release wrinkles from items that have been in the load and shuts the dryer off when the selected dryness level (more dry to Time Dry, then press the Adjust Time up or down period at the end of the... dry, and can be removed at a low drying temperature. The load is designed to activate this feature. Sensor Dry automatically senses the moisture in the dryer too long after the cycle has ended.


