
User Manual
Page 28
Otherwise, it . Wallmount Components A B CENTER LINE A-TYPE : 616mm B-TYPE : 360mm B A Wall Mount Guide Holder-Screw (2 EA) Screw (2EA) Bracket-Wall Mount L Bracket-Wall Mount R ENG - 24 09 INSTALLING THE WALL MOUNT Installation Precautions •• Install on . -- If not, reinforce the wall or choose another installation point. •• Purchase and use the fixing screws or ...
Otherwise, it . Wallmount Components A B CENTER LINE A-TYPE : 616mm B-TYPE : 360mm B A Wall Mount Guide Holder-Screw (2 EA) Screw (2EA) Bracket-Wall Mount L Bracket-Wall Mount R ENG - 24 09 INSTALLING THE WALL MOUNT Installation Precautions •• Install on . -- If not, reinforce the wall or choose another installation point. •• Purchase and use the fixing screws or ...

User Manual
Page 30
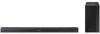
...;• Slightly tilt the Soundbar to insert both Bracket-Wall Mount L and R to the holes on the brackets. •• The left and right mounts are different shapes. Install the Soundbar with the attached Bracket-Wall Mounts by hanging the Bracket-Wall Mounts on the Holder-Screws on the Soundbar to the...the bumps on the wall. •• When assembling, make sure the hanger part of the Bracket-Wall Mounts are firmly fixed. Make sure to attach both Holder-Screw heads into Bracket-Wall Mount holes. Rear of Soundbar ENG - 26 Use the two Screws (M4 x L12) to position them...
...;• Slightly tilt the Soundbar to insert both Bracket-Wall Mount L and R to the holes on the brackets. •• The left and right mounts are different shapes. Install the Soundbar with the attached Bracket-Wall Mounts by hanging the Bracket-Wall Mounts on the Holder-Screws on the Soundbar to the...the bumps on the wall. •• When assembling, make sure the hanger part of the Bracket-Wall Mounts are firmly fixed. Make sure to attach both Holder-Screw heads into Bracket-Wall Mount holes. Rear of Soundbar ENG - 26 Use the two Screws (M4 x L12) to position them...


