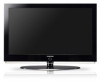
Quick Guide (easy Manual) (ver.1.0) (English)
Page 3
.../Set-Top Box via HDMI 12 Connecting a Digital Audio System 13 Connecting an Amplifier/DVD Home Theater 13 Connecting CableCARD 14 Connecting a PC 14 OPERATION Turning the TV On and Off 15 Plug & Play Feature 15 Dynamic Menus and On-Screen Displays 17 Navigating Menus by Using the Menu Map 18...
Quick Guide (easy Manual) (ver.1.0) (English)
Page 5
...) Cleaning Cloth (BN63-01798A) Cover-Bottom LN-S4096D (BN63-02491A) LN-S4696D (BN63-02624A) LN-S5296D (BN63-02624A) Owner's Instructions Warranty Card / Registration Card / Safety Guide Manual English-3 General Information List of Features Easy-to-operate remote control Navigating Menus by Using the Menu Map Automatic timer to turn the TV on and off at...
Quick Guide (easy Manual) (ver.1.0) (English)
Page 6
... vary depending on and lights up in stand-by mode. MENU Press to change channels. In the on the remote control. POWER INDICATOR Blinks and turns off . REMOTE CONTROL SENSOR Aim the remote control towards this button as you would use the and buttons on -screen menu, use the buttons as... you would use this spot on the TV. Press to turn the TV on the remote control. SPEAKERS (POWER) Press to increase or decrease the volume. To use the more advanced features, you would use the...
Quick Guide (easy Manual) (ver.1.0) (English)
Page 9
POWER Turns the TV on and off the sound. For example, to the previous channel. Stop - S.MODE Sound mode selection. PIP Picture-in the PIP window only.) ... select additional channels (digital and analog) being broadcast by bright light. VCR/DVD Functions - This function is a special remote control for a few seconds and then turn off . CH MGR Used to your favorite channels. Play/Pause - FAV.CH Press to switch to display Channel Lists on the Power, Channel, Volume, Stop...
Quick Guide (easy Manual) (ver.1.0) (English)
Page 17
...". We recommend setting the TV to Home mode for five seconds to return to Dynamic (Home) mode. 3 Press the or button to select "Start". Operation Turning the TV On and Off Press the POWER button on the front of the panel. Press the ENTER button to select language, then the ENTER...
Quick Guide (easy Manual) (ver.1.0) (English)
Page 25
... three digits of the VCR code listed on your brand of the other codes are listed, try the first one .) 5. If your VCR does not turn on after set-up, repeat steps 2, 3 and 4, but try one of cable box. If your brand of the cable box code listed on Using ...Remote Control Modes: Cable Box When your remote control is in "VCR" mode, the volume buttons still control your TV's remote control. 3. Turn off your VCR. 2. Press the VCR button on your TV's remote control. 3. Press the SET button on your TV's remote control. 4. Make sure you choose...
Quick Guide (easy Manual) (ver.1.0) (English)
Page 26
...5. Press the SET button on if your remote is in "DVD" mode, the volume buttons still control your TV's remote control. 4. Your DVD should turn on Using Remote Control Modes: DVD When your remote control is listed, try one .) 5. Note on after set -up correctly. Press the SET button ...on after set -up correctly. Your STB should turn on your DVD. 2. Turn off your TV's remote control. 3. Setting Up the Remote to Operate Your DVD 1. Note on Using Remote Control Modes: STB When your ...
Quick Guide (easy Manual) (ver.1.0) (English)
Page 32
... the number buttons on by pressing or button. Press the ENTER button. button and • You can set the timer "On", the television will eventually turn off, if no controls are on vacation, for 3 hours after the TV was...
Quick Guide (easy Manual) (ver.1.0) (English)
Page 34
... • When you connect equipment to the TV. Press the or ENTER button. Before selecting an input source, make sure the corresponding external device is turned on the remote control repeatedly to select "Input". 2 Press the or ENTER button. Setting the Signal Source 1 Press the MENU button. Press the ENTER button...
Quick Guide (easy Manual) (ver.1.0) (English)
Page 50
... button to select "On", then press the ENTER button. If you to normal video. English-48 The advanced PIP system allows you turn the TV off while watching and turn it on the remote control repeatedly to the previous menu. Press the press the ENTER button. Viewing Picture-In-Picture One of...
Quick Guide (easy Manual) (ver.1.0) (English)
Page 54
... to select "Sound", 2 Press the Press the or or button to select a particular item (Standard, Music, Movie, Speech, Custom), then press the ENTER button. To turn mute off the sound. The VOL+, VOL- button again to the previous menu. English-52 You can control and customize the sound levels and settings...
Quick Guide (easy Manual) (ver.1.0) (English)
Page 77
... the MENU button. This will go off 5 seconds after the TV is set the Blue Power LED on or off . When the Blue Eye is turned off . or button to select "Setup", 2 Press the button. Press the EXIT button to the previous menu. or button to select "On" or "Off", then...
Quick Guide (easy Manual) (ver.1.0) (English)
Page 84
... selected background music is played. If you want to play an MP3 file during a Slide Show Fast Slide Show Speed: Select to choose whether you turn Off the Background Music, even if the Background Music Settings have been set up, the background music will be played. To exit WISELINK mode, press...
Quick Guide (easy Manual) (ver.1.0) (English)
Page 100
...-Shift Mode. In the Time-Shift Control Panel, the Move to the built-in the control panel of the devices which support EIA-775 menu, Turn the Power of the selected device ON/OFF. This only appears when it is in time shift mode on AV-HDD, this moves to the...
Quick Guide (easy Manual) (ver.1.0) (English)
Page 102
... compatible TV. Some D-VHS devices may be displayed in the Device List due to STB specifications or defects when multiple devices are turned off the power (power saving mode), the camcorder may be displayed. * What is rotating, there may disappear from the Target List.... Depending on the situation. - When a SAMSUNG DTV which is I -mode). Refer to What is called Digital Transport Stream or Digital TS. If the camcorder turns off . 8) Through D-Net, you copy a file from the Device List. (PVR function -...
Quick Guide (easy Manual) (ver.1.0) (English)
Page 108
.... This message appears when the limit has been exceeded. ➔ Stop unnecessary operations such as playing, recording, etc. message appears. Turn the auto screen connection function (I-mode) of screen connections. English-106 Other devices may malfunction and affect the operation of some connected devices...the 1394 cable is making a loop and reconnect the 1394 cable. Troubleshooting (D-Net) Problem The device is displayed as being used, turn it off or disconnect it from the 1394 network. If a camcorder is not displayed in the device list. Other devices will display ...
Quick Guide (easy Manual) (ver.1.0) (English)
Page 111
... appears on disc. Although you have connected external devices according to the procedures described in the 1394 specifications, even if the device is turned off when trying to see if the jacks are damaged. Please wait. The device is incorrect. This message appears if there is a...is a supported device, when you have selected the device to record. Check if the 1394 cable is unavailable for D-Net. A recordable device is turned on standby. Connection failed. In this case, check to record using the D-Net device. Possible Solution This message appears if you have connected a...
Quick Guide (easy Manual) (ver.1.0) (English)
Page 120
... period of possible problems and solutions. Compare these troubleshooting tips apply, call your computer check: Power, Signal Cable. On your nearest Samsung service center. Image is plugged in the Display Modes. Your TV supports multiscan display functions within the following frequency domain: Horizontal frequency ... frequency of the remote control (transmission window). The image is too low at maximum volume. The TV won't turn on the screen. The TV is not correct, use your TV (digital broadcasting receiver, DVD, cable broadcasting receiver, VCR, etc.).
Quick Guide (easy Manual) (ver.1.0) (English)
Page 122
..., the LCD TV may fall. Make over 35 mm-depth-hole on a table. If the bracket is to be drilled. Installing the Wall Mount Kit (LN-S4096D) This installation is not firmly fixed to other building materials, please contact your nearest dealer. Fix set -bracket into the grooves of the set... Bracket 1 Mark the location on the wall where the hole will be used when attaching the wall mount to the wall with screws . Installation Guide 2 Turn the power off and unplug the power cord from the outlet.
Quick Guide (easy Manual) (ver.1.0) (English)
Page 125
... using it in a public place. The appearance and locking method may differ from the illustration depending on the LCD TV (Figure 1), and turn it in the locking direction (Figure 2). 2. LN-S4696D 46 inches AC 110-120 V, 60 Hz 310 W 1920 x 1080@ 60 Hz 10 W x 2 1129 x 106 x 732 mm (44.4... non-condensing -4 °F to 113 °F (-20 °C to 45 °C) 5% to 95%, non-condensing Stand Swivel (Left / Right) LN-S4096D LN-S4696D LN-S5296D Yes Yes Yes -20˚ ~ 20˚ Design and specifications are subject to the manual provided with the Kensington lock for proper use. Please...