
Print Specs
Page 1
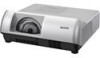
... # 645 102 1724 4000h(Eco) 4000h (Eco) D-sub 15 x 1 (RGB, Component) D-sub 15 x 1 (RGB, Monitor out) Mini DIN 4pin x 1 (S-Video) RCA x 1 (Composite) HDMI x 1 (Ver.1.3) Stereo mini jack x 1 RCA x 2(R/L, mono) D-sub 15 x 1 (in common) Stereo mini jack x 1 D-sub 9pin x 1 (control port) RJ-45 x 1 (Wired... on as soon as it is equipped with SANYO's proprietary hybrid filter, composed of multiple filter layers, and the lamp lifespan has been improved compared to project HD images. 2500 LUMENS z WXGA z ULTRA SHORT THROW PROJECTOR PLC-WL2500 WXGA ULTRA SHORT THROW PROJECTOR 3LCD Built-in ...
... # 645 102 1724 4000h(Eco) 4000h (Eco) D-sub 15 x 1 (RGB, Component) D-sub 15 x 1 (RGB, Monitor out) Mini DIN 4pin x 1 (S-Video) RCA x 1 (Composite) HDMI x 1 (Ver.1.3) Stereo mini jack x 1 RCA x 2(R/L, mono) D-sub 15 x 1 (in common) Stereo mini jack x 1 D-sub 9pin x 1 (control port) RJ-45 x 1 (Wired... on as soon as it is equipped with SANYO's proprietary hybrid filter, composed of multiple filter layers, and the lamp lifespan has been improved compared to project HD images. 2500 LUMENS z WXGA z ULTRA SHORT THROW PROJECTOR PLC-WL2500 WXGA ULTRA SHORT THROW PROJECTOR 3LCD Built-in ...
Owner's Manual
Page 3
... 33 Image Adjustment 34 Screen Size Adjustment 35 Video Input 37 Input Source Selection (Video, S-video) 37 Input Source Selection (Component, RGB Scart 21-pin, HDMI) 38 Video System Selection 39 Image Mode Selection 40 Image Adjustment 41 Screen Size Adjustment 43 Setting 44 Setting 44 Information 59 Input Source Information...
... 33 Image Adjustment 34 Screen Size Adjustment 35 Video Input 37 Input Source Selection (Video, S-video) 37 Input Source Selection (Component, RGB Scart 21-pin, HDMI) 38 Video System Selection 39 Image Mode Selection 40 Image Adjustment 41 Screen Size Adjustment 43 Setting 44 Setting 44 Information 59 Input Source Information...

Owner's Manual
Page 9
... signal from a computer or output to the other monitor. This terminal outputs sound from AUDIO IN terminal (⑧ or ⑨) or HDMI terminal ② (digital audio). ⑦ CONTROL PORT When controlling the projector with RS-232C, connect the control equipment to this connector ... ④ ⑤ ⑥ ⑦ ⑩⑨ ⑧ ① LAN Connection Terminal Connect the LAN cable (refer to the owner's manual of HDMI Licensing, LLC. ③ COMPUTER IN 1 / COMPONENT IN Connect output signal from a computer, RGB scart 21-pin video output or component video output to this ...
... signal from a computer or output to the other monitor. This terminal outputs sound from AUDIO IN terminal (⑧ or ⑨) or HDMI terminal ② (digital audio). ⑦ CONTROL PORT When controlling the projector with RS-232C, connect the control equipment to this connector ... ④ ⑤ ⑥ ⑦ ⑩⑨ ⑧ ① LAN Connection Terminal Connect the LAN cable (refer to the owner's manual of HDMI Licensing, LLC. ③ COMPUTER IN 1 / COMPONENT IN Connect output signal from a computer, RGB scart 21-pin video output or component video output to this ...

Owner's Manual
Page 11
... item or adjust the value in Digital zoom mode. (p.36) ㉑ COMPONENT button Select the COMPONENT input source. (p.38) ㉒ HDMI button Select the HDMI input source. (p.38) 11 Pan the image in the Digital zoom +/- Remote Control Part Names and Functions ① ②...; HDMI ③ ㉒ ④ ㉑ ⑳ ⑤ ⑥ ⑲ ⑦ ⑧ ⑱ ⑰ ⑨ ⑯ ASPECT ⑩ ⑮ ⑪ ⑭ ⑬...
... item or adjust the value in Digital zoom mode. (p.36) ㉑ COMPONENT button Select the COMPONENT input source. (p.38) ㉒ HDMI button Select the HDMI input source. (p.38) 11 Pan the image in the Digital zoom +/- Remote Control Part Names and Functions ① ②...; HDMI ③ ㉒ ④ ㉑ ⑳ ⑤ ⑥ ⑲ ⑦ ⑧ ⑱ ⑰ ⑨ ⑯ ASPECT ⑩ ⑮ ⑪ ⑭ ⑬...

Owner's Manual
Page 12
... or your local disposal rule or guidelines. Remote Control Battery Installation 2 Install new batteries into the compartment. 3 Replace the compartment lid. While pressing the MENU HDMI button, press the IMAGE button more than five seconds to switch between the codes. 12 MENU button ASPECT IMAGE button Remote Control Operating Range Point...
... or your local disposal rule or guidelines. Remote Control Battery Installation 2 Install new batteries into the compartment. 3 Replace the compartment lid. While pressing the MENU HDMI button, press the IMAGE button more than five seconds to switch between the codes. 12 MENU button ASPECT IMAGE button Remote Control Operating Range Point...

Owner's Manual
Page 14
...is advisable to a Computer Cables used for connection • VGA cables (Mini D-sub 15 pin) * • Audio cables • HDMI-DVI cable (*One cable is AUDIO IN switchable. other cables are not supplied with the projector.) DVI Output Monitor Output or Monitor Input External... Audio Equipment Monitor Output Audio Output Audio Input HDMI-DVI cable VGA cable VGA Audio cable cable (stereo) Audio cable (stereo) HDMI COMPUTER IN 1 / COMPUTER IN 2 / COMPUTER/ AUDIO OUT COMPONENT IN MONITOR OUT COMPONENT (stereo...
...is advisable to a Computer Cables used for connection • VGA cables (Mini D-sub 15 pin) * • Audio cables • HDMI-DVI cable (*One cable is AUDIO IN switchable. other cables are not supplied with the projector.) DVI Output Monitor Output or Monitor Input External... Audio Equipment Monitor Output Audio Output Audio Input HDMI-DVI cable VGA cable VGA Audio cable cable (stereo) Audio cable (stereo) HDMI COMPUTER IN 1 / COMPUTER IN 2 / COMPUTER/ AUDIO OUT COMPONENT IN MONITOR OUT COMPONENT (stereo...

Owner's Manual
Page 16
... cable • Component-VGA cable • HDMI cable (Cables are not supplied with this projector.) Component Video Output RGB Scart 21- (Y, Pb/Cb, Pr/Cr) pin Output HDMI Output Audio Output External Audio Equipment Audio Input HDMI cable Component cable ComponentVGA cable Scart-VGA cable... Audio cable (stereo) Audio cable (stereo) HDMI COMPUTER IN 1/ COMPONENT IN COMPUTER IN/ COMPONENT AUDIO IN AUDIO OUT...
... cable • Component-VGA cable • HDMI cable (Cables are not supplied with this projector.) Component Video Output RGB Scart 21- (Y, Pb/Cb, Pr/Cr) pin Output HDMI Output Audio Output External Audio Equipment Audio Input HDMI cable Component cable ComponentVGA cable Scart-VGA cable... Audio cable (stereo) Audio cable (stereo) HDMI COMPUTER IN 1/ COMPONENT IN COMPUTER IN/ COMPONENT AUDIO IN AUDIO OUT...

Owner's Manual
Page 22
... source, used to select an image mode from among Dynamic, Standard, Real, Blackboard(Green), Colorboard and Image 1-4. (p.33) For video or HDMI source, used to select an image mode among Dynamic, Standard, Cinema, Blackboard(Green), Colorboard and Image 1-4. (p.40) ④ Image adjust ...to adjust computer image [Contrast, Brightness, Color temp., White balance (Red/Green/ Blue), Sharpness and Gamma]. (pp.34-35) For video or HDMI source, used to adjust picture image [Contrast, Brightness, Color, Tint, Color temp., White balance (Red/Green/Blue), Sharpness, Gamma, Noise reduction...
... source, used to select an image mode from among Dynamic, Standard, Real, Blackboard(Green), Colorboard and Image 1-4. (p.33) For video or HDMI source, used to select an image mode among Dynamic, Standard, Cinema, Blackboard(Green), Colorboard and Image 1-4. (p.40) ④ Image adjust ...to adjust computer image [Contrast, Brightness, Color temp., White balance (Red/Green/ Blue), Sharpness and Gamma]. (pp.34-35) For video or HDMI source, used to adjust picture image [Contrast, Brightness, Color, Tint, Color temp., White balance (Red/Green/Blue), Sharpness, Gamma, Noise reduction...

Owner's Manual
Page 23
... pressing the AUTO SET button on the input signal. Focus Lever Basic Operation Auto Setup Function Auto setup function is provided to correct keystone distortion. HDMI Remote Control Reduce the upper width with the focus lever. Reduce the lower width with this operation, manual adjustments are required. (pp.31-32) Remote...
... pressing the AUTO SET button on the input signal. Focus Lever Basic Operation Auto Setup Function Auto setup function is provided to correct keystone distortion. HDMI Remote Control Reduce the upper width with the focus lever. Reduce the lower width with this operation, manual adjustments are required. (pp.31-32) Remote...

Owner's Manual
Page 24
The MUTE function is displayed. Volume Press the Point ► button to display the On-Screen Menu. Press the VOLUME +/- HDMI Basic Operation Sound Adjustment Direct Operation Volume Press the VOLUME+/- buttons Menu Operation 1 Press the MENU button to turn up the volume; Remote Control ASPECT ...
The MUTE function is displayed. Volume Press the Point ► button to display the On-Screen Menu. Press the VOLUME +/- HDMI Basic Operation Sound Adjustment Direct Operation Volume Press the VOLUME+/- buttons Menu Operation 1 Press the MENU button to turn up the volume; Remote Control ASPECT ...

Owner's Manual
Page 25
...button on the remote control to freeze the picture on the remote control to enter to the D. Fig.1 Remote Control COMPUTER 1/2 buttons HDMI VIDEO button HDMI button S-VIDEO button COMPONENT button FREEZE button D.ZOOM buttons ASPECT INFO. button Display the input source information: Input, H-sync freq., V-... without calling up the On-Screen Menu. LAMP button Press the LAMP button on the screen. COMPUTER 1/2, HDMI, VIDEO, S-VIDEO and COMPONENT buttons Press the COMPUTER 1/2, HDMI, VIDEO, S-VIDEO and COMPONENT buttons on the Screen menu while the Freeze function is working. To cancel the...
...button on the remote control to freeze the picture on the remote control to enter to the D. Fig.1 Remote Control COMPUTER 1/2 buttons HDMI VIDEO button HDMI button S-VIDEO button COMPONENT button FREEZE button D.ZOOM buttons ASPECT INFO. button Display the input source information: Input, H-sync freq., V-... without calling up the On-Screen Menu. LAMP button Press the LAMP button on the screen. COMPUTER 1/2, HDMI, VIDEO, S-VIDEO and COMPONENT buttons Press the COMPUTER 1/2, HDMI, VIDEO, S-VIDEO and COMPONENT buttons on the Screen menu while the Freeze function is working. To cancel the...

Owner's Manual
Page 26
... is captured and is set as User in the Logo selection (p.47), the screen changes each time you press the NO SHOW button as follows. HDMI P-TIMER button Press the P-TIMER button on the remote control to release the No Show function, the mute function can not be operated at the...
... is captured and is set as User in the Logo selection (p.47), the screen changes each time you press the NO SHOW button as follows. HDMI P-TIMER button Press the P-TIMER button on the remote control to release the No Show function, the mute function can not be operated at the...

Owner's Manual
Page 27
...; to access the submenu items. Use the Point ▲▼ buttons to display the On-Screen Menu. Remote Control HDMI COMPUTER 1 button Top Control Computer 1 Computer 2 * Computer 1(RGB) ASPECT Computer 1(Scart) INPUT button HDMI Video Input Menu S-video *COMPUTER 2 can not be selected when using these buttons, correct input source should be...
...; to access the submenu items. Use the Point ▲▼ buttons to display the On-Screen Menu. Remote Control HDMI COMPUTER 1 button Top Control Computer 1 Computer 2 * Computer 1(RGB) ASPECT Computer 1(Scart) INPUT button HDMI Video Input Menu S-video *COMPUTER 2 can not be selected when using these buttons, correct input source should be...

Owner's Manual
Page 28
...press the SELECT button. 3 When Computer 2 is set to Input and then press the Point ► or the SELECT button. INPUT button HDMI Video S-video Menu Operation 1 Press the MENU button to display the On-Screen Menu. Computer Input Input Source Selection (Computer 2: RGB) ... the remote control or press the INPUT button on the top control. Before using the COMPUTEARSPEICNT 2/ MONITOR OUT terminal as described below. Remote Control HDMI COMPUTER 2 button Computer 2 (RGB)* Top Control Computer 1 Computer 2 * *COMPUTER 2 can not be selected when using these buttons, correct ...
...press the SELECT button. 3 When Computer 2 is set to Input and then press the Point ► or the SELECT button. INPUT button HDMI Video S-video Menu Operation 1 Press the MENU button to display the On-Screen Menu. Computer Input Input Source Selection (Computer 2: RGB) ... the remote control or press the INPUT button on the top control. Before using the COMPUTEARSPEICNT 2/ MONITOR OUT terminal as described below. Remote Control HDMI COMPUTER 2 button Computer 2 (RGB)* Top Control Computer 1 Computer 2 * *COMPUTER 2 can not be selected when using these buttons, correct ...

Owner's Manual
Page 30
... Auto PC adjustment is not provided properly with the Auto PC adjustment function. PC adjust Menu To store adjustment parameters The adjusted parameters from the HDMI terminal. When the image is in the projector. Use the Point ▲▼ buttons to select PC adjust and then press the Point ► or...
... Auto PC adjustment is not provided properly with the Auto PC adjustment function. PC adjust Menu To store adjustment parameters The adjusted parameters from the HDMI terminal. When the image is in the projector. Use the Point ▲▼ buttons to select PC adjust and then press the Point ► or...

Owner's Manual
Page 33
... the color image projected on a black colored board. Blackboard (Green) For the image projected on a blackboard. This mode helps enhance the image projected on a blackboard. HDMI Image Mode Selection Direct Operation Select the desired image mode among Dynamic, Standard, Real, Blackboard (Green), Colorboard, Image 1, Image 2, Image 3, and Image 4 by selecting the...
... the color image projected on a black colored board. Blackboard (Green) For the image projected on a blackboard. This mode helps enhance the image projected on a blackboard. HDMI Image Mode Selection Direct Operation Select the desired image mode among Dynamic, Standard, Real, Blackboard (Green), Colorboard, Image 1, Image 2, Image 3, and Image 4 by selecting the...

Owner's Manual
Page 36
... pages 27-28) again, or adjust the screen size with this function. mode, press any button except the D.ZOOM ▲▼ and the SELECT buttons. HDMI Remote Control POINT buttons SELECT button ASPECT D.ZOOM ▲ button D.ZOOM ▼ button Note: • The panning function may not operate properly if the...
... pages 27-28) again, or adjust the screen size with this function. mode, press any button except the D.ZOOM ▲▼ and the SELECT buttons. HDMI Remote Control POINT buttons SELECT button ASPECT D.ZOOM ▲ button D.ZOOM ▼ button Note: • The panning function may not operate properly if the...

Owner's Manual
Page 37
... Operation 1 Press the MENU button to select either Video or S-video and then press the SELECT button. Remote Control HDMI VIDEO button Video S-VIDEO button S-video Top Control INPUT button Computer 1 Computer 2 * HDMI Video S-video *COMPUTER 2 can ASPECT not be selected when using these buttons, correct input source should be searched automatically...
... Operation 1 Press the MENU button to select either Video or S-video and then press the SELECT button. Remote Control HDMI VIDEO button Video S-VIDEO button S-video Top Control INPUT button Computer 1 Computer 2 * HDMI Video S-video *COMPUTER 2 can ASPECT not be selected when using these buttons, correct input source should be searched automatically...

Owner's Manual
Page 38
... to select Computer 1 and then press the Point ► button; Top Control Computer 1 Computer 2 * Remote Control HDMI COMPUTER 1 button Computer 1 (RGB) Computer 1 (Scart) HDMI button HDMI COMPONENT button ASPECT Computer 1 (Component) *COMPUTER 2 can not be selected when using these buttons, correct input source should... be searched automatically (p.45). 38 choose HDMI by pressing the the COMPONENT or COMPUTER 1 button on the remote control or press the INPUT button on the top control. Use...
... to select Computer 1 and then press the Point ► button; Top Control Computer 1 Computer 2 * Remote Control HDMI COMPUTER 1 button Computer 1 (RGB) Computer 1 (Scart) HDMI button HDMI COMPONENT button ASPECT Computer 1 (Component) *COMPUTER 2 can not be selected when using these buttons, correct input source should... be searched automatically (p.45). 38 choose HDMI by pressing the the COMPONENT or COMPUTER 1 button on the remote control or press the INPUT button on the top control. Use...

Owner's Manual
Page 39
... adjusts itself to optimize its performance. PAL/SECAM/NTSC/NTSC4.43/PAL-M/PAL-N If the projector can not be selected when selecting RGB (Scart) or HDMI. 39 AV System Menu (Video or S-video) Video or S-video Auto The projector automatically detects an incoming video system, and adjusts itself to display the...
... adjusts itself to optimize its performance. PAL/SECAM/NTSC/NTSC4.43/PAL-M/PAL-N If the projector can not be selected when selecting RGB (Scart) or HDMI. 39 AV System Menu (Video or S-video) Video or S-video Auto The projector automatically detects an incoming video system, and adjusts itself to display the...
