
Brochure
Page 2
...Frame POA-BF-140 *Appearance may result if the above precautions are averages of all products at http: //w w w.sanyo-lcdp.com/english/ * Caution: please consult the instruction manual to block the lamp light the instant you turn off ) H-sync: 15-120 kHz, V-sync: 48 -120 Hz... maintenance, with JIS X6911: 2003Data Projector Specifications Format. Safety Precautions Pixelworks ICs are used in this product can be stored in memory for instant recall.* * Supports only the standard Iens (LNS-W04) RF Remote Control with Touch Pad The PLC-XF60A/ EF60A's RF remote control unit features...
...Frame POA-BF-140 *Appearance may result if the above precautions are averages of all products at http: //w w w.sanyo-lcdp.com/english/ * Caution: please consult the instruction manual to block the lamp light the instant you turn off ) H-sync: 15-120 kHz, V-sync: 48 -120 Hz... maintenance, with JIS X6911: 2003Data Projector Specifications Format. Safety Precautions Pixelworks ICs are used in this product can be stored in memory for instant recall.* * Supports only the standard Iens (LNS-W04) RF Remote Control with Touch Pad The PLC-XF60A/ EF60A's RF remote control unit features...
User Manual
Page 1
Multimedia Projector MODEL PLC-XF60A PLC-EF60A ✽ Projection lens is optional. Owner's Manual
Multimedia Projector MODEL PLC-XF60A PLC-EF60A ✽ Projection lens is optional. Owner's Manual
User Manual
Page 2
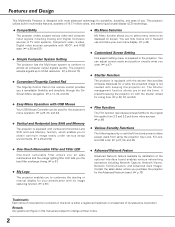
...notice. 2 Remark Any graphic and figure in this manual are subject to set the timer. Contact the sales dealer where you to almost all computer output signals quickly. Features and Design This Multimedia Projector is designed with most advanced technology for a while ...Advanced Network feature available by installation of 16.77 million colors, and matrix liquid crystal display (LCD) technology. ◆ Compatibility The projector widely accepts various video and computer input signals including Analog and Digital Computer sources, 6 TV color systems, Component video, S-video, ...
...notice. 2 Remark Any graphic and figure in this manual are subject to set the timer. Contact the sales dealer where you to almost all computer output signals quickly. Features and Design This Multimedia Projector is designed with most advanced technology for a while ...Advanced Network feature available by installation of 16.77 million colors, and matrix liquid crystal display (LCD) technology. ◆ Compatibility The projector widely accepts various video and computer input signals including Analog and Digital Computer sources, 6 TV color systems, Component video, S-video, ...

User Manual
Page 3
...and Design 2 Table of Contents 3 To The Owner 4 Safety Instructions 5 Air Circulation 6 Setup In Proper Directions 6 Moving the Projector 7 Caution in Handling the Projector 7 Compliance 8 Preparation 9 Parts Name 9 Indicators 10 Top Control 11 Terminals 12 Remote Control 14 Remote Control Transmitter 16 Remote ...Video or S-Video Signal Selection 39 Component Signal Selection 39 Computer Adjustment 40 PC Adjustment 40 Auto PC Adjust 40 Manual PC Adjust 41 Image Adjustment 43 Image 43 Image Adjust 44 Screen Setting 47 Screen Setting 47 Setting 49 Setting ...
...and Design 2 Table of Contents 3 To The Owner 4 Safety Instructions 5 Air Circulation 6 Setup In Proper Directions 6 Moving the Projector 7 Caution in Handling the Projector 7 Compliance 8 Preparation 9 Parts Name 9 Indicators 10 Top Control 11 Terminals 12 Remote Control 14 Remote Control Transmitter 16 Remote ...Video or S-Video Signal Selection 39 Component Signal Selection 39 Computer Adjustment 40 PC Adjustment 40 Auto PC Adjust 40 Manual PC Adjust 41 Image Adjustment 43 Image 43 Image Adjust 44 Screen Setting 47 Screen Setting 47 Setting 49 Setting ...
User Manual
Page 4
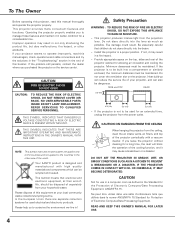
To The Owner Before operating this projector, read this booklet. If your projector seems to conserve the environment we live in a proper position. REFER SERVICING TO QUALIFIED SERVICE PERSONNEL. Your SANYO product is designed and manufactured with a vacuum cleaner. This symbol means that ...PRESENT WITHIN THIS UNIT. Do not cover the ventilation slot on the top, sides and rear of this manual thoroughly and operate the projector properly. NO USER-SERVICEABLE PARTS INSIDE EXCEPT LAMP REPLACEMENT. THIS SYMBOL INDICATES THAT THERE ARE IMPORTANT OPERATING AND...
To The Owner Before operating this projector, read this booklet. If your projector seems to conserve the environment we live in a proper position. REFER SERVICING TO QUALIFIED SERVICE PERSONNEL. Your SANYO product is designed and manufactured with a vacuum cleaner. This symbol means that ...PRESENT WITHIN THIS UNIT. Do not cover the ventilation slot on the top, sides and rear of this manual thoroughly and operate the projector properly. NO USER-SERVICEABLE PARTS INSIDE EXCEPT LAMP REPLACEMENT. THIS SYMBOL INDICATES THAT THERE ARE IMPORTANT OPERATING AND...
User Manual
Page 8
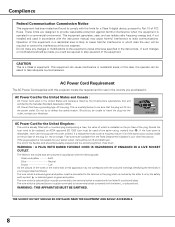
...See Over) WARNING : A PLUG WITH BARED FLEXIBLE CORD IS HAZARDOUS IF ENGAGED IN A LIVE SOCKET OUTLET. Should the fuse need to defeat this projector meets the requirement for your User Instructions. Fuse covers are designed to the terminal which is a Class A equipment. Do not make any changes or... Cord has a grounding-type AC line plug. GROUND AC Power Cord for the United Kingdom : This cord is marked with the instruction manual, may not correspond with the cover omitted. The end of which is already fitted with this safety feature. If such changes or modifications ...
...See Over) WARNING : A PLUG WITH BARED FLEXIBLE CORD IS HAZARDOUS IF ENGAGED IN A LIVE SOCKET OUTLET. Should the fuse need to defeat this projector meets the requirement for your User Instructions. Fuse covers are designed to the terminal which is a Class A equipment. Do not make any changes or... Cord has a grounding-type AC line plug. GROUND AC Power Cord for the United Kingdom : This cord is marked with the instruction manual, may not correspond with the cover omitted. The end of which is already fitted with this safety feature. If such changes or modifications ...
User Manual
Page 18
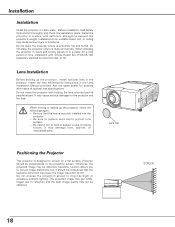
... Ask the sales dealer for a long period of optional lens specifications. It may cause serious damages to the projector and the lens. Otherwise, the projected image may be perpendicular to correct image distortions, but it should be ...projector in the Lens Installation Manual provided. Install the projector in the projector. Installation on a flat surface. Do not move the projector with sufficient strength to direct sunlight or excessive ambient lighting. Lens cap Positioning the Projector This projector is securely installed into the projector. - Projector...
... Ask the sales dealer for a long period of optional lens specifications. It may cause serious damages to the projector and the lens. Otherwise, the projected image may be perpendicular to correct image distortions, but it should be ...projector in the Lens Installation Manual provided. Install the projector in the projector. Installation on a flat surface. Do not move the projector with sufficient strength to direct sunlight or excessive ambient lighting. Lens cap Positioning the Projector This projector is securely installed into the projector. - Projector...
User Manual
Page 19
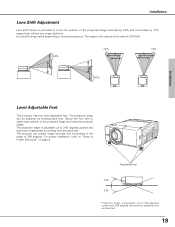
... projection angle is adjustable up to 3.65 degrees upward and 3.65 degrees downward by adjusting front and back feet. 19 The projector can be adjusted by rotating each foot. Adjustable feet 3.65° 3.65° Projection angle is adjustable up to 3.65 degrees upward and downward respectively ... 10% respectively without any image distortion. ✽ Lens shift range varies depending on page 6. The projection angle can project image vertically and horizontally in this manual is the case of the projected image and make the projector stable.
... projection angle is adjustable up to 3.65 degrees upward and 3.65 degrees downward by adjusting front and back feet. 19 The projector can be adjusted by rotating each foot. Adjustable feet 3.65° 3.65° Projection angle is adjustable up to 3.65 degrees upward and downward respectively ... 10% respectively without any image distortion. ✽ Lens shift range varies depending on page 6. The projection angle can project image vertically and horizontally in this manual is the case of the projected image and make the projector stable.
User Manual
Page 27
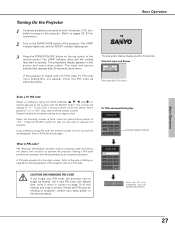
...write it down in Setting on page 55 for Input) Enter a PJ PIN code Select a number by an unauthorized person. Repeat this manual, and keep it to operate the projector. PJ PIN code Input Dialog Box Pointer (yellow frame) What is fixed, move the yellow frame pointer to "C" or "Ent" ...red, and the READY indicator lights green. 3 Press the POWER ON-OFF button on the screen and count-down . Setting a PIN code prevents the projector from being operated by using the Point buttons (e, d, 7, and 8) or Control pad and fix the number with the SELECT button. Basic Operation 16 ...
...write it down in Setting on page 55 for Input) Enter a PJ PIN code Select a number by an unauthorized person. Repeat this manual, and keep it to operate the projector. PJ PIN code Input Dialog Box Pointer (yellow frame) What is fixed, move the yellow frame pointer to "C" or "Ent" ...red, and the READY indicator lights green. 3 Press the POWER ON-OFF button on the screen and count-down . Setting a PIN code prevents the projector from being operated by using the Point buttons (e, d, 7, and 8) or Control pad and fix the number with the SELECT button. Basic Operation 16 ...
User Manual
Page 30
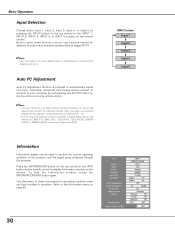
... Input 3, Input 4, or Input 5 by just pressing the AUTO PC ADJ. Before using these buttons, correct input source should be selected through the projector. Refer to display Information window on page 59. 30 INPUT button Input 1 Input 2 Input 3 Input 4 Input 5 06 Information Information display can ... menu operation as described on pages 36~37. ✔Note: Input 4 and Input 5 can not be fully adjusted with this operation, manual adjustments are required. (p.41, 42) • Auto PC Adjustment function cannot be selected when no interface board is inserted into the respective ...
... Input 3, Input 4, or Input 5 by just pressing the AUTO PC ADJ. Before using these buttons, correct input source should be selected through the projector. Refer to display Information window on page 59. 30 INPUT button Input 1 Input 2 Input 3 Input 4 Input 5 06 Information Information display can ... menu operation as described on pages 36~37. ✔Note: Input 4 and Input 5 can not be fully adjusted with this operation, manual adjustments are required. (p.41, 42) • Auto PC Adjustment function cannot be selected when no interface board is inserted into the respective ...
User Manual
Page 38
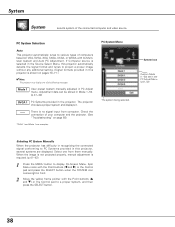
.... Check the connection of the following messages. PC System Selection Auto This projector automatically tunes to various types of the connected computer and video source. Mode 1 User preset system manually adjusted in the projector. Spin Menu icons with the Point buttons (7 and 8) or the Control... the SELECT button when the SYSTEM icon comes right in this projector automatically detects the signal format and tunes to display On-Screen Menu. When the image is not projected properly, manual adjustment is selected in recognizing the connected signal conforming to a ...
.... Check the connection of the following messages. PC System Selection Auto This projector automatically tunes to various types of the connected computer and video source. Mode 1 User preset system manually adjusted in the projector. Spin Menu icons with the Point buttons (7 and 8) or the Control... the SELECT button when the SYSTEM icon comes right in this projector automatically detects the signal format and tunes to display On-Screen Menu. When the image is not projected properly, manual adjustment is selected in recognizing the connected signal conforming to a ...
User Manual
Page 39
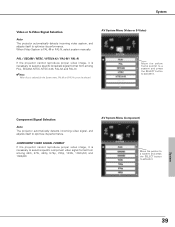
... reproduce proper video image, it . When Video System is necessary to optimize its performance. Component Signal Selection Auto The projector automatically detects incoming video signal, and adjusts itself to select a specific component video signal format from among PAL, SECAM, NTSC, NTSC 4.43,... SELECT button to activate it is selected for the System menu, PAL-M and PAL-N cannot be selected. COMPONENT VIDEO SIGNAL FORMAT If the projector cannot reproduce proper video image, it . System 39 AV System Menu (Component) Move the pointer to a system and press the SELECT button...
... reproduce proper video image, it . When Video System is necessary to optimize its performance. Component Signal Selection Auto The projector automatically detects incoming video signal, and adjusts itself to select a specific component video signal format from among PAL, SECAM, NTSC, NTSC 4.43,... SELECT button to activate it is selected for the System menu, PAL-M and PAL-N cannot be selected. COMPONENT VIDEO SIGNAL FORMAT If the projector cannot reproduce proper video image, it . System 39 AV System Menu (Component) Move the pointer to a system and press the SELECT button...
User Manual
Page 40
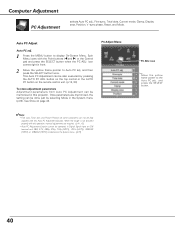
...41, 42) • Auto PC Adjustment function cannot be operated in the System menu (p.38). When the image is not provided properly with this operation, manual adjustments are memorized, the setting can be fully adjusted with the Point buttons (7 and 8) or the Control pad and press the SELECT button when the...720p (HDTV), 1035i (HDTV), 1080i/50 (HDTV), or 1080i/60 (HDTV) is selected on the System menu . (p.39) PC ADJ. Spin Menu icons with this projector. and then press the SELECT button twice. button on the top control or the AUTO PC button on page 42. This Auto PC Adjustment can...
...41, 42) • Auto PC Adjustment function cannot be operated in the System menu (p.38). When the image is not provided properly with this operation, manual adjustments are memorized, the setting can be fully adjusted with the Point buttons (7 and 8) or the Control pad and press the SELECT button when the...720p (HDTV), 1035i (HDTV), 1080i/50 (HDTV), or 1080i/60 (HDTV) is selected on the System menu . (p.39) PC ADJ. Spin Menu icons with this projector. and then press the SELECT button twice. button on the top control or the AUTO PC button on page 42. This Auto PC Adjustment can...
User Manual
Page 41
... icon comes right in one horizontal period. Adjust value with the Point buttons (e and d) or the Control pad. (From 0 to match those parameters adjusted manually. and V-Freq. Clamp Adjusts clamp level (Phase and Width). Decrease or increase value with the Point buttons (e and d) or the Control pad. Adjust number... and d) or the Control pad. PC Adjust Menu Fine sync Eliminates flicker from the image displayed. Vertical Adjusts the vertical area displayed by this projector. Adjust value with the Point buttons (e and d) or the Control pad. When the image has dark bars, try this...
... icon comes right in one horizontal period. Adjust value with the Point buttons (e and d) or the Control pad. (From 0 to match those parameters adjusted manually. and V-Freq. Clamp Adjusts clamp level (Phase and Width). Decrease or increase value with the Point buttons (e and d) or the Control pad. Adjust number... and d) or the Control pad. PC Adjust Menu Fine sync Eliminates flicker from the image displayed. Vertical Adjusts the vertical area displayed by this projector. Adjust value with the Point buttons (e and d) or the Control pad. When the image has dark bars, try this...
User Manual
Page 54
...lamp is turned on .) Delete deletes the registered USB keys. USB lock This function prevents the projector from being operated by an unauthorized person. Refer to the owner's manual enclosed with our specified optional USB key. The setting selected. 54 Off unlock any operation. To ...settings for purchasing. Setting . . . . . .key lock setting (On1, On2, and Off) Registration . .registers 2nd USB key into the projector. (First key can be registered by just being operated by hold down , the READY indicator turns green lighting and the SHUTTER indicator keeps blinking. Shutter...
...lamp is turned on .) Delete deletes the registered USB keys. USB lock This function prevents the projector from being operated by an unauthorized person. Refer to the owner's manual enclosed with our specified optional USB key. The setting selected. 54 Off unlock any operation. To ...settings for purchasing. Setting . . . . . .key lock setting (On1, On2, and Off) Registration . .registers 2nd USB key into the projector. (First key can be registered by just being operated by hold down , the READY indicator turns green lighting and the SHUTTER indicator keeps blinking. Shutter...
User Manual
Page 58
...button to display the selected pattern on USB memory function, refer to the owner's manual that comes with the USB key. ✔Note: • USB memory function cannot be continued to the projector and recall it . Select one of the USB key. (PC mode data:...x 10) (p.43, 47) Save . . . . . .stores the adjustment data on the top control or the remote control. Test pattern Various test patterns are prepared in this projector allowing users to one from the USB key. Choose one of patterns: Cross 1 (W), Cross 2 (R), Cross 3 (G), Cross 4 (B), Cross 5 (M), Cross 6 (C), Cross 7 ...
...button to display the selected pattern on USB memory function, refer to the owner's manual that comes with the USB key. ✔Note: • USB memory function cannot be continued to the projector and recall it . Select one of the USB key. (PC mode data:...x 10) (p.43, 47) Save . . . . . .stores the adjustment data on the top control or the remote control. Test pattern Various test patterns are prepared in this projector allowing users to one from the USB key. Choose one of patterns: Cross 1 (W), Cross 2 (R), Cross 3 (G), Cross 4 (B), Cross 5 (M), Cross 6 (C), Cross 7 ...
User Manual
Page 63
...be ordered through your projector : ● Replacement Lamp Type No. : PLC-XF60A / PLC-EF60A POA-LMP80 (Service Parts No. 610 315 7689) Maintenance & Cleaning LAMP HANDLING PRECAUTIONS This projector uses a high-pressure lamp which the projector and lamp are familiar with projector service. Contact an ...time than other similar lamps. ● If the projector indicates that there are not appropriately trained to the dealer. ● Model No. Risk of this manual.) Continuous use . No one IMMEDIATELY after the projector has cooled down. (Follow carefully the instructions in ...
...be ordered through your projector : ● Replacement Lamp Type No. : PLC-XF60A / PLC-EF60A POA-LMP80 (Service Parts No. 610 315 7689) Maintenance & Cleaning LAMP HANDLING PRECAUTIONS This projector uses a high-pressure lamp which the projector and lamp are familiar with projector service. Contact an ...time than other similar lamps. ● If the projector indicates that there are not appropriately trained to the dealer. ● Model No. Risk of this manual.) Continuous use . No one IMMEDIATELY after the projector has cooled down. (Follow carefully the instructions in ...
User Manual
Page 68
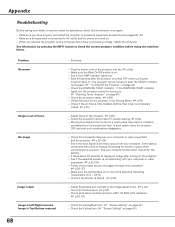
... setting. - Check the projection lens to display an image after turning on page 28) - In such cases, leave the projector OFF and wait until condensation disappears. - See your computer's instruction manual for the projector in the Setting Menu. (☞ p.54) - See if the selected system is turned on . See Information by pressing the...
... setting. - Check the projection lens to display an image after turning on page 28) - In such cases, leave the projector OFF and wait until condensation disappears. - See your computer's instruction manual for the projector in the Setting Menu. (☞ p.54) - See if the selected system is turned on . See Information by pressing the...
User Manual
Page 73
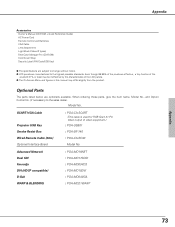
...) D-Sub WARP & BLENDING : POA-MD19NET : POA-MD17SDID : POA-MD09VD3 : POA-MD18DVI : POA-MD04VGA : POA-MD21WARP Appendix 73 Appendix Accessories Owner's Manual (CD-ROM + Quick Reference Guide) AC Power Cord Remote Control and Batteries VGA Cable Lens Attachment Light Block Plates (2 types) Real Color Manager Pro (CD...) may be ineffective by the characteristics of video equipment.) : POA-USB01 : POA-SR-140 : POA-CA-RC30 Model No. SCART-VGA Cable Projector USB Key Smoke Resist Box Wired Remote Cable (30m) Optional Interface Board : POA-CA-SCART (This cable is used for RGB Scart 21-Pin...
...) D-Sub WARP & BLENDING : POA-MD19NET : POA-MD17SDID : POA-MD09VD3 : POA-MD18DVI : POA-MD04VGA : POA-MD21WARP Appendix 73 Appendix Accessories Owner's Manual (CD-ROM + Quick Reference Guide) AC Power Cord Remote Control and Batteries VGA Cable Lens Attachment Light Block Plates (2 types) Real Color Manager Pro (CD...) may be ineffective by the characteristics of video equipment.) : POA-USB01 : POA-SR-140 : POA-CA-RC30 Model No. SCART-VGA Cable Projector USB Key Smoke Resist Box Wired Remote Cable (30m) Optional Interface Board : POA-CA-SCART (This cable is used for RGB Scart 21-Pin...
User Manual
Page 79
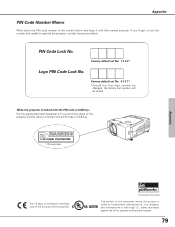
...of the European Community (EC). Appendix PIN Code Number Memo Write down the PIN code number in a prominent place of the projector's body while it with this manual securely. It is locked with the PIN code or USB key... safety standards against risk of fire, casualty and electrical hazards.... 79 While the projector is locked with a PIN code or USB key. Factory default set number will be changed, the factory set No: 1 2 3 ...
...of the European Community (EC). Appendix PIN Code Number Memo Write down the PIN code number in a prominent place of the projector's body while it with this manual securely. It is locked with the PIN code or USB key... safety standards against risk of fire, casualty and electrical hazards.... 79 While the projector is locked with a PIN code or USB key. Factory default set number will be changed, the factory set No: 1 2 3 ...

