
Owners Manual
Page 1
Multimedia Projector MODEL PLC-XR201 PLC-XR251 Network Supported □ Wired LAN 100-Base-TX/10-Base-T Refer to the Owner's Manuals below for details about network function. □ Network Set-up and Operation □ PJ Network Manager Owner's Manual
Multimedia Projector MODEL PLC-XR201 PLC-XR251 Network Supported □ Wired LAN 100-Base-TX/10-Base-T Refer to the Owner's Manuals below for details about network function. □ Network Set-up and Operation □ PJ Network Manager Owner's Manual
Owners Manual
Page 2
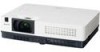
... available in 18 languages; projected on the crucial information during a presentation (p.35). You can operate and manage the projector - The projector has the Multi-scan system to conform to the wall color from the product. • The contents of simple projection...conveniently. (p.49) ♦ Multilanguage Menu Display Operation menu is easy to ♦ Helpful Maintenance Functions WUXGA resolution can be accepted. This projector utilizes built-in multimedia features, a palette of 16.77 million colors, and matrix liquid crystal display (LCD) technology. ♦ Compact...
... available in 18 languages; projected on the crucial information during a presentation (p.35). You can operate and manage the projector - The projector has the Multi-scan system to conform to the wall color from the product. • The contents of simple projection...conveniently. (p.49) ♦ Multilanguage Menu Display Operation menu is easy to ♦ Helpful Maintenance Functions WUXGA resolution can be accepted. This projector utilizes built-in multimedia features, a palette of 16.77 million colors, and matrix liquid crystal display (LCD) technology. ♦ Compact...
Owners Manual
Page 3
... Control 10 Remote Control 11 Remote Control Battery Installation 12 Remote Control Operating Range 12 Remote Control Code 12 Installation 13 Positioning the Projector 13 Adjustable Foot 13 Connecting to a Computer 14 Connecting to Video Equipment 15 Connecting to Component Video and RGB (Scart) Equipment ...16 Connecting the AC Power Cord 17 Basic Operation 18 Turning On the Projector 18 Turning Off the Projector 20 How to Operate the On-Screen Menu 21 Menu Bar 22 Zoom and Focus Adjustment 23 Auto Setup Function ...
... Control 10 Remote Control 11 Remote Control Battery Installation 12 Remote Control Operating Range 12 Remote Control Code 12 Installation 13 Positioning the Projector 13 Adjustable Foot 13 Connecting to a Computer 14 Connecting to Video Equipment 15 Connecting to Component Video and RGB (Scart) Equipment ...16 Connecting the AC Power Cord 17 Basic Operation 18 Turning On the Projector 18 Turning Off the Projector 20 How to Operate the On-Screen Menu 21 Menu Bar 22 Zoom and Focus Adjustment 23 Auto Setup Function ...
Owners Manual
Page 4
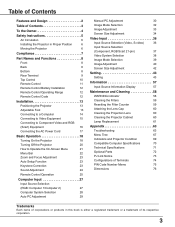
...battery or accumulator contains a heavy metal at a certain concentration. SIDE and TOP REAR 0.7'(20cm) 1.5'(50cm) 3'(1m) 3'(1m) -If the projector is unused for an extended time, unplug the20cpmrojector from the power outlet. -Do not project the same image for many convenient features and functions.... To the Owner Before installing and operating this projector, read this manual again, check operations and cable connections and try the solutions in the "Troubleshooting" section on the LCD panels...
...battery or accumulator contains a heavy metal at a certain concentration. SIDE and TOP REAR 0.7'(20cm) 1.5'(50cm) 3'(1m) 3'(1m) -If the projector is unused for an extended time, unplug the20cpmrojector from the power outlet. -Do not project the same image for many convenient features and functions.... To the Owner Before installing and operating this projector, read this manual again, check operations and cable connections and try the solutions in the "Troubleshooting" section on the LCD panels...

Owners Manual
Page 5
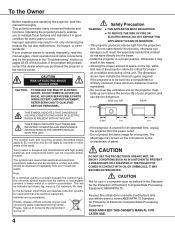
...rug, or other hazards. Do not use attachments not recommended by the manufacturer as opening should not be read Do not install the projector near the ventilation duct of power supplied, consult your authorized dealer or local power company. Wall or shelf mounting should follow the ...manufacturer's instructions, and should be moved with a cart or stand recommended by placing the projector on the projector. Do not attempt to service this projector from wall outlet and refer servicing to dangerous voltage or other similar surface. Refer all servicing to rest...
...rug, or other hazards. Do not use attachments not recommended by the manufacturer as opening should not be read Do not install the projector near the ventilation duct of power supplied, consult your authorized dealer or local power company. Wall or shelf mounting should follow the ...manufacturer's instructions, and should be moved with a cart or stand recommended by placing the projector on the projector. Do not attempt to service this projector from wall outlet and refer servicing to dangerous voltage or other similar surface. Refer all servicing to rest...

Owners Manual
Page 6
... project an image. Installing the Projector in a case before the projector is exhausted from overheating, these openings must not be taken. - Do not put the projector in Proper Position Install the projector properly. For information about transporting the projector by heat. Improper Installation may result...an unsuitable transport case. The fans' running speed is being used. - Do not point the projector down the projector. Moving the Projector When moving the projector, replace the lens cap and retract adjustable foot to prevent damage to the temperature inside the...
... project an image. Installing the Projector in a case before the projector is exhausted from overheating, these openings must not be taken. - Do not put the projector in Proper Position Install the projector properly. For information about transporting the projector by heat. Improper Installation may result...an unsuitable transport case. The fans' running speed is being used. - Do not point the projector down the projector. Moving the Projector When moving the projector, replace the lens cap and retract adjustable foot to prevent damage to the temperature inside the...

Owners Manual
Page 7
... WARNING : A PLUG WITH BARED FLEXIBLE CORD IS HAZARDOUS IF ENGAGED IN A LIVE SOCKET OUTLET. Model Number : PLC-XR201, PLC-XR251 Trade Name : Sanyo Responsible party : SANYO FISHER COMPANY Address : 21605 Plummer Street, Chatsworth, California 91311 Telephone No 818)998-7322 AC Power Cord Requirement The... already fitted with a moulded plug incorporating a fuse, the value of FCC Rules. Should the fuse need to defeat this projector meets the requirement for use the plug with the cover omitted. If a replacement fuse cover is required, ensure it should be...
... WARNING : A PLUG WITH BARED FLEXIBLE CORD IS HAZARDOUS IF ENGAGED IN A LIVE SOCKET OUTLET. Model Number : PLC-XR201, PLC-XR251 Trade Name : Sanyo Responsible party : SANYO FISHER COMPANY Address : 21605 Plummer Street, Chatsworth, California 91311 Telephone No 818)998-7322 AC Power Cord Requirement The... already fitted with a moulded plug incorporating a fuse, the value of FCC Rules. Should the fuse need to defeat this projector meets the requirement for use the plug with the cover omitted. If a replacement fuse cover is required, ensure it should be...

Owners Manual
Page 8
...; Lamp Cover ⑩ Terminals and Connectors ⑪ LAN Connection Terminal ⑫ Power Cord Connector ⑬ Exhaust Vents CAUTION Hot air is a registered trademark of the projector. Kensington is exhausted from the exhaust vent. Refer to the owner's manual of "Network Set-up and Operation" . Kensington Security Slot This slot... near this side. ⑭ Filters ⑮ Adjustable Foot Bottom ⑭ ⑮ Note: ⑪ LAN Connection Terminal is for attaching.) CAUTION Do not turn on a projector with lens cap attached.
...; Lamp Cover ⑩ Terminals and Connectors ⑪ LAN Connection Terminal ⑫ Power Cord Connector ⑬ Exhaust Vents CAUTION Hot air is a registered trademark of the projector. Kensington is exhausted from the exhaust vent. Refer to the owner's manual of "Network Set-up and Operation" . Kensington Security Slot This slot... near this side. ⑭ Filters ⑮ Adjustable Foot Bottom ⑭ ⑮ Note: ⑪ LAN Connection Terminal is for attaching.) CAUTION Do not turn on a projector with lens cap attached.

Owners Manual
Page 9
....14-16). ③ COMPUTER IN 2 / MONITOR OUT - Rear Terminal ① ② Part Names and Functions ③ ④ ⑤ ⑥ ⑦ ① CONTROL PORT When the projector is controlled by a computer, connect to this jack with serial control cable. ② COMPUTER IN 1 /S-VIDEO IN / COMPONENT IN Connect analog RGB output signal from...
....14-16). ③ COMPUTER IN 2 / MONITOR OUT - Rear Terminal ① ② Part Names and Functions ③ ④ ⑤ ⑥ ⑦ ① CONTROL PORT When the projector is controlled by a computer, connect to this jack with serial control cable. ② COMPUTER IN 1 /S-VIDEO IN / COMPONENT IN Connect analog RGB output signal from...

Owners Manual
Page 10
... and Auto Keystone functions) in the setting menu. (pp.23, 44). ④ ON/STAND-BY button Turn the projector on or off (pp.18-20). ⑤ POWER indicator -Lights red when the projector is in stand-by mode. -Lights green during operations. -Blinks green in the Digital zoom +/- Part Names and Functions...). ⑦ LAMP REPLACE indicator Lights yellow when the projection lamp reaches its end of life (pp.61, 69). ⑧ WARNING indicator -Lights red when the projector detects an abnormal condition. -Blinks red when the internal temperature of Auto setup (includes Input search, Auto PC adj.
... and Auto Keystone functions) in the setting menu. (pp.23, 44). ④ ON/STAND-BY button Turn the projector on or off (pp.18-20). ⑤ POWER indicator -Lights red when the projector is in stand-by mode. -Lights green during operations. -Blinks green in the Digital zoom +/- Part Names and Functions...). ⑦ LAMP REPLACE indicator Lights yellow when the projection lamp reaches its end of life (pp.61, 69). ⑧ WARNING indicator -Lights red when the projector detects an abnormal condition. -Blinks red when the internal temperature of Auto setup (includes Input search, Auto PC adj.
Owners Manual
Page 11
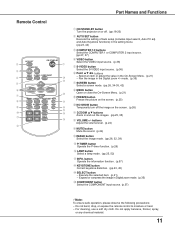
.... (p.37) Note: To ensure safe operation, please observe the following precautions: - Remote Control Part Names and Functions ① ON/STAND-BY button Turn the projector on or off the image on the screen. (p.25) ⑰ ⑩ NO SHOW button ⑯ Temporarily turn off . (pp.18-20) ② AUTO SET button...
.... (p.37) Note: To ensure safe operation, please observe the following precautions: - Remote Control Part Names and Functions ① ON/STAND-BY button Turn the projector on or off the image on the screen. (p.25) ⑰ ⑩ NO SHOW button ⑯ Temporarily turn off . (pp.18-20) ② AUTO SET button...

Owners Manual
Page 12
... Remote Receiver) when pressing the buttons. The initial code is replaced by an incorrect type. ● Dispose of the projector. 16.4' (5 m) 30° 30° Remote control Remote Control Code The 2 different remote control codes (Code 1-Code 2) are assigned to Code 1. Maximum ...on the remote control, carefully wipe the case clean and install new batteries. ● Risk of an explosion if battery is set to this projector. See "Remote control" in compartment. MENU button IMAGE button 12 Press and hold the MENU and IMAGE buttons for the remote control. To ensure...
... Remote Receiver) when pressing the buttons. The initial code is replaced by an incorrect type. ● Dispose of the projector. 16.4' (5 m) 30° 30° Remote control Remote Control Code The 2 different remote control codes (Code 1-Code 2) are assigned to Code 1. Maximum ...on the remote control, carefully wipe the case clean and install new batteries. ● Risk of an explosion if battery is set to this projector. See "Remote control" in compartment. MENU button IMAGE button 12 Press and hold the MENU and IMAGE buttons for the remote control. To ensure...

Owners Manual
Page 13
...menu operation.(see the figures below. To retract the adjustable foot, lift the front of the projector and push the foot lock latch on picture quality. Lift the front of the projector and push and undo the foot lock latch. Release the foot lock latch to lock the adjustable... the adjustable foot to obtain the best image. • All measurements are approximate and may vary from the actual sizes. Installation Positioning the Projector For projector positioning, see pages 23, 44-45) Foot Lock Latch Adjustable Foot 13 It is recommended to limit ambient lighting in the room has a...
...menu operation.(see the figures below. To retract the adjustable foot, lift the front of the projector and push the foot lock latch on picture quality. Lift the front of the projector and push and undo the foot lock latch. Release the foot lock latch to lock the adjustable... the adjustable foot to obtain the best image. • All measurements are approximate and may vary from the actual sizes. Installation Positioning the Projector For projector positioning, see pages 23, 44-45) Foot Lock Latch Adjustable Foot 13 It is recommended to limit ambient lighting in the room has a...

Owners Manual
Page 14
... is advisable to use the COMPUTER IN 1 /S-VIDEO IN /COMPONENT IN and not the COMPUTER IN 2/MONITOR OUT. other cables are not supplied with the projector.) Audio Output Monitor Output Monitor Input or Monitor Output Audio cable (stereo) VGA cable VGA cable External Audio Equipment Audio Input COMPUTER IN 1 / S-VIDEO IN... the COMPUTER IN 1/ S-VIDEO IN / COMPONENT IN and the COMPUTER IN 2/MONITOR OUT terminals as input. • When the AUDIO OUT is plugged-in, the projector's built-in speaker is not available. • When the cable is of both the...
... is advisable to use the COMPUTER IN 1 /S-VIDEO IN /COMPONENT IN and not the COMPUTER IN 2/MONITOR OUT. other cables are not supplied with the projector.) Audio Output Monitor Output Monitor Input or Monitor Output Audio cable (stereo) VGA cable VGA cable External Audio Equipment Audio Input COMPUTER IN 1 / S-VIDEO IN... the COMPUTER IN 1/ S-VIDEO IN / COMPONENT IN and the COMPUTER IN 2/MONITOR OUT terminals as input. • When the AUDIO OUT is plugged-in, the projector's built-in speaker is not available. • When the cable is of both the...

Owners Manual
Page 15
...• Video Cable • S-Video Cable • S-Video-VGA Cable • Audio Cables (Mini Plug: stereo) (Cables are not supplied with the projector. ) External Audio Equipment S-Video Output Audio Output Audio Input S-Video cable Composite Video and Audio Output S-Video-VGA cable Audio cable (stereo) Audio cable (... / S-VIDEO IN /COMPONENT IN AUDIO IN AUDIO OUT (stereo) VIDEO IN Note: • When the AUDIO OUT is plugged-in, the projector's built-in speaker is not available. • See page 72 for ordering optional cables. Unplug the power cords of both the...
...• Video Cable • S-Video Cable • S-Video-VGA Cable • Audio Cables (Mini Plug: stereo) (Cables are not supplied with the projector. ) External Audio Equipment S-Video Output Audio Output Audio Input S-Video cable Composite Video and Audio Output S-Video-VGA cable Audio cable (stereo) Audio cable (... / S-VIDEO IN /COMPONENT IN AUDIO IN AUDIO OUT (stereo) VIDEO IN Note: • When the AUDIO OUT is plugged-in, the projector's built-in speaker is not available. • See page 72 for ordering optional cables. Unplug the power cords of both the...

Owners Manual
Page 16
...8226; Audio Cables (Mini Plug: stereo) • Scart-VGA Cable • Component Cable • Component-VGA Cable (Cables are not supplied with this projector.) Audio Output RGB Scart 21-pin Output Component Video Output (Y, Pb/Cb, Pr/Cr) Audio cable (stereo) Component cable External Audio Equipment Audio Input Scart...stereo) COMPUTER IN 1/ S-VIDEO IN / COMPONENT IN AUDIO OUT (stereo) AUDIO IN Note: • When the AUDIO OUT is plugged-in, the projector's built-in speaker is not available. • See page 72 for ordering optional cables. Unplug the power cords of both the...
...8226; Audio Cables (Mini Plug: stereo) • Scart-VGA Cable • Component Cable • Component-VGA Cable (Cables are not supplied with this projector.) Audio Output RGB Scart 21-pin Output Component Video Output (Y, Pb/Cb, Pr/Cr) Audio cable (stereo) Component cable External Audio Equipment Audio Input Scart...stereo) COMPUTER IN 1/ S-VIDEO IN / COMPONENT IN AUDIO OUT (stereo) AUDIO IN Note: • When the AUDIO OUT is plugged-in, the projector's built-in speaker is not available. • See page 72 for ordering optional cables. Unplug the power cords of both the...

Owners Manual
Page 17
...an outlet with single-phase power systems having a grounded neutral conductor. Connect the AC power cord (supplied) to the projector. CAUTION The AC outlet must be near this projector is connected to work with the AC power cord, it automatically selects the correct input voltage. NOTE ON THE POWER ...CORD AC power cord must be easily accessible. Note: Unplug the AC power cord when the projector is in use the projector. To the AC outlet. (120 V AC) To the AC outlet. (200 - 240 V AC) To the AC outlet. (200 - 240 V AC) ...
...an outlet with single-phase power systems having a grounded neutral conductor. Connect the AC power cord (supplied) to the projector. CAUTION The AC outlet must be near this projector is connected to work with the AC power cord, it automatically selects the correct input voltage. NOTE ON THE POWER ...CORD AC power cord must be easily accessible. Note: Unplug the AC power cord when the projector is in use the projector. To the AC outlet. (120 V AC) To the AC outlet. (200 - 240 V AC) To the AC outlet. (200 - 240 V AC) ...

Owners Manual
Page 18
...and the input signal guidance window are not shown on the next page. 16 The preparation display will appear. Basic Operation Turning On the Projector 1 Complete peripheral connections (with a PIN code, PIN code input dialog box will disappear after 30 seconds. Is cable connected properly? ...The POWER indicator lights green and the cooling fans start on the projector, or the current signal is selected in the Display function, the preparation display will not be shown on the screen (p.45). •...
...and the input signal guidance window are not shown on the next page. 16 The preparation display will appear. Basic Operation Turning On the Projector 1 Complete peripheral connections (with a PIN code, PIN code input dialog box will disappear after 30 seconds. Is cable connected properly? ...The POWER indicator lights green and the cooling fans start on the projector, or the current signal is selected in the Display function, the preparation display will not be shown on the screen (p.45). •...

Owners Manual
Page 19
... code lock function in the Setting Menu on page 75 of a four-digit number. Should the PIN code be started. If you can operate the projector. Enter the correct PIN code all over again. write down the number in setting a new PIN code; PIN Code Input Dialog Box After the OK... code? Press the Point ◄ ► buttons to fix the number and move the pointer to enter a number. If you forget your PIN code, the projector can no longer be missing or forgotten, consult your PIN code. Note: • If the PIN code number is a security code that allows the...
... code lock function in the Setting Menu on page 75 of a four-digit number. Should the PIN code be started. If you can operate the projector. Enter the correct PIN code all over again. write down the number in setting a new PIN code; PIN Code Input Dialog Box After the OK... code? Press the Point ◄ ► buttons to fix the number and move the pointer to enter a number. If you forget your PIN code, the projector can no longer be missing or forgotten, consult your PIN code. Note: • If the PIN code number is a security code that allows the...

Owners Manual
Page 20
... shortened when the normal power-off ? The waiting time to restart will be turned on automatically by connecting the AC power cord to On, the projector will be turned on. disappears after the poweroff. 20 CONTINUOUS USE MAY RESULT IN SHORTENING THE LAMP LIFE. appears on the screen. 2 Press the ... blinks or lights red, see "WARNING indicator" on page 58. • While the POWER indicator is blinking, the lamp is turned off. • The projector can turn off ? See "Fan" on page 55.) At this time, you can select the level of cooling fans is changed according to turn on...
... shortened when the normal power-off ? The waiting time to restart will be turned on automatically by connecting the AC power cord to On, the projector will be turned on. disappears after the poweroff. 20 CONTINUOUS USE MAY RESULT IN SHORTENING THE LAMP LIFE. appears on the screen. 2 Press the ... blinks or lights red, see "WARNING indicator" on page 58. • While the POWER indicator is blinking, the lamp is turned off. • The projector can turn off ? See "Fan" on page 55.) At this time, you can select the level of cooling fans is changed according to turn on...


