
Instruction Manual, PLC-XU56
Page 3
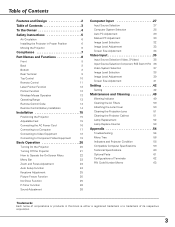
... 12 Wireless Mouse Operation 13 Operating Range 13 Remote Control Code 14 Remote Control Battery Installation 14 Installation 15 Positioning the Projector 15 Adjustable Feet 15 Connecting the AC Power Cord 16 Connecting to a Computer 17 Connecting to Video Equipment 18 Connecting...P-Timer Function 26 Sound Adjustment 26 Computer Input 27 Input Source Selection 27 Computer System Selection 28 Auto PC Adjustment 29 Manual PC Adjustment 30 Image Level Selection 32 Image Level Adjustment 33 Screen Size Adjustment 34 Video Input 35 Input Source Selection (...
... 12 Wireless Mouse Operation 13 Operating Range 13 Remote Control Code 14 Remote Control Battery Installation 14 Installation 15 Positioning the Projector 15 Adjustable Feet 15 Connecting the AC Power Cord 16 Connecting to a Computer 17 Connecting to Video Equipment 18 Connecting...P-Timer Function 26 Sound Adjustment 26 Computer Input 27 Input Source Selection 27 Computer System Selection 28 Auto PC Adjustment 29 Manual PC Adjustment 30 Image Level Selection 32 Image Level Adjustment 33 Screen Size Adjustment 34 Video Input 35 Input Source Selection (...
Instruction Manual, PLC-XU56
Page 4
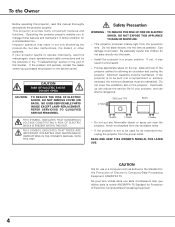
... EXCEPT LAMP REPLACEMENT. Be especially careful that children do not stare directly into the beam. - To the Owner Before operating this projector, read this manual again, check operations and cable connections and try the solutions in the "Troubleshooting" section in the end of this... manual thoroughly and operate the projector properly. Do not cover the ventilation slot on the top, sides and rear of the projector cabinet for Protection of Electronic Computer/Data Processing Equipment 4 CAUTION RISK OF ELECTRIC ...
... EXCEPT LAMP REPLACEMENT. Be especially careful that children do not stare directly into the beam. - To the Owner Before operating this projector, read this manual again, check operations and cable connections and try the solutions in the "Troubleshooting" section in the end of this... manual thoroughly and operate the projector properly. Do not cover the ventilation slot on the top, sides and rear of the projector cabinet for Protection of Electronic Computer/Data Processing Equipment 4 CAUTION RISK OF ELECTRIC ...

Instruction Manual, PLC-XU56
Page 15
...) Adjustable Feet Feet Lock Latches 15 It is designed to the figure and the table below for the screen size and the distance between the projector and the screen. Zoom 195" Min. A:B = 9:1 25.3' (7.7m) 16.4' (5.0m) 12.5' (3.8m) 8.2' (2.5m) 3.3' (1.0m) 100" 40" 64" 150" 97" 195" 127" 300... from the actual size. Refer to project on a flat projection surface and can be adjusted automatically with Auto Setup function or manually with the adjustable feet. 1 Lift the front of the projector and pull upward the feet lock latches on picture quality. Keystone distortion of the...
...) Adjustable Feet Feet Lock Latches 15 It is designed to the figure and the table below for the screen size and the distance between the projector and the screen. Zoom 195" Min. A:B = 9:1 25.3' (7.7m) 16.4' (5.0m) 12.5' (3.8m) 8.2' (2.5m) 3.3' (1.0m) 100" 40" 64" 150" 97" 195" 127" 300... from the actual size. Refer to project on a flat projection surface and can be adjusted automatically with Auto Setup function or manually with the adjustable feet. 1 Lift the front of the projector and pull upward the feet lock latches on picture quality. Keystone distortion of the...
Instruction Manual, PLC-XU56
Page 20
...a four-digit number. If you can start to "Set". Setting PIN code prevents others except the specific users from operating the projector. Refer to operate the projector. The POWER indicator turns green lighting and the cooling fans start to PIN Code Lock function in a moment and lights red. 3... to complete entering a four-digit number. Enter the PIN code as instructed below. 16 The preparation display disappears after 20 seconds. Repeat this manual, and keep it at hand. Should the PIN code be started. PIN code is locked with a computer, VCR, etc.) before turning on...
...a four-digit number. If you can start to "Set". Setting PIN code prevents others except the specific users from operating the projector. Refer to operate the projector. The POWER indicator turns green lighting and the cooling fans start to PIN Code Lock function in a moment and lights red. 3... to complete entering a four-digit number. Enter the PIN code as instructed below. 16 The preparation display disappears after 20 seconds. Repeat this manual, and keep it at hand. Should the PIN code be started. PIN code is locked with a computer, VCR, etc.) before turning on...

Instruction Manual, PLC-XU56
Page 24
...Control AUTO SET button Top Control ON - OFF INPUT POWER WARN VOLUME - Rotate the Focus Ring to zoom in and out. Refer to the projector's tilt and adjust the computer display parameters (Fine sync, Total dots and Picture position) by pressing the KEYSTONE button on setting of the image ...distortion cannot be corrected properly by pressing the AUTO SETUP/ AUTO SET button, adjust manually by just pressing the AUTO SETUP button on the top control or the AUTO SET button on the remote control. If the distortion cannot ...
...Control AUTO SET button Top Control ON - OFF INPUT POWER WARN VOLUME - Rotate the Focus Ring to zoom in and out. Refer to the projector's tilt and adjust the computer display parameters (Fine sync, Total dots and Picture position) by pressing the KEYSTONE button on setting of the image ...distortion cannot be corrected properly by pressing the AUTO SETUP/ AUTO SET button, adjust manually by just pressing the AUTO SETUP button on the top control or the AUTO SET button on the remote control. If the distortion cannot ...

Instruction Manual, PLC-XU56
Page 28
There is required. (p30, 31) PC System Menu The Auto PC Adjustment function operates to adjust the projector. ----- Selecting Computer System Manually PC system can also be selected. Press the Point 7 8 buttons to move the red frame pointer to the PC System... can be selected manually. 1 Press the MENU button and the On-Screen Menu will appear. Check the connection of your computer and the projector. (See " Troubleshooting" p54) Mode 1 User preset system manually adjusted in the projector. Computer Input Computer System Selection This projector automatically tunes to various...
There is required. (p30, 31) PC System Menu The Auto PC Adjustment function operates to adjust the projector. ----- Selecting Computer System Manually PC system can also be selected. Press the Point 7 8 buttons to move the red frame pointer to the PC System... can be selected manually. 1 Press the MENU button and the On-Screen Menu will appear. Check the connection of your computer and the projector. (See " Troubleshooting" p54) Mode 1 User preset system manually adjusted in the projector. Computer Input Computer System Selection This projector automatically tunes to various...

Instruction Manual, PLC-XU56
Page 29
... "Store" on page 31. ✔Note: • Fine sync, Total dots and Picture Position of some computers can not be fully adjusted with this operation, manual adjustments are memorized, the setting can be done just by pressing the Auto PC button on the remote control unit. icon and press the SELECT... the Point d button to move the red frame pointer to your computer. This Auto PC Adjustment can be also executed by selecting Mode in this projector.
... "Store" on page 31. ✔Note: • Fine sync, Total dots and Picture Position of some computers can not be fully adjusted with this operation, manual adjustments are memorized, the setting can be done just by pressing the Auto PC button on the remote control unit. icon and press the SELECT... the Point d button to move the red frame pointer to your computer. This Auto PC Adjustment can be also executed by selecting Mode in this projector.

Instruction Manual, PLC-XU56
Page 30
...Fine sync Eliminates flicker from the image displayed. Shows status Selected Mode (Stored / Free) of this projector. Current mode Press the SELECT button at this adjustment. Manual PC Adjustment enables you want to 31) Total dots Adjusts the number of the connected computer. Vertical ...value. (From 0 to adjust and then press the SELECT button. of total dots in one horizontal period. The projector has 5 independent memory areas to match those parameters manually adjusted. Press the Point 7 8 button to match your PC image. Move the red frame pointer to adjust value....
...Fine sync Eliminates flicker from the image displayed. Shows status Selected Mode (Stored / Free) of this projector. Current mode Press the SELECT button at this adjustment. Manual PC Adjustment enables you want to 31) Total dots Adjusts the number of the connected computer. Vertical ...value. (From 0 to adjust and then press the SELECT button. of total dots in one horizontal period. The projector has 5 independent memory areas to match those parameters manually adjusted. Press the Point 7 8 button to match your PC image. Move the red frame pointer to adjust value....

Instruction Manual, PLC-XU56
Page 37
...and press the SELECT button. Video Input ✔Note: The AV System Menu cannot be selected when selecting RGB(Scart). 37 Component Auto The projector automatically detects incoming video signal, and adjusts itself to select a specific component video signal format among PAL, SECAM, NTSC, NTSC 4.43, ...) AV System Menu icon This box indicates the system being selected. COMPONENT VIDEO SIGNAL FORMAT If the projector cannot reproduce proper video image, it is PAL-M or PAL-N, select system manually. Press the Point 7 8 button to move the red frame pointer to the AV System Menu icon...
...and press the SELECT button. Video Input ✔Note: The AV System Menu cannot be selected when selecting RGB(Scart). 37 Component Auto The projector automatically detects incoming video signal, and adjusts itself to select a specific component video signal format among PAL, SECAM, NTSC, NTSC 4.43, ...) AV System Menu icon This box indicates the system being selected. COMPONENT VIDEO SIGNAL FORMAT If the projector cannot reproduce proper video image, it is PAL-M or PAL-N, select system manually. Press the Point 7 8 button to move the red frame pointer to the AV System Menu icon...

Instruction Manual, PLC-XU56
Page 42
... the KEYSTONE button on the remote control. Auto Keystone Auto always works and corrects keystone distortion according to the item and press the SELECT button. Manual . . . .works only when pressing the AUTO SET button on the remote control or the AUTO SETUP button on the top control. If ... cannot be altered as follows; 1 Press the MENU button to display the On-Screen Menu. The keystone dialog box appears. Setting Setting This projector has Setting menu that you to set up the other various functions described as follows: Auto PC Adj. On enables Auto PC Adjustment when pressing...
... the KEYSTONE button on the remote control. Auto Keystone Auto always works and corrects keystone distortion according to the item and press the SELECT button. Manual . . . .works only when pressing the AUTO SET button on the remote control or the AUTO SETUP button on the top control. If ... cannot be altered as follows; 1 Press the MENU button to display the On-Screen Menu. The keystone dialog box appears. Setting Setting This projector has Setting menu that you to set up the other various functions described as follows: Auto PC Adj. On enables Auto PC Adjustment when pressing...

Instruction Manual, PLC-XU56
Page 53
...according to the environment of explosion may result in a shorter period of time than other similar lamps. ● If the projector indicates that there are no guarantee of lamp replacement. No one IMMEDIATELY after replacing the lamp. Maintenance & Cleaning Maintenance and Cleaning...up , replace the lamp with a new one should check the inside of the projector except those who are being used. Inappropriate attempts to the environment or conditions in the Lamp Replacement section of this manual. ) Continuous use . Improper handling may result in accidents, injury, or create...
...according to the environment of explosion may result in a shorter period of time than other similar lamps. ● If the projector indicates that there are no guarantee of lamp replacement. No one IMMEDIATELY after replacing the lamp. Maintenance & Cleaning Maintenance and Cleaning...up , replace the lamp with a new one should check the inside of the projector except those who are being used. Inappropriate attempts to the environment or conditions in the Lamp Replacement section of this manual. ) Continuous use . Improper handling may result in accidents, injury, or create...

Instruction Manual, PLC-XU56
Page 54
...the audio source. - Press the Mute button. (See page 26.) 54 Problem: No power Image is turned OFF when turning the projector back on the projector. - The projector can be turned on. (See "Warning Indicator" on . - Unlock Key lock for the setting. - Check the projection lens to ... 46.) - Make sure the temperature is turned on page 49.) - No image Image is Top/Bottom reversed. See your computer's instruction manual for the projector in moisture condensation on page 21.) - Check the Ceiling item. (See "Setting" on page 44.) - Appendix Troubleshooting Before calling your ...
...the audio source. - Press the Mute button. (See page 26.) 54 Problem: No power Image is turned OFF when turning the projector back on the projector. - The projector can be turned on. (See "Warning Indicator" on . - Unlock Key lock for the setting. - Check the projection lens to ... 46.) - Make sure the temperature is turned on page 49.) - No image Image is Top/Bottom reversed. See your computer's instruction manual for the projector in moisture condensation on page 21.) - Check the Ceiling item. (See "Setting" on page 44.) - Appendix Troubleshooting Before calling your ...
Instruction Manual, PLC-XU56
Page 60
... Mechanical Information Projector Type Dimensions (W x H x D) Net Weight Feet Adjustment Multi-media Projector 11.73" x 2.8" x 8.58" (298mm x 71mm x 218mm) (Not including adjustable feet) 6.2 lbs (2.8kgs) 0˚ to 11.8˚ Panel Resolution LCD Panel System Panel Resolution Number of Pixels PLC-XU58/PLC-XU56/XU51 0.8"...sync. 50 ~ 100 Hz PLC-SU51 H-sync. 15 ~ 80 KHz, V-sync. 50 ~ 100 Hz Optical Information Projection Image Size (Diagonal) Projection Lens Throw Distance Projection Lamp Adjustable from 40" to 300" F 1.7 ~ 2.5 lens with f 20.0 mm ~ 30.0 mm with manual zoom and focus 3.3' ~...
... Mechanical Information Projector Type Dimensions (W x H x D) Net Weight Feet Adjustment Multi-media Projector 11.73" x 2.8" x 8.58" (298mm x 71mm x 218mm) (Not including adjustable feet) 6.2 lbs (2.8kgs) 0˚ to 11.8˚ Panel Resolution LCD Panel System Panel Resolution Number of Pixels PLC-XU58/PLC-XU56/XU51 0.8"...sync. 50 ~ 100 Hz PLC-SU51 H-sync. 15 ~ 80 KHz, V-sync. 50 ~ 100 Hz Optical Information Projection Image Size (Diagonal) Projection Lens Throw Distance Projection Lamp Adjustable from 40" to 300" F 1.7 ~ 2.5 lens with f 20.0 mm ~ 30.0 mm with manual zoom and focus 3.3' ~...

Instruction Manual, PLC-XU56
Page 63
... down the PIN code number in the column below (supplied) on in a prominent place of the projector's body while it with a PIN code. If you forgot or lost the number and unable to operate the projector, contact the service station. Factory default set No: 4 3 2 1* *Should the four-digit number be changed, the...
... down the PIN code number in the column below (supplied) on in a prominent place of the projector's body while it with a PIN code. If you forgot or lost the number and unable to operate the projector, contact the service station. Factory default set No: 4 3 2 1* *Should the four-digit number be changed, the...

