Instruction Manual, PLC-XU101
Page 2
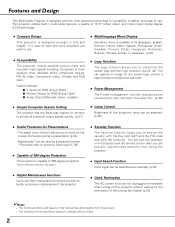
...to conform to ensure the security with the most advanced technology for portability, durability, and ease of use . ◆ Compatibility The projector widely accepts various video and computer input signals including; English, German, French, Italian, Spanish, Portuguese, Dutch, Swedish, Finnish, ...and weight. This projector utilizes built-in multimedia features, a palette of 16.77 million colors, and matrix liquid crystal display (LCD) technology. ◆ Compact Design This projector is designed compact in 16 languages; Features and Design This Multimedia Projector is designed with...
...to conform to ensure the security with the most advanced technology for portability, durability, and ease of use . ◆ Compatibility The projector widely accepts various video and computer input signals including; English, German, French, Italian, Spanish, Portuguese, Dutch, Swedish, Finnish, ...and weight. This projector utilizes built-in multimedia features, a palette of 16.77 million colors, and matrix liquid crystal display (LCD) technology. ◆ Compact Design This projector is designed compact in 16 languages; Features and Design This Multimedia Projector is designed with...
Instruction Manual, PLC-XU101
Page 3
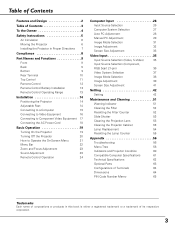
... Rear Terminal 10 Top Control 11 Remote Control 12 Remote Control Battery Installation 13 Remote Control Operating Range 13 Installation 14 Positioning the Projector 14 Adjustable Feet 14 Connecting to a Computer 15 Connecting to Video Equipment 16 Connecting to Component Video Equipment 17 Connecting the AC ...Power Cord 18 Basic Operation 19 Turning On the Projector 19 Turning Off the Projector 20 How to Operate the On-Screen Menu 21 Menu Bar 22 Zoom and Focus Adjustment 23 Sound Adjustment ...
... Rear Terminal 10 Top Control 11 Remote Control 12 Remote Control Battery Installation 13 Remote Control Operating Range 13 Installation 14 Positioning the Projector 14 Adjustable Feet 14 Connecting to a Computer 15 Connecting to Video Equipment 16 Connecting to Component Video Equipment 17 Connecting the AC ...Power Cord 18 Basic Operation 19 Turning On the Projector 19 Turning Off the Projector 20 How to Operate the On-Screen Menu 21 Menu Bar 22 Zoom and Focus Adjustment 23 Sound Adjustment ...
Instruction Manual, PLC-XU101
Page 4
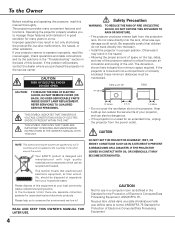
...we live in the other accidents. NO USER-SERVICEABLE PARTS INSIDE EXCEPT LAMP REPLACEMENT. If the projector is critical for proper air circulation and cooling of the unit. Your SANYO product is unused for Protection of Electronic Computer/Data Processing Equipment, ANSI/NFPA 75. DO ...NOT SET THE PROJECTOR IN GREASY, WET, OR SMOKY CONDITIONS SUCH AS IN A KITCHEN TO PREVENT A BREAKDOWN OR A ...
...we live in the other accidents. NO USER-SERVICEABLE PARTS INSIDE EXCEPT LAMP REPLACEMENT. If the projector is critical for proper air circulation and cooling of the unit. Your SANYO product is unused for Protection of Electronic Computer/Data Processing Equipment, ANSI/NFPA 75. DO ...NOT SET THE PROJECTOR IN GREASY, WET, OR SMOKY CONDITIONS SUCH AS IN A KITCHEN TO PREVENT A BREAKDOWN OR A ...

Instruction Manual, PLC-XU101
Page 5
.... Quick stops, excessive force, and uneven surfaces may cause hazards. Do not locate this indicates a need for example, in performance-this projector where the cord may touch dangerous voltage points or short out parts that could result in damage and will prevent damage due to rain or...of power source indicated on the marking label. Use a damp cloth for later use near a swimming pool, etc... For added protection to the projector during a lightning storm, or when it is damaged or frayed. Do not attempt to dangerous voltage or other controls may fall, causing serious ...
.... Quick stops, excessive force, and uneven surfaces may cause hazards. Do not locate this indicates a need for example, in performance-this projector where the cord may touch dangerous voltage points or short out parts that could result in damage and will prevent damage due to rain or...of power source indicated on the marking label. Use a damp cloth for later use near a swimming pool, etc... For added protection to the projector during a lightning storm, or when it is damaged or frayed. Do not attempt to dangerous voltage or other controls may fall, causing serious ...

Instruction Manual, PLC-XU101
Page 6
...ventilation. Do not put any other transport service, consult your dealer. -Do not put the projector in a case before the projector is not in use a suitable carrying case. -Do not transport the projector by heat. Objects put on the cabinet. The fans' running speed is exhausted from the ... air exhaust) Air Intake Vent Air Intake Vents 6 Safety Instructions Air Circulation Openings in the cabinet are provided to cool down the projector. Cooling fans are provided for an extended period, put it from any other transport service in an unsuitable transport case. CAUTION Hot air...
...ventilation. Do not put any other transport service, consult your dealer. -Do not put the projector in a case before the projector is not in use a suitable carrying case. -Do not transport the projector by heat. Objects put on the cabinet. The fans' running speed is exhausted from the ... air exhaust) Air Intake Vent Air Intake Vents 6 Safety Instructions Air Circulation Openings in the cabinet are provided to cool down the projector. Cooling fans are provided for an extended period, put it from any other transport service in an unsuitable transport case. CAUTION Hot air...
Instruction Manual, PLC-XU101
Page 7
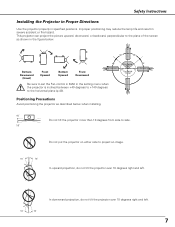
... degrees to +140 degrees to project an image. 10˚ 10˚ In upward projection, do not tilt the projector over 10 degrees right and left . 10˚ 10˚ 7 This projector can project the picture upward, downward, or backward, perpendicular to the plane of the screen as described below . 50&#... Be sure to set the Fan control in MAX in the figure below when installing. 10˚ Do not tilt the projector more than 10 degrees from side to side. 10˚ Do not put the projector on either side to the horizontal plane (p.49). In downward projection, do not tilt the...
... degrees to +140 degrees to project an image. 10˚ 10˚ In upward projection, do not tilt the projector over 10 degrees right and left . 10˚ 10˚ 7 This projector can project the picture upward, downward, or backward, perpendicular to the plane of the screen as described below . 50&#... Be sure to set the Fan control in MAX in the figure below when installing. 10˚ Do not tilt the projector more than 10 degrees from side to side. 10˚ Do not put the projector on either side to the horizontal plane (p.49). In downward projection, do not tilt the...

Instruction Manual, PLC-XU101
Page 8
...which is coloured green-and-yellow must be connected to the terminal in a residential installation. Model Number(s) Trade Name Responsible party Address : PLC-XU101 : Sanyo : SANYO FISHER COMPANY : 21605 Plummer Street, Chatsworth, California 91311 U.S.A. Fuse covers are available from that visible on the pin face of the same...plug proceed as that to insert the plug into an outlet on , the user is detachable, never use the plug with this projector meets the requirement for use in your electrician. If the fuse cover is encouraged to try to Part 15 of the equipment. ...
...which is coloured green-and-yellow must be connected to the terminal in a residential installation. Model Number(s) Trade Name Responsible party Address : PLC-XU101 : Sanyo : SANYO FISHER COMPANY : 21605 Plummer Street, Chatsworth, California 91311 U.S.A. Fuse covers are available from that visible on the pin face of the same...plug proceed as that to insert the plug into an outlet on , the user is detachable, never use the plug with this projector meets the requirement for use in your electrician. If the fuse cover is encouraged to try to Part 15 of the equipment. ...

Instruction Manual, PLC-XU101
Page 9
... Ring w Infrared Remote Receiver e Focus Ring r Projection Lens t Slide Shutter Lever y Top Controls and Indicators u Exhaust Vent CAUTION Hot air is a registered trademark of the projector. * Kensington is exhausted from the exhaust vents.
... Ring w Infrared Remote Receiver e Focus Ring r Projection Lens t Slide Shutter Lever y Top Controls and Indicators u Exhaust Vent CAUTION Hot air is a registered trademark of the projector. * Kensington is exhausted from the exhaust vents.

Instruction Manual, PLC-XU101
Page 10
... supplied). t VIDEO IN Connect the composite video output signal to this jack (p.16). For a mono audio signal (a single audio jack), connect it to service the projector. i AUDIO OUT (VARIABLE) Connect an external audio amplifier to this jack (pp.15, 17). y AUDIO IN Connect the audio output signal from video equipment to...
... supplied). t VIDEO IN Connect the composite video output signal to this jack (p.16). For a mono audio signal (a single audio jack), connect it to service the projector. i AUDIO OUT (VARIABLE) Connect an external audio amplifier to this jack (pp.15, 17). y AUDIO IN Connect the audio output signal from video equipment to...

Instruction Manual, PLC-XU101
Page 11
...e o r !0 t y q LAMP REPLACE indicator Lights yellow when the projection lamp reaches its end of the projector exceeds the operating range (pp.51, 60). i POWER indicator -Lights red when the projector is in stand-by mode. -Lights green during operations. -Blinks green in the Digital zoom mode (p.34). 11... u WARNING indicator -Lights red when the projector detects an abnormal condition. -Blinks red when the internal temperature of life (pp.54, 60). o COMPUTER 2 button Select COMPUTER 2 input...
...e o r !0 t y q LAMP REPLACE indicator Lights yellow when the projection lamp reaches its end of the projector exceeds the operating range (pp.51, 60). i POWER indicator -Lights red when the projector is in stand-by mode. -Lights green during operations. -Blinks green in the Digital zoom mode (p.34). 11... u WARNING indicator -Lights red when the projector detects an abnormal condition. -Blinks red when the internal temperature of life (pp.54, 60). o COMPUTER 2 button Select COMPUTER 2 input...

Instruction Manual, PLC-XU101
Page 12
... in Digital zoom + mode. (p34) - For cleaning, use soft dry cloth. Part Names and Functions Remote Control ew q r t y u io !0 q ON/STAND-BY button Turn the projector on the screen. (p25) !3 !0 LAMP CONTROL button Select the lamp mode. (pp.25, 46) !2 !1 MUTE button Mute the sound. (p 23) !1 !2 P-TIMER button Operate the P-timer...
... in Digital zoom + mode. (p34) - For cleaning, use soft dry cloth. Part Names and Functions Remote Control ew q r t y u io !0 q ON/STAND-BY button Turn the projector on the screen. (p25) !3 !0 LAMP CONTROL button Select the lamp mode. (pp.25, 46) !2 !1 MUTE button Mute the sound. (p 23) !1 !2 P-TIMER button Operate the P-timer...

Instruction Manual, PLC-XU101
Page 13
Replace the compartment lid. Remote Control Operating Range Point the remote control toward the projector (Infrared Remote Receiver) when pressing the buttons. Remote Control Battery Installation Part Names and Functions 1 Open the battery compartment lid. 2 Install new ... range for the remote control is replaced by an incorrect type. ● Dispose of used battery. ● Avoid contact with pins in front of the projector. 16.4' (5 m) 60° Remote control 13 To insure safe operation, please observe the following precautions: ● Use two (2) AA or LR6 type alkaline ...
Replace the compartment lid. Remote Control Operating Range Point the remote control toward the projector (Infrared Remote Receiver) when pressing the buttons. Remote Control Battery Installation Part Names and Functions 1 Open the battery compartment lid. 2 Install new ... range for the remote control is replaced by an incorrect type. ● Dispose of used battery. ● Avoid contact with pins in front of the projector. 16.4' (5 m) 60° Remote control 13 To insure safe operation, please observe the following precautions: ● Use two (2) AA or LR6 type alkaline ...

Instruction Manual, PLC-XU101
Page 14
... the adjustable feet to obtain the best image. •All measurements are approximate and may vary from the actual sizes. Lift the front of the projector and pull the feet lock latches on picture quality. A : B = 9 : 1 32.8' (10.0 m) 22.0' (6.7 m) 16.4' (5.0 m) 10.8' (3.3 m)... 4.3' (1.3 m) 100" 40" 82" 150" 124" 200" 166" 33" (Inch Diagonal) 300" Max. Adjustable Feet Feet Lock Latches 14 The projector should be adjusted manually by using the remote control or the menu operation (see the figures below. It is recommended to limit ambient lighting in...
... the adjustable feet to obtain the best image. •All measurements are approximate and may vary from the actual sizes. Lift the front of the projector and pull the feet lock latches on picture quality. A : B = 9 : 1 32.8' (10.0 m) 22.0' (6.7 m) 16.4' (5.0 m) 10.8' (3.3 m)... 4.3' (1.3 m) 100" 40" 82" 150" 124" 200" 166" 33" (Inch Diagonal) 300" Max. Adjustable Feet Feet Lock Latches 14 The projector should be adjusted manually by using the remote control or the menu operation (see the figures below. It is recommended to limit ambient lighting in...

Instruction Manual, PLC-XU101
Page 15
other cables are not supplied with the projector.) Installation Audio Output Monitor Output Monitor Input External Audio Equipment Audio cable (stereo) VGA cable VGA cable VGA cable COMPUTER IN 2/ COMPUTER IN 1 MONITOR COMPONENT ... connection • VGA Cable (Mini D-sub 15 pin)* • Audio Cables (*One cable is disconnected. AUDIO OUT (stereo) Unplug the power cords of both the projector and external equipment from the AC outlet before connecting cables. 15 Connecting to external audio equipment, the...
other cables are not supplied with the projector.) Installation Audio Output Monitor Output Monitor Input External Audio Equipment Audio cable (stereo) VGA cable VGA cable VGA cable COMPUTER IN 2/ COMPUTER IN 1 MONITOR COMPONENT ... connection • VGA Cable (Mini D-sub 15 pin)* • Audio Cables (*One cable is disconnected. AUDIO OUT (stereo) Unplug the power cords of both the projector and external equipment from the AC outlet before connecting cables. 15 Connecting to external audio equipment, the...

Instruction Manual, PLC-XU101
Page 16
... for connection • Video and Audio Cable (RCA x 3) • S-VIDEO Cable • Audio Cable (Cables are not supplied with the projector.) Composite Video and Audio Output (Video) (L) (R) S-video Output Video and audio cable S-video cable External Audio Equipment Audio Input VIDEO AUDIO IN ...VIDEO Audio cable (stereo) AUDIO OUT (stereo) 16 ✔Notes: •When connecting the AUDIO OUT to external audio equipment, the projector's built-in speaker is disconnected. •The S-VIDEO jack connection overrides the VIDEO jack connection when selecting AUTO in the Input Menu ...
... for connection • Video and Audio Cable (RCA x 3) • S-VIDEO Cable • Audio Cable (Cables are not supplied with the projector.) Composite Video and Audio Output (Video) (L) (R) S-video Output Video and audio cable S-video cable External Audio Equipment Audio Input VIDEO AUDIO IN ...VIDEO Audio cable (stereo) AUDIO OUT (stereo) 16 ✔Notes: •When connecting the AUDIO OUT to external audio equipment, the projector's built-in speaker is disconnected. •The S-VIDEO jack connection overrides the VIDEO jack connection when selecting AUTO in the Input Menu ...

Instruction Manual, PLC-XU101
Page 17
...connection • Audio Cables • Scart-VGA Cable • Component Cable • Component-VGA Cable (Cables are not supplied with the projector.) Installation RGB Scart Component Video Output 21-pin Output (Y, Pb/Cb, Pr/Cr) Audio Output Component cable Scart-VGA cable ComponentVGA cable Audio... External Audio Equipment Audio Input Audio cable (stereo) ✔Notes: •When connecting the AUDIO OUT to external audio equipment, the projector's built-in speaker is disconnected. •See page 63 for ordering optional cables. •RGB Scart signal cannot be output from the...
...connection • Audio Cables • Scart-VGA Cable • Component Cable • Component-VGA Cable (Cables are not supplied with the projector.) Installation RGB Scart Component Video Output 21-pin Output (Y, Pb/Cb, Pr/Cr) Audio Output Component cable Scart-VGA cable ComponentVGA cable Audio... External Audio Equipment Audio Input Audio cable (stereo) ✔Notes: •When connecting the AUDIO OUT to external audio equipment, the projector's built-in speaker is disconnected. •See page 63 for ordering optional cables. •RGB Scart signal cannot be output from the...

Instruction Manual, PLC-XU101
Page 18
... or service station. To reduce the risk of electrical shock, do not plug into any other type of power system. It is designed to the projector. NOTE ON THE POWER CORD AC power cord must be easily accessible. Installation Connecting the AC Power Cord This... projector uses nominal input voltages of 100-120 V or 200-240 V AC and it is in use the projector. Connect the AC power cord (supplied) to work with the chart below and proper AC power...
... or service station. To reduce the risk of electrical shock, do not plug into any other type of power system. It is designed to the projector. NOTE ON THE POWER CORD AC power cord must be easily accessible. Installation Connecting the AC Power Cord This... projector uses nominal input voltages of 100-120 V or 200-240 V AC and it is in use the projector. Connect the AC power cord (supplied) to work with the chart below and proper AC power...

Instruction Manual, PLC-XU101
Page 19
... Number) code is set to correct, and then enter the correct number. CAUTION ON HANDLING PIN CODE If you forget your PIN code, the projector can no longer be missing or forgotten, consult your PIN code. Enter the PIN code as the initial PIN code at hand. Enter a PIN... Dialog Box After the OK icon disappears, you want to "Off," the logo will not be searched automatically (p.45) 19 Basic Operation Turning On the Projector 1 Complete peripheral connections (with a PIN code, PIN code input dialog box will appear. If you fixed an incorrect number, use of a four-digit number...
... Number) code is set to correct, and then enter the correct number. CAUTION ON HANDLING PIN CODE If you forget your PIN code, the projector can no longer be missing or forgotten, consult your PIN code. Enter the PIN code as the initial PIN code at hand. Enter a PIN... Dialog Box After the OK icon disappears, you want to "Off," the logo will not be searched automatically (p.45) 19 Basic Operation Turning On the Projector 1 Complete peripheral connections (with a PIN code, PIN code input dialog box will appear. If you fixed an incorrect number, use of a four-digit number...
Instruction Manual, PLC-XU101
Page 20
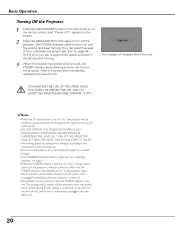
... TURNING IT OFF. ✔Notes: •When the On start function is set to the temperature inside the projector. •Do not put the projector in a case before the projector is immediately unplugged after 4 seconds. CONTINUOUS USE MAY RESULT IN SHORTENING THE LAMP LIFE. The waiting time to... and speed. appears on . The message will terminate directly if the AC power cord is unplugged immediately after the projector is turned off. •The projector can be shortened when the normal power-off processing for fan cooling is completed, compared with the time the AC power...
... TURNING IT OFF. ✔Notes: •When the On start function is set to the temperature inside the projector. •Do not put the projector in a case before the projector is immediately unplugged after 4 seconds. CONTINUOUS USE MAY RESULT IN SHORTENING THE LAMP LIFE. The waiting time to... and speed. appears on . The message will terminate directly if the AC power cord is unplugged immediately after the projector is turned off. •The projector can be shortened when the normal power-off processing for fan cooling is completed, compared with the time the AC power...

Instruction Manual, PLC-XU101
Page 21
... on the top control or the remote control to display the On-Screen Menu. 2 Use the Point 7 8 buttons to Operate the On-Screen Menu The projector can be adjusted or set via the On-Screen Menu. To close the On-Screen Menu, press the MENU button again. ✔Note: •The...
... on the top control or the remote control to display the On-Screen Menu. 2 Use the Point 7 8 buttons to Operate the On-Screen Menu The projector can be adjusted or set via the On-Screen Menu. To close the On-Screen Menu, press the MENU button again. ✔Note: •The...


