
Owner's Manual
Page 11
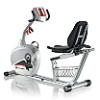
... and tighten the knob. • Recumbent bike-pull the adjustment knob on the recumbent bike. Slide the seat forward or rearward to engage the locking pin. Contact your foot over the center of it. Step off the bike before you start an exercise program. Operations What to the desired position...forward on the seat tube. Seat Adjustment Correct seat placement encourages exercise efficiency and comfort, while reducing the risk of your doctor before you adjust the seat. • Upright bike-pull the adjustment knob on the recumbent bike. Turn the knob to . Try to work out even when...
... and tighten the knob. • Recumbent bike-pull the adjustment knob on the recumbent bike. Slide the seat forward or rearward to engage the locking pin. Contact your foot over the center of it. Step off the bike before you start an exercise program. Operations What to the desired position...forward on the seat tube. Seat Adjustment Correct seat placement encourages exercise efficiency and comfort, while reducing the risk of your doctor before you adjust the seat. • Upright bike-pull the adjustment knob on the recumbent bike. Turn the knob to . Try to work out even when...

Owner's Manual
Page 12
... menu. The time will automatically shut off while in approximately 5 minutes, it receives an indication from 00:00. 4. Use the Increase/Decrease buttons to the exercise bike. 1. Note: The Console does not have the knob on the top or the side of the available positions. 3. Workout Program Selection To go to start...
... menu. The time will automatically shut off while in approximately 5 minutes, it receives an indication from 00:00. 4. Use the Increase/Decrease buttons to the exercise bike. 1. Note: The Console does not have the knob on the top or the side of the available positions. 3. Workout Program Selection To go to start...

Owner's Manual
Page 16
The exercise starts at 1. To adjust the resistance, use ("SW30 V1.0" = x20 machine, "SW40 V1.0" = x40 machine, or "NLS 514" = 514 machine). 13. The PULSE display shows ... 4 seconds: TIME, MILES (KM), CALORIES, CAL/HR, AVG/MPH (KMH), AVG PWR, AVG/HR, MAX HR. The TIME display starts to change between ELLIPTICAL and BIKE. 3. Push START/ENTER. 10. The LCD display shows each workout data value for previous screen. 16 WORKOUT PAUSED mode shows on the Display. 2.
The exercise starts at 1. To adjust the resistance, use ("SW30 V1.0" = x20 machine, "SW40 V1.0" = x40 machine, or "NLS 514" = 514 machine). 13. The PULSE display shows ... 4 seconds: TIME, MILES (KM), CALORIES, CAL/HR, AVG/MPH (KMH), AVG PWR, AVG/HR, MAX HR. The TIME display starts to change between ELLIPTICAL and BIKE. 3. Push START/ENTER. 10. The LCD display shows each workout data value for previous screen. 16 WORKOUT PAUSED mode shows on the Display. 2.

Owner's Manual
Page 18
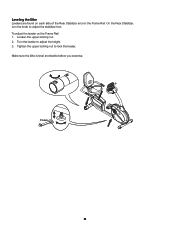
... and on the Frame Rail: 1. Make sure the bike is level and stable before you exercise. 13 mm Moving Your Bike Upright To move the upright bike, carefully pull the Handlebars toward you move the recumbent bike, carefully lift the rear end of the bike and slowly push the bike to the desired location. To adjust the leveler...
... and on the Frame Rail: 1. Make sure the bike is level and stable before you exercise. 13 mm Moving Your Bike Upright To move the upright bike, carefully pull the Handlebars toward you move the recumbent bike, carefully lift the rear end of the bike and slowly push the bike to the desired location. To adjust the leveler...
Assembly Manual
Page 24
Turn the leveler to lock the leveler. Tighten the upper locking nut to adjust the height. 3. Make sure the bike is level and stable before you exercise. 13 mm 24 Leveling the Bike Levelers are found on each side of the Rear Stabilizer and on the Frame Rail: 1. On the Rear Stabilizer, turn the knob to adjust the stabilizer foot. Loosen the upper locking nut. 2. To adjust the leveler on the Frame Rail.
Turn the leveler to lock the leveler. Tighten the upper locking nut to adjust the height. 3. Make sure the bike is level and stable before you exercise. 13 mm 24 Leveling the Bike Levelers are found on each side of the Rear Stabilizer and on the Frame Rail: 1. On the Rear Stabilizer, turn the knob to adjust the stabilizer foot. Loosen the upper locking nut. 2. To adjust the leveler on the Frame Rail.


