

LC-13S2U | LC-15S2U | LC-20S2U Operation Manual
Page 1
...RISK OF ELECTRIC SHOCK, DO NOT REMOVE COVER (OR BACK). ENGLISH LC-13S2U LC-15S2U LC-20S2U LIQUID CRYSTAL TELEVISION ENGLISH OPERATION MANUAL IMPORTANT: To aid reporting in case of loss or theft, please record the TV's model and serial numbers in the literature accompanying the product. ONLY WARNING... located at the rear of uninsulated "dangerous voltage" within a triangle is intended to alert the user to the presence of the TV. Model No.: Serial No.: IMPORTANT INFORMATION U.S.A. The lightning flash with arrowhead symbol, within an equilateral triangle, is intended to alert the...
...RISK OF ELECTRIC SHOCK, DO NOT REMOVE COVER (OR BACK). ENGLISH LC-13S2U LC-15S2U LC-20S2U LIQUID CRYSTAL TELEVISION ENGLISH OPERATION MANUAL IMPORTANT: To aid reporting in case of loss or theft, please record the TV's model and serial numbers in the literature accompanying the product. ONLY WARNING... located at the rear of uninsulated "dangerous voltage" within a triangle is intended to alert the user to the presence of the TV. Model No.: Serial No.: IMPORTANT INFORMATION U.S.A. The lightning flash with arrowhead symbol, within an equilateral triangle, is intended to alert the...

LC-13S2U | LC-15S2U | LC-20S2U Operation Manual
Page 5
... the wall outlet and disconnect the antenna. I Lightning - If an outside antenna system, extreme care should not be placed on the top or near the TV set. When installing an outside antenna is grounded so as contact with regard to proper grounding of the mast and supporting structure, grounding of the...
... the wall outlet and disconnect the antenna. I Lightning - If an outside antenna system, extreme care should not be placed on the top or near the TV set. When installing an outside antenna is grounded so as contact with regard to proper grounding of the mast and supporting structure, grounding of the...

LC-13S2U | LC-15S2U | LC-20S2U Operation Manual
Page 6
CONTENTS Page IMPORTANT INFORMATION ...1, 2 DEAR SHARP CUSTOMER ...3 IMPORTANT SAFETY PRECAUTIONS 3-5 CONTENTS ...6 SUPPLIED ACCESSORIES ...7 PREPARATION ...8-11 Using the Remote Control ...8 Batteries for the Remote Control 8 Removing the Terminal Cover 9 Bundling Cables ...THE CLOCK ...17-19 AUTO CLOCK Setting ...17, 18 MANUAL CLOCK Setting ...19 BASIC OPERATION ...20-24 TV signals in your region ...20 Turning on POWER ...21 Standby ...21 Switching TV/VIDEO [AV1/AV2/COMPONENT/TV] Modes 22 Sound Volume ...23 Listening with Headphones ...23 Changing Channels ...24 SELECTING MENU ITEMS ...25 ...
CONTENTS Page IMPORTANT INFORMATION ...1, 2 DEAR SHARP CUSTOMER ...3 IMPORTANT SAFETY PRECAUTIONS 3-5 CONTENTS ...6 SUPPLIED ACCESSORIES ...7 PREPARATION ...8-11 Using the Remote Control ...8 Batteries for the Remote Control 8 Removing the Terminal Cover 9 Bundling Cables ...THE CLOCK ...17-19 AUTO CLOCK Setting ...17, 18 MANUAL CLOCK Setting ...19 BASIC OPERATION ...20-24 TV signals in your region ...20 Turning on POWER ...21 Standby ...21 Switching TV/VIDEO [AV1/AV2/COMPONENT/TV] Modes 22 Sound Volume ...23 Listening with Headphones ...23 Changing Channels ...24 SELECTING MENU ITEMS ...25 ...

LC-13S2U | LC-15S2U | LC-20S2U Operation Manual
Page 8
POWER OPC HEADPHONE HEADPHONE jack OPC indicator POWER indicator Remote control sensor OPC sensor Batteries for the Remote Control Before using the LCD TV set , or operate the remote control closer to storage conditions. • If the remote control will not be used for the first time, ...install two ("AAA" size, UM/SUM-4) batteries (supplied). Caution! Do not mix batteries of the lighting or LCD TV set for an extended period of time, remove the batteries from batteries can cause a rash. I Do not install or place the remote control under ...
POWER OPC HEADPHONE HEADPHONE jack OPC indicator POWER indicator Remote control sensor OPC sensor Batteries for the Remote Control Before using the LCD TV set , or operate the remote control closer to storage conditions. • If the remote control will not be used for the first time, ...install two ("AAA" size, UM/SUM-4) batteries (supplied). Caution! Do not mix batteries of the lighting or LCD TV set for an extended period of time, remove the batteries from batteries can cause a rash. I Do not install or place the remote control under ...

LC-13S2U | LC-15S2U | LC-20S2U Operation Manual
Page 10
... white television reception. The following two diagrams if you connect an outdoor antenna. A 300-ohm system is a brief explanation of the type of the TV set. A: Using a VHF/UHF combination outdoor antenna B: Using separate VHF and/or UHF outdoor antennas • Connect the outdoor antenna cable lead-in... should be finger-tightened only. If tools are more important than those for good color television reception are used, it may cause damage to your TV set , do not tighten F-type connector with the various antenna systems. 1. F-type connector 75-ohm coaxial cable (round) 300-ohm twin-lead...
... white television reception. The following two diagrams if you connect an outdoor antenna. A 300-ohm system is a brief explanation of the type of the TV set. A: Using a VHF/UHF combination outdoor antenna B: Using separate VHF and/or UHF outdoor antennas • Connect the outdoor antenna cable lead-in... should be finger-tightened only. If tools are more important than those for good color television reception are used, it may cause damage to your TV set , do not tighten F-type connector with the various antenna systems. 1. F-type connector 75-ohm coaxial cable (round) 300-ohm twin-lead...

LC-13S2U | LC-15S2U | LC-20S2U Operation Manual
Page 11
...long period of these premium pay channels". Since the signals of these channels is generally provided to the subscriber by your cable TV company.) For more specific instructions on the design of the wall outlet. • Always turn the MAIN POWER switch of...A • Use a commercially available AC plug adapter, if necessary, depending on installing cable TV, consult your SHARP Dealer or Service Center for easy hookup. PREPARATION (Continued) Antenna Connection (Continued) CABLE TV (CATV) CONNECTION • A 75-ohm coaxial cable connector is explained below. terminal. &#...
...long period of these premium pay channels". Since the signals of these channels is generally provided to the subscriber by your cable TV company.) For more specific instructions on the design of the wall outlet. • Always turn the MAIN POWER switch of...A • Use a commercially available AC plug adapter, if necessary, depending on installing cable TV, consult your SHARP Dealer or Service Center for easy hookup. PREPARATION (Continued) Antenna Connection (Continued) CABLE TV (CATV) CONNECTION • A 75-ohm coaxial cable connector is explained below. terminal. &#...

LC-13S2U | LC-15S2U | LC-20S2U Operation Manual
Page 12
... backward. DISPLAY AND CONTROL OVERVIEW Controls Upper control panel VOL (-)/(+) CH ( )/( ) MENU TV/VIDEO MAIN POWER To change the vertical angle of the TV set can be rotated 25 degrees horizontally. Basically, this manual are based A on the LC-20S2U model. • TV/VIDEO, CH ( )/( ), VOL (-)/(+), and MENU on the main unit have the same...
... backward. DISPLAY AND CONTROL OVERVIEW Controls Upper control panel VOL (-)/(+) CH ( )/( ) MENU TV/VIDEO MAIN POWER To change the vertical angle of the TV set can be rotated 25 degrees horizontally. Basically, this manual are based A on the LC-20S2U model. • TV/VIDEO, CH ( )/( ), VOL (-)/(+), and MENU on the main unit have the same...

LC-13S2U | LC-15S2U | LC-20S2U Operation Manual
Page 14
...) Switch the Liquid Crystal Television power 10 on the screen. 13 MENU (p. 17) Display the menu screen. 14 CC (p. 38) Display Closed Caption subtitles. 15 TV/VIDEO (p. 22) Select a Liquid Crystal Television input source. 16 FLASHBACK (p. 24) Return to the previous channel. 17 Channel Select (p. 24) Set the channel. 14 FLIP...
...) Switch the Liquid Crystal Television power 10 on the screen. 13 MENU (p. 17) Display the menu screen. 14 CC (p. 38) Display Closed Caption subtitles. 15 TV/VIDEO (p. 22) Select a Liquid Crystal Television input source. 16 FLASHBACK (p. 24) Return to the previous channel. 17 Channel Select (p. 24) Set the channel. 14 FLIP...

LC-13S2U | LC-15S2U | LC-20S2U Operation Manual
Page 15
... be displayed. 2 Press a/b to select "ENGLISH", "ESPAÑOL (SPANISH)" or "FRANCAIS (FRENCH)", and press ENTER. 3 Press a/b to turn on the TV for the first time, it will automatically memorize the broadcasting channels. EZ SETUP (WITH AUTO CLOCK SETTING) EZ SETUP during the First Power On Control...or OFF. If you press MAIN POWER. (1) Insert the batteries into the remote control. (See page 8.) (2) Connect the antenna cable to the TV set will automatically memorize the broadcasting channels and clock. Press ENTER to access AUTO CLOCK mode. 4 Press a/b to access EZ SETUP mode. The ...
... be displayed. 2 Press a/b to select "ENGLISH", "ESPAÑOL (SPANISH)" or "FRANCAIS (FRENCH)", and press ENTER. 3 Press a/b to turn on the TV for the first time, it will automatically memorize the broadcasting channels. EZ SETUP (WITH AUTO CLOCK SETTING) EZ SETUP during the First Power On Control...or OFF. If you press MAIN POWER. (1) Insert the batteries into the remote control. (See page 8.) (2) Connect the antenna cable to the TV set will automatically memorize the broadcasting channels and clock. Press ENTER to access AUTO CLOCK mode. 4 Press a/b to access EZ SETUP mode. The ...

LC-13S2U | LC-15S2U | LC-20S2U Operation Manual
Page 16
.... (The CH No. will automatically increase when it will be displayed. STEREO FLIP DISPLAY ENTER MENU AUDIO MUTE ONLY CC TV/VIDEO VOL CH FLASHBACK ENTER/ a/b/c/d MENU 6 Press a/b to select NO, and press ENTER. START EZ SETUP? YES NO To cancel EZ SETUP SELECT : ENTER ...again, please refer to stop the EZ SETUP process once it has started, press c and it appears.) PLEASE WA I T AUTO PROGRAMMI NG STOP : The TV set will automatically search for EDS signals. STOP : 7 Once EZ SETUP is completed, the lowest channel number memorized 2 will be displayed, and then the ...
.... (The CH No. will automatically increase when it will be displayed. STEREO FLIP DISPLAY ENTER MENU AUDIO MUTE ONLY CC TV/VIDEO VOL CH FLASHBACK ENTER/ a/b/c/d MENU 6 Press a/b to select NO, and press ENTER. START EZ SETUP? YES NO To cancel EZ SETUP SELECT : ENTER ...again, please refer to stop the EZ SETUP process once it has started, press c and it appears.) PLEASE WA I T AUTO PROGRAMMI NG STOP : The TV set will automatically search for EDS signals. STOP : 7 Once EZ SETUP is completed, the lowest channel number memorized 2 will be displayed, and then the ...

LC-13S2U | LC-15S2U | LC-20S2U Operation Manual
Page 17
FLIP DISPLAY ENTER MENU AUDIO MUTE ONLY CC TV/VIDEO VOL CH FLASHBACK ENTER/ a/b 1 Press MENU to display the MENU screen. 2 Press a/b to move the cursor... SET UP SELECT : ENTER : ENTER EX I T : MENU Time reset for power outage, AC adapter disconnected If the TV has a power outage or the AC adapter cord is disconnected, the time display will have to be stopped completely by some... TV stations, to automatically adjust the clock. In that case, refer to SETTING THE CLOCK on pages 17 to...
FLIP DISPLAY ENTER MENU AUDIO MUTE ONLY CC TV/VIDEO VOL CH FLASHBACK ENTER/ a/b 1 Press MENU to display the MENU screen. 2 Press a/b to move the cursor... SET UP SELECT : ENTER : ENTER EX I T : MENU Time reset for power outage, AC adapter disconnected If the TV has a power outage or the AC adapter cord is disconnected, the time display will have to be stopped completely by some... TV stations, to automatically adjust the clock. In that case, refer to SETTING THE CLOCK on pages 17 to...

LC-13S2U | LC-15S2U | LC-20S2U Operation Manual
Page 18
... EDS CH SET to MANUAL. SETTING THE CLOCK (Continued) AUTO CLOCK Setting (Continued) POWER SLEEP BRIGHT PIC. FLIP DISPLAY ENTER MENU AUDIO MUTE ONLY CC TV/VIDEO VOL CH FLASHBACK ENTER/ a/b/c/d 5 Press a/b to move the cursor to EDS CH SET, and press ENTER. 6 Press c/d to select AUTO or MANUAL. 7 Press a/b to...
... EDS CH SET to MANUAL. SETTING THE CLOCK (Continued) AUTO CLOCK Setting (Continued) POWER SLEEP BRIGHT PIC. FLIP DISPLAY ENTER MENU AUDIO MUTE ONLY CC TV/VIDEO VOL CH FLASHBACK ENTER/ a/b/c/d 5 Press a/b to move the cursor to EDS CH SET, and press ENTER. 6 Press c/d to select AUTO or MANUAL. 7 Press a/b to...

LC-13S2U | LC-15S2U | LC-20S2U Operation Manual
Page 19
... by 1 hour, set the DST to forward the clock by 1 hour. 7 Press MENU to return to display the MENU POWER screen. AUDIO MUTE ONLY CC TV/VIDEO ENTER/ 3 a/b/c/d Press a/b to move the cursor to VOL CH FLASHBACK CLOCK, and press ENTER. MENU SLEEP T IMER AV ADJUST PRESET CLOSED CAPT I ON V-CH...
... by 1 hour, set the DST to forward the clock by 1 hour. 7 Press MENU to return to display the MENU POWER screen. AUDIO MUTE ONLY CC TV/VIDEO ENTER/ 3 a/b/c/d Press a/b to move the cursor to VOL CH FLASHBACK CLOCK, and press ENTER. MENU SLEEP T IMER AV ADJUST PRESET CLOSED CAPT I ON V-CH...

LC-13S2U | LC-15S2U | LC-20S2U Operation Manual
Page 20
I LC-20S2U Country TV broadcasting Factory setting of color system User setting TV Video TV NTSC (N358) US ch NTSC (N358) US ch NTSC (N358) US ch NTSC (N358) US ch World Multi Auto System World Multi Auto System World ..., set to the country before using this product by following the table below . 1 N358 2 N443 3 PAL 4 PAL-M 5 PAL-N 6 SECAM 7 PAL-60 I LC-13S2U, LC-15S2U The VIDEO INPUT mode is compatible with color systems worldwide and is used to N358 in TV mode and Video mode. *The 3 Dimensional Y/C separation circuit is automatically set.
I LC-20S2U Country TV broadcasting Factory setting of color system User setting TV Video TV NTSC (N358) US ch NTSC (N358) US ch NTSC (N358) US ch NTSC (N358) US ch World Multi Auto System World Multi Auto System World ..., set to the country before using this product by following the table below . 1 N358 2 N443 3 PAL 4 PAL-M 5 PAL-N 6 SECAM 7 PAL-60 I LC-13S2U, LC-15S2U The VIDEO INPUT mode is compatible with color systems worldwide and is used to N358 in TV mode and Video mode. *The 3 Dimensional Y/C separation circuit is automatically set.

LC-13S2U | LC-15S2U | LC-20S2U Operation Manual
Page 21
A • The On-screen indicator disappears after a few seconds. FLIP DISPLAY ENTER MENU AUDIO MUTE ONLY CC TV/VIDEO VOL CH FLASHBACK POWER To turn the LCD TV back on . 2 2 The POWER indicator instantane- ously changes from red to on Press POWER again. The POWER indicator turns ...red. To turn off the LCD TV Press POWER on . BASIC OPERATION (Continued) Turning on POWER Control section of main unit 1 Press MAIN POWER, located on M On-screen display ...
A • The On-screen indicator disappears after a few seconds. FLIP DISPLAY ENTER MENU AUDIO MUTE ONLY CC TV/VIDEO VOL CH FLASHBACK POWER To turn the LCD TV back on . 2 2 The POWER indicator instantane- ously changes from red to on Press POWER again. The POWER indicator turns ...red. To turn off the LCD TV Press POWER on . BASIC OPERATION (Continued) Turning on POWER Control section of main unit 1 Press MAIN POWER, located on M On-screen display ...

LC-13S2U | LC-15S2U | LC-20S2U Operation Manual
Page 22
... source. AV2 mode • AV1: Video equipment connected to the COMPONENT input terminals. IN2 input. BASIC OPERATION (Continued) Switching TV/VIDEO [AV1/AV2/COMPONENT/TV] Modes POWER SLEEP BRIGHT PIC. AV2 indication is COMPONE N T not displayed when OUT is used to adjust the COMPONENT mode ...STEREO The screen displays AV1, AV2, COM- AV2 The S-video input terminal is selected for the AV- PONENT or TV mode each time TV/VIDEO is available. IN1 input. AV1 mode nected video equipment. A • The AV input mode indication remains for the AV...
... source. AV2 mode • AV1: Video equipment connected to the COMPONENT input terminals. IN2 input. BASIC OPERATION (Continued) Switching TV/VIDEO [AV1/AV2/COMPONENT/TV] Modes POWER SLEEP BRIGHT PIC. AV2 indication is COMPONE N T not displayed when OUT is used to adjust the COMPONENT mode ...STEREO The screen displays AV1, AV2, COM- AV2 The S-video input terminal is selected for the AV- PONENT or TV mode each time TV/VIDEO is available. IN1 input. AV1 mode nected video equipment. A • The AV input mode indication remains for the AV...
LC-13S2U | LC-15S2U | LC-20S2U Operation Manual
Page 23
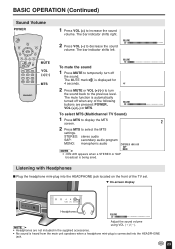
...(+)/(-) to turn off when any of the following buttons are pressed: POWER, VOL (+)/(-) or MTS. VOLUME 10 VOLUME 30 To select MTS (Multichannel TV Sound) 1 Press MTS to display the MTS screen. 2 2 Press MTS to temporarily turn the sound back to the previous level. The MUTE ... the sound. The bar indicator shifts right. 2 Press VOL (-) to increase the sound volume. FLIP DISPLAY ENTER MENU AUDIO MUTE ONLY CC TV/VIDEO VOL CH FLASHBACK MUTE VOL (+)/(-) MTS 1 Press VOL (+) to decrease the sound volume. BASIC OPERATION (Continued) Sound Volume POWER POWER SLEEP...
...(+)/(-) to turn off when any of the following buttons are pressed: POWER, VOL (+)/(-) or MTS. VOLUME 10 VOLUME 30 To select MTS (Multichannel TV Sound) 1 Press MTS to display the MTS screen. 2 2 Press MTS to temporarily turn the sound back to the previous level. The MUTE ... the sound. The bar indicator shifts right. 2 Press VOL (-) to increase the sound volume. FLIP DISPLAY ENTER MENU AUDIO MUTE ONLY CC TV/VIDEO VOL CH FLASHBACK MUTE VOL (+)/(-) MTS 1 Press VOL (+) to decrease the sound volume. BASIC OPERATION (Continued) Sound Volume POWER POWER SLEEP...

LC-13S2U | LC-15S2U | LC-20S2U Operation Manual
Page 24
To select a channel, enter a 2or 3-digit number. FLIP DISPLAY ENTER MENU AUDIO MUTE ONLY CC TV/VIDEO VOL CH FLASHBACK CH ( )/( ) FLASHBACK Channel Select To select a 1- A • The 3-digit channel number can be selected only when the receiving mode ... see page 35.) • Press FLASHBACK to show the previous channel. 0- 5 1-- 11- 115 Changing channels with CH ( )/( ) on the remote control. • This LCD TV set allows you to select up to 125 channels (1 to press the button first. To select a 3-digit channel number (e.g., Channel 115): Complete the following procedure...
To select a channel, enter a 2or 3-digit number. FLIP DISPLAY ENTER MENU AUDIO MUTE ONLY CC TV/VIDEO VOL CH FLASHBACK CH ( )/( ) FLASHBACK Channel Select To select a 1- A • The 3-digit channel number can be selected only when the receiving mode ... see page 35.) • Press FLASHBACK to show the previous channel. 0- 5 1-- 11- 115 Changing channels with CH ( )/( ) on the remote control. • This LCD TV set allows you to select up to 125 channels (1 to press the button first. To select a 3-digit channel number (e.g., Channel 115): Complete the following procedure...

LC-13S2U | LC-15S2U | LC-20S2U Operation Manual
Page 25
...• To return to the previous screen, select RETURN. • You can adjust some settings with the color system in magenta cannot be selected. • TV mode This product is factory set to comply with the special buttons: SLEEP, BRIGHT, PIC. EX I T : MENU (Pages 17-19, 31 and 35-...; The selected item changes to yellow. • Items in the United States (NTSC-N358). SELECTING MENU ITEMS Selecting Menu Items • This LCD TV set allows you to adjust the various settings using this operation manual are for details. Select the desired menu item by following the steps below...
...• To return to the previous screen, select RETURN. • You can adjust some settings with the color system in magenta cannot be selected. • TV mode This product is factory set to comply with the special buttons: SLEEP, BRIGHT, PIC. EX I T : MENU (Pages 17-19, 31 and 35-...; The selected item changes to yellow. • Items in the United States (NTSC-N358). SELECTING MENU ITEMS Selecting Menu Items • This LCD TV set allows you to adjust the various settings using this operation manual are for details. Select the desired menu item by following the steps below...

LC-13S2U | LC-15S2U | LC-20S2U Operation Manual
Page 26
...The SLEEP TIMER counts down and shows a similar 4-second display for 4 seconds. is displayed. 5 Press MENU to return to automatically turn off the TV. 26 The time can set the SLEEP TIMER to the main screen. FLIP Directly setting the SLEEP TIMER 1 Press SLEEP to set the sleep timer... You can be set in increments of 30 minutes and in the range between 30 and 150 minutes. DISPLAY ENTER MENU AUDIO MUTE ONLY CC TV/VIDEO VOL CH FLASHBACK SLEEP 2 Press SLEEP to display the SLEEP TIMER screen. A • The SLEEP TIMER screen automatically disappears in 3 seconds. 60 REMA...
...The SLEEP TIMER counts down and shows a similar 4-second display for 4 seconds. is displayed. 5 Press MENU to return to automatically turn off the TV. 26 The time can set the SLEEP TIMER to the main screen. FLIP Directly setting the SLEEP TIMER 1 Press SLEEP to set the sleep timer... You can be set in increments of 30 minutes and in the range between 30 and 150 minutes. DISPLAY ENTER MENU AUDIO MUTE ONLY CC TV/VIDEO VOL CH FLASHBACK SLEEP 2 Press SLEEP to display the SLEEP TIMER screen. A • The SLEEP TIMER screen automatically disappears in 3 seconds. 60 REMA...

