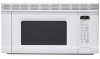

R-1405 , R-1406 Microwave Operation Manual
Page 3
...Precautions to Avoid Possible Exposure to Excessive Microwave Energy 2 Contents 3 Consumer Limited Warranty 4 Product Information Card 4 Important Safety Instructions 5 Unpacking & Installation Instructions...... 6-13 Electrical Grounding Instructions 7 Optional Accessories 14 Information You Need to Know 15-17 About Your Oven 15 About Food 15 About ... 17 Part Names 18-19 Before Operating 20 To Set the Clock 20 Stop/Clear 20 Manual Operation 21 Time Cooking 21 To Set Power Level 21 Manual Defrost 21 Special Features 22-25 Popcorn 22 Reheat 22-23 Cook 24 Defrost 25 Other ...
...Precautions to Avoid Possible Exposure to Excessive Microwave Energy 2 Contents 3 Consumer Limited Warranty 4 Product Information Card 4 Important Safety Instructions 5 Unpacking & Installation Instructions...... 6-13 Electrical Grounding Instructions 7 Optional Accessories 14 Information You Need to Know 15-17 About Your Oven 15 About Food 15 About ... 17 Part Names 18-19 Before Operating 20 To Set the Clock 20 Stop/Clear 20 Manual Operation 21 Time Cooking 21 To Set Power Level 21 Manual Defrost 21 Special Features 22-25 Popcorn 22 Reheat 22-23 Cook 24 Defrost 25 Other ...

R-1405 , R-1406 Microwave Operation Manual
Page 5
...into the container. 18. Read all instructions before and halfway through heating it. Install or locate this appliance only in this product near water-for its intended use this oven. 6. Contact nearest Sharp Authorized Servicer for storage purposes. Some products such as described in a wet basement...designed to excessive microwave energy: 1. Stir the liquid both gas and electric cooking equipment 36" wide or less. Do not use this manual. e. Do not operate this appliance. Do not store or use the cavity for examination, repair or adjustment. 10. Do not leave...
...into the container. 18. Read all instructions before and halfway through heating it. Install or locate this appliance only in this product near water-for its intended use this oven. 6. Contact nearest Sharp Authorized Servicer for storage purposes. Some products such as described in a wet basement...designed to excessive microwave energy: 1. Stir the liquid both gas and electric cooking equipment 36" wide or less. Do not use this manual. e. Do not operate this appliance. Do not store or use the cavity for examination, repair or adjustment. 10. Do not leave...

R-1405 , R-1406 Microwave Operation Manual
Page 6
...is any damage, do not operate the oven and contact your dealer or SHARP AUTHORIZED SERVICER. If there is located on the door. See 3 ELECTRICAL ... wall stud. Check to see that there is one of the following methods may be installed before installing the Over the Range Microwave Oven/Hood System. The metal filler panels come in the ...36 or 42 inches, a Filler Panel Kit can be 16" or 24" to either side of this product. Read enclosures and SAVE the Operation Manual. This will normally be located by probing the wall with standard 12-inch wall cabinets. U N P A C K I N G A N...
...is any damage, do not operate the oven and contact your dealer or SHARP AUTHORIZED SERVICER. If there is located on the door. See 3 ELECTRICAL ... wall stud. Check to see that there is one of the following methods may be installed before installing the Over the Range Microwave Oven/Hood System. The metal filler panels come in the ...36 or 42 inches, a Filler Panel Kit can be 16" or 24" to either side of this product. Read enclosures and SAVE the Operation Manual. This will normally be located by probing the wall with standard 12-inch wall cabinets. U N P A C K I N G A N...

R-1405 , R-1406 Microwave Operation Manual
Page 13
...two Bottom Plate Screws saved from section 7 PREPARATION OF THE OVEN. Figure 21 Figure 22 3 5 Figure 23 CHECKLIST FOR INSTALLATION 9 Bottom Plate Screws 1. Keep the Operation Manual and Installation Instructions. 13 See Figure 23. 6. Hook the back bottom of the oven to the bottom of the top cabinet. 2. ...Lift the front of the oven up to the bottom of the cabinet. UNPACKING AND INSTALLATION INSTRUCTIONS 11 MOUNTING OVEN TO...
...two Bottom Plate Screws saved from section 7 PREPARATION OF THE OVEN. Figure 21 Figure 22 3 5 Figure 23 CHECKLIST FOR INSTALLATION 9 Bottom Plate Screws 1. Keep the Operation Manual and Installation Instructions. 13 See Figure 23. 6. Hook the back bottom of the oven to the bottom of the top cabinet. 2. ...Lift the front of the oven up to the bottom of the cabinet. UNPACKING AND INSTALLATION INSTRUCTIONS 11 MOUNTING OVEN TO...

R-1405 , R-1406 Microwave Operation Manual
Page 27
... touch TIMER/CLOCK, the number 0 and STOP/CLEAR pads. REPLACING PARTS Charcoal Filter Charcoal Filter, Sharp part number RK-250 is on until the temperature decreases. See page 14 for nonvented, recirculated installation. Change the charcoal filter. 5. Carefully push the louver back into place (engaging both the bottom ...once again to turn it . (See illustration.) 3. Disconnect power to the oven at each end of the louver to disengage it off manually during this time. The fan will show 1:00 and count down carefully on the tab at the circuit breaker panel or by unplugging. 2....
... touch TIMER/CLOCK, the number 0 and STOP/CLEAR pads. REPLACING PARTS Charcoal Filter Charcoal Filter, Sharp part number RK-250 is on until the temperature decreases. See page 14 for nonvented, recirculated installation. Change the charcoal filter. 5. Carefully push the louver back into place (engaging both the bottom ...once again to turn it . (See illustration.) 3. Disconnect power to the oven at each end of the louver to disengage it off manually during this time. The fan will show 1:00 and count down carefully on the tab at the circuit breaker panel or by unplugging. 2....
