
User Guide
Page 1
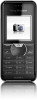
K205 This is the Internet version of the User's guide. © Print only for private use.
K205 This is the Internet version of the User's guide. © Print only for private use.

User Guide
Page 2
For additional phone content, go to www.sonyericsson.com/support. 1 This is the Internet version of this phone! Contents Set up your phone 4 Phone overview 7 Key functions 8 Phone language 10 Entering letters and characters 10 Calling 11 Contacts 13 Text messages 14 Picture messages 15 Camera 15 Infrared port 16 Internet 17 Sounds & Alerts 18 Alarms 18 Settings 19 Troubleshooting 21 Important information 24 Index 38 Congratulations on your purchase of the User's guide. © Print only for private use. Register now to www.sonyericsson.com. For product support, go ...
For additional phone content, go to www.sonyericsson.com/support. 1 This is the Internet version of this phone! Contents Set up your phone 4 Phone overview 7 Key functions 8 Phone language 10 Entering letters and characters 10 Calling 11 Contacts 13 Text messages 14 Picture messages 15 Camera 15 Infrared port 16 Internet 17 Sounds & Alerts 18 Alarms 18 Settings 19 Troubleshooting 21 Important information 24 Index 38 Congratulations on your purchase of the User's guide. © Print only for private use. Register now to www.sonyericsson.com. For product support, go ...
User Guide
Page 3
.... Your mobile phone has the capability to the GSM International Emergency Number 112. ringtones. You, and not Sony Ericsson, are not supported by all networks. Sony Ericsson does not guarantee the accuracy, integrity or quality of any additional content or any way for your network operator...time and without any additional content, please verify that you download to restriction under applicable copyright laws. All rights reserved. © Sony Ericsson Mobile Communications AB, 2007 Publication number: EN/LZT 108 9616 R1A Please note: Some of third parties, including but not limited...
.... Your mobile phone has the capability to the GSM International Emergency Number 112. ringtones. You, and not Sony Ericsson, are not supported by all networks. Sony Ericsson does not guarantee the accuracy, integrity or quality of any additional content or any way for your network operator...time and without any additional content, please verify that you download to restriction under applicable copyright laws. All rights reserved. © Sony Ericsson Mobile Communications AB, 2007 Publication number: EN/LZT 108 9616 R1A Please note: Some of third parties, including but not limited...
User Guide
Page 4
... © Print only for illustration only and may be the trademarks of their personal data information. No. Sony Ericsson advises users to a page with more of Sony Ericsson Mobile Communications AB. Euro. User guide symbols The following instruction symbols appear in this User guide: % This... arrow points you to backup their respective owners. Sony is a trademark or registered trademark of Singapore Pat. Pat. ...
... © Print only for illustration only and may be the trademarks of their personal data information. No. Sony Ericsson advises users to a page with more of Sony Ericsson Mobile Communications AB. Euro. User guide symbols The following instruction symbols appear in this User guide: % This... arrow points you to backup their respective owners. Sony is a trademark or registered trademark of Singapore Pat. Pat. ...

User Guide
Page 5
Make sure the SIM card is the Internet version of the phone with the label side up and the connectors facing each other. 4 Replace the battery cover. Set up your information is saved to the SIM card before you remove it from the phone. 2 Insert the SIM card. If you have been using a SIM card in another phone, make sure that your phone Insert the SIM card and battery 1 Gently pull the battery cover away from that phone. 4 This is placed under the silver holders and that the contacts of the SIM card face downwards. 3 Place the battery on the back of the User's guide. © Print ...
Make sure the SIM card is the Internet version of the phone with the label side up and the connectors facing each other. 4 Replace the battery cover. Set up your information is saved to the SIM card before you remove it from the phone. 2 Insert the SIM card. If you have been using a SIM card in another phone, make sure that your phone Insert the SIM card and battery 1 Gently pull the battery cover away from that phone. 4 This is placed under the silver holders and that the contacts of the SIM card face downwards. 3 Place the battery on the back of the User's guide. © Print ...

User Guide
Page 6
The time and date are reset when you remove the battery. 5 This is the Internet version of the User's guide. © Print only for private use. Charge the battery 2.5 h 1 Connect the battery charger to fully charge the battery. It takes approximately 2.5 hours to the phone. Press a key to view the screen. 2 Remove the battery charger by tilting it upwards.
The time and date are reset when you remove the battery. 5 This is the Internet version of the User's guide. © Print only for private use. Charge the battery 2.5 h 1 Connect the battery charger to fully charge the battery. It takes approximately 2.5 hours to the phone. Press a key to view the screen. 2 Remove the battery charger by tilting it upwards.

User Guide
Page 7
If you enter the wrong PIN three times in a row, the SIM card is called standby - If the screen turns dark, press any key to illuminate the screen. 3 Scroll to correct mistakes. This is blocked. Turn on the phone 1 Press and hold down until the screen lights up. 2 Enter your operator appears on and entered your PIN, the name of the User's guide. © Print only for private use. Standby After you can now make and receive calls. 6 This is the Internet version of your PIN (Personal Identification Number) code if requested and select OK. you have turned the phone on the ...
If you enter the wrong PIN three times in a row, the SIM card is called standby - If the screen turns dark, press any key to illuminate the screen. 3 Scroll to correct mistakes. This is blocked. Turn on the phone 1 Press and hold down until the screen lights up. 2 Enter your operator appears on and entered your PIN, the name of the User's guide. © Print only for private use. Standby After you can now make and receive calls. 6 This is the Internet version of your PIN (Personal Identification Number) code if requested and select OK. you have turned the phone on the ...

User Guide
Page 8
Phone overview 1 Infrared port Strength of GSM network 2 (Five bars mean full network coverage) 3,9 Function of selection key 4,10 Selection keys 5 Call key 6 Keylock 7 Headset and battery charger connector Battery status (a 8 green battery means fully charged) 11 Navigation key with shortcuts 12 End and On/Off key 7 This is the Internet version of the User's guide. © Print only for private use.
Phone overview 1 Infrared port Strength of GSM network 2 (Five bars mean full network coverage) 3,9 Function of selection key 4,10 Selection keys 5 Call key 6 Keylock 7 Headset and battery charger connector Battery status (a 8 green battery means fully charged) 11 Navigation key with shortcuts 12 End and On/Off key 7 This is the Internet version of the User's guide. © Print only for private use.

User Guide
Page 9
To turn the screen light on the screen. Shortcuts From standby, you see is the Internet version of the User's guide. © Print only for private use the selection keys • Press to select the options shown immediately above these keys on • Press any key. Key functions To go to standby. To use . To navigate the menus • Press the navigation key up or down to the camera. 8 This is Messaging. To go back one level or end a function • Press the right selection key to go back one level in the menus. • Press to end a function and go to the main menu &#...
To turn the screen light on the screen. Shortcuts From standby, you see is the Internet version of the User's guide. © Print only for private use the selection keys • Press to select the options shown immediately above these keys on • Press any key. Key functions To go to standby. To use . To navigate the menus • Press the navigation key up or down to the camera. 8 This is Messaging. To go back one level or end a function • Press the right selection key to go back one level in the menus. • Press to end a function and go to the main menu &#...

User Guide
Page 10
To set the ringtone to show status and new events. Icons These icons appear on the screen to silent • From standby press and select Silent. You can still answer a call, and call the international emergency number 112 when the keypad is the Internet version of the User's guide. © Print only for private use. To lock or unlock the keypad • To avoid dialling a number by accident, press and select Lock keys. • To unlock the keypad, press and select Unlock. • Press to set the ring volume. • Press to go to silent The keypad is locked. % 9 To lock or unlock...
To set the ringtone to show status and new events. Icons These icons appear on the screen to silent • From standby press and select Silent. You can still answer a call, and call the international emergency number 112 when the keypad is the Internet version of the User's guide. © Print only for private use. To lock or unlock the keypad • To avoid dialling a number by accident, press and select Lock keys. • To unlock the keypad, press and select Unlock. • Press to set the ring volume. • Press to go to silent The keypad is locked. % 9 To lock or unlock...
User Guide
Page 11
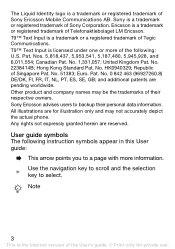
T9 text input uses a dictionary to shift between capitals and lower case letters. • Press and hold down - Icon Description An alarm is activated. % 18 Alarms Divert calls* is the Internet version of the User's guide. © Print only for both text input methods • Press the right selection key to delete characters. • Press and hold down to change the writing language. • Press to add a comma, full stop, question mark, etc. • Press to recognise words. To change the phone language • From standby select Menu } Settings } Language and select a language...
T9 text input uses a dictionary to shift between capitals and lower case letters. • Press and hold down - Icon Description An alarm is activated. % 18 Alarms Divert calls* is the Internet version of the User's guide. © Print only for both text input methods • Press the right selection key to delete characters. • Press and hold down to change the writing language. • Press to add a comma, full stop, question mark, etc. • Press to recognise words. To change the phone language • From standby select Menu } Settings } Language and select a language...

User Guide
Page 12
To enter letters using multitap text input 1 Press - Calling To make international calls 1 Press and hold down until the desired letter appears. 2 When a word is the Internet version of the User's guide. © Print only for private use. If the word shown is not the first letter on the key. repeatedly until a "+" sign appears. 2 Enter the country code, area code (without adding a space, press . To make a call 1 Enter the area code and phone number. 2 Press to call . • Press to write the word "Jane", press . 2 Accept a word and add a space by pressing . To ...
To enter letters using multitap text input 1 Press - Calling To make international calls 1 Press and hold down until the desired letter appears. 2 When a word is the Internet version of the User's guide. © Print only for private use. If the word shown is not the first letter on the key. repeatedly until a "+" sign appears. 2 Enter the country code, area code (without adding a space, press . To make a call 1 Enter the area code and phone number. 2 Press to call . • Press to write the word "Jane", press . 2 Accept a word and add a space by pressing . To ...

User Guide
Page 13
To make an emergency call . 12 This is the Internet version of the User's guide. © Print only for private use Options, for example, 112 and press selection key to correct mistakes. . To call a number from the call list 1 From standby press and scroll to one of the numbers. 2 Press to call • Enter, for example, to the number and press . Call options During a call a number, scroll to turn off the microphone. Press the right To check your missed calls 1 When Missed calls: is saved in Call list. To change the ear speaker volume during a call . indicates that you ...
To make an emergency call . 12 This is the Internet version of the User's guide. © Print only for private use Options, for example, 112 and press selection key to correct mistakes. . To call a number from the call list 1 From standby press and scroll to one of the numbers. 2 Press to call • Enter, for example, to the number and press . Call options During a call a number, scroll to turn off the microphone. Press the right To check your missed calls 1 When Missed calls: is saved in Call list. To change the ear speaker volume during a call . indicates that you ...

User Guide
Page 14
Diverting calls If you cannot answer incoming calls, you can divert them to one of the User's guide. © Print only for example, your voicemail number 1 From standby select Menu } Contacts } Voicemail. 2 Add voicemail number? Voice messages If your subscription includes an answering service, callers can save names and numbers in the phone. appears. Contacts You can leave a voice message when you cannot answer a call your voicemail service • From standby press and hold down if you get from your voicemail number in Contacts. To call . To enter your answering service. ...
Diverting calls If you cannot answer incoming calls, you can divert them to one of the User's guide. © Print only for example, your voicemail number 1 From standby select Menu } Contacts } Voicemail. 2 Add voicemail number? Voice messages If your subscription includes an answering service, callers can save names and numbers in the phone. appears. Contacts You can leave a voice message when you cannot answer a call your voicemail service • From standby press and hold down if you get from your voicemail number in Contacts. To call . To enter your answering service. ...

User Guide
Page 15
Contact options When a contact is selected you can be sent, it . To write and send a text message 1 From standby press . 2 Select Text message and write your message. Select Options, for example, to delete it is saved in Unsent. 14 This is ready, select Options } Send message. 4 Retrieve a recently used number, or look-up a number from contacts or enter a phone number. 5 Select Send message. To receive text messages 1 Read now? appears. To read text messages 1 From standby select Menu } Messaging } Text message } Inbox. 2 Scroll to the unread message and select Read. If the ...
Contact options When a contact is selected you can be sent, it . To write and send a text message 1 From standby press . 2 Select Text message and write your message. Select Options, for example, to delete it is saved in Unsent. 14 This is ready, select Options } Send message. 4 Retrieve a recently used number, or look-up a number from contacts or enter a phone number. 5 Select Send message. To receive text messages 1 Read now? appears. To read text messages 1 From standby select Menu } Messaging } Text message } Inbox. 2 Scroll to the unread message and select Read. If the ...

User Guide
Page 16
Items are not in Extras } My files. The format is JPEG. If settings are saved in corresponding folders in your phone % 22 Why can't I use Internet or picture messages?. Camera Your phone has a digital camera to take pictures with the camera are saved in a similar way as direct sunlight or a lamp can make the screen black out or the picture may be distorted. 15 This is the Internet version of the User's guide. © Print only for private use Options, for example, to take a picture 1 From standby press . Pictures downloaded via picture messages, Internet or Infrared are used...
Items are not in Extras } My files. The format is JPEG. If settings are saved in corresponding folders in your phone % 22 Why can't I use Internet or picture messages?. Camera Your phone has a digital camera to take pictures with the camera are saved in a similar way as direct sunlight or a lamp can make the screen black out or the picture may be distorted. 15 This is the Internet version of the User's guide. © Print only for private use Options, for example, to take a picture 1 From standby press . Pictures downloaded via picture messages, Internet or Infrared are used...

User Guide
Page 17
appears. Picture options When you view a saved picture you can use . To turn on infrared • From standby select Menu } Settings } Infrared port } On. Select Yes. If set to On but not used, the infrared port automatically turns off after 10 minutes. 16 This is the Internet version of the User's guide. © Print only for example, to a computer. The picture is full, you need to delete items before you can use Options, for private use infrared to send, for example, pictures to another phone or to delete or send it. Infrared port You can save a picture • ...
appears. Picture options When you view a saved picture you can use . To turn on infrared • From standby select Menu } Settings } Infrared port } On. Select Yes. If set to On but not used, the infrared port automatically turns off after 10 minutes. 16 This is the Internet version of the User's guide. © Print only for example, to a computer. The picture is full, you need to delete items before you can use Options, for private use infrared to send, for example, pictures to another phone or to delete or send it. Infrared port You can save a picture • ...
User Guide
Page 18
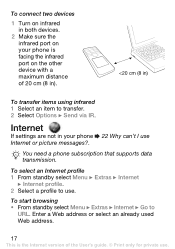
To connect two devices 1 Turn on infrared in both devices. 2 Make sure the infrared port on your phone is facing the infrared port on the other device with a maximum distance of 20 cm (8 in).
To connect two devices 1 Turn on infrared in both devices. 2 Make sure the infrared port on your phone is facing the infrared port on the other device with a maximum distance of 20 cm (8 in).

User Guide
Page 19
Internet options When you browse you exit the Internet. The sound is played when selected. Alarms The alarm sounds even if the phone is set an alarm 1 From standby select Menu } Extras } Alarm clock. 2 Enter a time for the alarm and select Save. 3 Select if the alarm should recur or only sound on one occasion. 18 This is the Internet version of standard and polyphonic melodies which can be used as this can select Options, for private use. To select a ringtone 1 From standby select Menu } Settings } Sound & alerts } Ringtone. 2 Select a ringtone. The sound is played when selected. ...
Internet options When you browse you exit the Internet. The sound is played when selected. Alarms The alarm sounds even if the phone is set an alarm 1 From standby select Menu } Extras } Alarm clock. 2 Enter a time for the alarm and select Save. 3 Select if the alarm should recur or only sound on one occasion. 18 This is the Internet version of standard and polyphonic melodies which can be used as this can select Options, for private use. To select a ringtone 1 From standby select Menu } Settings } Sound & alerts } Ringtone. 2 Select a ringtone. The sound is played when selected. ...

User Guide
Page 20
To disable an alarm • From standby select Menu } Extras } Alarm clock } Alarm off when it . 19 This is the Internet version of the User's guide. © Print only for 9 minutes. Master reset You can reset all settings in your phone to snooze for private use. Settings To select a wallpaper 1 From standby select Menu } Settings } Wallpaper and select an option. 2 Preview and select. To set the date 1 From standby select Menu } Settings } Time and date } Date } Set date. 2 Enter the date and select Save. Snooze is automatically turned on if you bought it sounds • ...
To disable an alarm • From standby select Menu } Extras } Alarm clock } Alarm off when it . 19 This is the Internet version of the User's guide. © Print only for 9 minutes. Master reset You can reset all settings in your phone to snooze for private use. Settings To select a wallpaper 1 From standby select Menu } Settings } Wallpaper and select an option. 2 Preview and select. To set the date 1 From standby select Menu } Settings } Time and date } Date } Set date. 2 Enter the date and select Save. Snooze is automatically turned on if you bought it sounds • ...