
Operating Instructions
Page 1
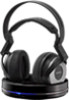
2-650-249-11(1) Wireless Stereo Headphone System Operating Instructions US Mode d'emploi FR Manual de instrucciones ES MDR-RF5000K © 2006 Sony Corporation
2-650-249-11(1) Wireless Stereo Headphone System Operating Instructions US Mode d'emploi FR Manual de instrucciones ES MDR-RF5000K © 2006 Sony Corporation

Operating Instructions
Page 2
Refer to them whenever you call upon your authority to operate this equipment. Transmitter Headphones NOTE The transmitter must accept any interference, including interference that any other antenna or transmitter. If this product. The serial number is ...manual could void your Sony dealer regarding this equipment does cause harmful interference to Part 15 of the FCC Rules. WARNING To reduce the risk of fire or electric shock, do not open the cabinet. For the customers in a residential installation. MDR-RF5000K Transmitter TMR-RF5000 Headphones MDR-RF5000 Serial No....
Refer to them whenever you call upon your authority to operate this equipment. Transmitter Headphones NOTE The transmitter must accept any interference, including interference that any other antenna or transmitter. If this product. The serial number is ...manual could void your Sony dealer regarding this equipment does cause harmful interference to Part 15 of the FCC Rules. WARNING To reduce the risk of fire or electric shock, do not open the cabinet. For the customers in a residential installation. MDR-RF5000K Transmitter TMR-RF5000 Headphones MDR-RF5000 Serial No....

Operating Instructions
Page 3
... the supplied rechargeable nickel-metal hydride battery ......... 9 Charging 10 US Checking the battery power 12 Using the headphones with alkaline batteries (sold separately 13 Connecting the Headphone System 14 Connecting the transmitter to analog components 14 Connecting the transmitter to digital components 15 Listening to the ...batteries. You can help preserve our environment by returning your used rechargeable batteries to a Connected Component 17 Using Additional Headphones .. 21 Replacing the Ear Pads 22 Troubleshooting 23 Precautions 27 Specifications 28 3US
... the supplied rechargeable nickel-metal hydride battery ......... 9 Charging 10 US Checking the battery power 12 Using the headphones with alkaline batteries (sold separately 13 Connecting the Headphone System 14 Connecting the transmitter to analog components 14 Connecting the transmitter to digital components 15 Listening to the ...batteries. You can help preserve our environment by returning your used rechargeable batteries to a Connected Component 17 Using Additional Headphones .. 21 Replacing the Ear Pads 22 Troubleshooting 23 Precautions 27 Specifications 28 3US

Operating Instructions
Page 4
.... *1 "SYNIC Intelligent Wireless" is a wireless headphone system using 2.4 GHz wireless digital transmission*1. • The MDR-RF5000K is a trademark of dedicated headphones (MDR-RF5000, sold separately) can use . 4US Main Features The MDR-RF5000K is a wireless stereo headphone system using 2.4 GHz wireless digital transmission. •...are transmitted with minimum delay and high fidelity. *2 Transmission distance varies depending on conditions of use these headphones anywhere indoors without worrying about things getting in the way. (Range: Up to approx. 30m)*2 • Battery is...
.... *1 "SYNIC Intelligent Wireless" is a wireless headphone system using 2.4 GHz wireless digital transmission*1. • The MDR-RF5000K is a trademark of dedicated headphones (MDR-RF5000, sold separately) can use . 4US Main Features The MDR-RF5000K is a wireless stereo headphone system using 2.4 GHz wireless digital transmission. •...are transmitted with minimum delay and high fidelity. *2 Transmission distance varies depending on conditions of use these headphones anywhere indoors without worrying about things getting in the way. (Range: Up to approx. 30m)*2 • Battery is...

Operating Instructions
Page 5
1 Preparation Checking the Components and Accessories Before setting up the system, check that all of the components are included. Transmitter TMR-RF5000 (1) Wireless stereo headphones MDR-RF5000 (1) AC power adaptor (1) Rechargeable nickel-metal hydride battery BP-HP2000 (1) Connecting cable (stereo mini plug y pin plug × 2), 1 m (1) Unimatch plug adaptor (stereo mini jack y stereo phone plug) (1) Preparation 5US
1 Preparation Checking the Components and Accessories Before setting up the system, check that all of the components are included. Transmitter TMR-RF5000 (1) Wireless stereo headphones MDR-RF5000 (1) AC power adaptor (1) Rechargeable nickel-metal hydride battery BP-HP2000 (1) Connecting cable (stereo mini plug y pin plug × 2), 1 m (1) Unimatch plug adaptor (stereo mini jack y stereo phone plug) (1) Preparation 5US

Operating Instructions
Page 7
... DIGITAL OUT (THROUGH) 1 2 3 4 56 1 TUNE/ID SET button (See pages 19 and 21 for details.) Use this button when reception deteriorates, or when using additional headphones. 2 ATT (attenuator) switch Set this switch should be set to "-8 dB." 3 LINE IN jacks (See page 14 for details.) Connect the audio output jacks on...
... DIGITAL OUT (THROUGH) 1 2 3 4 56 1 TUNE/ID SET button (See pages 19 and 21 for details.) Use this button when reception deteriorates, or when using additional headphones. 2 ATT (attenuator) switch Set this switch should be set to "-8 dB." 3 LINE IN jacks (See page 14 for details.) Connect the audio output jacks on...

Operating Instructions
Page 8
...This battery case is for the rechargeable nickel-metal hydride battery (supplied) or commercially available (size AA) alkaline batteries only. 4 Self-adjusting band The headphones automatically turn on when you put them on. 5 Ear pad (right) 6 TUNE/ID SET button (See pages 19 and 21 for details.) ...Use this button when reception deteriorates, or when using additional headphones. 7 VOL (Volume) control Use to adjust the volume. 8 POWER indicator By pulling up the self-adjusting band, the indicator lights blue when battery ...
...This battery case is for the rechargeable nickel-metal hydride battery (supplied) or commercially available (size AA) alkaline batteries only. 4 Self-adjusting band The headphones automatically turn on when you put them on. 5 Ear pad (right) 6 TUNE/ID SET button (See pages 19 and 21 for details.) ...Use this button when reception deteriorates, or when using additional headphones. 7 VOL (Volume) control Use to adjust the volume. 8 POWER indicator By pulling up the self-adjusting band, the indicator lights blue when battery ...

Operating Instructions
Page 9
... the battery compartment lid. 2 1 Preparation 9US Note The battery compartment has a tab on the # side which holds the battery in the compartment. To charge the headphones, place them on the battery to charge it before use it. Be sure to the 3 mark in place. The battery compartment lid comes off. metal...
... the battery compartment lid. 2 1 Preparation 9US Note The battery compartment has a tab on the # side which holds the battery in the compartment. To charge the headphones, place them on the battery to charge it before use it. Be sure to the 3 mark in place. The battery compartment lid comes off. metal...

Operating Instructions
Page 11
...transmitter again so that the indicator lights up. • Make sure that the CHG indicator lights up. When the transmitter's contact pin meets the headphones' contact point, the CHG indicator lights up . The battery charge function is not activated when the lid is not fully closed. • ...Check if the right and left housings are rested on the transmitter so that the headphones' contact point meets the transmitter's contact pin, and make sure that the supplied rechargeable nickel-metal hydride battery is damaged or the 3 and...
...transmitter again so that the indicator lights up. • Make sure that the CHG indicator lights up. When the transmitter's contact pin meets the headphones' contact point, the CHG indicator lights up . The battery charge function is not activated when the lid is not fully closed. • ...Check if the right and left housings are rested on the transmitter so that the headphones' contact point meets the transmitter's contact pin, and make sure that the supplied rechargeable nickel-metal hydride battery is damaged or the 3 and...

Operating Instructions
Page 12
... attempt to fully charge an empty battery *3 Time may vary, depending on the right housing. usage time*1 7 hours*3 *1 at your nearest Sony dealer. 12US Preparation Checking the battery power Pull up the self-adjusting band and check the POWER indicator located on the temperature or conditions of... charged with this system only. • Charge in timer recognizes when charging is complete (approx. 3 hours), there is designed to remove the headphones from the store where you purchased this system. • If dry batteries are dusty. Wipe them with a new one when it lasts only...
... attempt to fully charge an empty battery *3 Time may vary, depending on the right housing. usage time*1 7 hours*3 *1 at your nearest Sony dealer. 12US Preparation Checking the battery power Pull up the self-adjusting band and check the POWER indicator located on the temperature or conditions of... charged with this system only. • Charge in timer recognizes when charging is complete (approx. 3 hours), there is designed to remove the headphones from the store where you purchased this system. • If dry batteries are dusty. Wipe them with a new one when it lasts only...

Operating Instructions
Page 13
Using the headphones with coins or metallic objects. Battery life Battery Sony alkaline batteries LR6(SG) Approx. Preparation 13US hours*1 5 hours*2 *1 at 1 kHz, 1 mW + 1 mW output *2 Time may vary, depending on batteries • Do not charge a dry ...
Using the headphones with coins or metallic objects. Battery life Battery Sony alkaline batteries LR6(SG) Approx. Preparation 13US hours*1 5 hours*2 *1 at 1 kHz, 1 mW + 1 mW output *2 Time may vary, depending on batteries • Do not charge a dry ...

Operating Instructions
Page 14
...Use the supplied connecting cable (stereo mini-plug y pin plug × 2) when connecting a stereo mini-jack (line out jack or headphone jack) to a TV headphone jack, sound may not be heard from the TV speaker. Transmitter TV, portable device, etc. Noise can occur if the volume on ... Audio left (L, white) Unimatch plug adaptor (supplied) Connecting cable (supplied) to the LINE IN (L/R) jacks on the player at a medium level. to headphones jack (stereo mini jack) Stereo mini-plug To LINE IN jacks Audio right (R, red) Audio left (white) Audio right (R, red) Audio right (red...
...Use the supplied connecting cable (stereo mini-plug y pin plug × 2) when connecting a stereo mini-jack (line out jack or headphone jack) to a TV headphone jack, sound may not be heard from the TV speaker. Transmitter TV, portable device, etc. Noise can occur if the volume on ... Audio left (L, white) Unimatch plug adaptor (supplied) Connecting cable (supplied) to the LINE IN (L/R) jacks on the player at a medium level. to headphones jack (stereo mini jack) Stereo mini-plug To LINE IN jacks Audio right (R, red) Audio left (white) Audio right (R, red) Audio right (red...

Operating Instructions
Page 17
...on automatically and the RF indicator blinks for transmission according to the transmitter. The RF indicator lights up when emission from the headphones about 5 seconds. Signal transmission system This unit employs a proprietary transmission system using 2.4 GHz frequency. Sound is heard from ...automatically detects the optimum frequency for about 3 seconds after you put on the headphones. Be sure to match the right and left side of the headphones with this wireless system. 3 Put on the headphones. POWER indicator (Continued) Operation 17US You can enjoy non-compressed sound with...
...on automatically and the RF indicator blinks for transmission according to the transmitter. The RF indicator lights up when emission from the headphones about 5 seconds. Signal transmission system This unit employs a proprietary transmission system using 2.4 GHz frequency. Sound is heard from ...automatically detects the optimum frequency for about 3 seconds after you put on the headphones. Be sure to match the right and left side of the headphones with this wireless system. 3 Put on the headphones. POWER indicator (Continued) Operation 17US You can enjoy non-compressed sound with...

Operating Instructions
Page 18
INPUT SELECT ANALOG DIGITAL Position of switch DIGITAL ANALOG Selected sound source Sound of the component connected to LINE IN jacks. The headphones automatically turn off when they are removed - VOL Raise the volume Lower the volume Notes • When watching films, be careful not to on ...to listen to the LINE IN jacks, and then select the sound source you disconnect the AC power adaptor from the transmitter before removing the headphones. Auto Power On/Off function Do not pull up the self-adjusting band when not in quiet scenes. Self-adjusting band 18US Operation Sound of...
INPUT SELECT ANALOG DIGITAL Position of switch DIGITAL ANALOG Selected sound source Sound of the component connected to LINE IN jacks. The headphones automatically turn off when they are removed - VOL Raise the volume Lower the volume Notes • When watching films, be careful not to on ...to listen to the LINE IN jacks, and then select the sound source you disconnect the AC power adaptor from the transmitter before removing the headphones. Auto Power On/Off function Do not pull up the self-adjusting band when not in quiet scenes. Self-adjusting band 18US Operation Sound of...

Operating Instructions
Page 19
...for transmission again following the procedure below. 1 Press TUNE/ID SET on the transmitter position and room conditions. The beep sound stops when the headphones start receiving signals. In this system transmits signals at 2.4 GHz, sound may be interrupted if the transmitter is up and emission starts. 2 ...Press TUNE/ID SET on the transmitter and headphones to have them detect the optimum frequency again. It is completed, the RF indicator lights up to 30 m. The sound may vary depending ...
...for transmission again following the procedure below. 1 Press TUNE/ID SET on the transmitter position and room conditions. The beep sound stops when the headphones start receiving signals. In this system transmits signals at 2.4 GHz, sound may be interrupted if the transmitter is up and emission starts. 2 ...Press TUNE/ID SET on the transmitter and headphones to have them detect the optimum frequency again. It is completed, the RF indicator lights up to 30 m. The sound may vary depending ...

Operating Instructions
Page 20
Tip If RF signal transmission from the transmitter stops when an audio signal is not input for about 5 minutes. Note The headphones should be used within the RF signal transmission area (see "RF signal transmission area" (page 19)). 20US Operation If signal noise is output from a component ... and no sound is input again. If this happens, raise the volume of the connected audio or video component and lower the volume of the headphones. The RF signals are automatically transmitted when an audio signal is heard, press TUNE/ID SET on the...
Tip If RF signal transmission from the transmitter stops when an audio signal is not input for about 5 minutes. Note The headphones should be used within the RF signal transmission area (see "RF signal transmission area" (page 19)). 20US Operation If signal noise is output from a component ... and no sound is input again. If this happens, raise the volume of the connected audio or video component and lower the volume of the headphones. The RF signals are automatically transmitted when an audio signal is heard, press TUNE/ID SET on the...

Operating Instructions
Page 21
...) alkaline batteries. 3 Press and hold TUNE/ID SET on the headphones at the same time. When using additional MDR-RF5000 wireless headphones (sold separately) Notes • The transmitter turns off automatically while charging. Using Additional Headphones In this system, by using additional MDR-RF5000 wireless headphones (sold separately), more than one person can be sure to...
...) alkaline batteries. 3 Press and hold TUNE/ID SET on the headphones at the same time. When using additional MDR-RF5000 wireless headphones (sold separately) Notes • The transmitter turns off automatically while charging. Using Additional Headphones In this system, by using additional MDR-RF5000 wireless headphones (sold separately), more than one person can be sure to...

Operating Instructions
Page 23
...is not set to the component you want to listen to. , If you connect the transmitter to an AV component using the headphone jack, raise the volume level on the transmitter is weak, or replace alkaline batteries with new ones. 1 Additional Information Troubleshooting If... you are wearing the headphones correctly. , Raise the headphone volume. , The headphones' POWER indicator goes off after charging the battery, take the headphones to a Sony dealer. , You are playing back a DVD disc recorded in DTS when the ...
...is not set to the component you want to listen to. , If you connect the transmitter to an AV component using the headphone jack, raise the volume level on the transmitter is weak, or replace alkaline batteries with new ones. 1 Additional Information Troubleshooting If... you are wearing the headphones correctly. , Raise the headphone volume. , The headphones' POWER indicator goes off after charging the battery, take the headphones to a Sony dealer. , You are playing back a DVD disc recorded in DTS when the ...

Operating Instructions
Page 24
..., raise the volume level on the connected AV component. 24US Additional Information The sound cuts off after charging the battery, take the headphones to a Sony dealer. , Check if there is any wireless apparatus using 2.4 GHz frequency, or a microwave oven in the vicinity. , Change the position of... the transmitter to "0 dB." • If you connect the transmitter to an AV component using the headphone jack, raise the volume level on the connected AV component. , Raise the headphone volume. If the POWER indicator is selected, change the ATT switch on the transmitter to "0 dB." ...
..., raise the volume level on the connected AV component. 24US Additional Information The sound cuts off after charging the battery, take the headphones to a Sony dealer. , Check if there is any wireless apparatus using 2.4 GHz frequency, or a microwave oven in the vicinity. , Change the position of... the transmitter to "0 dB." • If you connect the transmitter to an AV component using the headphone jack, raise the volume level on the connected AV component. , Raise the headphone volume. If the POWER indicator is selected, change the ATT switch on the transmitter to "0 dB." ...

Operating Instructions
Page 25
...analog component, or set to "ANALOG") , Signal noise is output from the store where you purchased this system, or at your nearest Sony dealer. RF signal transmission does not stop. (when the INPUT SELECT switch on the transmitter is set the INPUT SELECT switch on the... battery. , Rechargeable batteries other than the supplied are installed. • Insert the supplied rechargeable nickel-metal hydride battery. , The transmitter's contact pin and headphones' contact point are dusty. • Wipe them with a new one. The CHG indicator , 3 and # of the component connected to the LINE IN...
...analog component, or set to "ANALOG") , Signal noise is output from the store where you purchased this system, or at your nearest Sony dealer. RF signal transmission does not stop. (when the INPUT SELECT switch on the transmitter is set the INPUT SELECT switch on the... battery. , Rechargeable batteries other than the supplied are installed. • Insert the supplied rechargeable nickel-metal hydride battery. , The transmitter's contact pin and headphones' contact point are dusty. • Wipe them with a new one. The CHG indicator , 3 and # of the component connected to the LINE IN...


